Legal Case Management Integration in Dash SaaS
Legal Case Management is a complete software solution designed to help law firms, legal departments, and individual lawyers manage their legal operations efficiently.
Introduction
Legal Case Management is a complete software solution designed to help law firms, legal departments, and individual lawyers manage their legal operations efficiently. The system allows users to maintain and monitor key legal processes, including managing advocates, courts, high courts, divisions, and case initiators. It also supports case creation and handling, fee receipts, and expense tracking. All Add-Ons work together to ensure that each legal case is recorded with accurate, connected, and accessible data for better organization and follow-up.
How To Install the Legal Case Management Add-On?
To Set Up the Legal Case Management Add-On, you can follow this link: Setup Add-On
How To Use the Legal Case Management Add-On?
Manage Advocates
- To add a new advocate, click the “Create” button. Fill in the following sections:
- Details: Enter Firm/Advocate Name, Email Address, Password, Phone Number, Age, Company Name, and Bank Details.
- Office Address: Add Address Line 1, Address Line 2, Country, State, City, and Zip/Postal Code.
- Chamber Address: Enter Address Line 1, Address Line 2, Country, State, City, and Zip/Postal Code.
- Click “Save” once all details are filled.
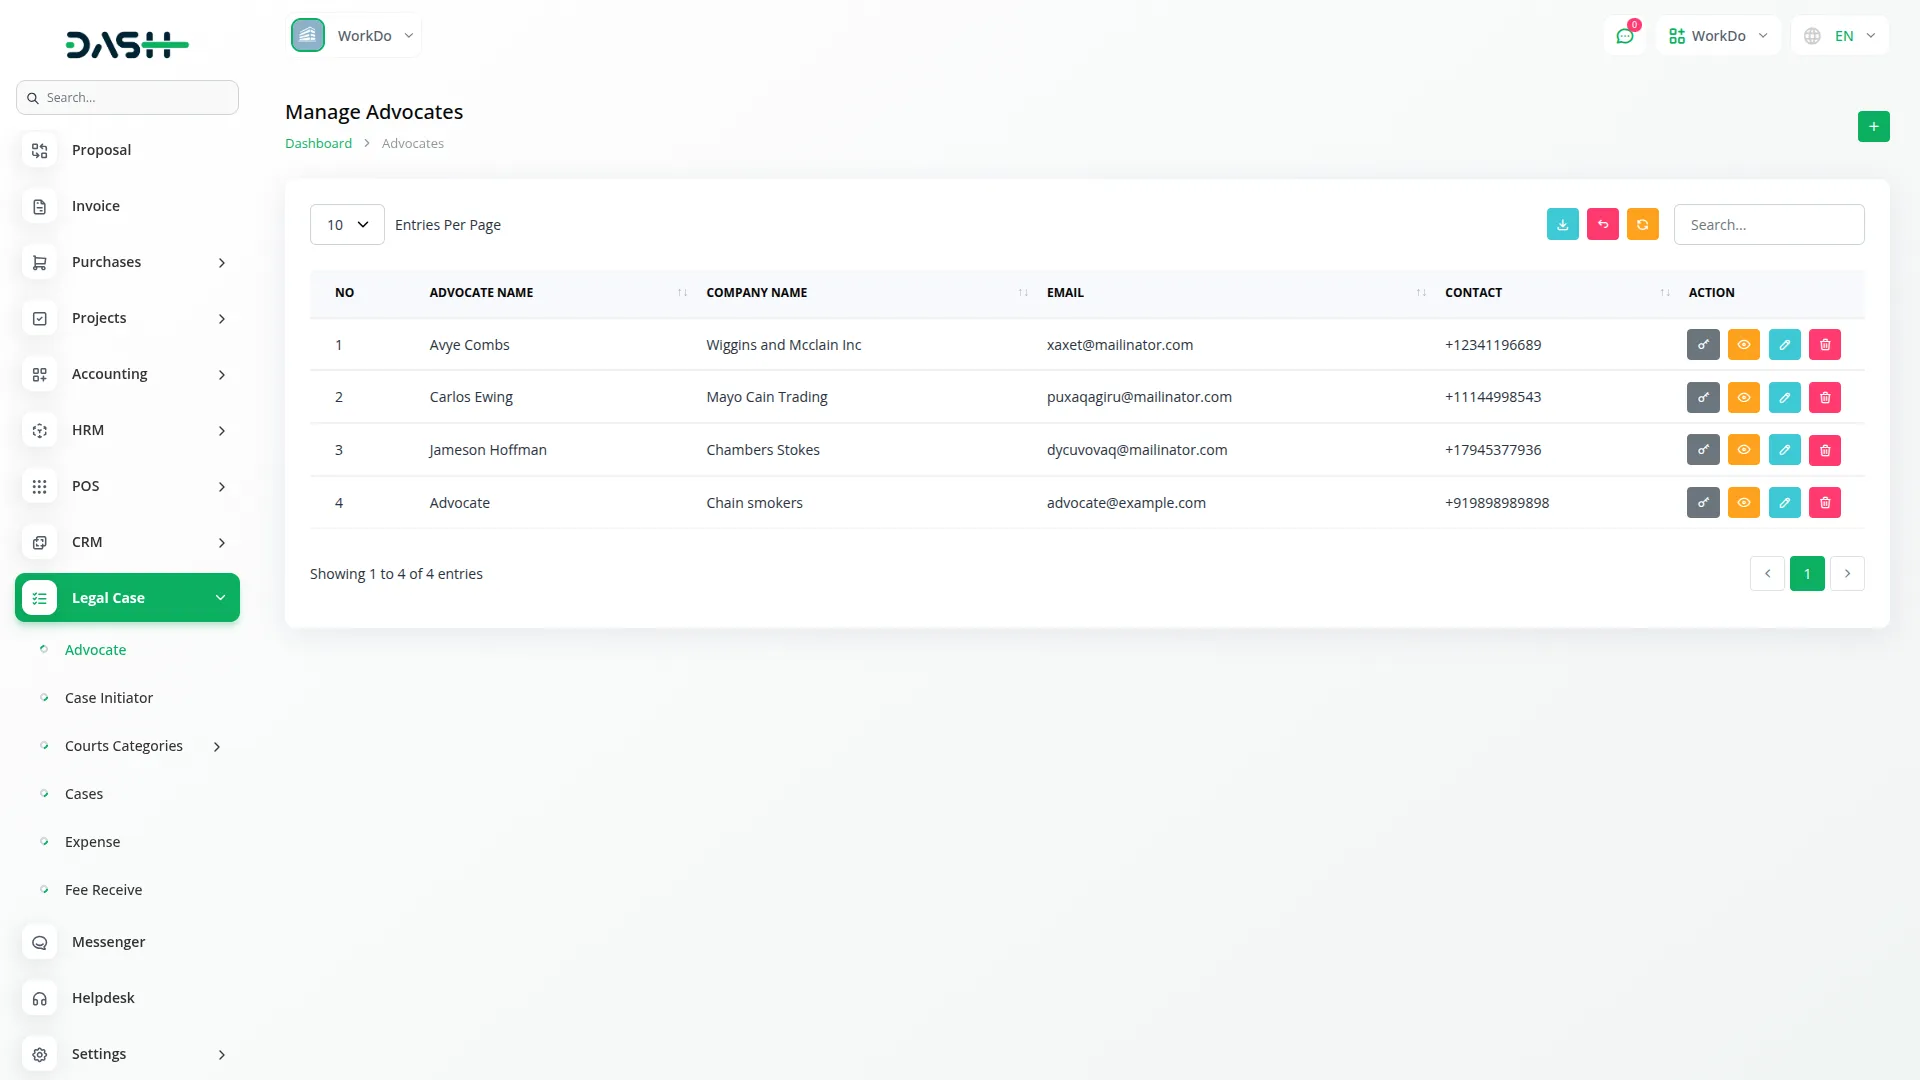
- On the list page, you will see a table with columns: No, Advocate Name, Company Name, Email, and Contact.
- You can perform actions such as Reset Password, Show, Edit, or Delete for each advocate.
- To advocate password reset, fill in Password, Confirm Password, and click “Save”.
- Use the Search and Export buttons to find or download advocate data.
-
Manage Case Initiator
- To create a new case initiator, click the “Create” button. Fill in the Name, Email, and Password, then click Save.
- On the list page, a table displays: No, Name, and Email.
- You can use the Search or Export button to find or download records.
- Available actions: Edit and Delete.
-

Manage Courts
- To add a new court, click the “Create” button. Fill in the required fields: Name, Type, Location, and Address, then click Save.
- The list page shows all courts with columns: No, Name, Type, Location, and Address.
- You can use the Search button to find specific courts.
- Available actions include Edit and Delete.
-

Manage High Courts
- To create a new high court, click the “Create” button. Fill in the Name and select a Court from the Courts. Click Save to store the record.
- This is connected to the Manage Courts, and the court list must be available there first.
- The list page displays No, Name, and Court Name.
- You can use the Search button to filter records.
- Actions available are Edit and Delete.
-

Manage Circuit/Division
- To add a new circuit or division, click the “Create” button. Enter the Name and select a High Court from the High Courts. Click Save.
- This is linked to the Manage High Courts. Ensure high court records are added there first.
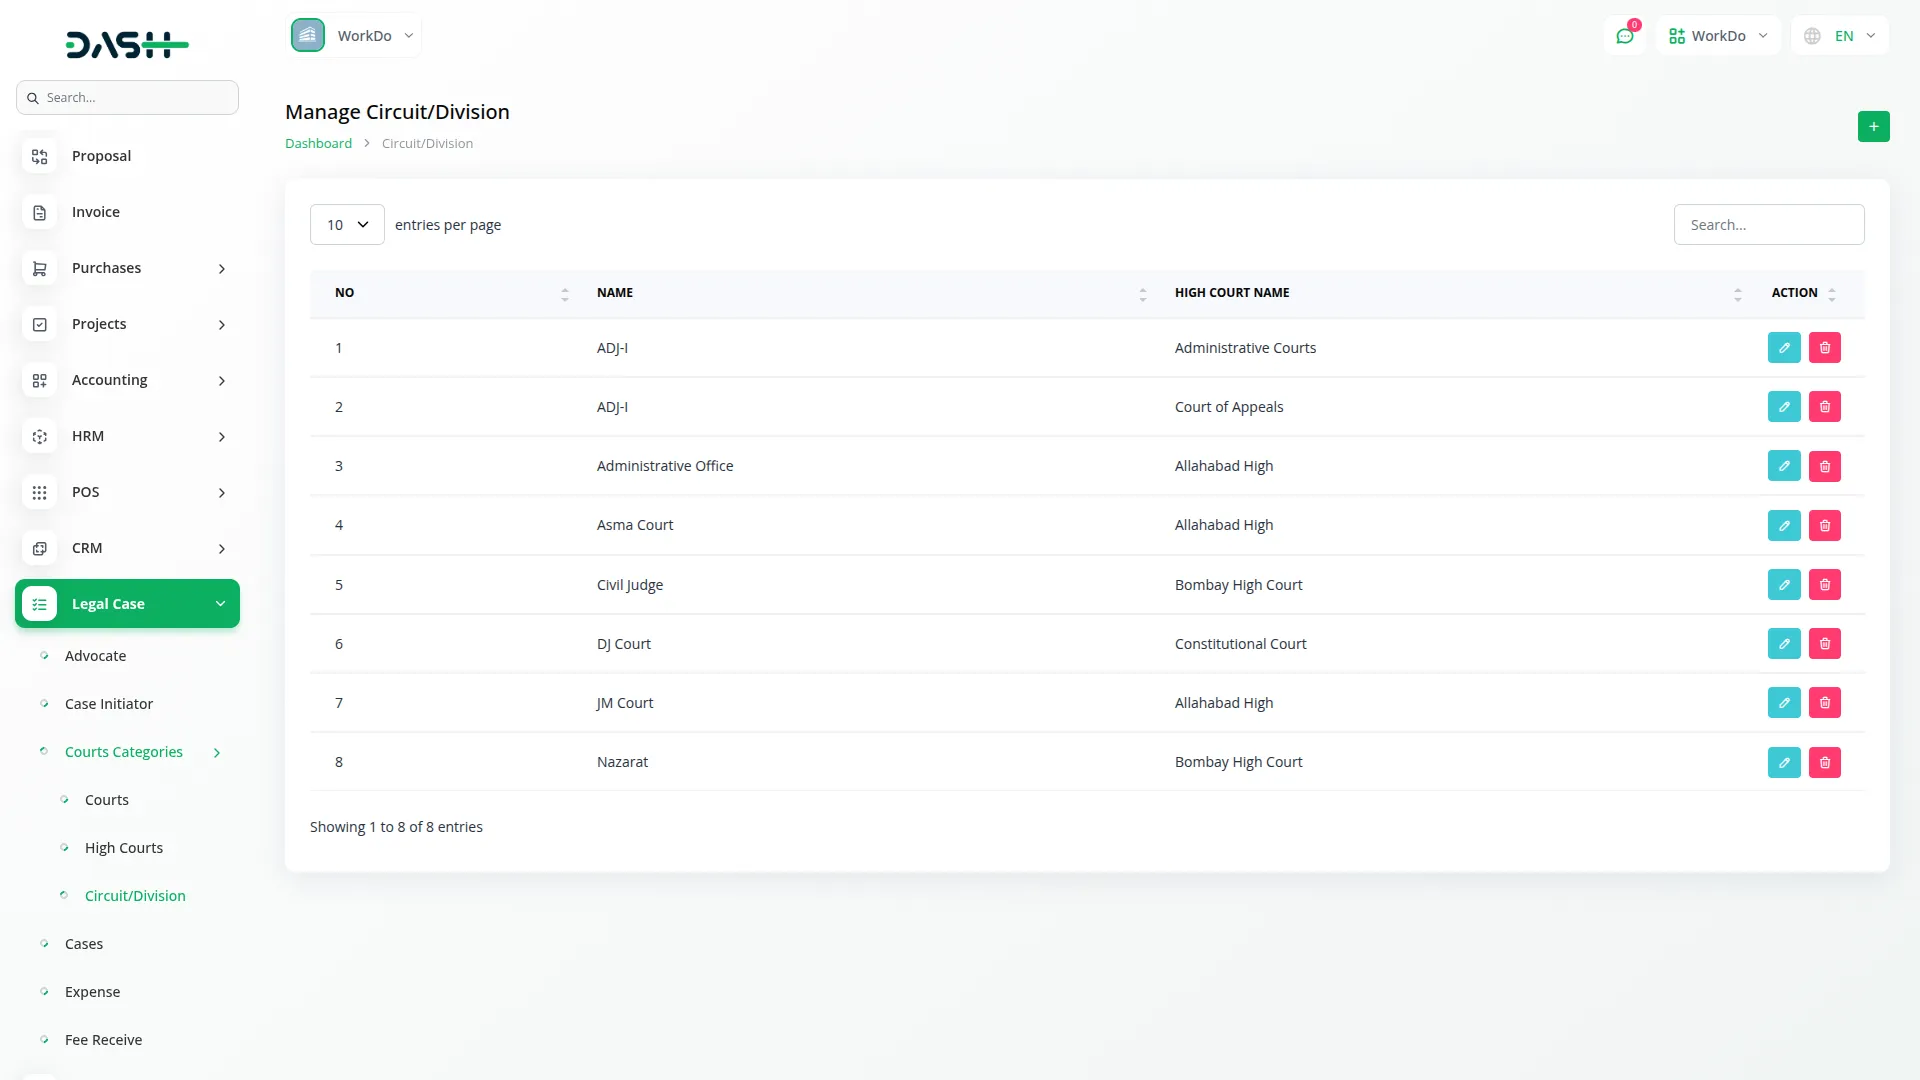
- The list page contains columns: No, Name, and High Court Name.
- You can use the Search button to locate specific records.
- Available actions are Edit and Delete.
-
Manage Cases
To add a new case, click the “Create” button. The form contains several sections and fields. Fill them out as follows:
- Courts/Tribunal: Select a court from the Courts.
- High Court: Select from the High Courts.
- If no High Court is selected, you must choose between entering a Case Number or Diary Number.
- Bench: Select from the Circuit/Division.
- Case Type: Required if High Court is not selected and Case Number is used.
- Diary Number: Required if the High Court is not selected and Diary Number is used.
- Case Details: Enter Case Number, Year, Title, Date of Filing, Judge Name, Court Room Number, Description, Under Acts, Under Section.
- FIR Details: Enter FIR Police Station, FIR Number, and FIR Year.
- Party Information:
- Select Your Party as either Petitioner/Plaintiff or Respondent/Defendant.
- Enter Your Party Name (you can add multiple names).
- Select Case Initiator from the Case Initiator for each Your Party Name.
- Enter Opposite Party names (multiple entries allowed).
- Advocates: Select from the Advocates page, you can also select multiple advocates at a time.
- Opposite Party Advocate: Enter the name.
- Case Summary: Upload one or more files related to the case summary.
- Click Save after completing the form.
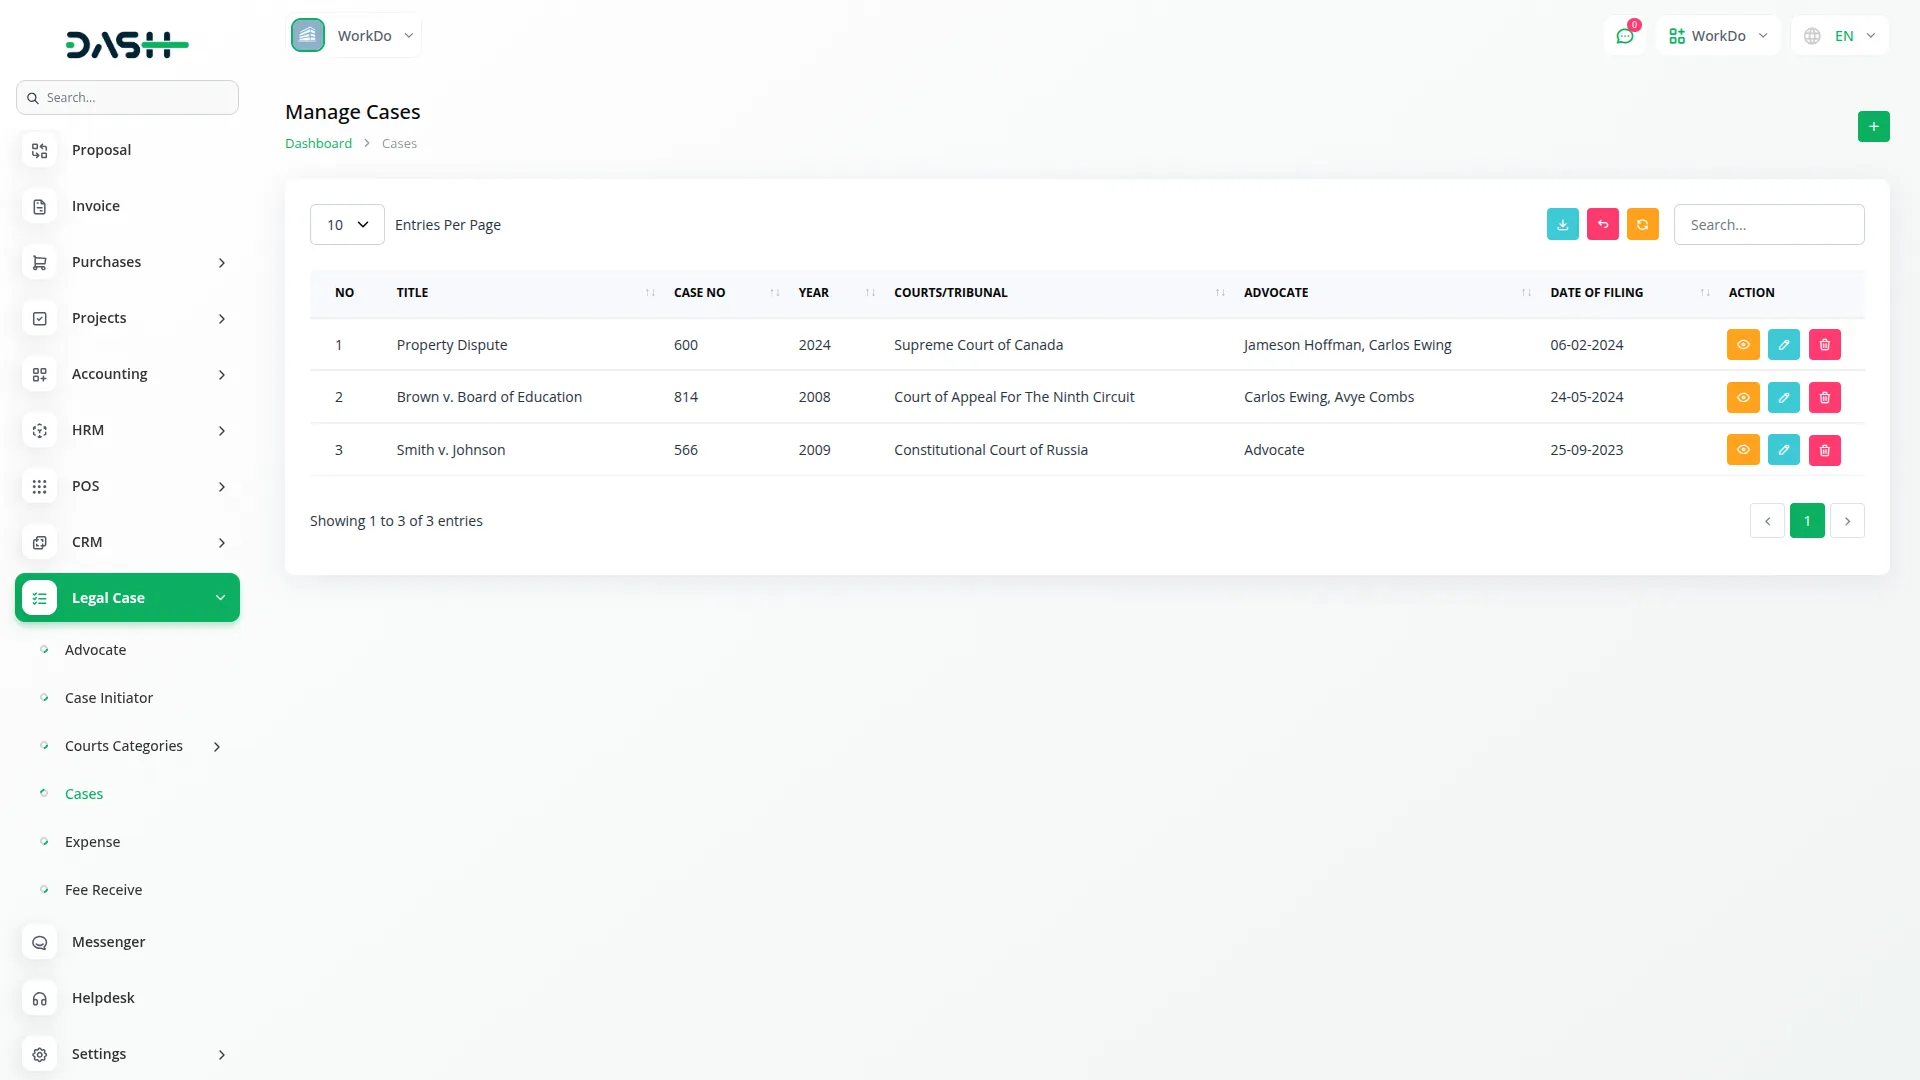
- On the list page, cases are shown with columns: No, Title, Case No, Year, Courts/Tribunal, Advocate, and Date of Filing.
- You can use Search, Export, or Add from the top bar.
- You can perform actions such as Show, Edit, or Delete for each case.
- Show: Opens the case details page.
- View Case Summary.
- View and manage uploaded files (download or delete).
- Manage Case Hearings: Add, Edit, or Delete hearing records by entering Hearing Date, Remarks, and uploading an Order Sheet.
Dependencies: This section is connected to the Courts, High Courts, Circuit/Division, Advocates, and Case Initiator. These must be filled before creating a case.
Manage Case Expense
To add a new case expense, click the “Create” button. Fill in the following fields:
- Case: Select a case from the Cases.
- Date: Enter the date of expense.
- Particulars: Describe the expense.
- Money Spent: Enter the amount.
- Payment Method: Select from Bank Transfer, Cash, Cheque, or Online Payment.
- Advocate: Choose from the list of advocates involved in the selected case.
- Notes: Add any additional notes.
- Click Save to store the record.
- On the list page, you will see columns: No, Case, Date, Particulars, Money Spent, Payment Method, and Advocate.
- You can use the Search, Export, and Add buttons as needed.
- Actions available: Show, Edit, Delete.
Dependency: Linked to the Cases and Advocates sections. Only advocates from the selected case are available for selection.

Manage Fee Receive
To record a fee received, click the “Create” button and complete the form:
- Case: Select from the Cases.
- Date: Enter the receipt date.
- Particulars: Mention the fee purpose or detail.
- Received Fee: Enter the amount.
- Payment Method: Choose from Bank Transfer, Cash, Cheque, or Online Payment.
- Case Initiator: Choose from the case initiators involved in the selected case.
- Notes: Add any comments or explanations.
- Click Save once the information is entered.
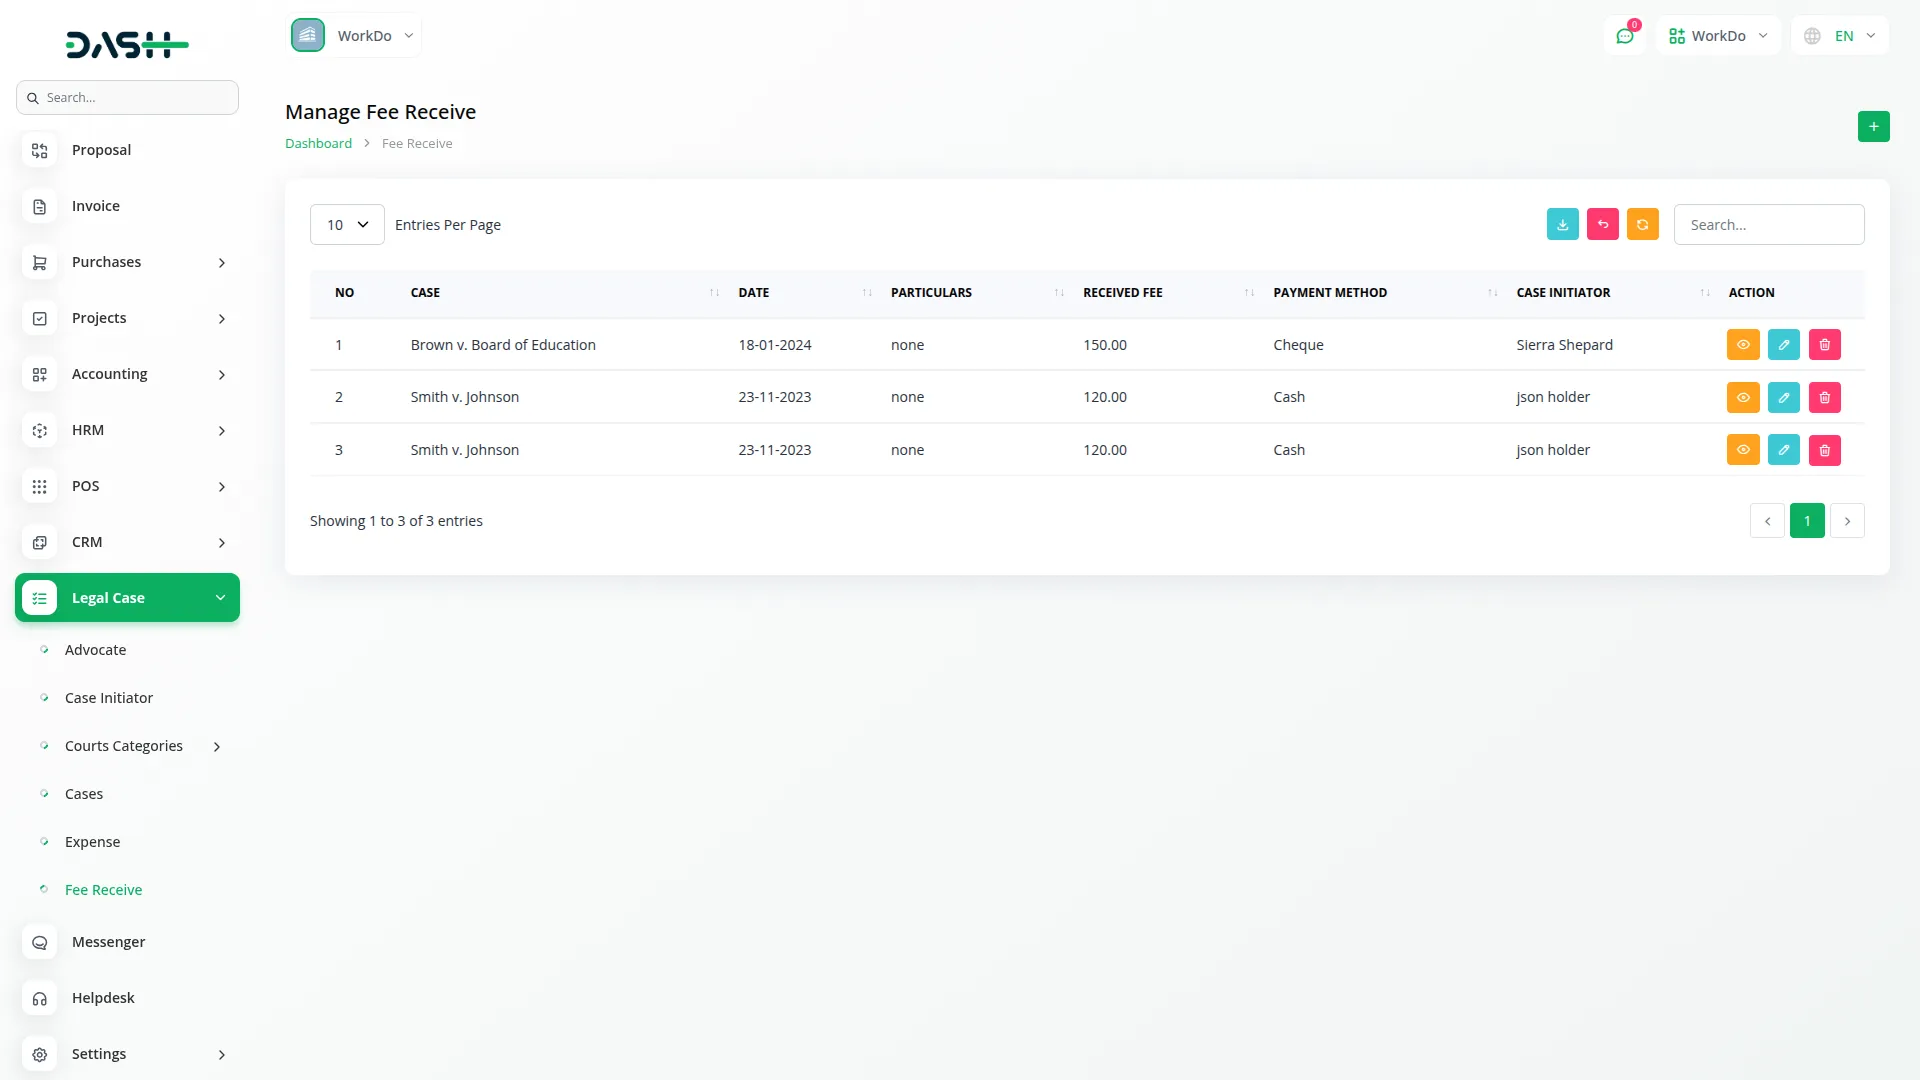
- On the list page, columns include: No, Case, Date, Particulars, Received Fee, Payment Method, and Case Initiator.
- You can Search, Export, or Add new records.
- Actions available: Show, Edit, Delete.
Dependency: Connected to the Cases and Case Initiator sections. Case Initiator options depend on the selected case.
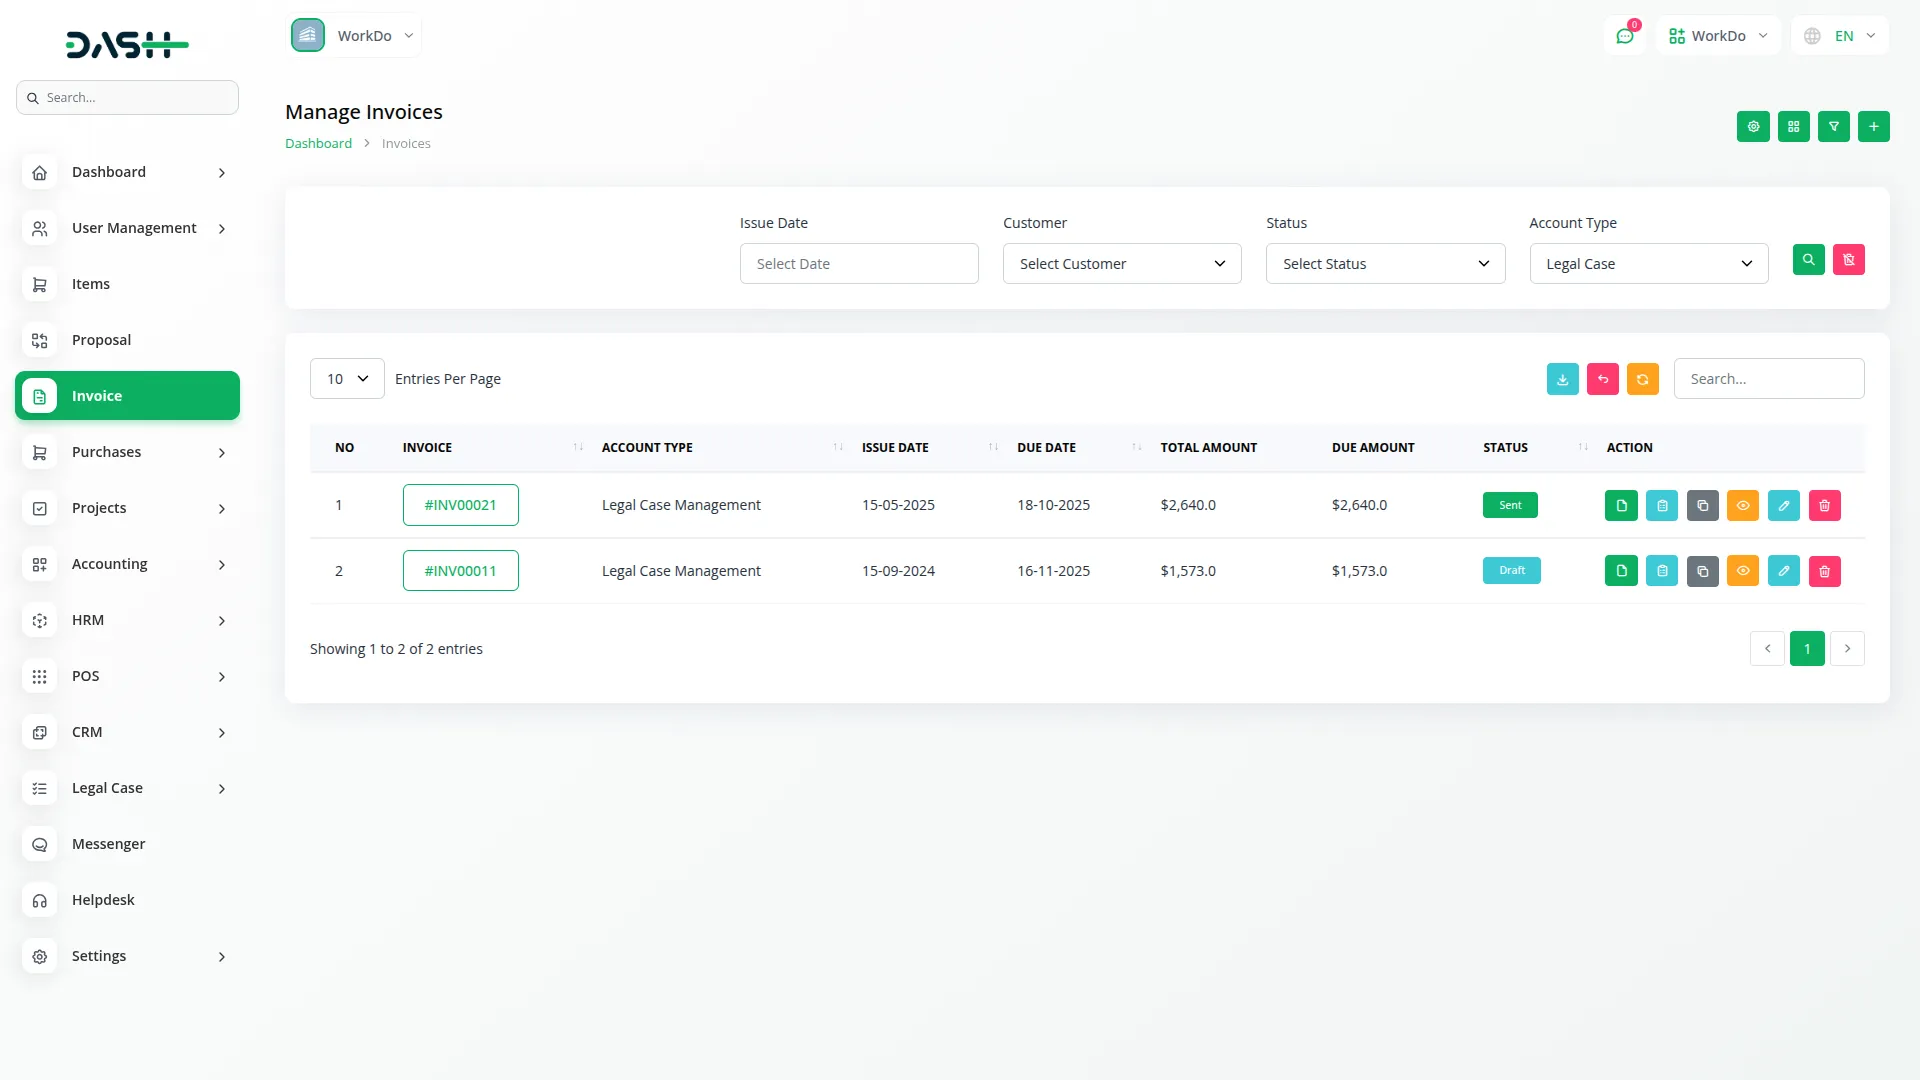
Invoice and Payment
To create a new invoice, click the “Create” button. Complete the form using these fields:
- Account Type: Select Legal Case.
- Case Initiator: Choose from the Case Initiator.
- Billing Type: Enter the billing type.
- Template: Select a template if available.
- Issue Date and Due Date: Set the respective dates.
- Invoice Number: Enter a unique number for the invoice.
- Particulars: Describe the billed item or service.
- Numbers: Enter quantity or count.
- Rate/Unit Cost: Enter the cost per unit.
- Discount: Apply if needed.
- Tax: Select from the Item.
- Description: Add any extra notes.
- Click Save after entering the details.
- On the invoice list page, columns include: No, Invoice, Account Type, Issue Date, Due Date, Total Amount, Due Amount, Status.
- You can use Search, Export, or Add from the top bar.
- Available actions: Show, Edit, Delete.
- Case Initiator can pay directly through the invoice page using Stripe/PayPal or other payment methods.
Dependency: Requires Case Initiator data and tax details from the Item.
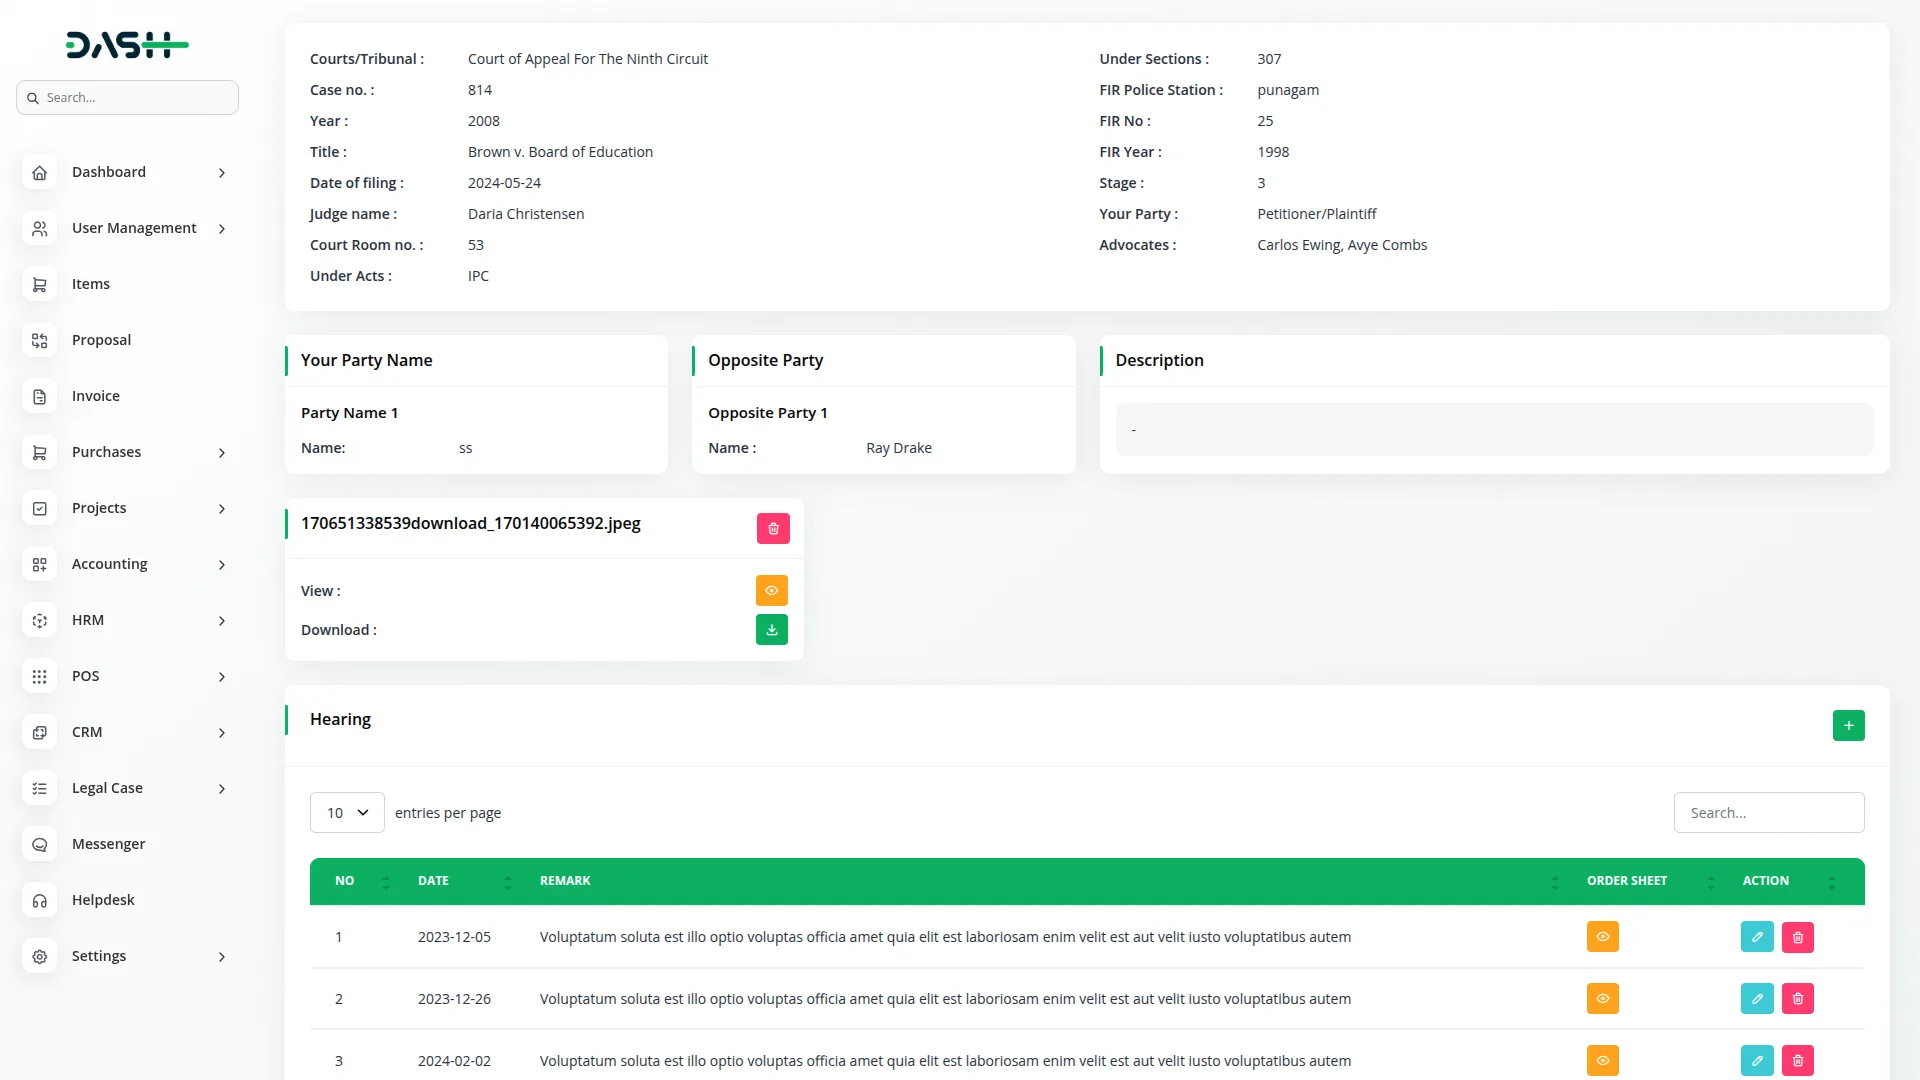
Case Details Page
Manage Case Summary Files
After opening a case using the “View” action on the Manage Cases list page, scroll to the Case Summary section.
To manage summary files:
- You can upload multiple files when creating or editing a case.
- In the Case Summary view, each uploaded file shows the following actions:
- Download: Save the file to your device.
- Delete: Permanently remove the file.
Note: These files help in attaching important documents related to the case, such as petitions, judgments, and client communications.
Manage Hearing
To manage hearings for a specific case, first click the “Show” action from the Manage Cases list page. Scroll to the Case Hearing section.
To create a new hearing, click the “Create” button. Complete the form using these fields:
- Fill in the Hearing Date.
- Enter Remarks related to the hearing.
- Upload the Order Sheet (file upload).
Click Save to store the hearing record.
For each hearing, you can perform actions such as:
- Edit: Update hearing details or replace the uploaded file.
- Delete: Permanently remove the hearing entry.
You can also use the Search option to quickly find specific hearing records.
Dependency: This section is part of the Manage Cases Page. Hearings must be linked to an existing case.
Categories
Related articles
- Business Process Mapping Integration in Dash SaaS
- Spreadsheet Integration in Dash SaaS
- Video Hub Integration in Dash SaaS
- Jira Add-On WorkDo Dash Detailed Documentation
- Sage Integration in Dash SaaS
- Google Authentication Integration in Dash SaaS
- Freight Management System Integration in Dash SaaS
- AI Assistant Integration in Dash SaaS
- Fire Safety Detailed Documentation
- Zapier Integration in Dash SaaS
- EaseBuzz Payment Gateway Detailed Documentation
- Rotas Integration in Dash SaaS
Reach Out to Us
Have questions or need assistance? We're here to help! Reach out to our team for support, inquiries, or feedback. Your needs are important to us, and we’re ready to assist you!


Need more help?
If you’re still uncertain or need professional guidance, don’t hesitate to contact us. You can contact us via email or submit a ticket with a description of your issue. Our team of experts is always available to help you with any questions. Rest assured that we’ll respond to your inquiry promptly.
Love what you see?
Do you like the quality of our products, themes, and applications, or perhaps the design of our website caught your eye? You can have similarly outstanding designs for your website or apps. Contact us, and we’ll bring your ideas to life.
