Google Docs Integration Detailed Documentation
Introduction The Google Docs Integration Add-On allows users to seamlessly connect their documents with the […]
Introduction
The Google Docs Integration Add-On allows users to seamlessly connect their documents with the platform, making it easier to create, access, and manage Google Docs directly within the system. This Add-On eliminates the need to switch between platforms by providing a unified space to handle document-related tasks, whether it’s drafting proposals, sharing notes, or collaborating on content. With this integration, users can link existing documents, create new ones on the go, and ensure all project or workflow-related files are stored and organized efficiently. This documentation will guide you through the steps to set up, use, and make the most of the Google Docs Integration Add-On.
How To Install The Google Docs Add-On?
To Set Up the Google Docs Add-On you can follow this link: Setup Add-On
How To Use the Google Docs Add-On?
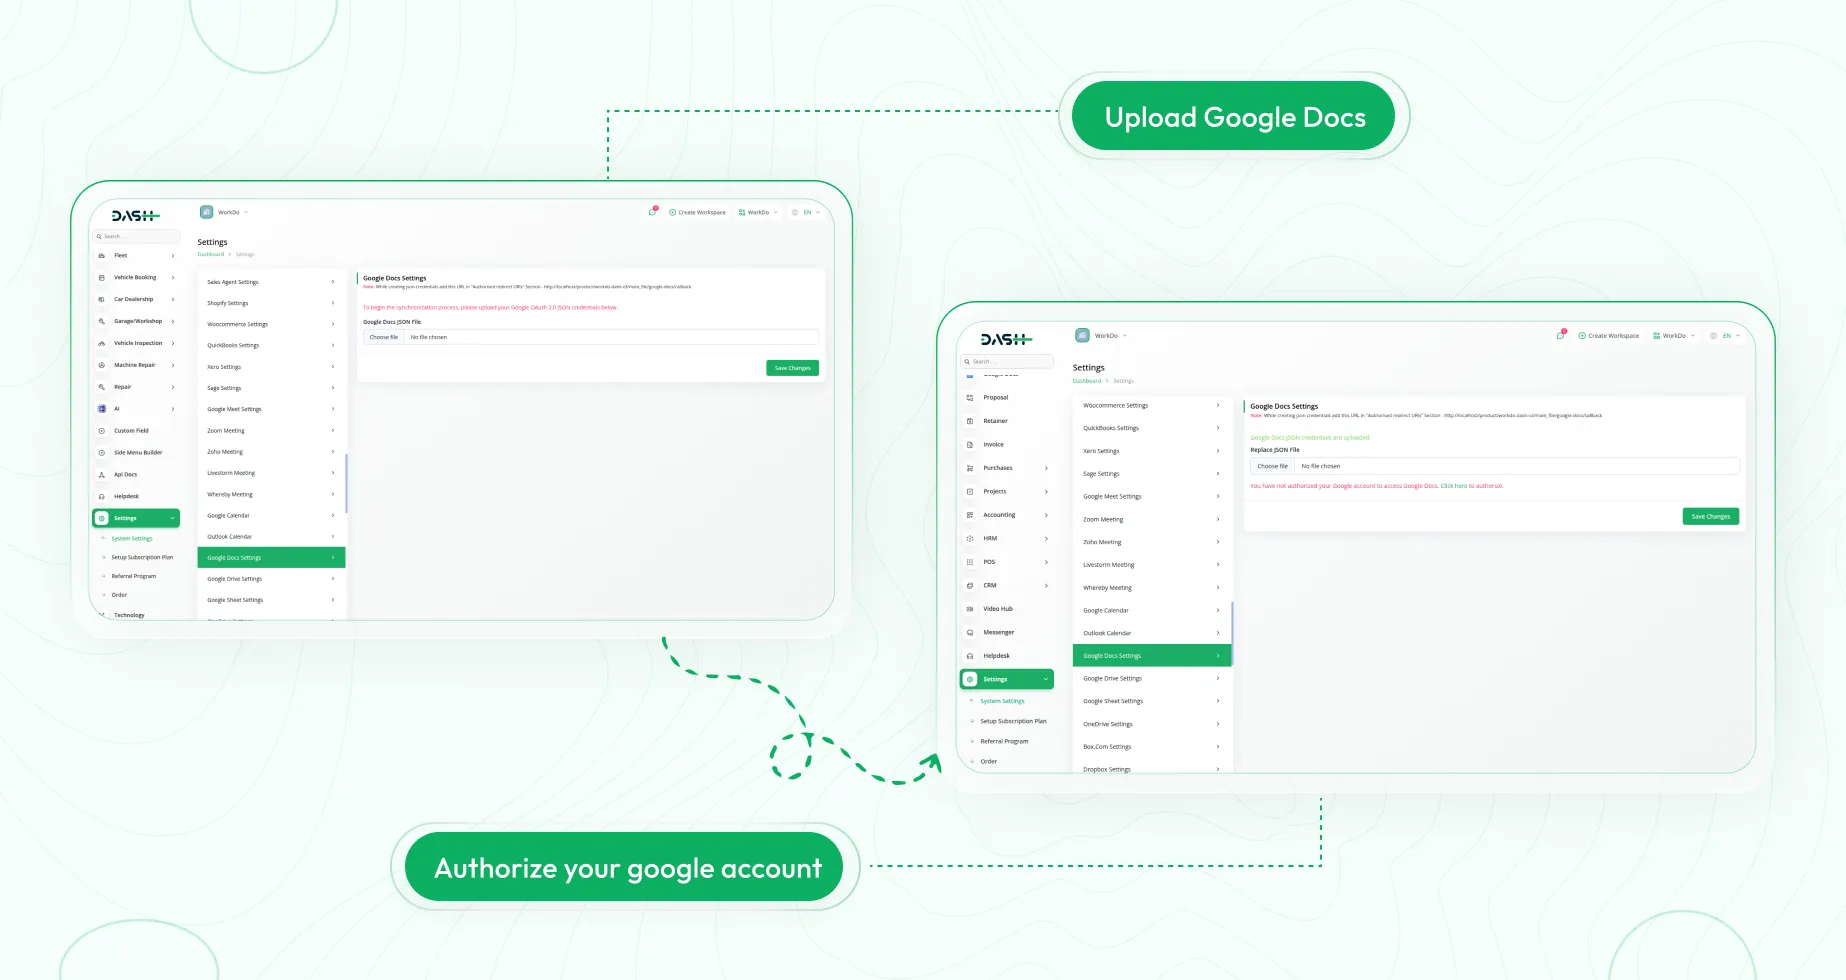
- After purchasing the Add-On, go to the system settings page of the platform and upload the JSON file of Google Docs.
- To generate the client id and client secret you can follow these steps:
Access the Google Cloud Console:
- Go to the Google Cloud Console.
- If you don’t have a project, create a new one.
Enable APIs:
- Navigate to “APIs & Services” in the left-hand menu.
- Enable the Google APIs you intend to use (e.g., Google Doc API, Drive API).
Configure OAuth Consent Screen (if necessary):
- Go to “APIs & Services” > “OAuth consent screen”.
- Select the user type (Internal or External) for your application.
- Fill in the application details (name, support email, etc.).
- Choose scopes (permissions) your app needs.
- Save the consent screen.
Create OAuth Client ID:
- Go to “APIs & Services” > “Credentials”.
- Click “+ Create Credentials” and select “OAuth client ID”.
- Choose the application type (Web application, Native application, etc.).
- Add a name for the client ID.
- Specify the authorized redirect URIs (where Google will redirect the user after consent).
- Click “Create”.
-
Obtain Client ID and Client Secret:
- The newly created credential will appear in the “Credentials” list.
- Note down the Client ID and Client Secret, which you will use in your application.
- You can also find the Download JSON file icon there.
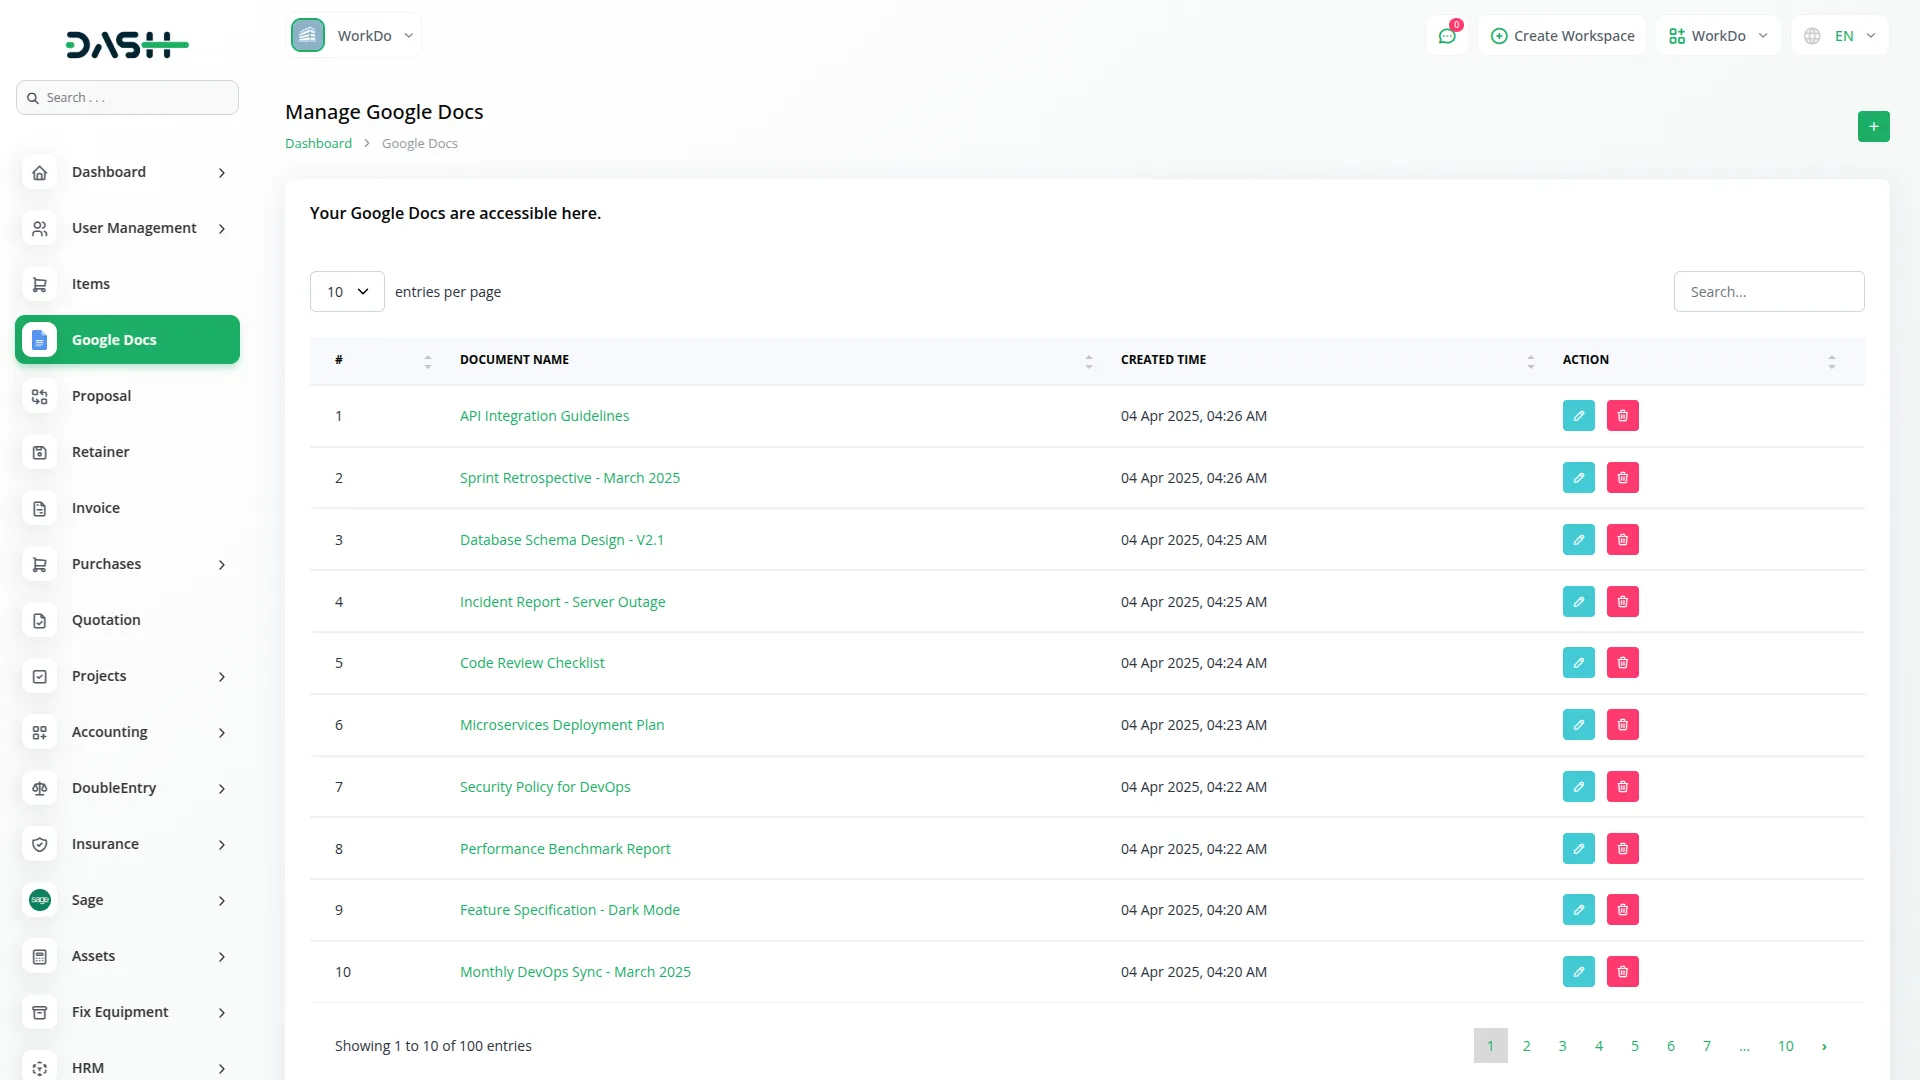
- Once you upload the JSON file, find out the google docs Add-On in the sidebar. Here you will see the list of the google documents you have created in your drive.
-

- You can also create new google documents on our platform. Just click on the create button given at the top, and enter the title.
- Once you do this, you can see the document on the google docs page, you can also edit or delete it through the action column easily.
- The changes done in Google Docs will be visible on our platform, and the changes done in our platform will be visible on Google docs.
-

Categories
Related articles
- ZitaSMS Integration in Dash SaaS
- Planning Module Detailed Integration in Dash SaaS
- Waste Management Integration in Dash SaaS
- OneDrive Integration in Dash SaaS
- Sign-In with Slack Add-On Integration in Dash SaaS
- Vehicle Wash Detailed Documentation
- Sofort Integration in Dash SaaS
- Google Sheet Integration in Dash SaaS
- Sage Integration in Dash SaaS
- BTCPay Integration in Dash SaaS
- Facilities Integration in Dash SaaS
- Contract Template Integration in Dash SaaS
Reach Out to Us
Have questions or need assistance? We're here to help! Reach out to our team for support, inquiries, or feedback. Your needs are important to us, and we’re ready to assist you!


Need more help?
If you’re still uncertain or need professional guidance, don’t hesitate to contact us. You can contact us via email or submit a ticket with a description of your issue. Our team of experts is always available to help you with any questions. Rest assured that we’ll respond to your inquiry promptly.
Love what you see?
Do you like the quality of our products, themes, and applications, or perhaps the design of our website caught your eye? You can have similarly outstanding designs for your website or apps. Contact us, and we’ll bring your ideas to life.
