Movie & Tv Studio Integration in Dash SaaS
Movie & TV Studio is a comprehensive content management platform designed for creating and managing a digital streaming service.
Introduction
Movie & TV Studio is a comprehensive content management platform designed for creating and managing a digital streaming service. The software allows you to build and operate your own movie and TV show platform with features similar to popular streaming services. You can upload and organize video content, manage customer accounts, process orders and payments, create playlists, handle customer authentication, and customize your website’s appearance. The platform includes both admin management tools and a customer-facing website where users can browse content, make purchases, create accounts, and watch their purchased shows and movies.
How To Install the Movie & TV Studio Add-On?
To Set Up the Movie & TV Studio Add-On, you can follow this link: Setup Add-On
How to Use the Movie & TV Studio Add-On?
Movie & TV Dashboard
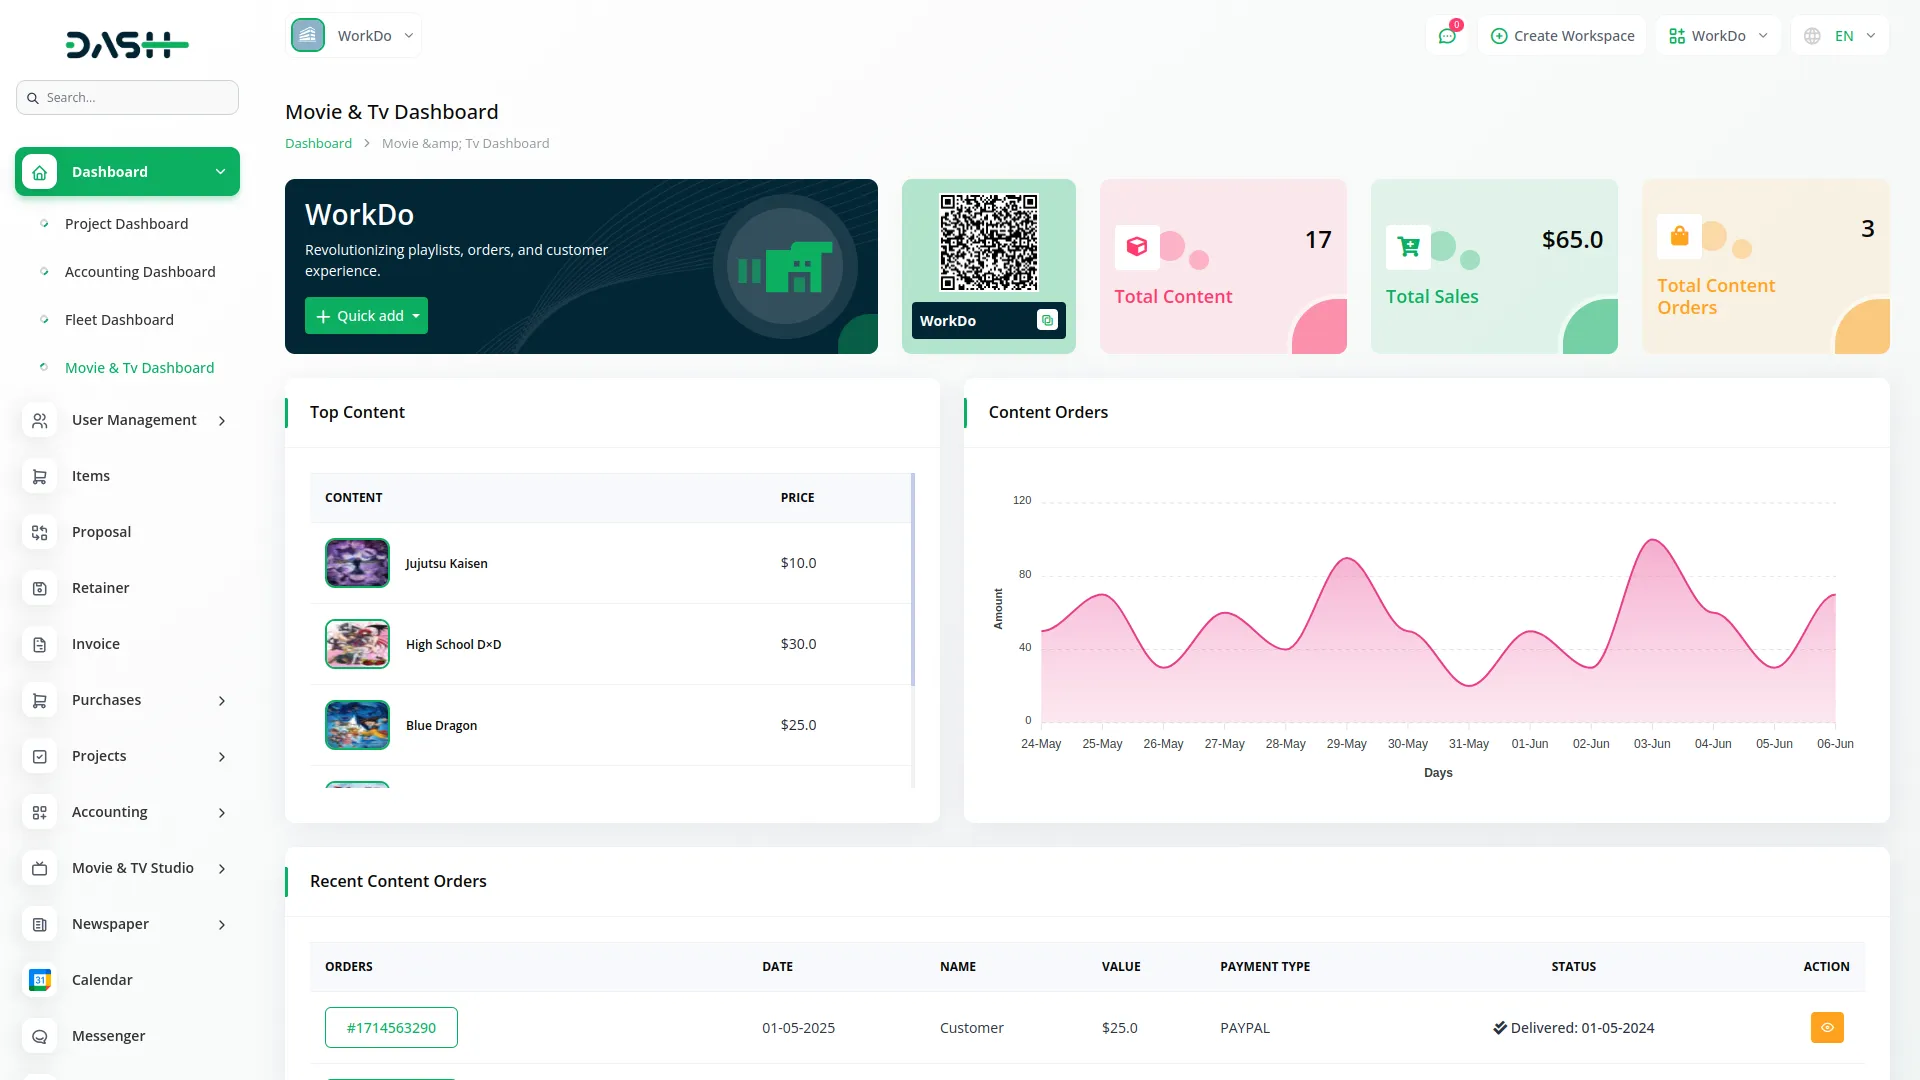
- The dashboard provides a central overview of your streaming platform’s performance and quick access to key functions. To access the dashboard, navigate to the main admin panel after logging in.
- The dashboard displays several important cards and widgets. At the top, you’ll find quick add buttons to click for Add New Playlist, Add New Content, Add New Category, and Add New SubCategory. These buttons provide fast access to create new items without navigating through multiple menus.
- The QR code scan card shows a scannable code for customers to access your platform, along with a booking link section where you can copy your store link to share with others.
- Performance metrics are displayed in cards showing Total Content, Total Sales, and Total Content Orders. These numbers give you an instant view of your platform’s activity.
- The Top Content section shows your 5 best-performing items with their content name, content image, and price displayed for easy reference.
- A Content Orders area chart displays order activity over the last 2 weeks, helping you track sales trends and patterns.
- The Recent Content Orders section shows the top 5 most recent orders. The list page displays columns for Orders (by clicking on which you can easily view the order details), Date, Name, Value, Payment Type, Status, and Action. You can click the “View” button to view detailed order information.
Movie & TV Studio Website
- The website controls your customer-facing streaming platform, where customers browse and purchase content.
- The header section contains your clickable logo that links to the homepage and a navigation menu with Home, Blog (that you need to add from the blogs section), and Custom Page sections that dynamically populate based on the pages you create through the Custom Page section.
- The right side of the header has a search bar for finding content, a wishlist icon that shows how many items are saved, a shopping cart icon that displays the number of items added, and a language dropdown for different languages.
- When customers are not logged in, they see a “Sign In” button, but when logged in, they see a “My Account” dropdown with their name and email, a link to their profile, access to their purchased content, and a logout option.
- The platform has separate login and registration forms for customers to create accounts or sign in to existing ones.
- If someone tries to buy content without being logged in, they get redirected to the login page, and if they try to write a review without logging in, they see a login prompt.
- After logging in, customers can purchase content, write reviews and ratings, and access their personal content library.
- Administrators can change how the website looks through System Settings in the Tv Studio Theme Settings, which controls what sections appear, like Series.
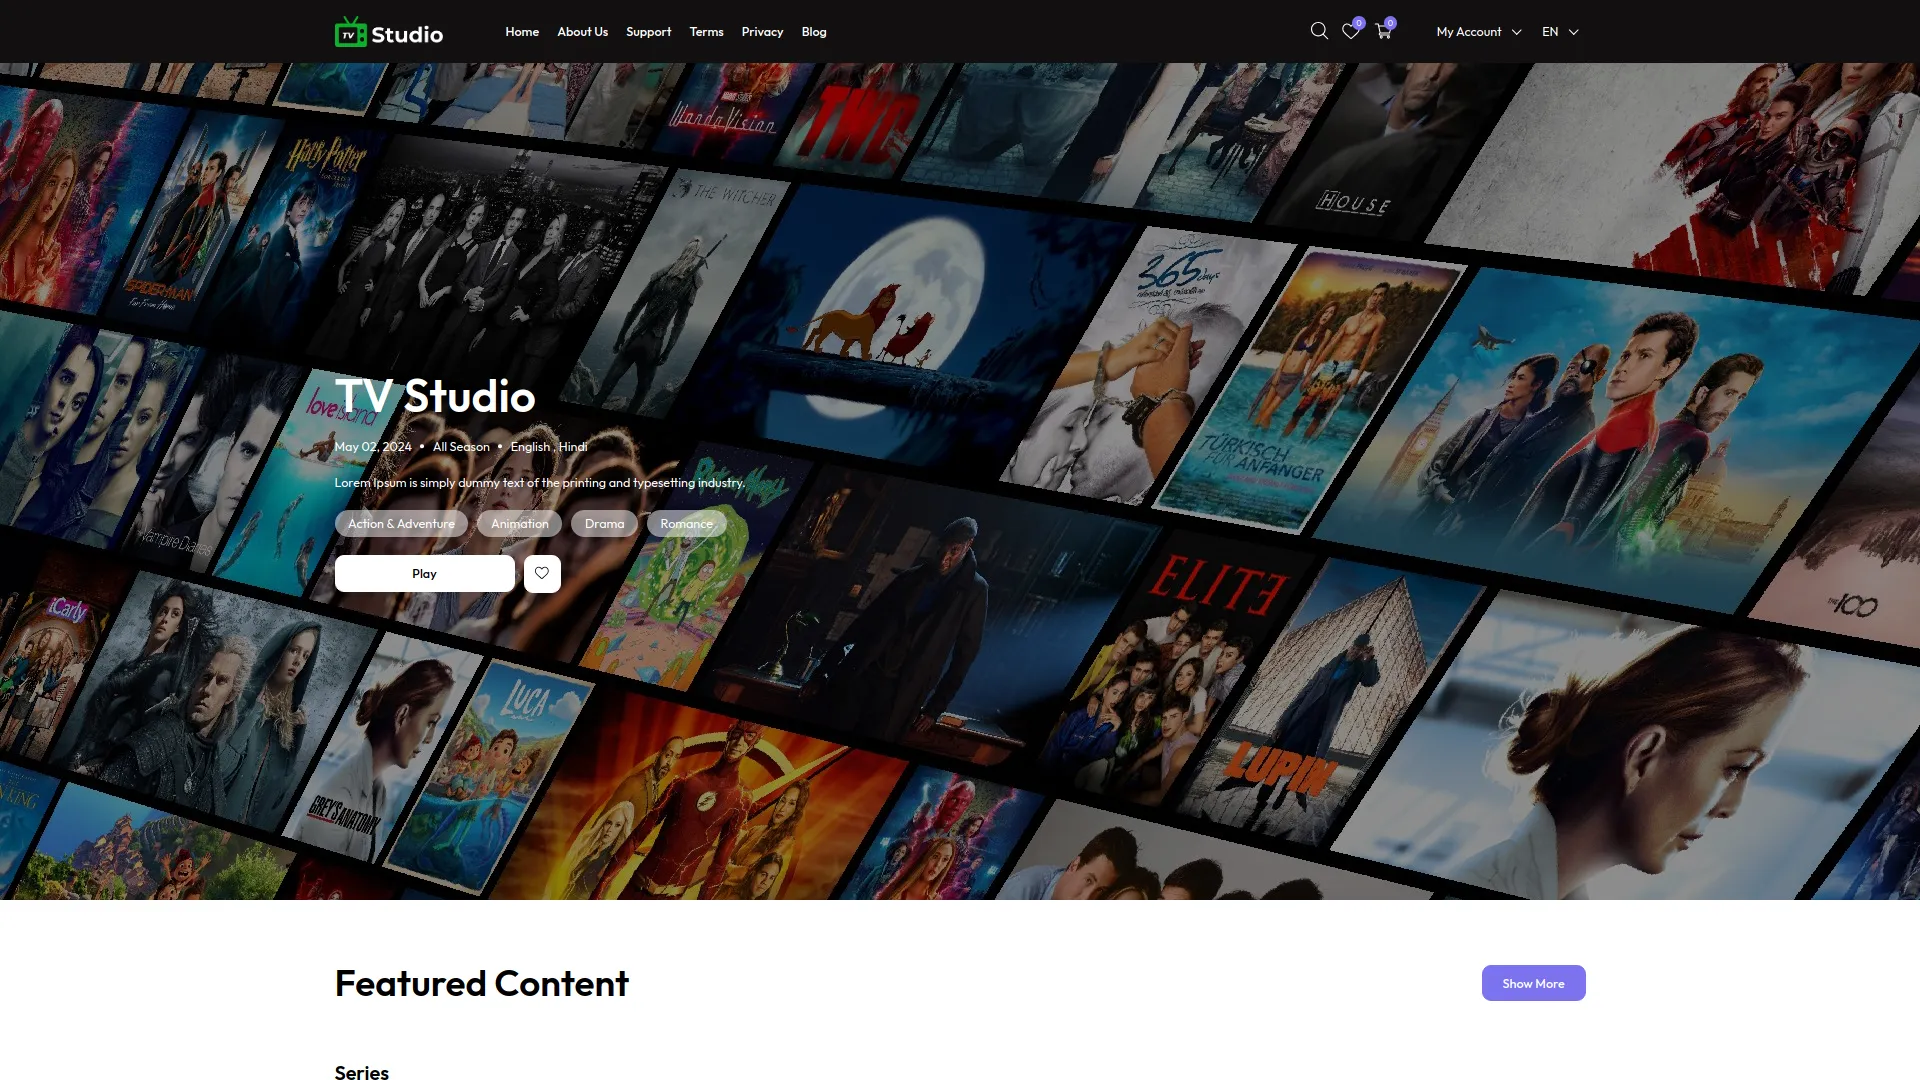
- Featured Content and On Sale items will be visible on product card layouts showing clickable images, clickable titles, star ratings, a heart icon to save to wishlist, prices, and “Add to Cart” buttons.
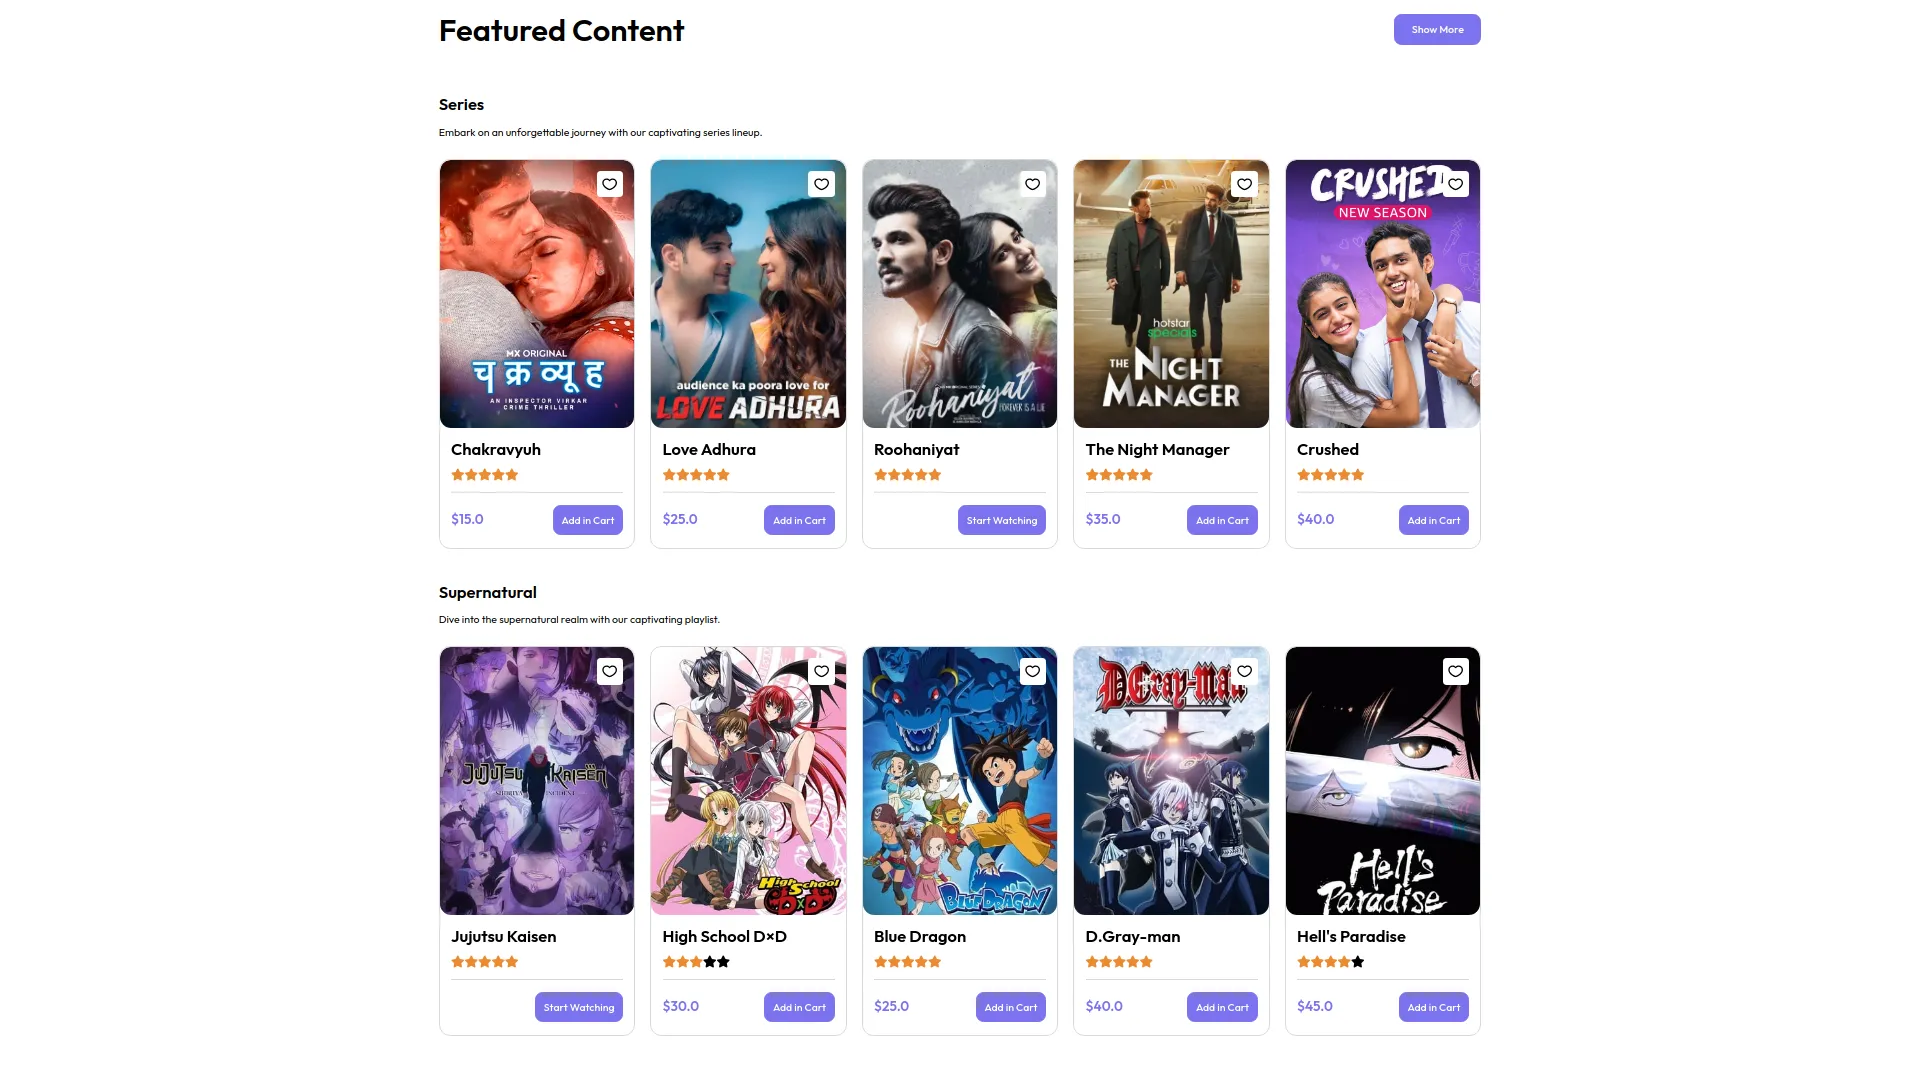
- When customers click on content, they see a detailed page with the content title, release date, season information, description, category, a “Play” button, and a wishlist heart icon.
- The detail page has dropdown tabs to select different chapters, and clicking on chapters shows videos or files that lead to detailed chapter pages.
- The customers can view the videos or series only if they have purchased them.
- There’s a “More Like This” section showing similar content and a review section where logged-in customers can leave feedback.
- The search page has filters on the side for categories using checkboxes and price filters for Paid or Free content.
- The main search area shows filtered results and has a search bar at the top for typing keywords.
- Customers can save content to their wishlist by clicking the heart icon on any content card.
- The wishlist page can be accessed from the header icon, which shows the count of saved items, and customers can move items to the cart or remove them.
- When administrators turn on discounts for content, those items automatically show up in the On Sale section.
- Customers can add content to the cart with one click, can adjust quantities, and go through checkout with order summary, coupon codes for discounts, and payment options, including online payments or bank transfers.
- After successful payment, customers go to a confirmation page with download links, printable invoices, and content details with a “Start” button.
- From My Account > My Shows in the header, customers see all their purchased content with “Start Watching” buttons.
- Clicking “Start Watching” takes customers to chapter pages where they can watch videos or view files in full screen.
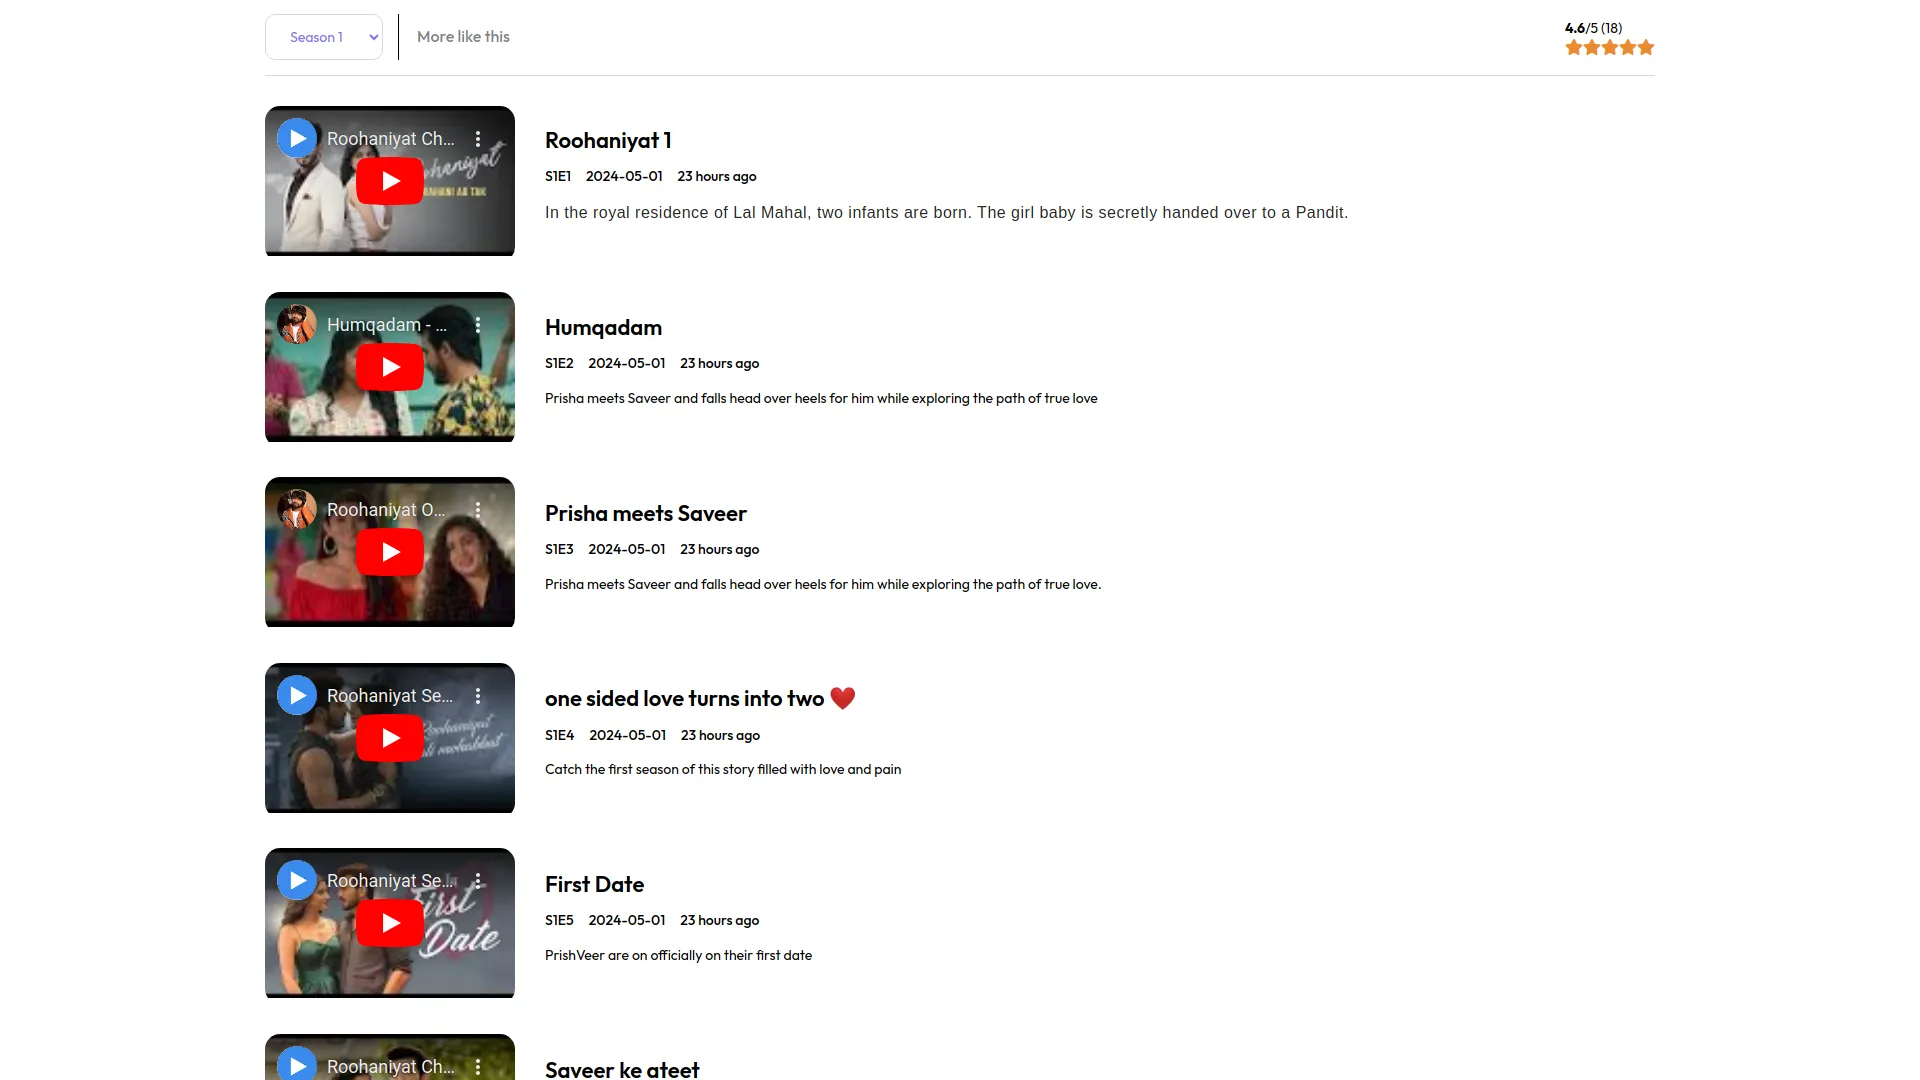
- Chapter pages show the content image, name, current chapter, like/dislike buttons, content description, related movies and series, and multiple images from that chapter.
- Customers can edit their profile from My Account > Profile to change their username, email, profile picture, current password, new password, and confirm the new password.
- The platform creates a complete streaming experience where customers can easily find, purchase, and watch movies and TV shows with simple navigation and user-friendly features.
System Settings
- System Settings manages the dynamic front theme settings for your Movie & TV Studio website.
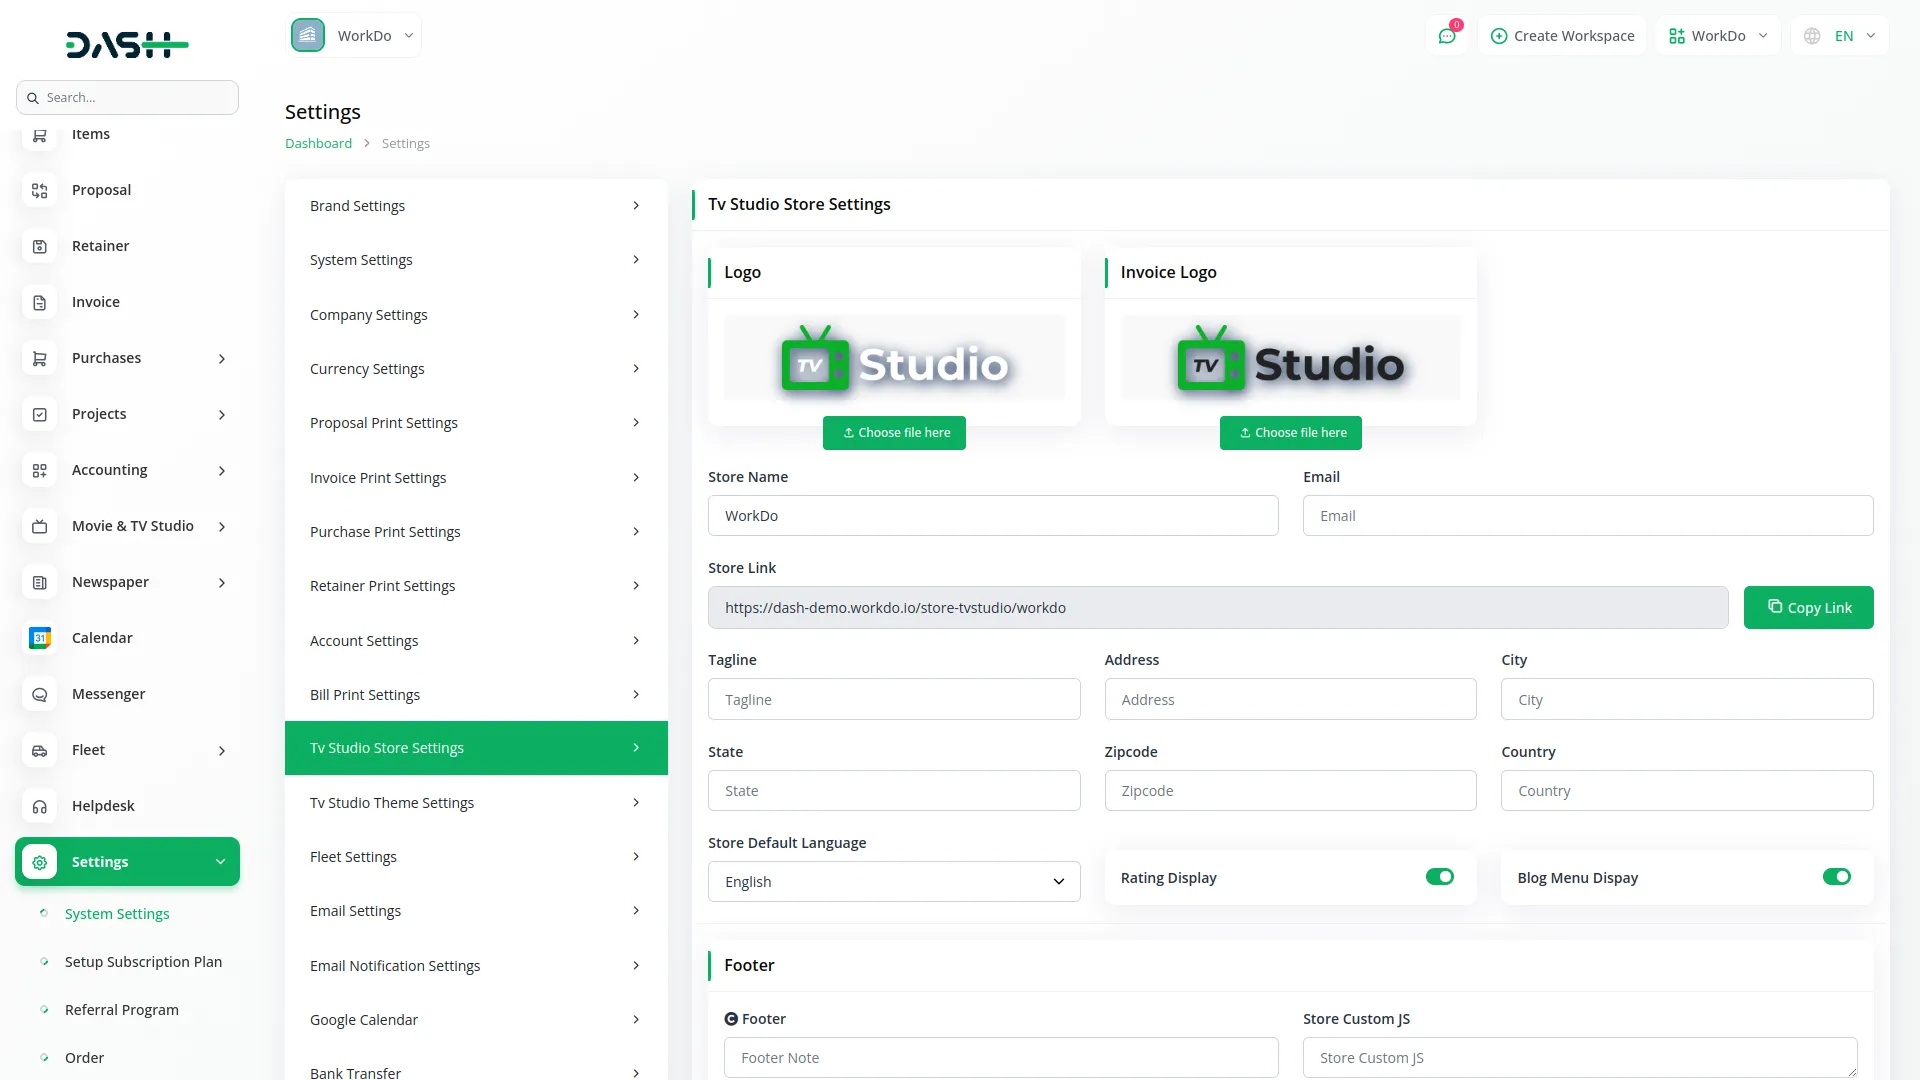
- Go to System Settings and locate the TV Studio Store Settings. Click to open the form and fill in details like Logo, Store Name, Email, Address, and Store Default Language.
- For TV Studio Store Settings, click on the settings section and fill out the form with your Logo, Invoice Logo, Store Name, Email, Store Link which is read-only with a Copy Link button, Tagline, Address, City, State, Zip Code, Country, Store Default Language from the dropdown, Rating Display toggle, Blog Menu Display toggle, and Footer with Store Custom JS.
- When the Rating Display is ON, ratings show on the website, and when Blog Menu Display is ON, the blog menu appears in the website header.
- For TV Studio Theme Settings, access the Edit Theme Page Layout, which shows top buttons for Store Analysis, QR Code, and Preview.
- Store Analysis displays charts showing website analytics including a Visitors Chart with area chart showing visitor counts for the last 15 days, Platforms Chart with bar chart displaying visitor platforms like Linux and Windows, Devices Chart with pie chart showing device types like Desktop and Mobile, and Browsers Chart with pie chart representing browser usage like Chrome and Firefox.
- The QR Code button shows a QR code linked to your website URL for quick scanning access, while Preview opens a live preview of your website theme and settings.
- The sidebar contains several sections. In the Detail section, configure your Banner with Title, Date, Total Season, Language, Subtitle, Action, Button Link, Thumbnail Image, and Banner Section toggle. Set up Home-Featured Content with Title, Button, and toggle.
- Configure Home-On Sale with Title, Button, and toggle. Add Home-other-Image with Cover Image and toggle. Set up Home-Footer with Footer Logo, three Footer Quick Link Name fields, three Footer Quick Link fields, six Social Link Icon fields, six Social Link fields, and a toggle.
- Each section’s toggle controls whether that section appears on your website.
- The SEO Section has two tabs: SEO and Info. In the SEO tab, enter Meta Keywords, Google Analytics, Meta Description, Facebook Pixel, and Meta Image. In the Info tab, create pixels by selecting the platform and entering the Pixel ID. The list page shows Platform, Pixel ID, and the Delete action.
- The PWA Section lets you enter App Title, App Name, App Background Color, App Theme Color, and the PWA toggle that enables PWA functionality when turned ON. When the PWA function is on, it will be performed on the website.
- The QR Code Section allows you to set Foreground Color, Background Color, Corner Radius, and choose between Normal, Text, or Image buttons.
- If Normal is selected, it shows a standard QR code with default styling. If Text is selected, fields appear for Text input, Text Color, and Text Size. If Image is selected, fields show for Upload Image and Image Size are displayed on the QR code.
System Setup
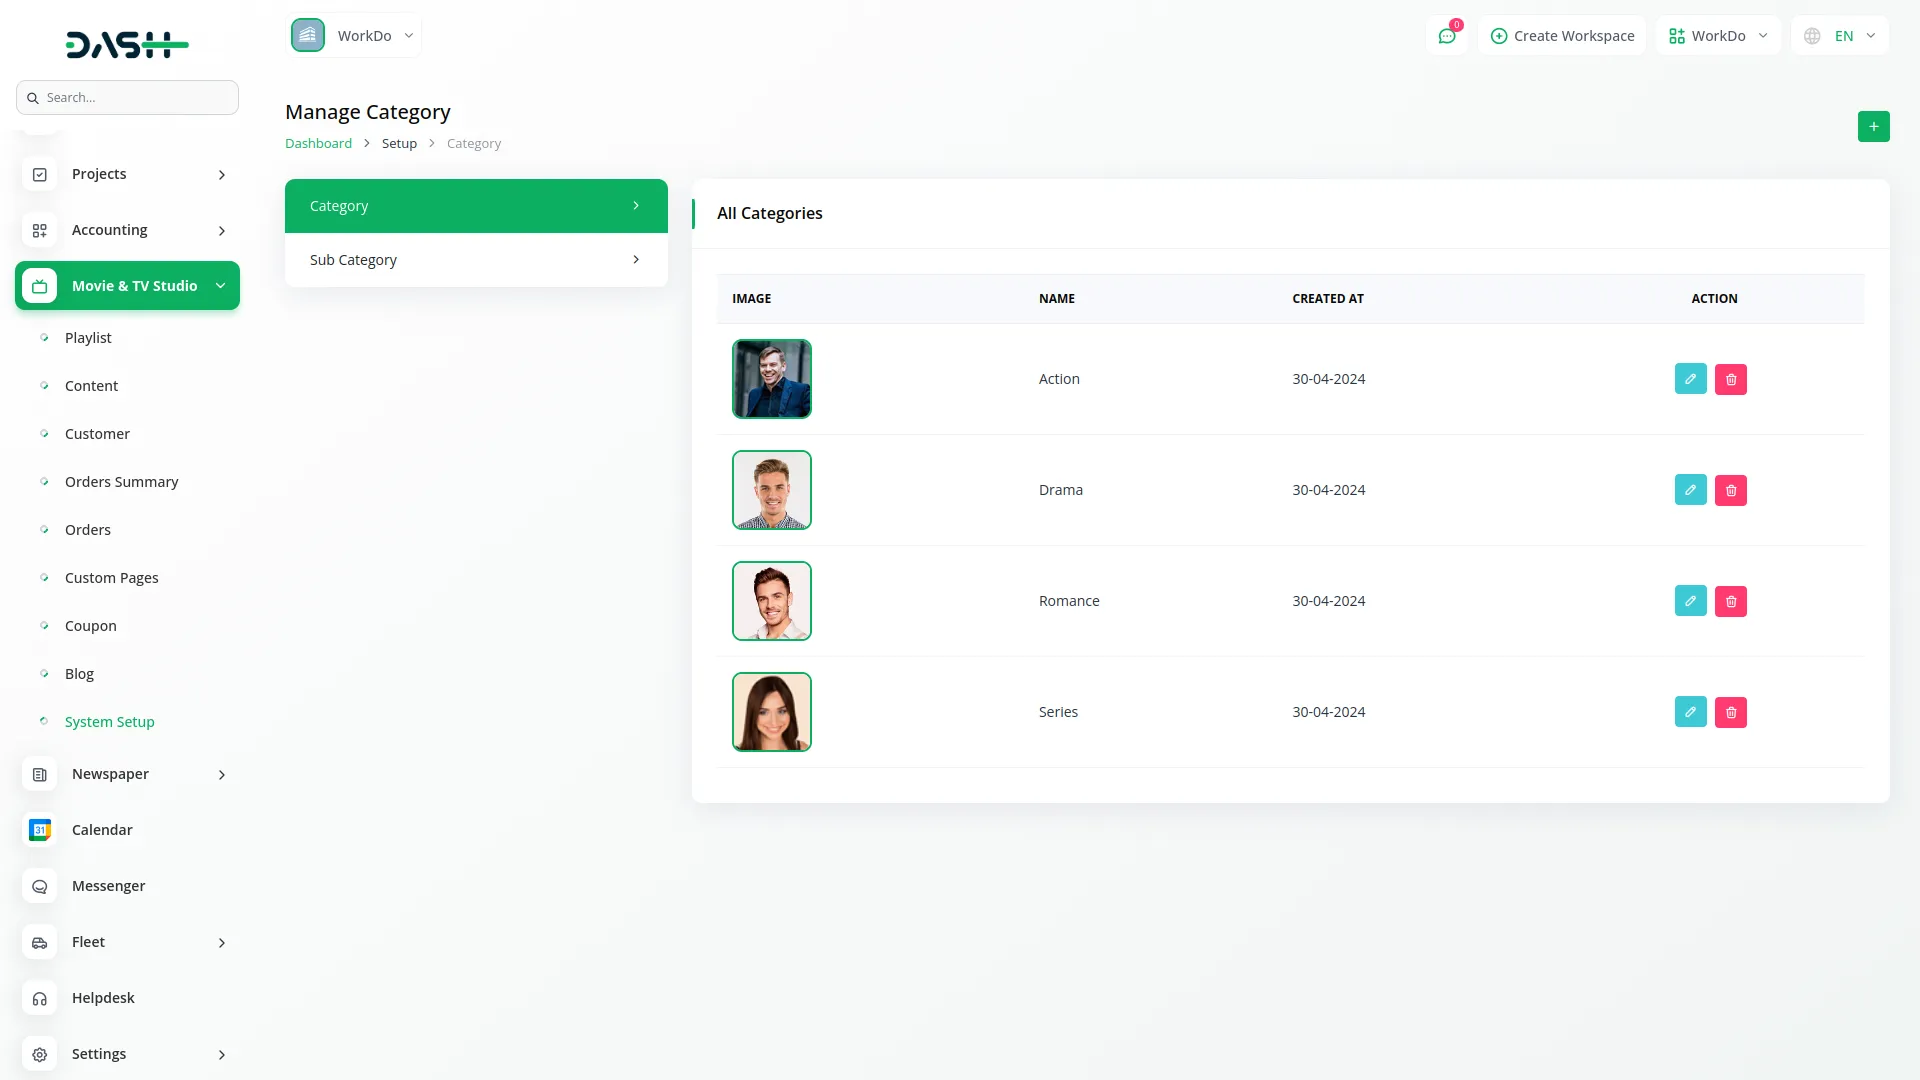
- System Setup manages the foundational categories and subcategories for organizing your content.
- For Category management, click the “Create” button to add a new category. Enter the Name, upload a Category Image, and add a Description for the category.
- The list page displays columns for Image, Name, Created At, and Action. You can use the Edit action to modify existing categories or the Delete action to remove them.
- For Sub Category management, click the “Create” button to add a new subcategory. Enter the Name and select the Category from the system setup, which pulls from your System Setup Category Section.
- The list page shows columns for Name, Category, Created At, and Action. Use Edit to modify subcategories or Delete to remove them. The subcategories are connected to the main categories you created, so make sure to have categories set up before creating subcategories.
Playlist Management
- Playlist management helps you organize your content into themed collections for better customer browsing.
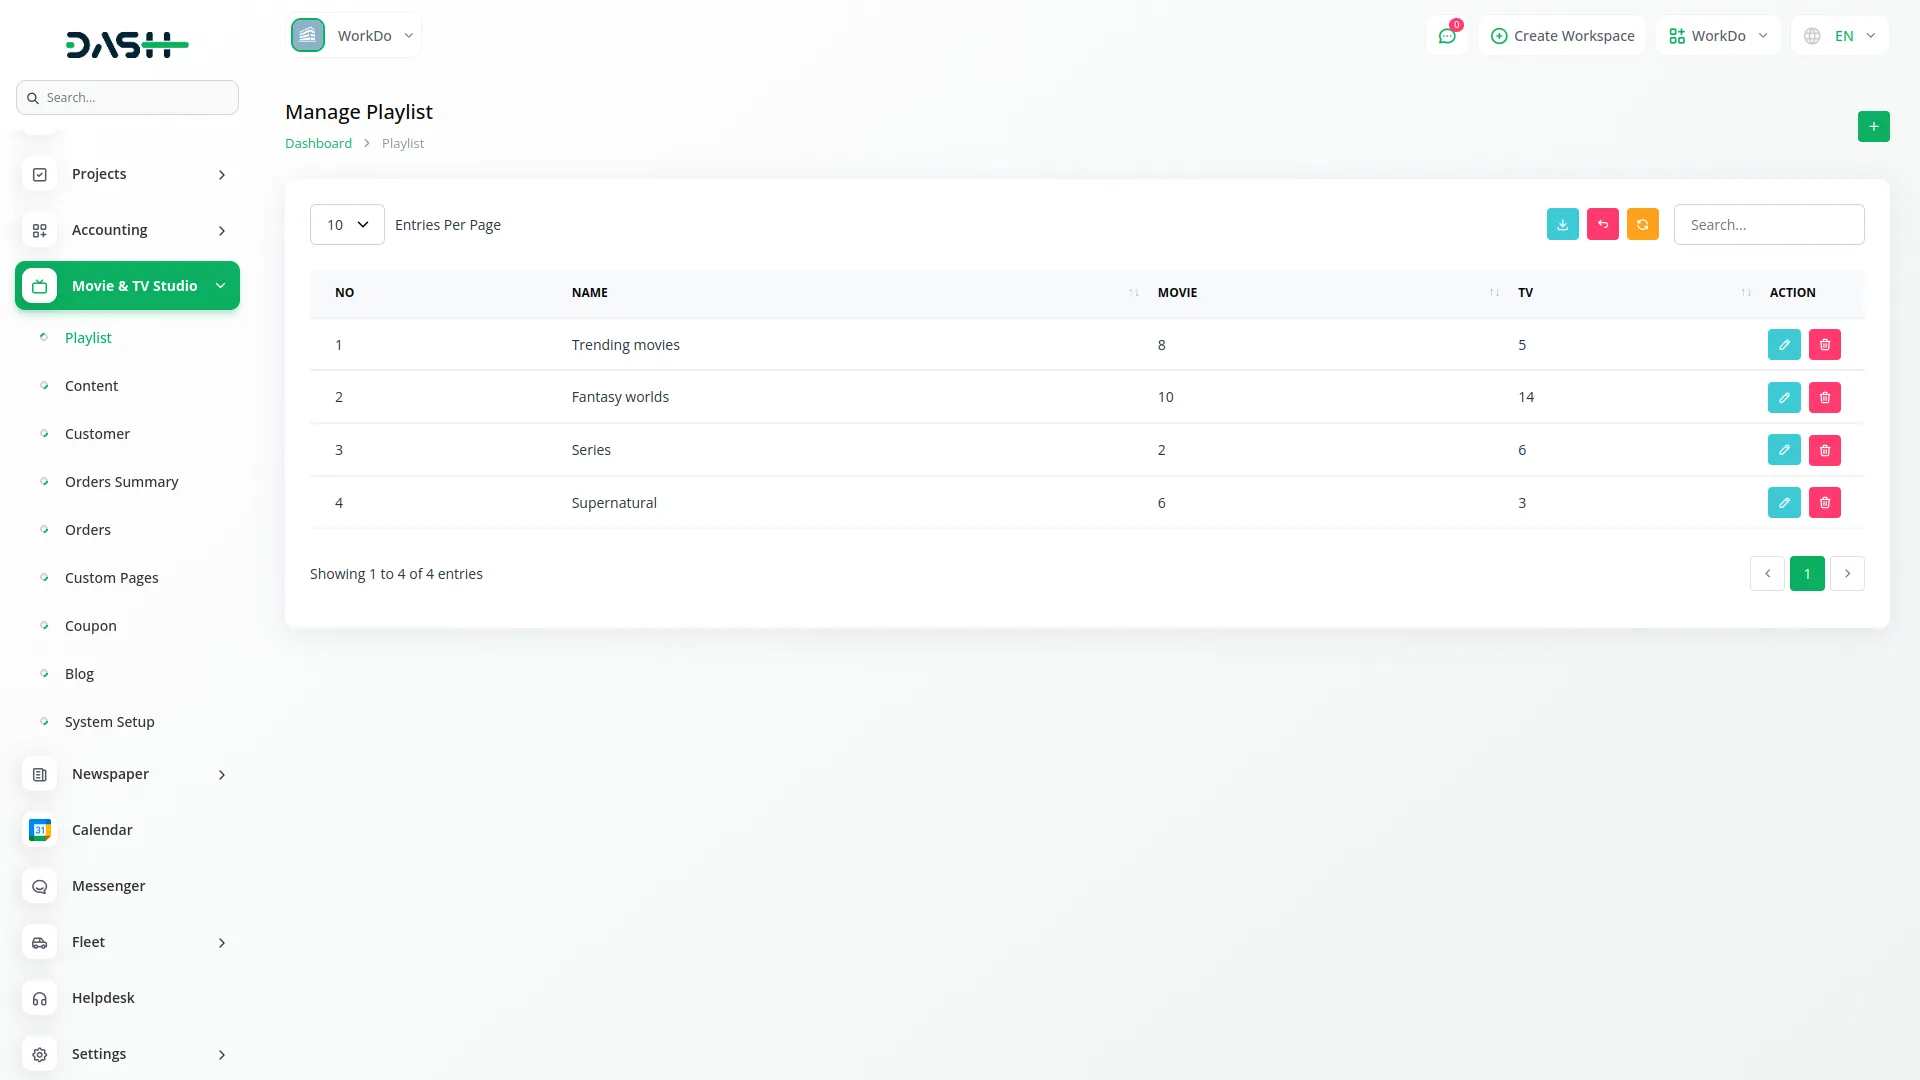
- To create a new playlist, click the “Create” button at the top of the playlist page. Enter the Name for your playlist and add a Description explaining what type of content the playlist contains.
- The list page provides Search, Export, and Add buttons at the top. The table displays columns for No, Name, Movie count showing the number of content items from the Content Section where Content type equals Movie, TV count showing content items where Content Type equals TV, and the Action column.
- You can use the Edit action to modify playlist names and descriptions, or the Delete action to remove playlists entirely. The Movie and TV counts automatically update based on content you assign to each playlist in the Content Section, so these numbers reflect the actual content associated with each playlist.
Customer Management
- Customer management handles user accounts and tracks customer activity on your platform.
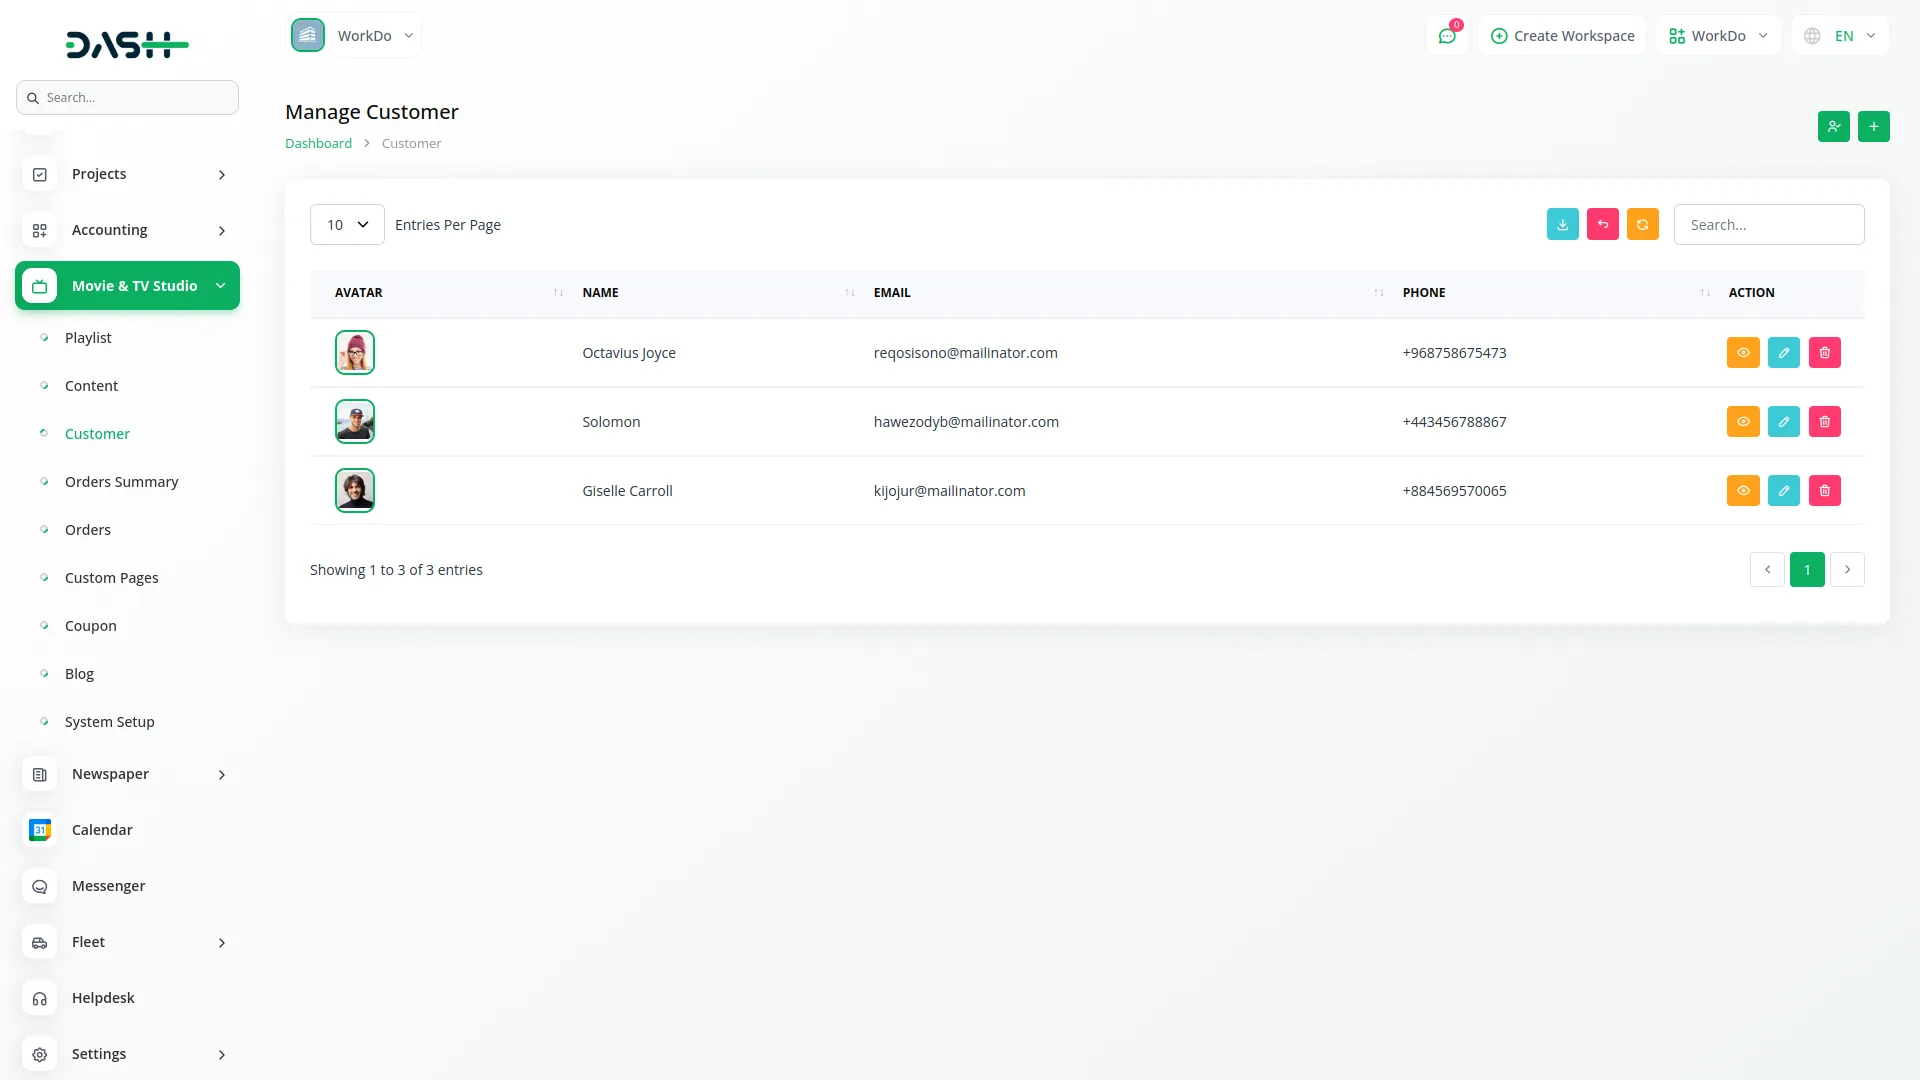
- To create a new customer account, click the “Create” button at the top of the customer page. Fill in the customer details, including Name, Email, Password, and Phone Number. This creates admin-generated customer accounts with the help of which customers can easily login the website.
- The list page provides Search, Export, and Add buttons for easy management. The table displays columns for Avatar, Name, Email, Phone, and Action. You can use the View action to see detailed customer information, the Edit action to modify customer details, or the Delete action to remove customer accounts.
- The Customer Log button opens a separate tracking system that monitors customer website activity. When customers register and login through your website, their activity automatically appears in the Customer Log Page.
- In the Customer Log section, use the filters to narrow down results by Month using the select dropdown, Customer from the Customer Section dropdown, then click Apply to filter or Reset to clear filters. The list page shows Search, Export, and Add buttons.
- The table displays columns for No, Customer Name, Email, Last Login, IP, Country, Device, OS, and Action. You can use the View action to see detailed login information or the Delete action to remove log entries. This helps you track customer engagement and identify login patterns from different locations and devices.
Content Management
- Content management is the core of your streaming platform, where you upload and organize all movies and TV shows.
- To create new content, click the “Create” button and fill out the comprehensive form. The SEO section requires Meta Keywords, Meta Description, and Meta Image for search engine optimization.
- In the Content section, enter the Topic Title, select Content Type as either Movie or TV, choose Select Category from your System Setup Category Section, then Select Subcategory, which dynamically loads based on your chosen category from the System Setup Subcategory Section. Choose the Playlist from your Playlist Section, set the Language, enter Duration, and upload the Poster image.
- Configure the content settings using toggle buttons. This is Free toggle defaults to OFF – when turned ON, it hides Price and Cut Price fields and ignores the Discount toggle state. When this Free toggle is OFF, the Discount toggle controls the pricing display. When the Discount toggle is ON, both Price and Cut Price fields appear. When the Discount toggle is OFF, only the Price field shows while the Cut Price remains hidden.
- The Featured Content toggle defaults to OFF. When turned ON, content appears in the Featured Content section on your website. When OFF, content displays in the Sale section instead.
- The Preview toggle defaults to OFF. When turned ON, a Preview Type dropdown appears with options for Select Video File, Image, or iFrame. Based on your selection, corresponding input fields appear – Select Video File shows a video upload field, Image shows an image upload field, and iFrame shows a URL input field.
- Complete the form by adding Content Description, Price, and Cut Price as needed based on your toggle settings.
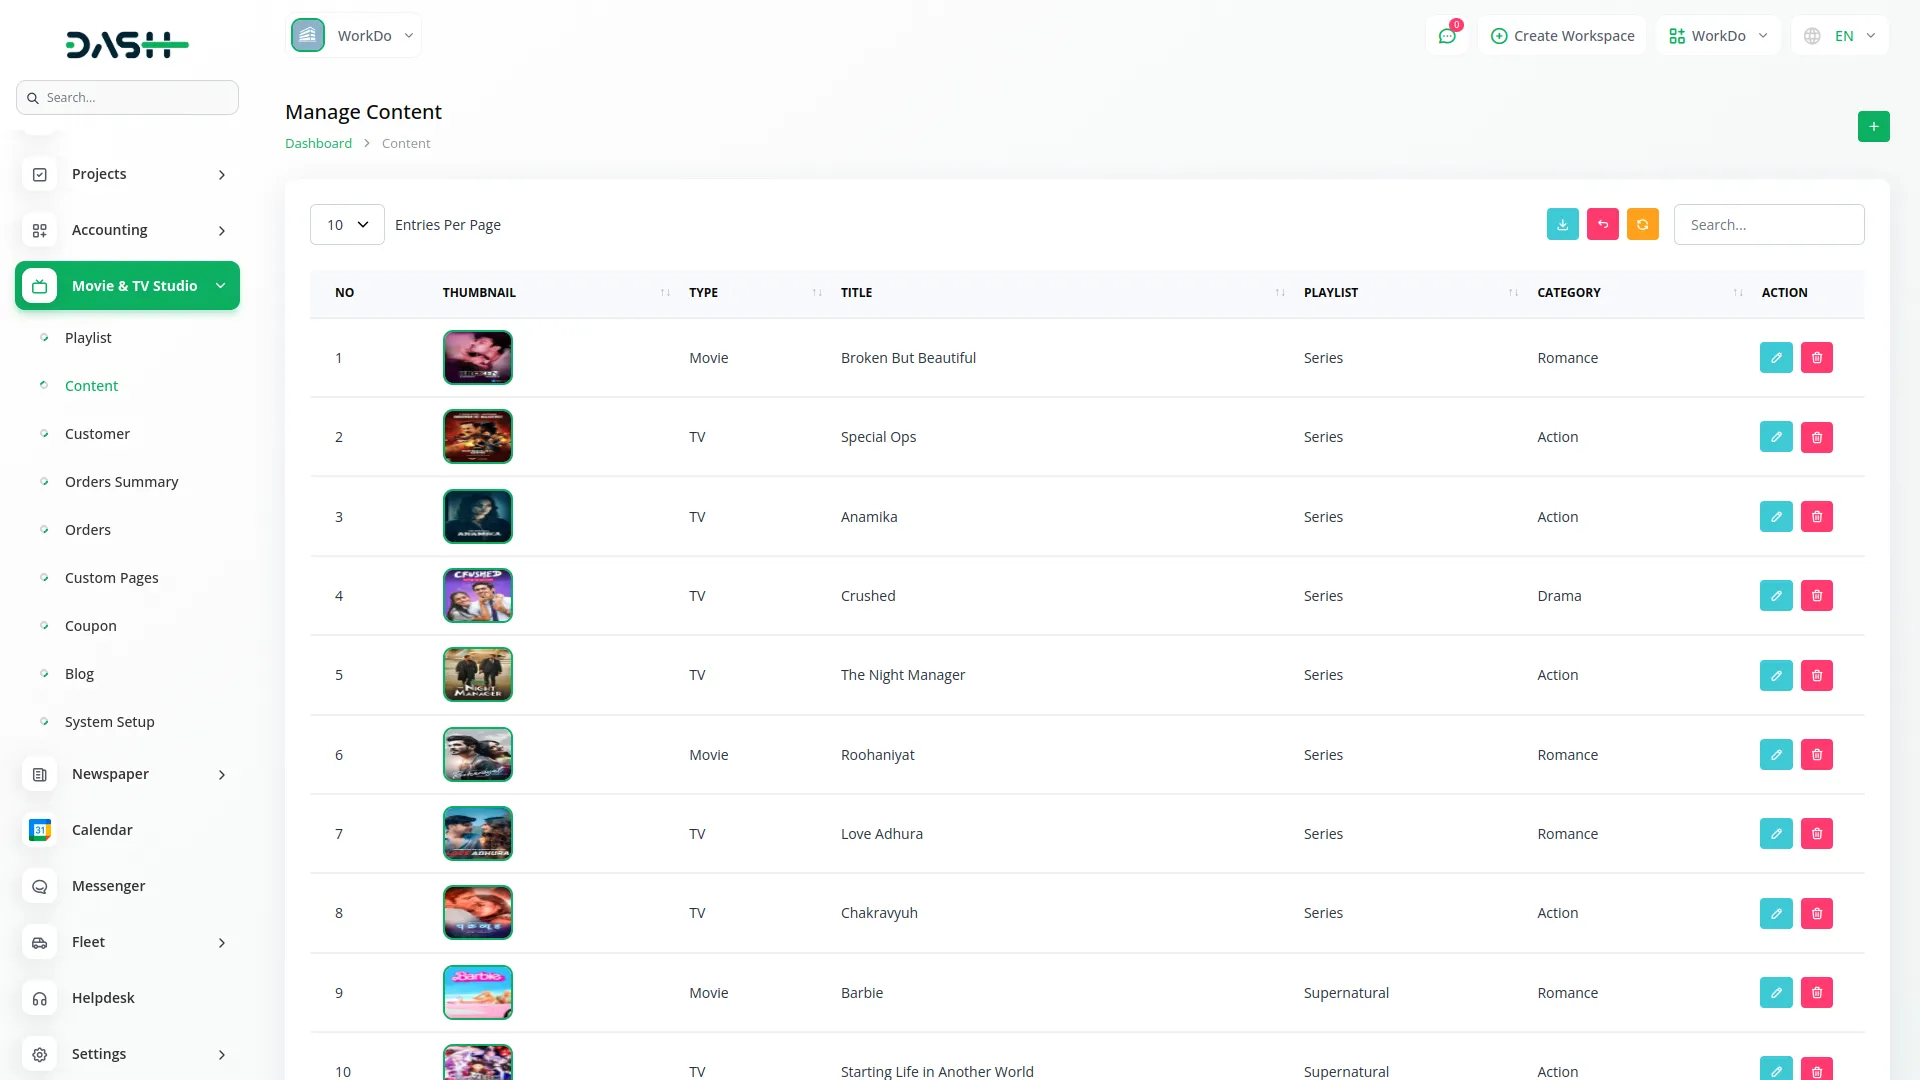
- The list page provides Search, Export, and Add buttons. The table shows columns for No, Thumbnail, Type, Title, Playlist, Category, and Action. Use Edit or Delete actions to manage your content.
- When you click the Edit button, the form opens with multiple sections. The Create Header & Edit Content section contains the same Content fields as the create form. The Header Section lets you create content chapters and episodes.
- To create headers, click Create Header and enter the Header Name. Each header entry shows Create, Edit, and Delete actions. Click Create to open the Create Chapter form, where you enter Chapter Name, select Chapter Type from Video URL, Video File, or iFrame options, add Chapter Description, and upload External File.
- Based on the Chapter Type selection, different inputs appear. Video URL shows Video URL and Duration fields. The Video File shows the Video File Upload and Duration fields. iFrame shows the iFrame URL and Duration fields.
- The Chapter List View shows all chapters under each header with Edit and Delete actions for management.
- The Images section contains the same Preview toggle and Upload Poster fields as the create form. The SEO section maintains the same Meta Keywords, Meta Description, and Meta Image fields.
Order Summary
- Order Summary allows you to manually create custom content orders within the admin panel for special cases or direct sales.
- To create a new order, click the “Create” button and begin with the Order Information section. Select the Customer from the dropdown, which pulls from your Customer Section, enter the Issue Date, and add the Content Number for tracking.
- The Content Summary section uses repeatable functionality for multiple content items in a single order. Each row includes a Content dropdown from your Content Section, Price that auto-fills based on selected content, and Discount percentage that auto-fills from content settings but remains editable.
- The Amount Fields calculate automatically. SubTotal shows Price multiplied by quantity or base amount. The discount is calculated as Sub Total multiplied by Discount percentage. The Total Amount shows the Subtotal minus Discount for the final amount.
- Use the Add Row button to include additional content items in the same order, or the Delete Row button to remove items. This flexibility allows you to create complex orders with multiple movies or TV shows for a single customer.
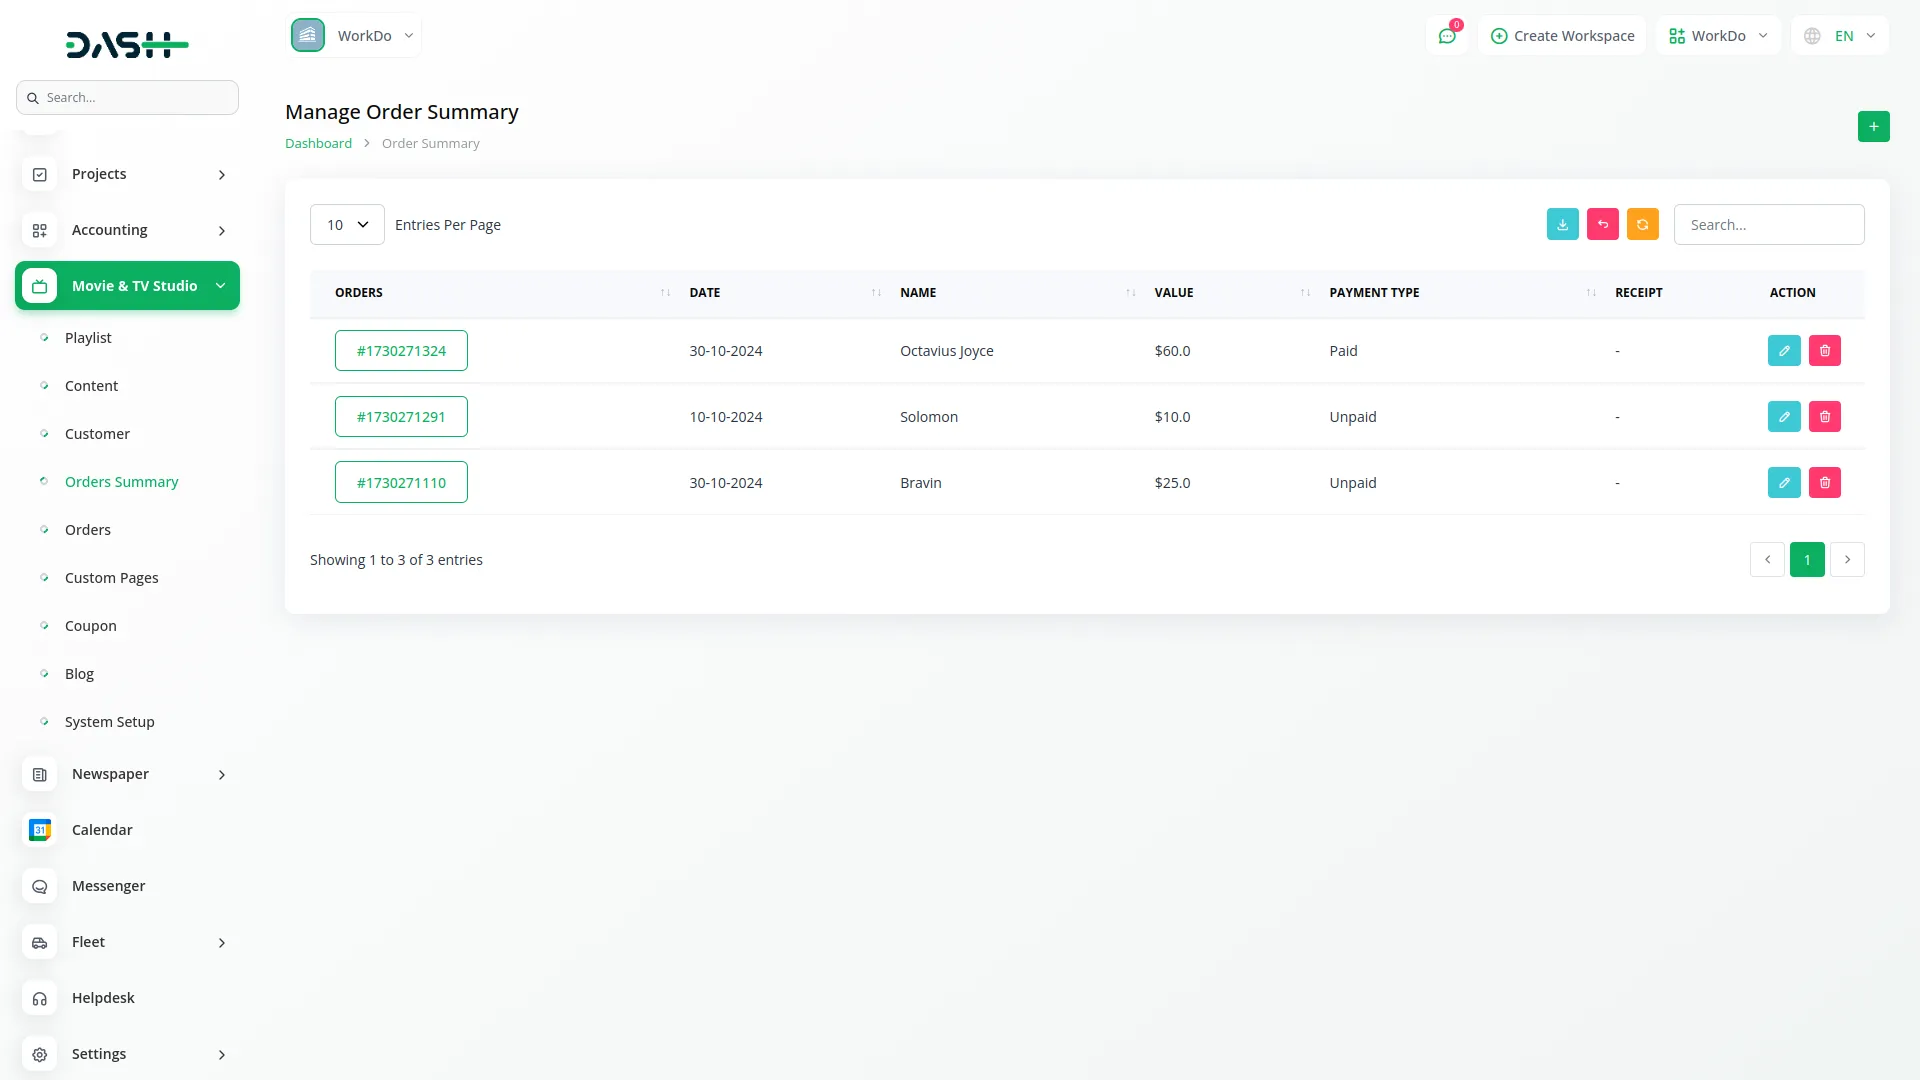
- The list page provides Search, Export, and Add buttons for management. The table displays columns for Orders, Date, Name, Value, Payment Type (paid, unpaid), showing default as unpaid, Receipt, and Action. You can use Edit to modify order details or Delete to remove orders completely.
Manage Orders
- Orders display all content purchases made through your website, providing a complete view of customer transactions.
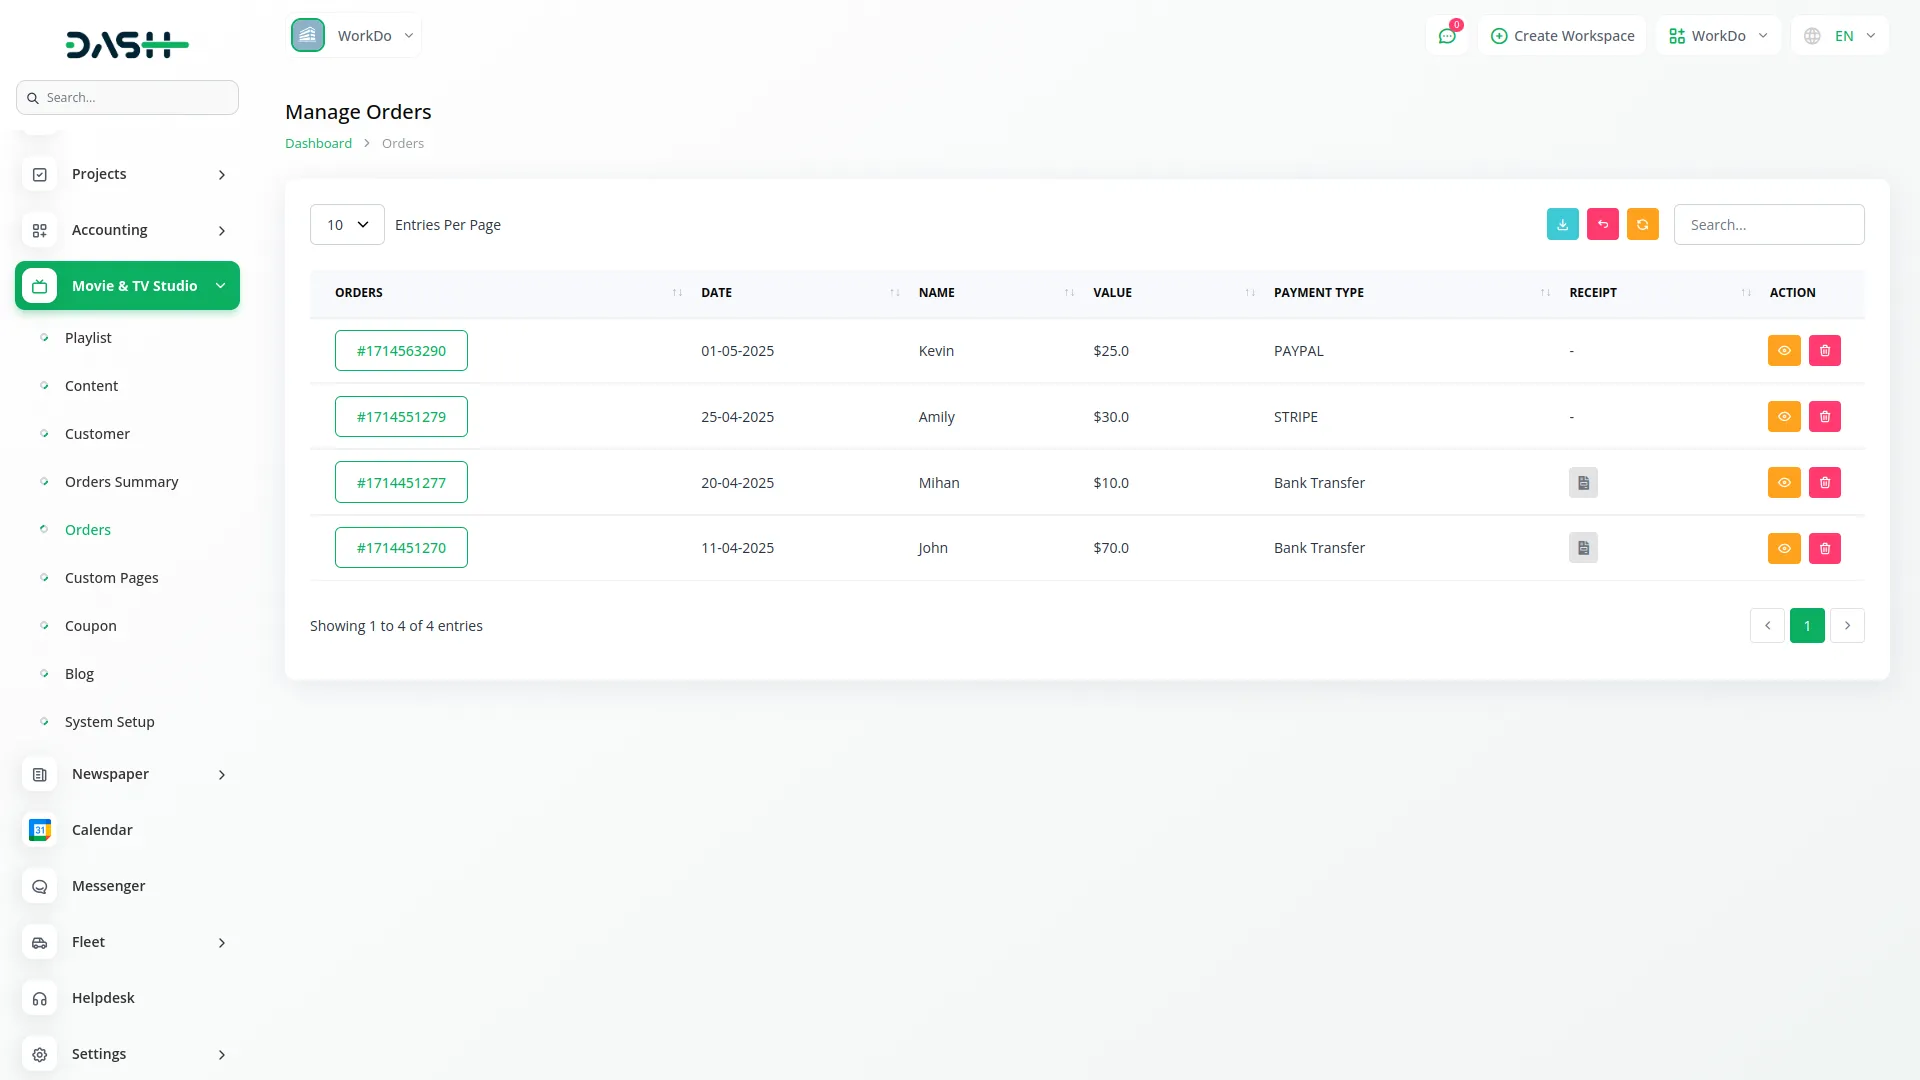
- The list page shows Search, Export, and Add buttons at the top. The table contains columns for Orders, Date, Name, Value, Payment Type, which shows either Online Payment with payment provider names or Bank Transfer, a Receipt showing a View option, and an Action column.
- You can use the View button to view detailed order information or the Delete action to remove orders from the system.
- When you click the view button, a detailed view opens displaying Customer Order Details with comprehensive information about the purchase. A Copy Link Icon allows you to copy a shareable view link for the order.
- The Copy Link opens in the browser to show a customer-friendly order summary view that customers can access independently. You can also download a PDF to print or save the order summary for record-keeping or customer service purposes.
- This Section connects directly to your website checkout process, automatically recording every successful purchase made by customers through the online platform.
Create Custom Pages
- Custom Page management lets you create additional website pages for terms, policies, about information, or any custom content.
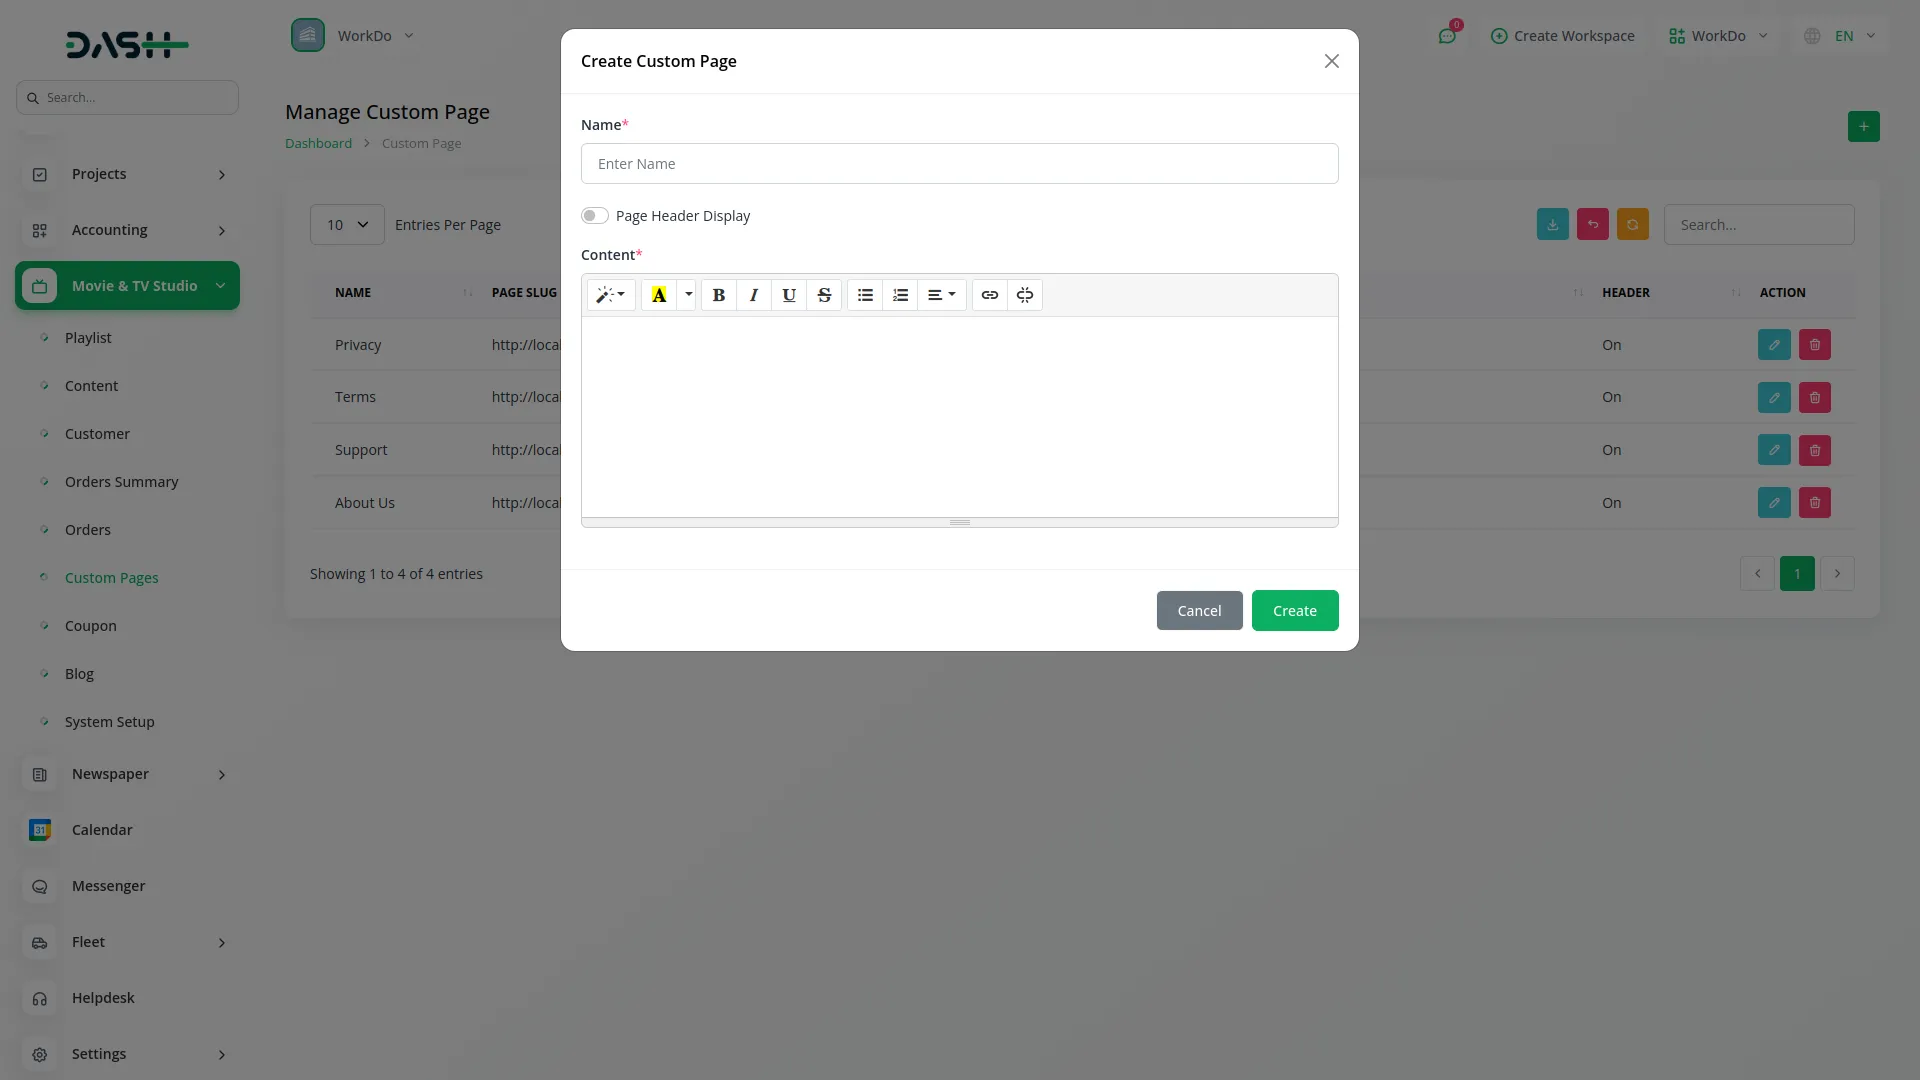
- To create a new page, click the “Create” button and enter the Name for your page. Set the Page Header Display toggle to control visibility in your website’s navigation. Add your Content using the text editor to create the page information.
- When the Page Header Display toggle is ON, the page name appears in your website’s top header section as a clickable menu item. When customers click the page name in the header, they see the dynamic Content you created for that page.
- The list page provides Search, Export, and Add buttons for page management. The table displays columns for Name, Page Slug showing the page link, Header indicating whether it’s on or off for header display, and the Action column.
- You can use the Edit button to modify page content and settings, or the Delete action to remove pages entirely. This section connects to your website’s navigation system, automatically updating the header menu when you enable Page Header Display for any custom page.
Manage Coupons
- Coupons management allows you to create discount codes that customers can apply during content orders on your website.
- To create a new coupon, click the “Create” button and enter the Name for your coupon campaign. Configure the discount type using the Flat Discount toggle which defaults to OFF.
- Set the Discount amount, enter the usage Limit for how many times the coupon can be used, and create the Code either by clicking the Generate button for automatic creation or manually entering your preferred code.
- When Flat Discount toggle is ON, a Flat Discount Amount field appears while the percentage-based Discount field is hidden. When Flat Discount toggle is OFF, the Discount percentage field shows while the flat amount field remains hidden.
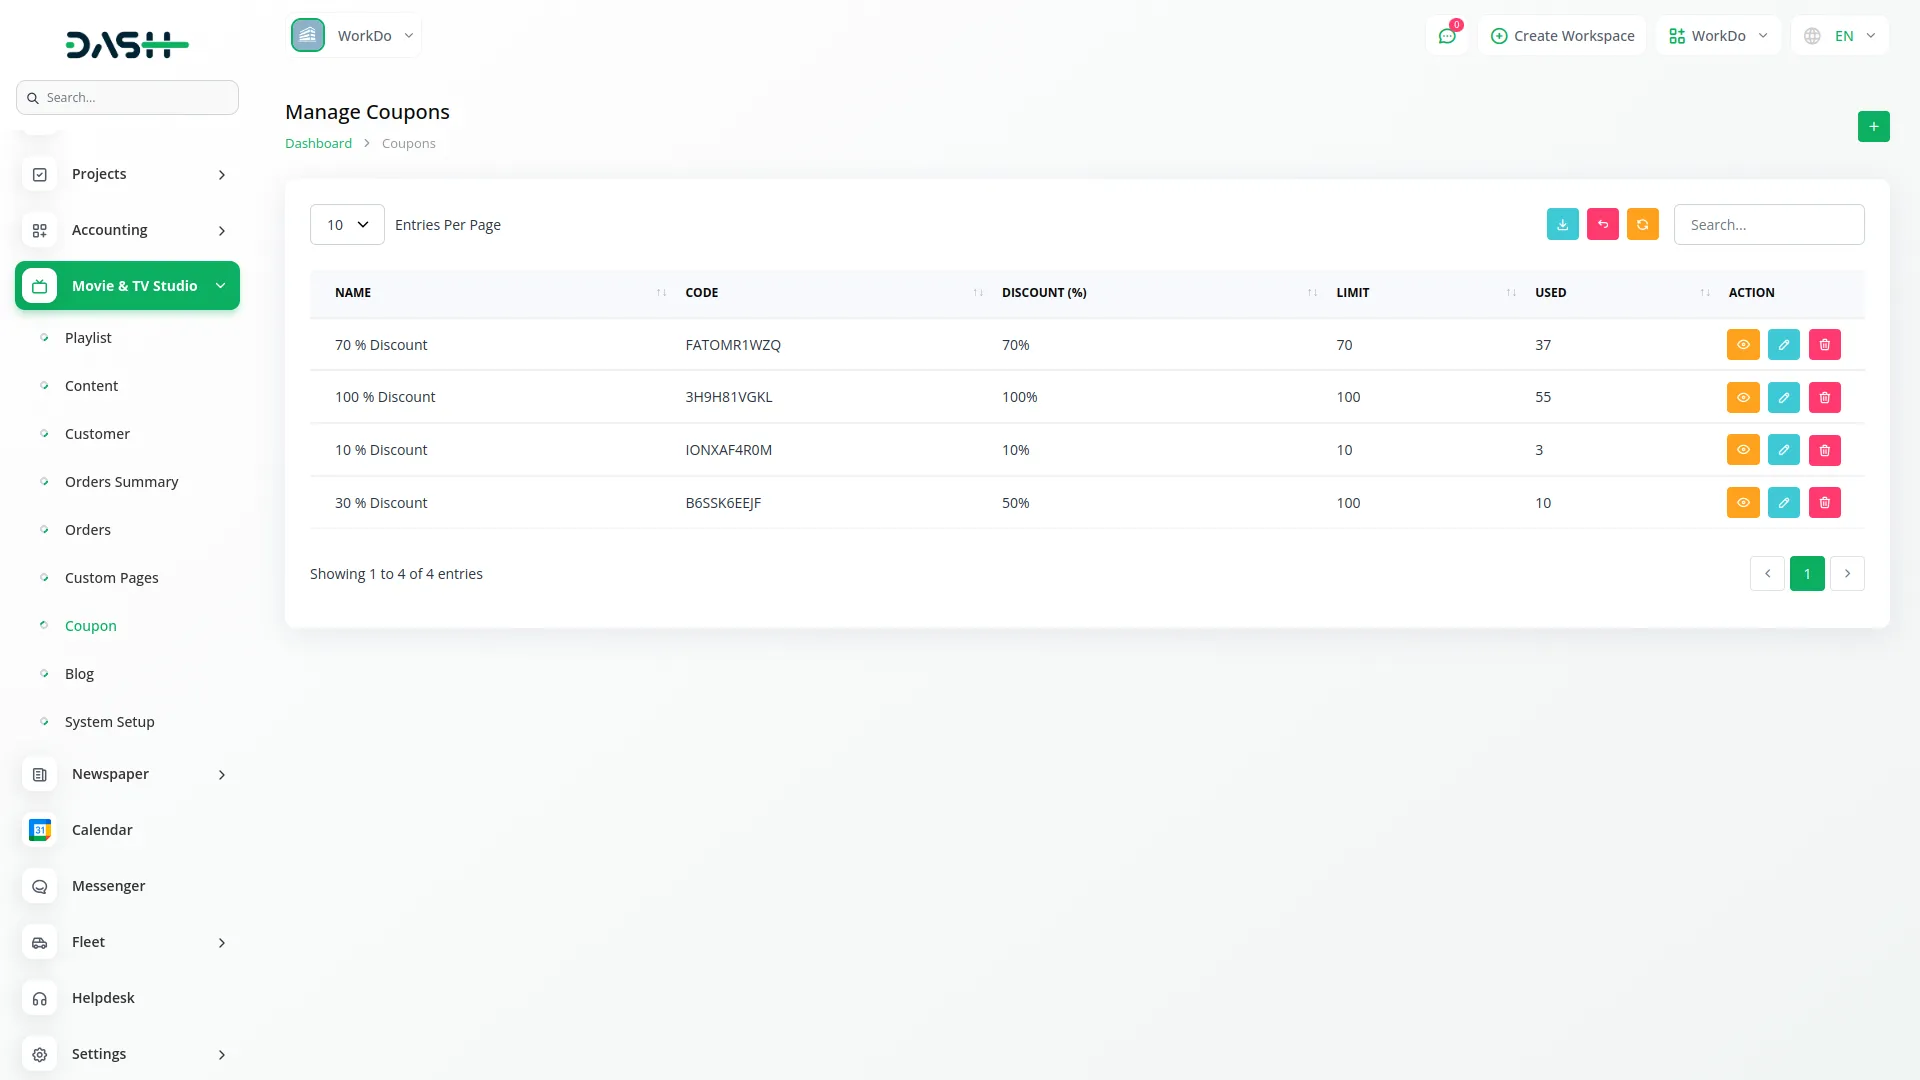
- The list page provides Search, Export, and Add buttons for coupon management. The table displays columns for Name, Code, Discount percentage, Limit, Used, showing the number of times the coupon has been applied, and an Action button.
- You can use the View button to view detailed coupon usage, Edit action to modify coupon settings, or the Delete action to remove coupons completely.
- When you click the View button, a new page opens displaying detailed usage information. The page shows the Coupon Code as the table header with a Search button for filtering. The table contains columns for Coupon, User, and Date, showing exactly which customers used the coupon and when they applied it during their content orders.
Manage Blogs
- Blog management enables you to create and publish blog content that appears in your website’s blog section for customer engagement.
- To create a new blog post, click the “Create” button and enter the Title for your blog article. Upload a Blog Cover Image that will display as the featured image for the post. Add the detailed content in the Detail field using the text editor to create engaging blog posts about your content, industry news, or other relevant topics.
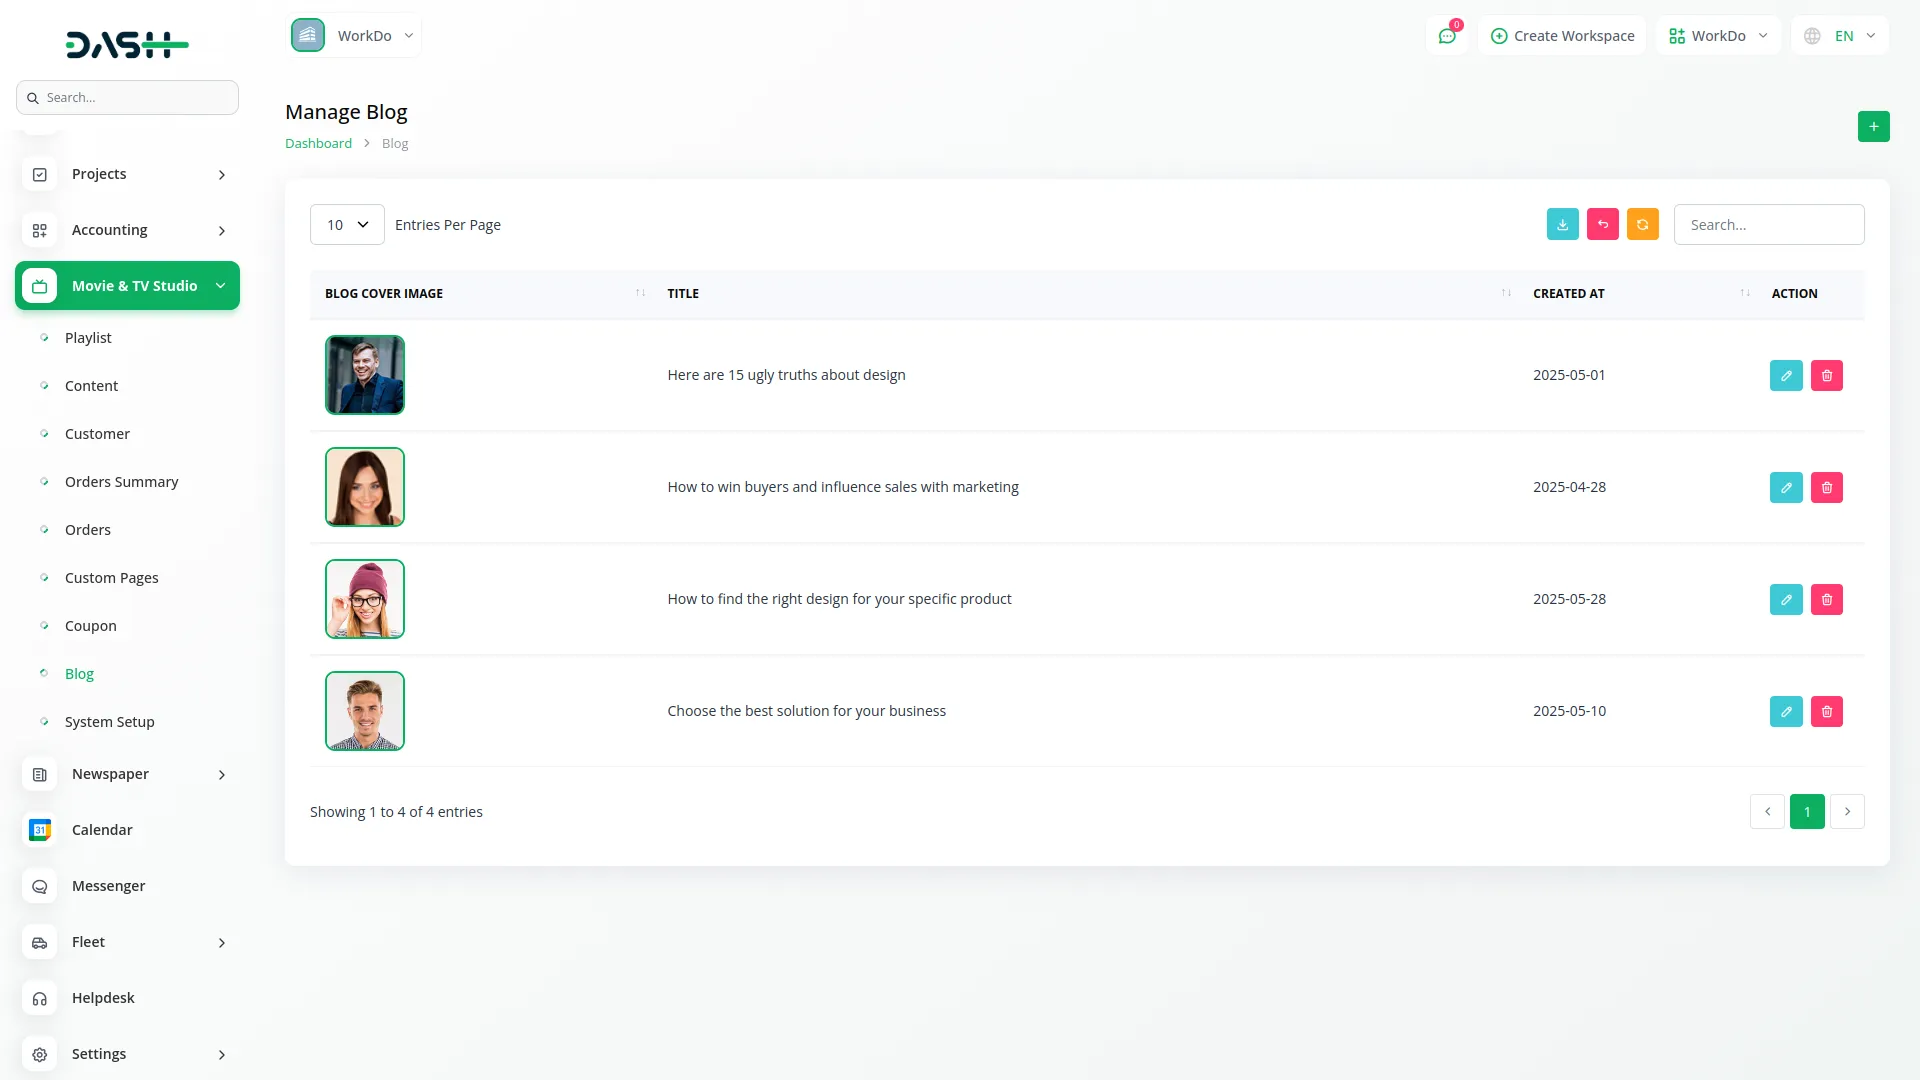
- The list page provides Search, Export, and Add buttons for blog management. The table displays columns for Blog Cover Image showing the uploaded featured image, Title of the blog post, Created At showing when the post was published, and the Action column.
- You can use the Edit action to modify blog post content, title, and images, or the Delete action to remove blog posts entirely.
- This section connects directly to your website’s blog section. When Blog Menu Display is enabled in your System Settings, customers can access the blog section through your website header. All published blog posts appear on the blog listing page, where customers can read your content to stay engaged with your platform.
Categories
Related articles
- Africa’s Talking Detailed Documentation
- Courier Management Integration in Dash SaaS
- Activity Log integration in Dash SaaS
- Sign-In with Slack Add-On Integration in Dash SaaS
- Quickbooks Integration in Dash SaaS
- Bundle Products Integration in eCommerceGo SaaS
- Vehicle Booking Management Integration in Dash SaaS
- Flexible Hours Integration in BookingGo SaaS
- Warranty Add-On Detailed Documentation
- WiFi QR Integration in vCard SaaS
- WhatsApp Twilio Integration in BookingGo SaaS
- User Manual – Sales SaaS
Reach Out to Us
Have questions or need assistance? We're here to help! Reach out to our team for support, inquiries, or feedback. Your needs are important to us, and we’re ready to assist you!


Need more help?
If you’re still uncertain or need professional guidance, don’t hesitate to contact us. You can contact us via email or submit a ticket with a description of your issue. Our team of experts is always available to help you with any questions. Rest assured that we’ll respond to your inquiry promptly.
Love what you see?
Do you like the quality of our products, themes, and applications, or perhaps the design of our website caught your eye? You can have similarly outstanding designs for your website or apps. Contact us, and we’ll bring your ideas to life.
