Requests Integration in Dash SaaS
The Requests Add-On is a comprehensive system designed to help organizations manage incoming requests efficiently.
Introduction
The Requests Add-On is a comprehensive system designed to help organizations manage incoming requests efficiently. It allows you to create customizable request forms, organize them by categories and subcategories, track responses, and convert requests to leads when appropriate. The platform streamlines the entire request management process, from form creation to final resolution.
How to Install the Requests Add-On?
To Set Up the Requests Add-On you can follow this link: Setup Add-On
Manage Requests
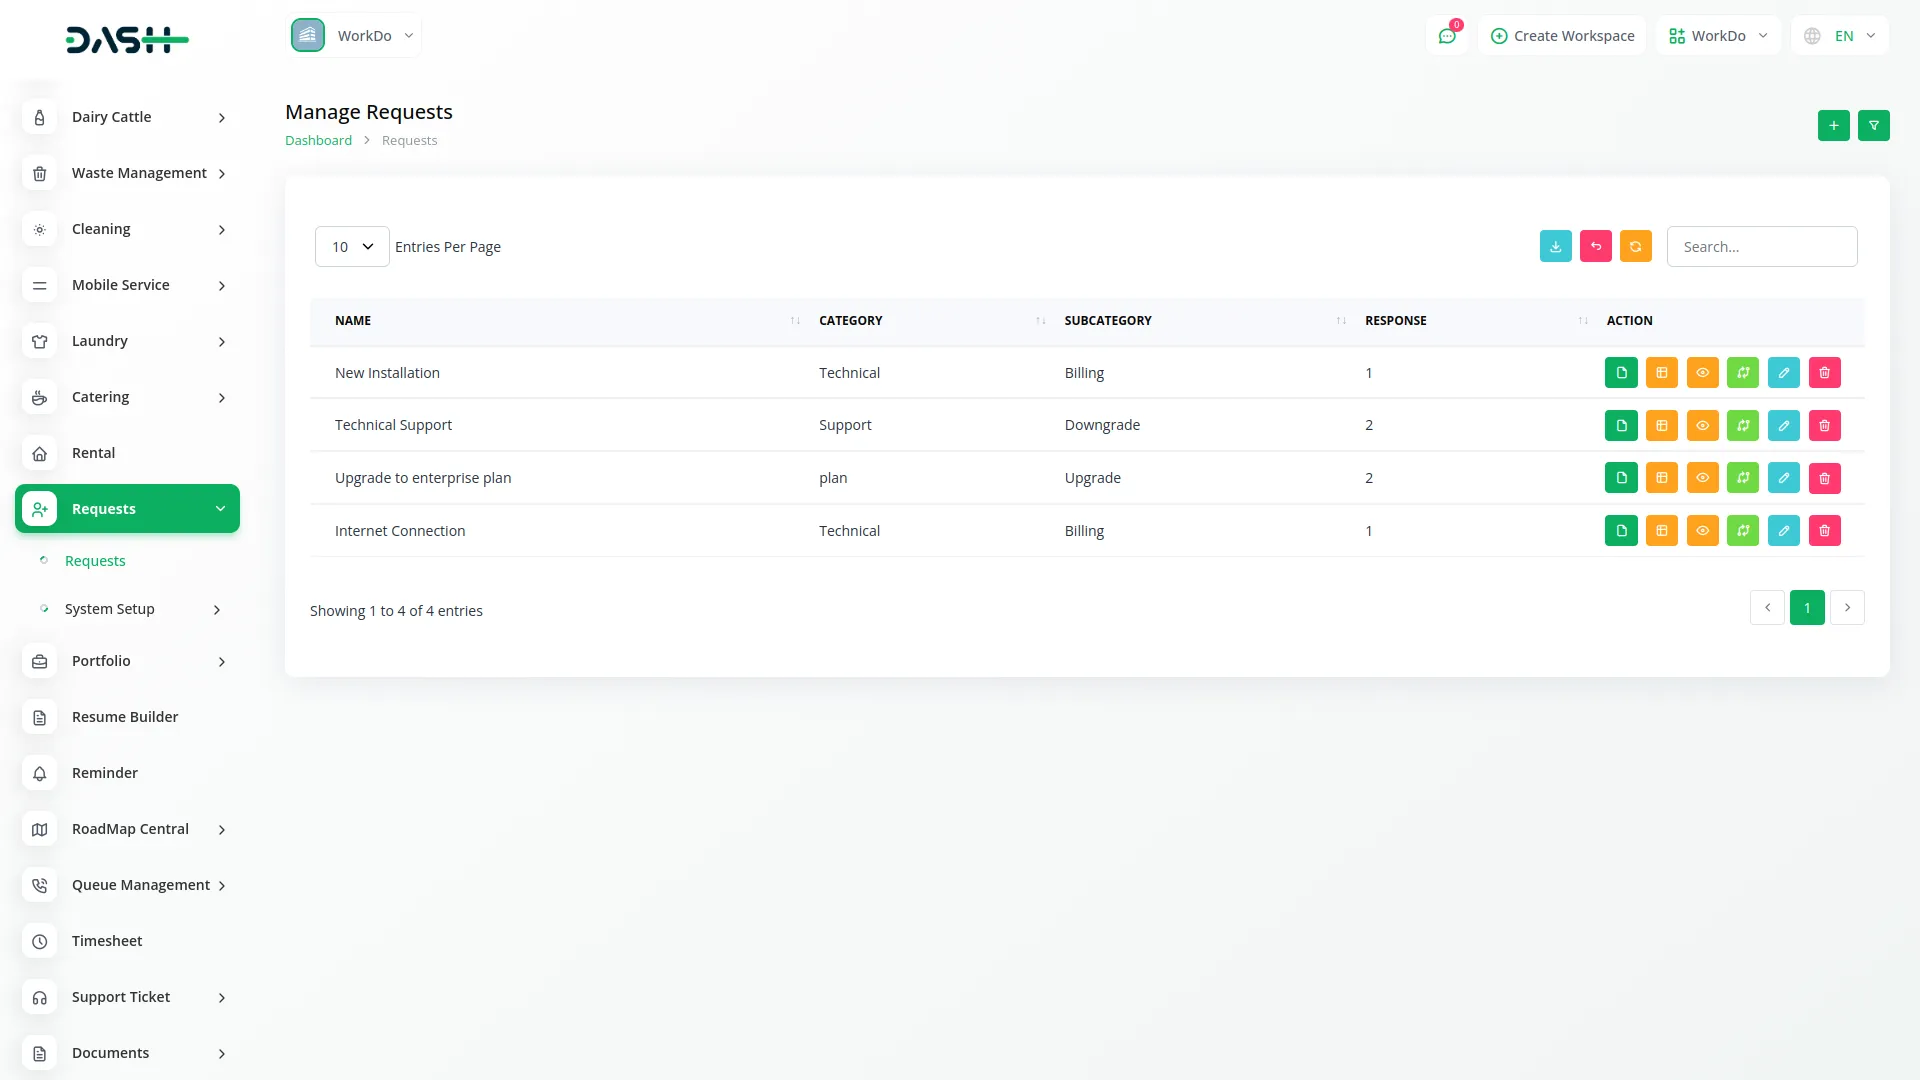
- To create a new request, click the “Create” button at the top of the Manage Requests page. Enter important details such as Name and select Type from the dropdown (lead). Choose the Category from the dropdown (comes from the system setup category).
- After selecting a category, the Sub Category dropdown will appear. Choose the appropriate Sub Category (comes from the system setup subcategory).
- At the top of the page you will see a filter search button, where you can easily search for the forms easily.
- Toggle the Active checkbox to make the request active or inactive. Then set up the form layouts as needed.
- The list page shows all requests with columns like Name, Category, Sub Category, and Response. You can search, export, filter, or add new requests using the buttons at the top.
- Available actions include Copy Link (shows the request form after copying the link), Convert to Lead, Form Field button, View (click to show Forms Details), Edit, and Delete.
- If you click on the view button, you can see the list of requests and also view or delete them whenever you want. If you click on the edit button, you can edit the installation name, select the type from the dropdown, select the category from the dropdown, subcategory, and a toggle button from where you can activate or deactivate the form, at last you can also select the form layout, and select the sub color of it easily.
- At last, you can also delete the form whenever you want.
- If you click on the convert to lead button, a form will be displayed in front of you where you will see a toggle button for on and off, if you click on the off button the convert button will not be visible to you. If you click on the on button a form will be displayed in front of you where you can select the subject from the dropdown, name from the dropdown, select the email, user, title, description, and pipeline. It will automatically convert the response to a lead based on the settings.
- With the help of the form field button you can add the form field with the help of the “create” button. You can also edit or delete the forms whenever you want.

Manage Category
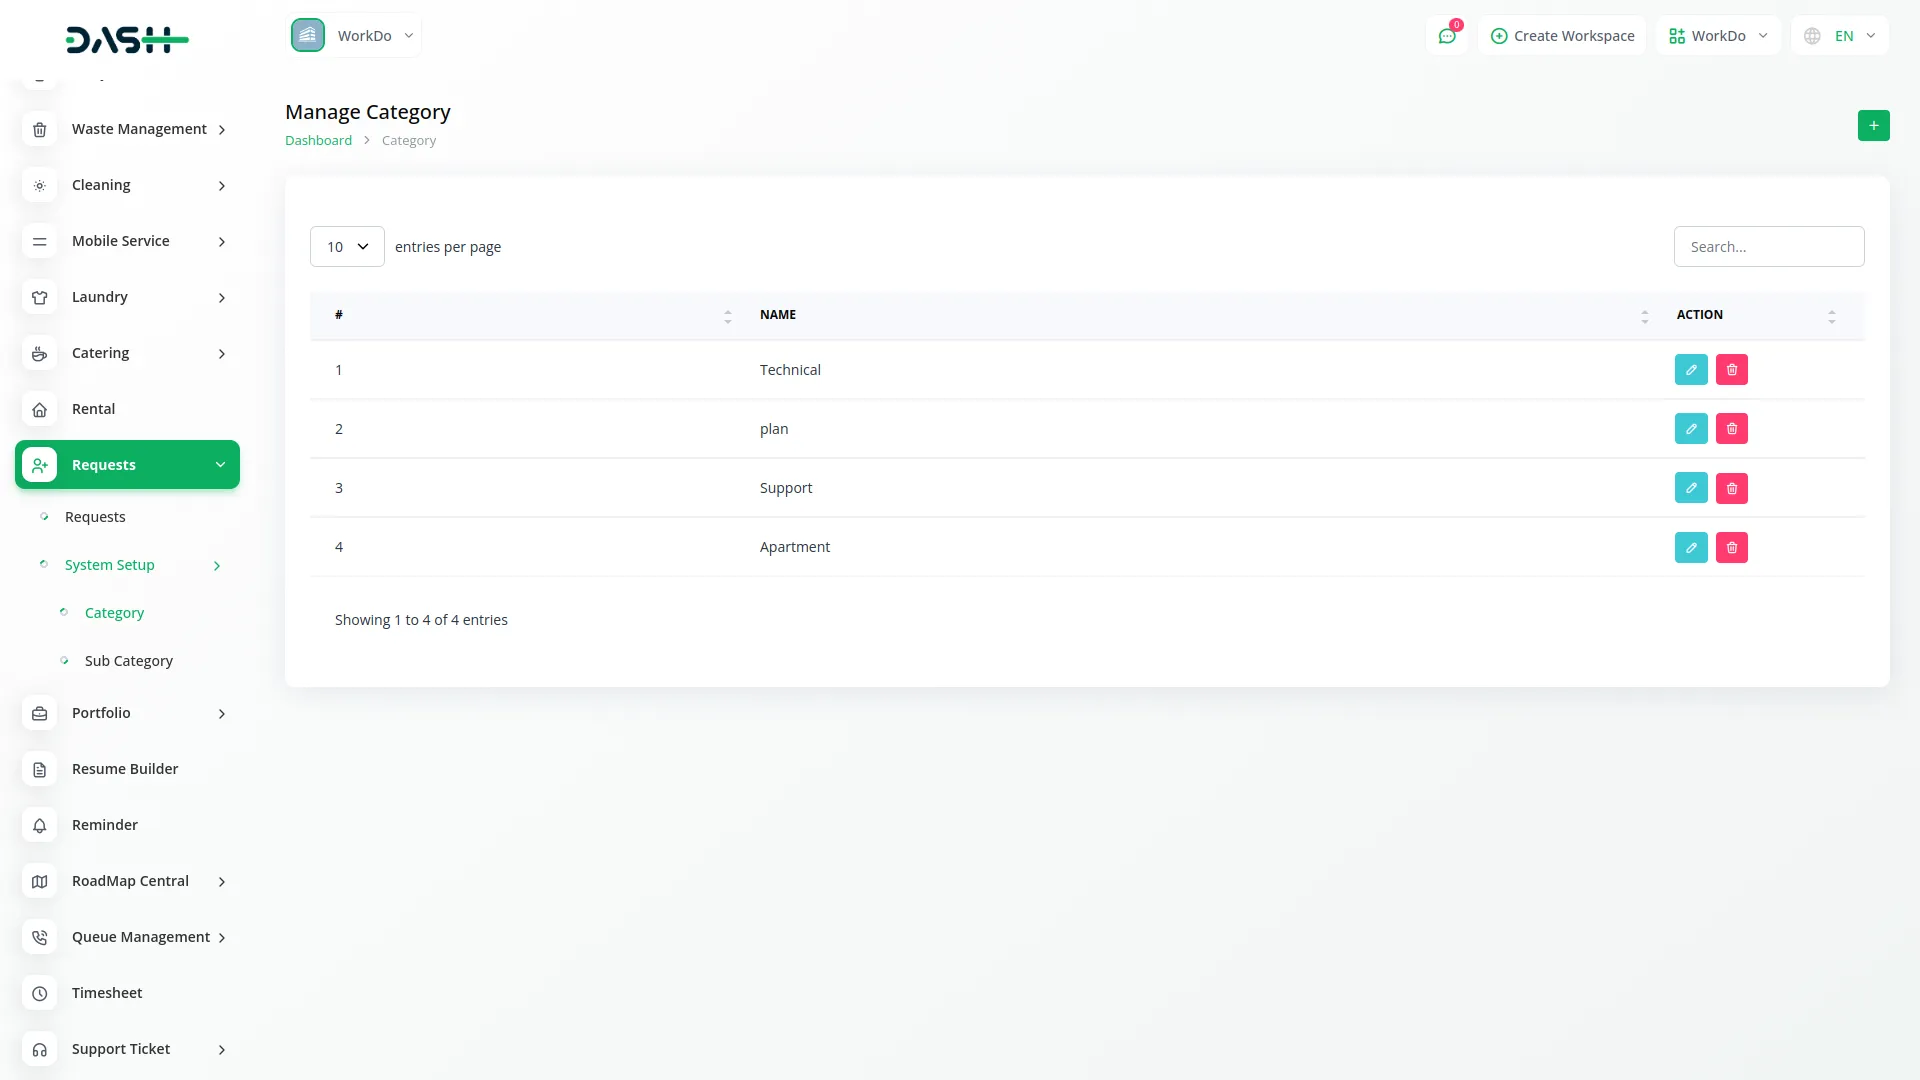
- To create a new category, click the “Create” button at the top of the Manage Category page. Enter the Name of the category and click “Submit” to create.
- The list page shows all categories in a table with No and Name columns. Options include Edit and Delete.
- This section is connected to the Manage Requests section, as categories created here will be available in the Category dropdown when creating a request.

Manage Sub Category
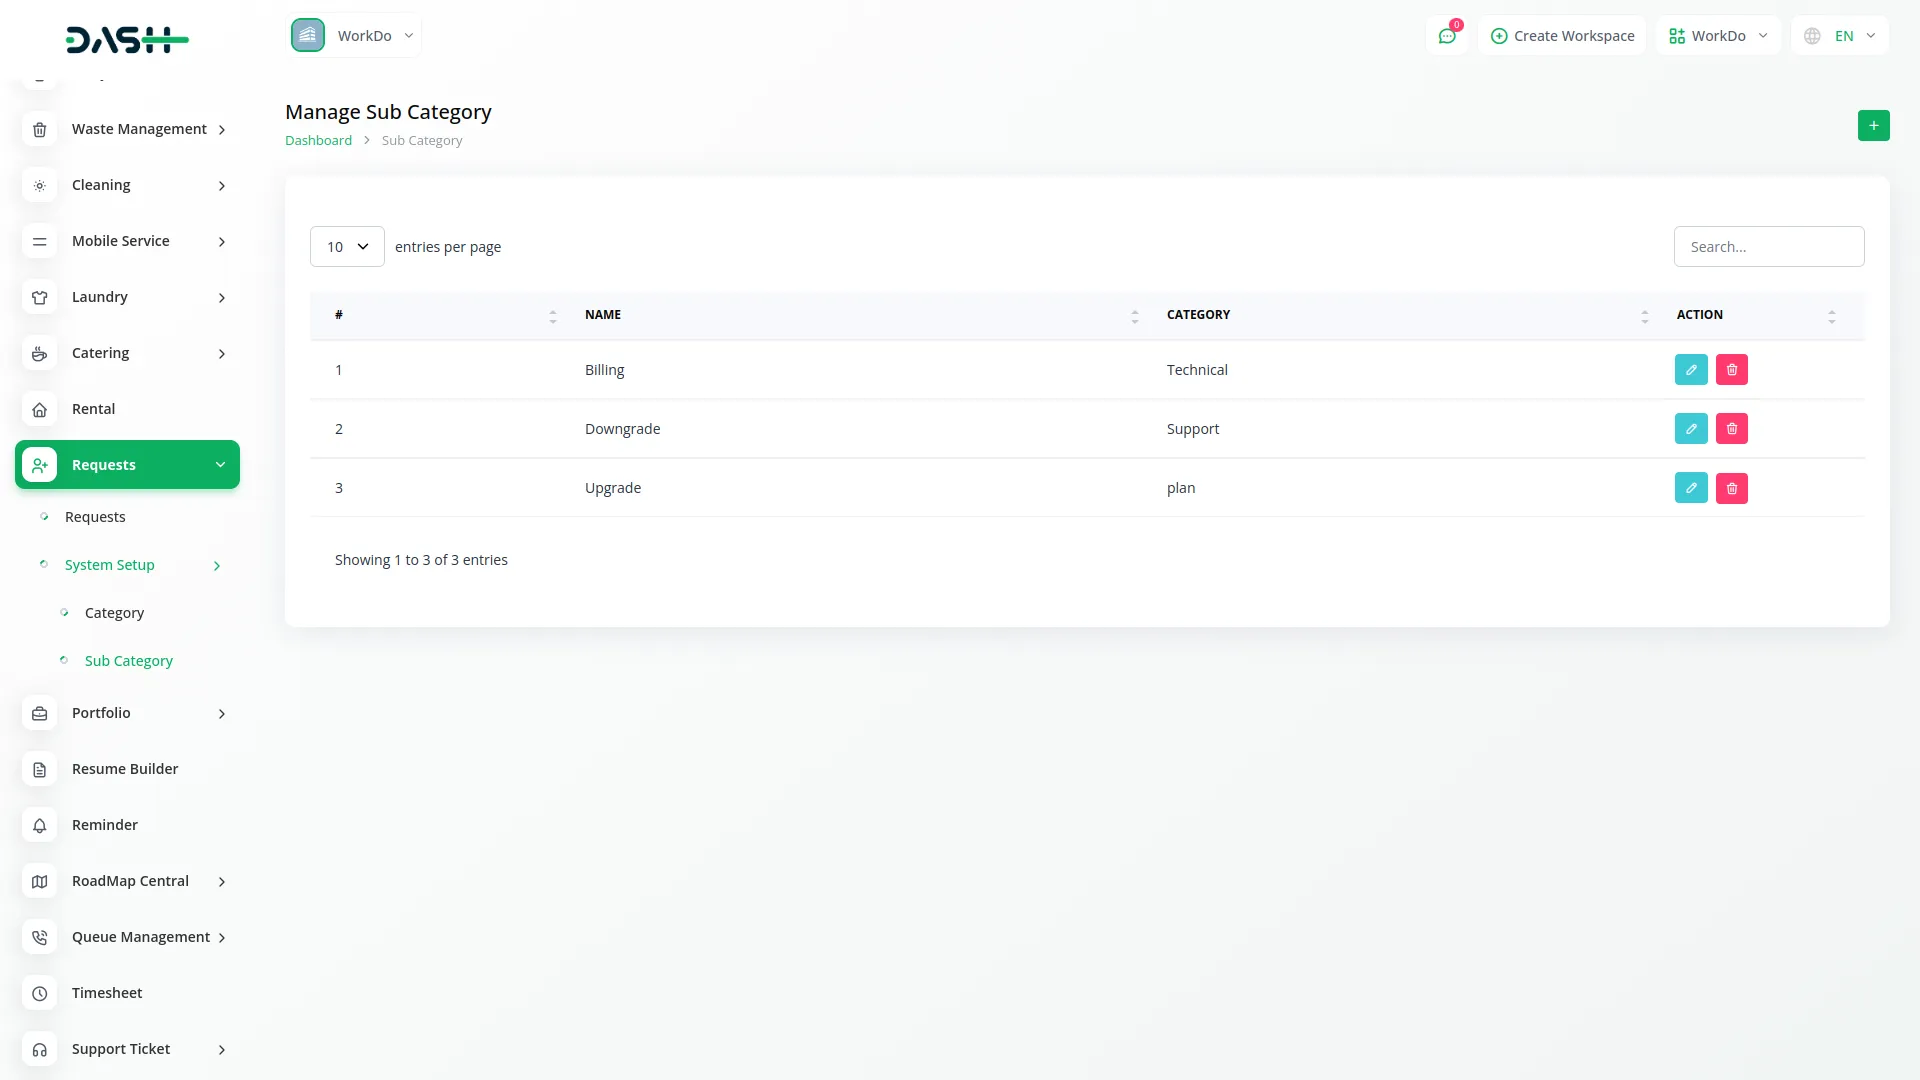
- To create a new sub category, click the “Create” button at the top of the Manage Sub Category page. Enter the Name of the sub category and select the parent Category from the dropdown (comes from the system setup category section).
- The list page shows all sub categories in a table with No, Name, and Category columns. Options include Edit and Delete.
- This section is connected to both the Manage Category and Manage Requests sections. The parent Category must be selected from categories created in the Manage Category section, and the sub categories created here will be available in the Sub Category dropdown when creating a request.

Request Form (Frontend)
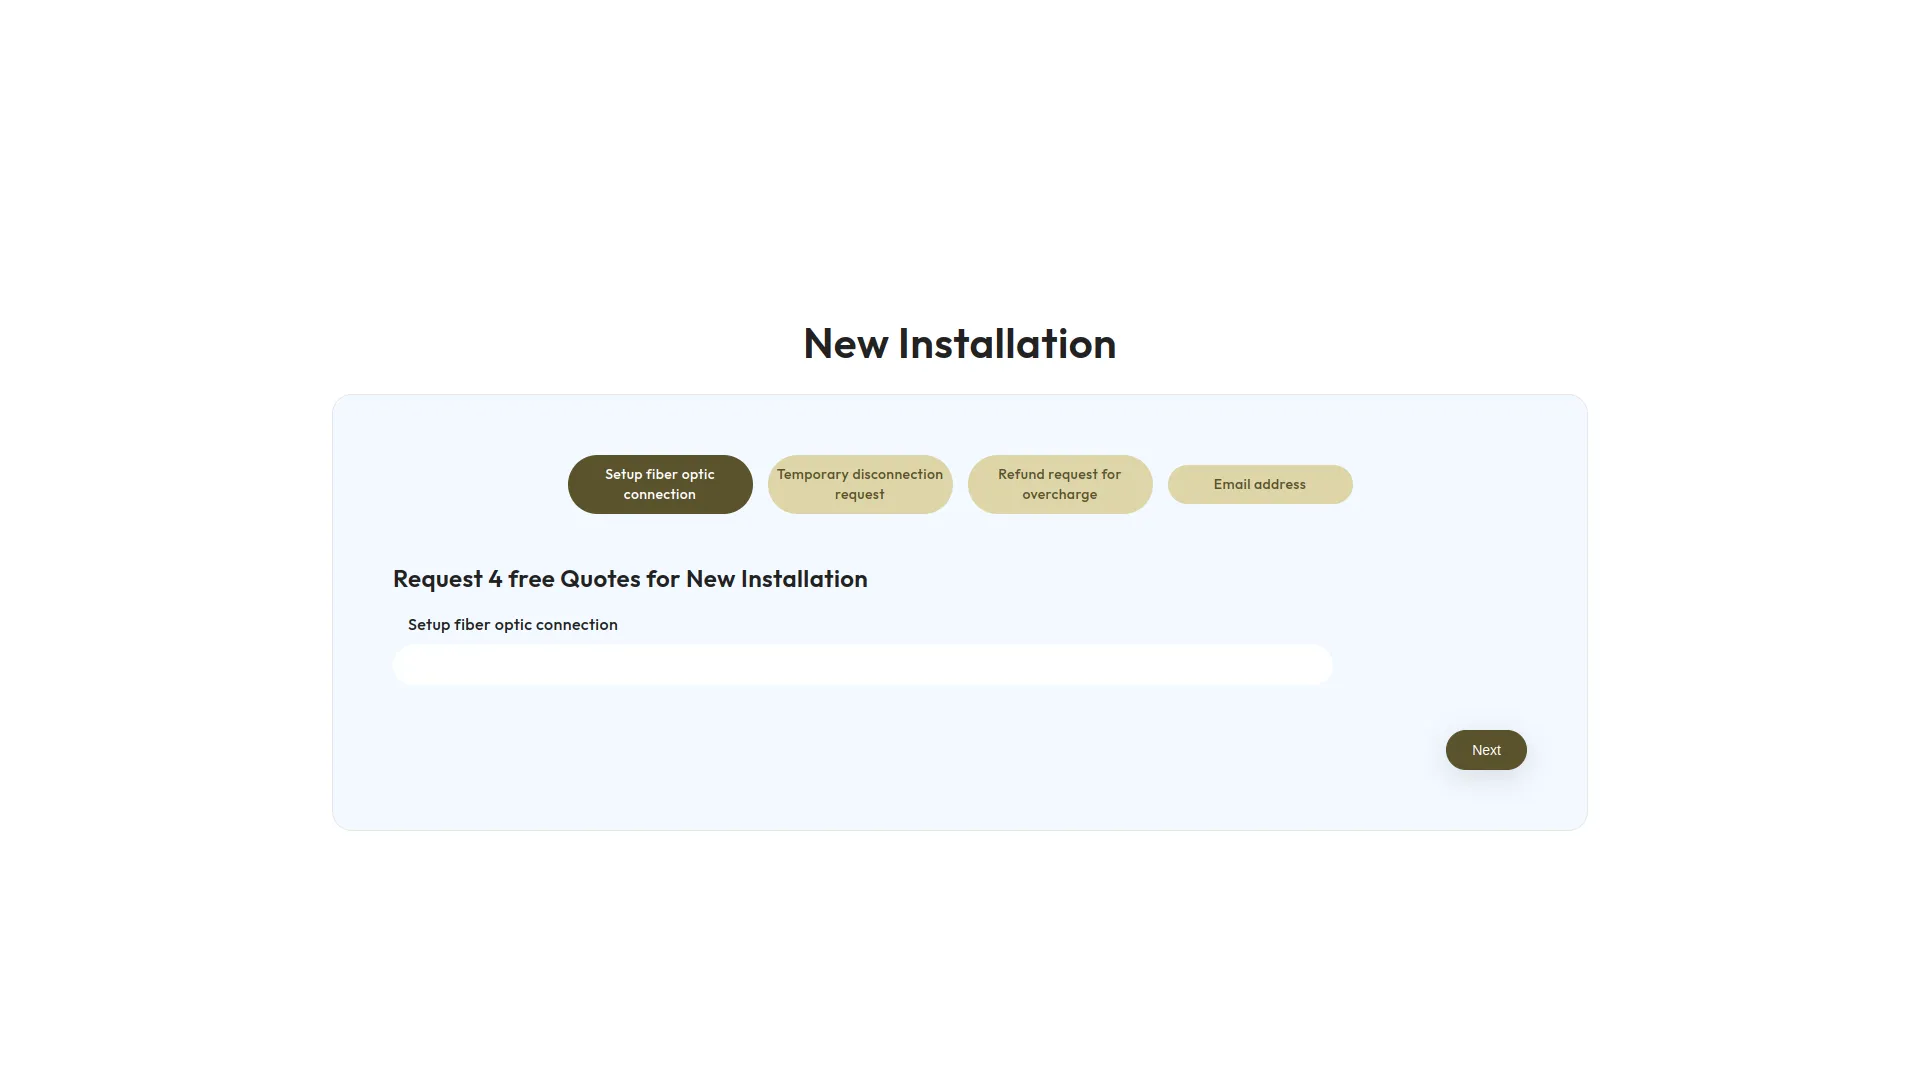
- The Requests Form section handles how users submit requests through the website or application interface (the frontend). This is where your customers or clients fill out and send request information directly.
- When you create or manage requests in the Manage Requests section, you can add custom fields using the Form Field button. These custom fields define exactly what information you want to collect from the users in the request form.
- All these custom fields will appear automatically on the frontend request form. Users will see the updated form with the relevant fields when they open the request form link.
- Users fill in the form with their details and submit it. After submission, the request data is saved and can be managed in the Manage Requests section.

Categories
Related articles
- Catering Management Integration in Dash SaaS
- Cleaning Management Integration in Dash SaaS
- How To Generate The YouTube Credentials
- PrintPress Management Integration in Dash SaaS
- Tawk.to Messenger – eCommerceGo Addon
- How to Generate Credentials in Zoho
- Backup & Restore Integration in Dash SaaS
- vCard Add-On Setup
- Frequently Product Integration in eCommerceGo SaaS
- 2checkout Integration in Dash SaaS
- Performance Indicator Integration in Dash SaaS
- SSLCommerz Detailed Documentation
Reach Out to Us
Have questions or need assistance? We're here to help! Reach out to our team for support, inquiries, or feedback. Your needs are important to us, and we’re ready to assist you!


Need more help?
If you’re still uncertain or need professional guidance, don’t hesitate to contact us. You can contact us via email or submit a ticket with a description of your issue. Our team of experts is always available to help you with any questions. Rest assured that we’ll respond to your inquiry promptly.
Love what you see?
Do you like the quality of our products, themes, and applications, or perhaps the design of our website caught your eye? You can have similarly outstanding designs for your website or apps. Contact us, and we’ll bring your ideas to life.
