Budget Planner Integration in Dash SaaS
The Budget Planner Add-On helps you create and manage financial budgets for your organization by tracking income and expense categories across different time periods.
Introduction
The Budget Planner Add-On helps you create and manage financial budgets for your organization by tracking income and expense categories across different time periods. This Add-On allows you to set budget amounts, monitor actual spending, and identify when expenses exceed planned budgets. The system automatically calculates variances and provides clear visibility into financial performance through organized budget periods ranging from monthly to yearly views.
Note: This Add-On is dependent on the Accounting Add-On, so you need to purchase it first.
How to Install the Add-On?
To Set Up the Budget Planner Add-On, you can follow this link: Setup Add-On
How to use the Budget Planner Add-on?
- The Budget Planner Add-On depends on the Account Add-On and will only function when the Account Add-On is active in your system. To access Budget Planner, navigate to the sidebar and go to Accounting, then Budget Planner.
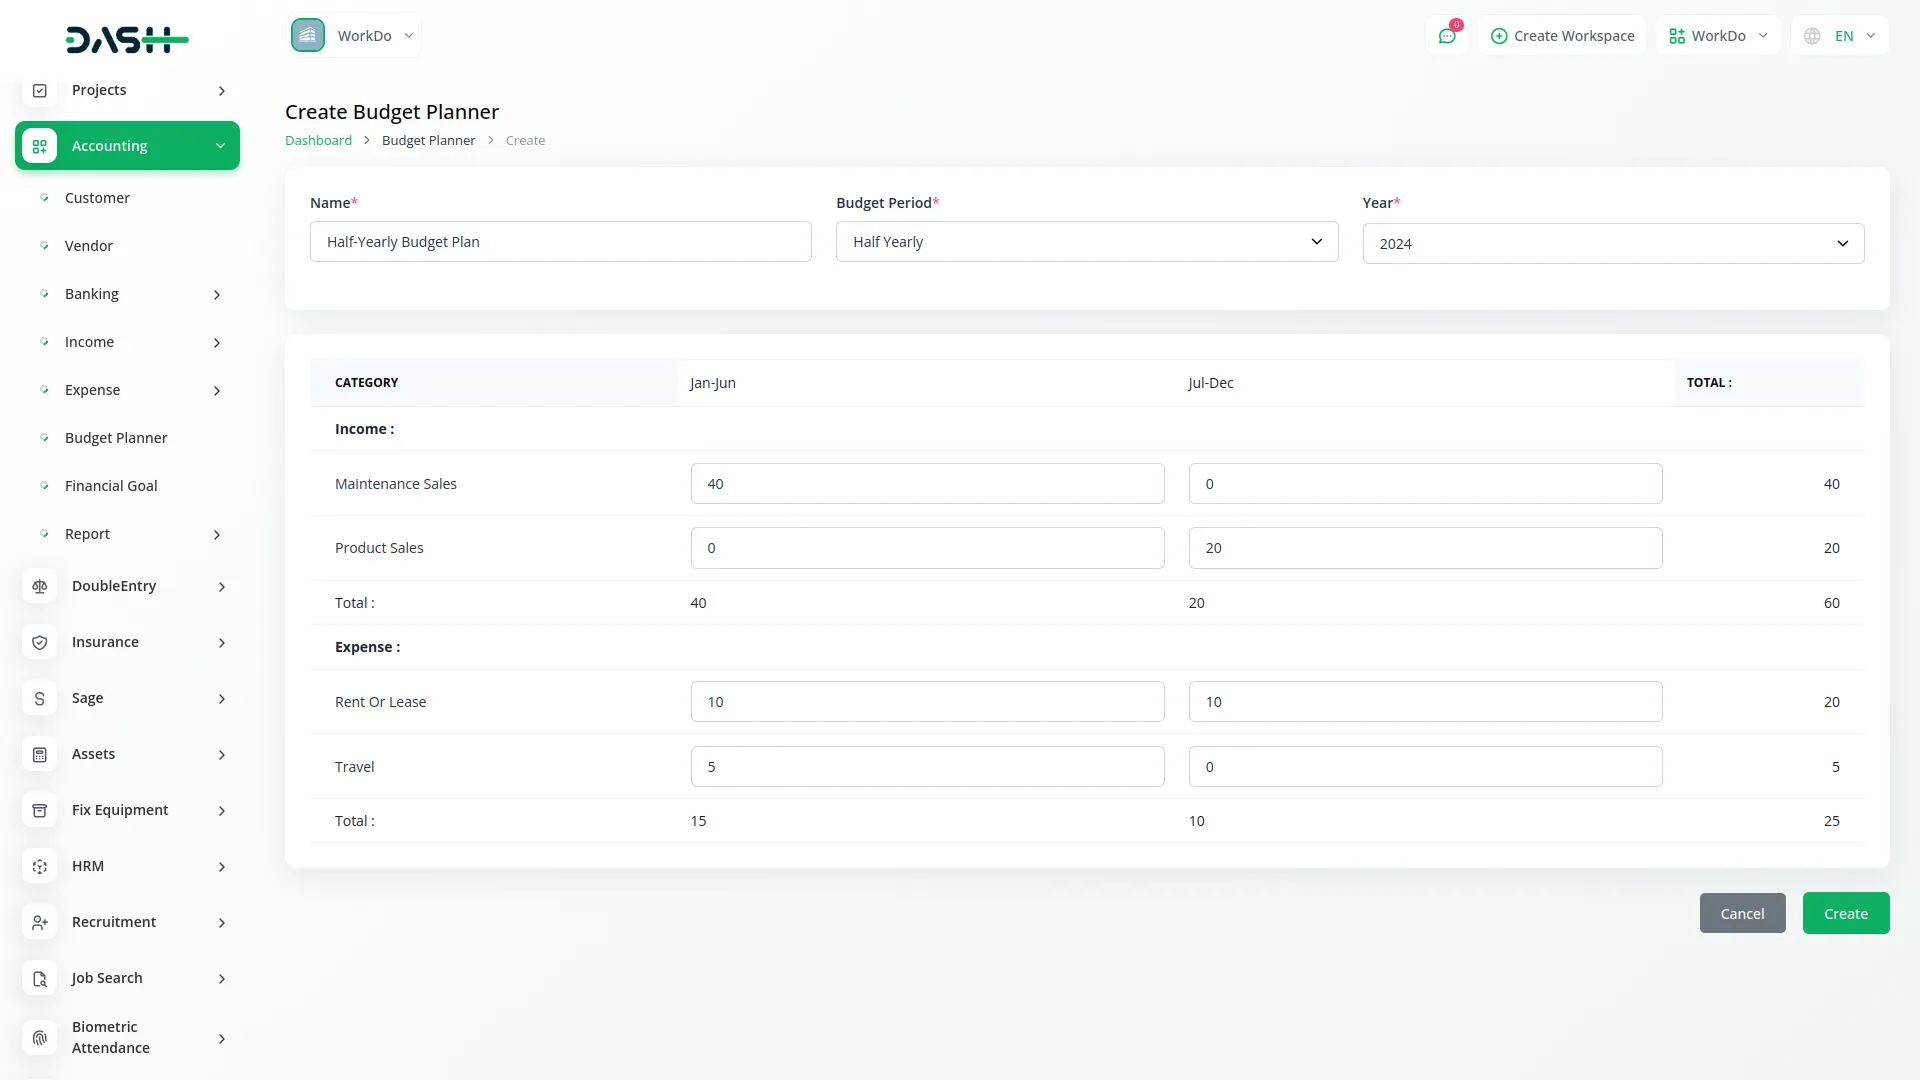
- To create a new budget, click the “Create” button at the top of the Budget Planner page. Fill out the form by entering the budget Name, selecting the Budget Period from the dropdown options (Monthly, Quarterly, Half-yearly, Yearly), and choosing the Year for which you want to create the budget.
-

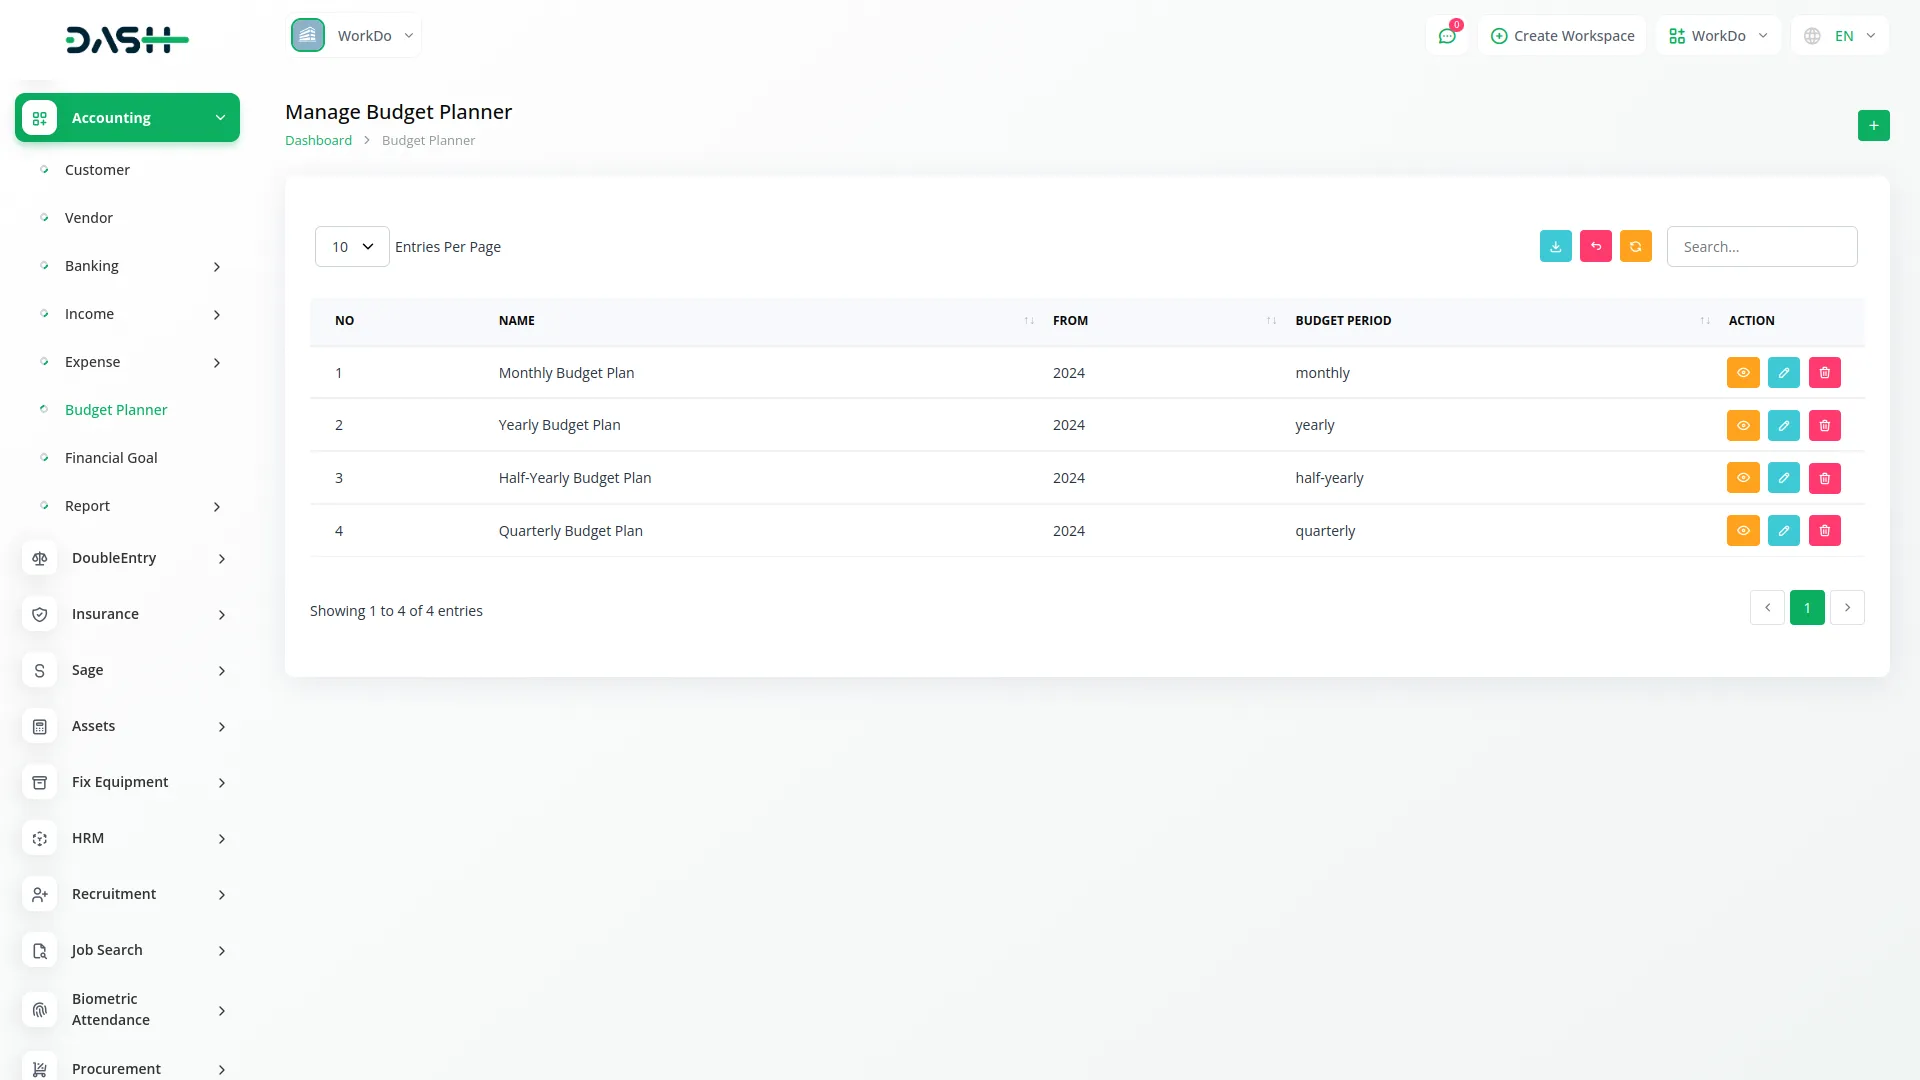
- The list page displays all created budgets in a table format with columns for No, Name, From, and Budget Period. You can use the Search button to find specific budgets or the Export button to download budget data.
- The Actions column provides three options: View button to see budget details and performance, Edit button to modify budget settings and amounts, and Delete to remove budgets that are no longer needed.
-

- The Budget Planner automatically displays Income and Expense categories in the Category section based on your system configuration.
- If you need to add more Income categories, navigate to Income then Setup then Invoice / Proposal / Revenue Category section. To add additional Expense categories, go to the Bill / Purchase Category section and create new expense types as needed.
- The time periods displayed in your budget depend on the Budget Period you selected during creation. When you select Monthly, all twelve months from January to December appear as separate columns.
- For Quarterly selection, months are grouped into four periods: Jan–Mar, Apr–Jun, Jul–Sep, and Oct–Dec. Half-yearly selection shows two periods: Jan-Jun and Jul-Dec. Yearly selection displays the entire year as Jan-Dec in a single period.
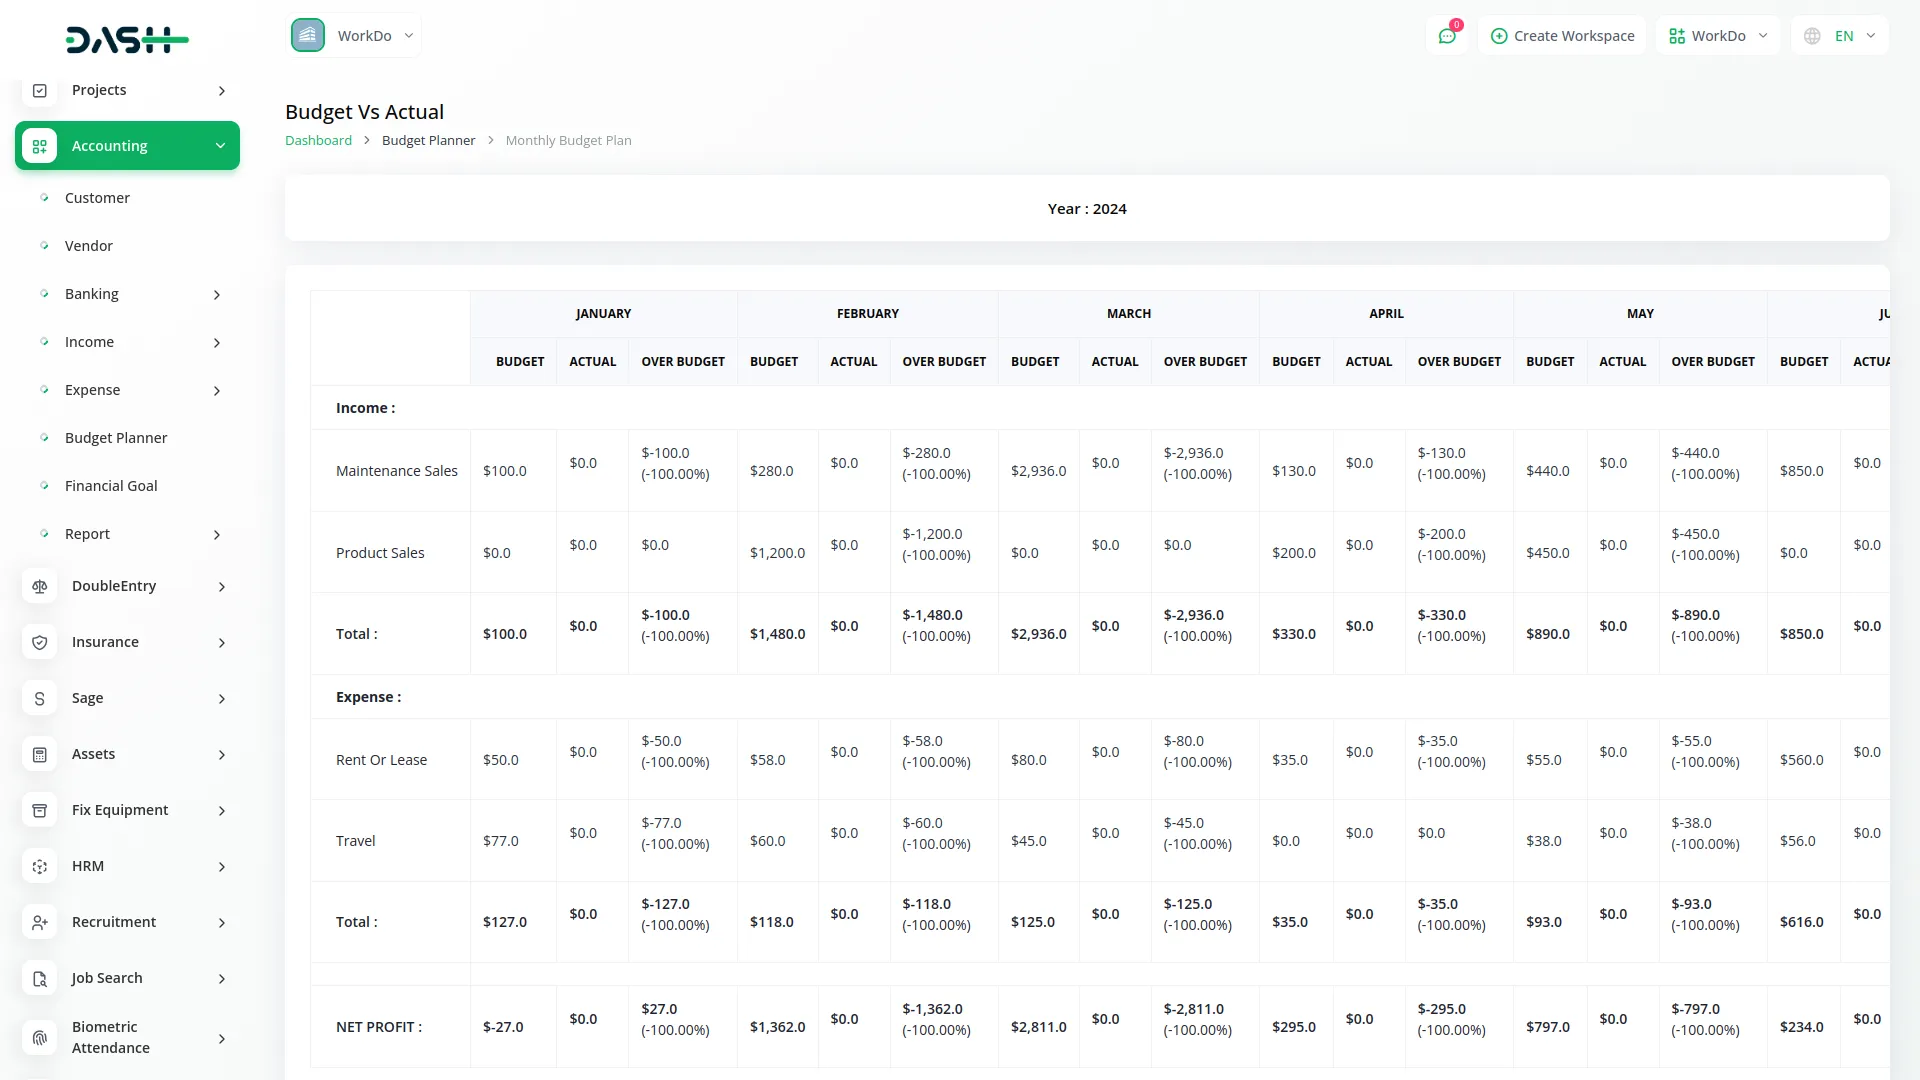
- In the budget view, each category shows three key financial metrics for the selected budget period. The Budget column displays the planned amount that was set when creating the budget.
- The Actual column shows the real amount that has been spent or earned during that period. The Over Budget column indicates the variance by calculating how much the actual amount exceeds or falls short of the budget using the formula Budget minus Actual, helping you quickly identify areas where spending has exceeded planned amounts.
-

Categories
Related articles
- Document Template Integration in Dash SaaS
- Repair Management Integration in Dash SaaS
- BookingGo Add-On Setup
- Product Enquiry Integration in eCommerceGo SaaS
- senangPay Payment Gateway Integration
- Library Management Detailed Documentation
- Rotas Integration in Dash SaaS
- Trello Integration Detailed Documentation
- Slack Integration in Dash SaaS
- Tailoring and Fashion Design Detailed Documentation
- vCard Add-On Setup
- UddoktaPay Payement Gateway in Dash SaaS
Reach Out to Us
Have questions or need assistance? We're here to help! Reach out to our team for support, inquiries, or feedback. Your needs are important to us, and we’re ready to assist you!


Need more help?
If you’re still uncertain or need professional guidance, don’t hesitate to contact us. You can contact us via email or submit a ticket with a description of your issue. Our team of experts is always available to help you with any questions. Rest assured that we’ll respond to your inquiry promptly.
Love what you see?
Do you like the quality of our products, themes, and applications, or perhaps the design of our website caught your eye? You can have similarly outstanding designs for your website or apps. Contact us, and we’ll bring your ideas to life.
