Vehicle Booking Management Integration in Dash SaaS
The Vehicle Booking Management Add-On is a comprehensive solution for managing vehicle reservations, routes, fuel logs, maintenance records, incidents, contracts, and emergency contacts.
Introduction
The Vehicle Booking Management Add-On is a comprehensive solution for managing vehicle reservations, routes, fuel logs, maintenance records, incidents, contracts, and emergency contacts. This Add-On depends on the Fleet Add-On and requires it to be activated first. The system helps fleet managers streamline booking operations, track vehicle usage, manage maintenance schedules, and provide customers with an easy-to-use booking platform through both backend management and frontend booking interfaces.
How To Install The Add-On?
To Set Up the Vehicle Booking Add-On, you can follow this link: Setup Add-On.
Note: This Add-On is dependent on the Fleet Add-On, so you need to purchase it first.
How To Use The Vehicle Booking Add-On?
Dashboard
- After completing the purchase process, go to the sidebar and find the Vehicle Booking Add-On.
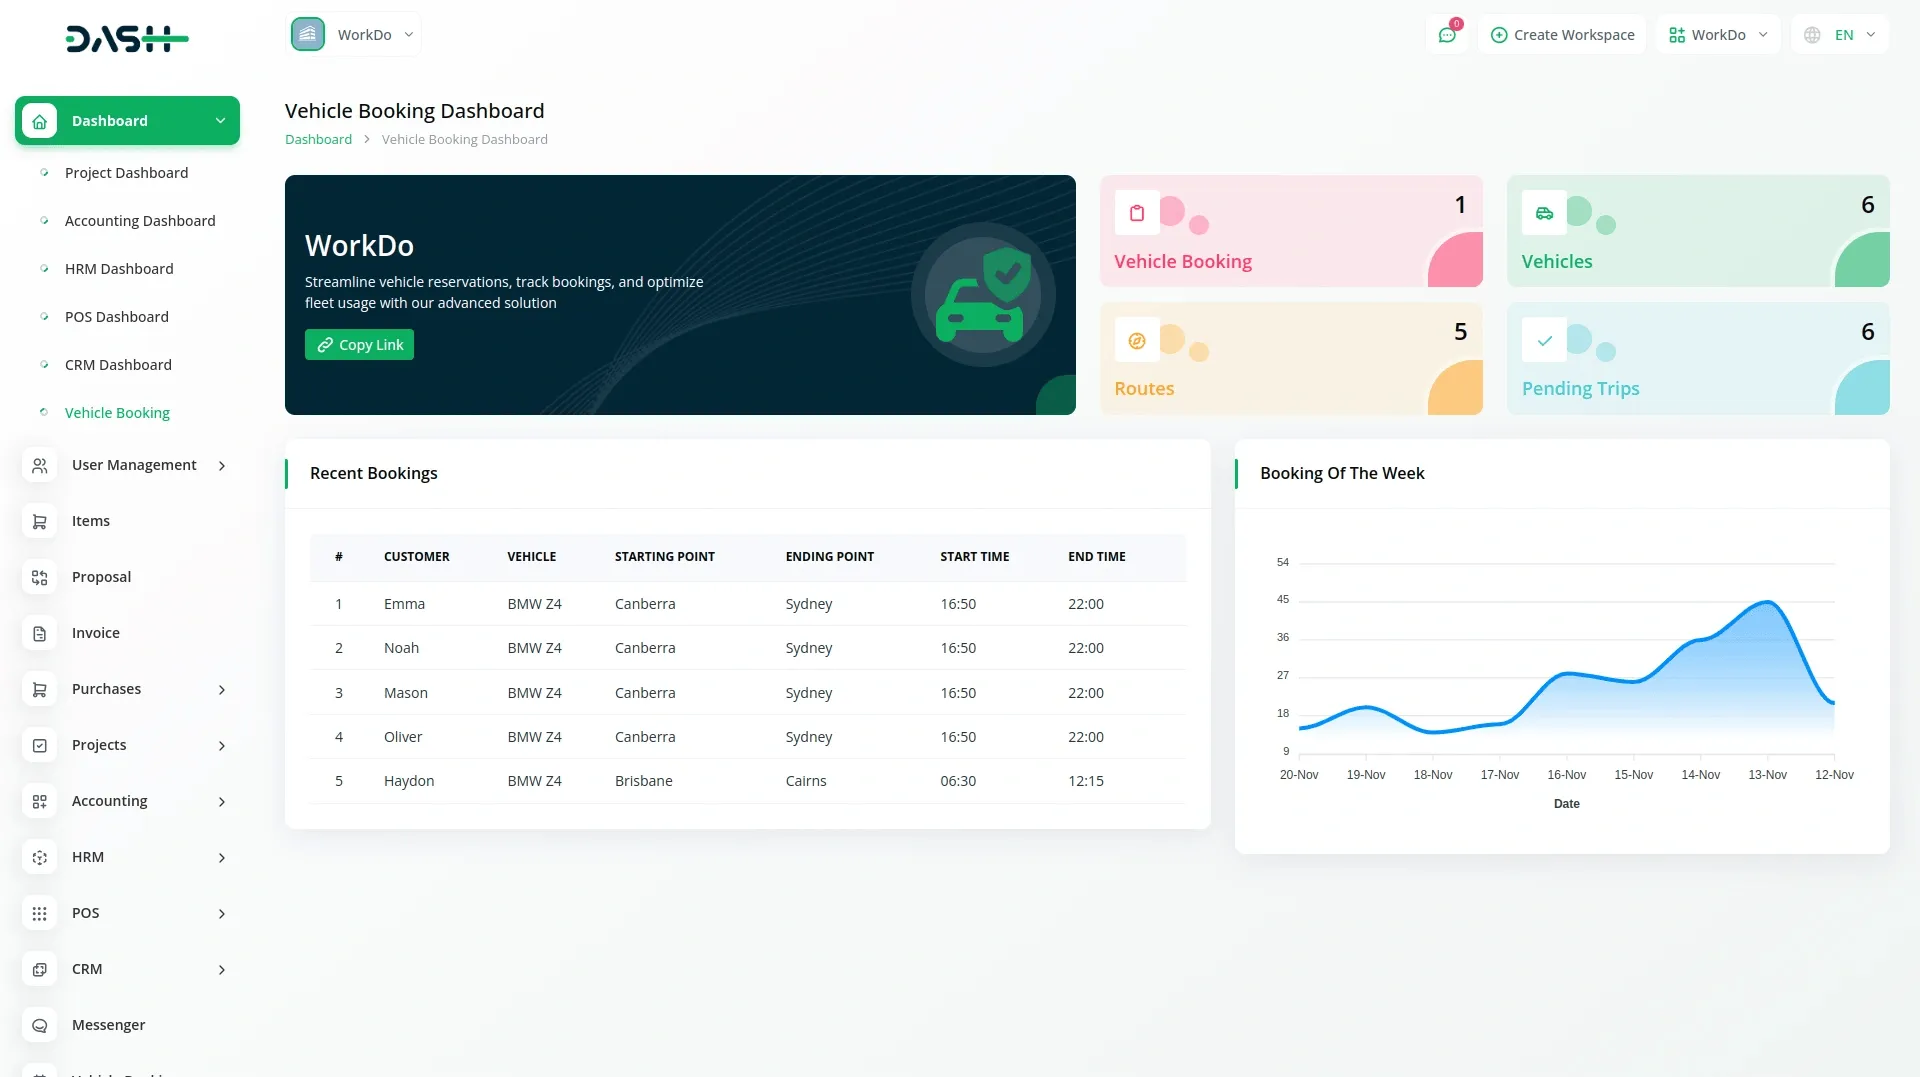
- First, you will see the dashboard. At the top, you’ll find the “Copy Link” button for quick access to the frontend booking page.
- The dashboard gives you a clear overview with summary cards showing live counts of Vehicle Bookings, Vehicles, Routes, and Pending Trips.
- Below the summary cards, you will find the recent bookings section, showing your latest reservations. The “Booking of the Week” feature helps you see booking trends from the past ten days.
Vehicle Booking
- On the vehicle booking page, you can easily add a new vehicle booking by clicking the “Create” button given at the top of the vehicle booking page.
- First, choose the “From” and “To” locations from the dropdown menu (both fields will come from the route section). Set the onward date for your journey and select the vehicle from the dropdown generated from the Fleet Add-On in the vehicles section. Finally, add the number of seats.
- After this, you can click the “Search” button to find available vehicles for your selected onward date.
- The search results appear in a table showing Vehicle, Boarding Point, Dropping Point, Start Time, Dropping Time, and Price for each available option.
- When you find a suitable vehicle, click the “Book Vehicle” button to open the booking form. In this form, you can select seats and enter passenger details, including name, age, and email. Note that you can only select the number of seats you specified during the search.
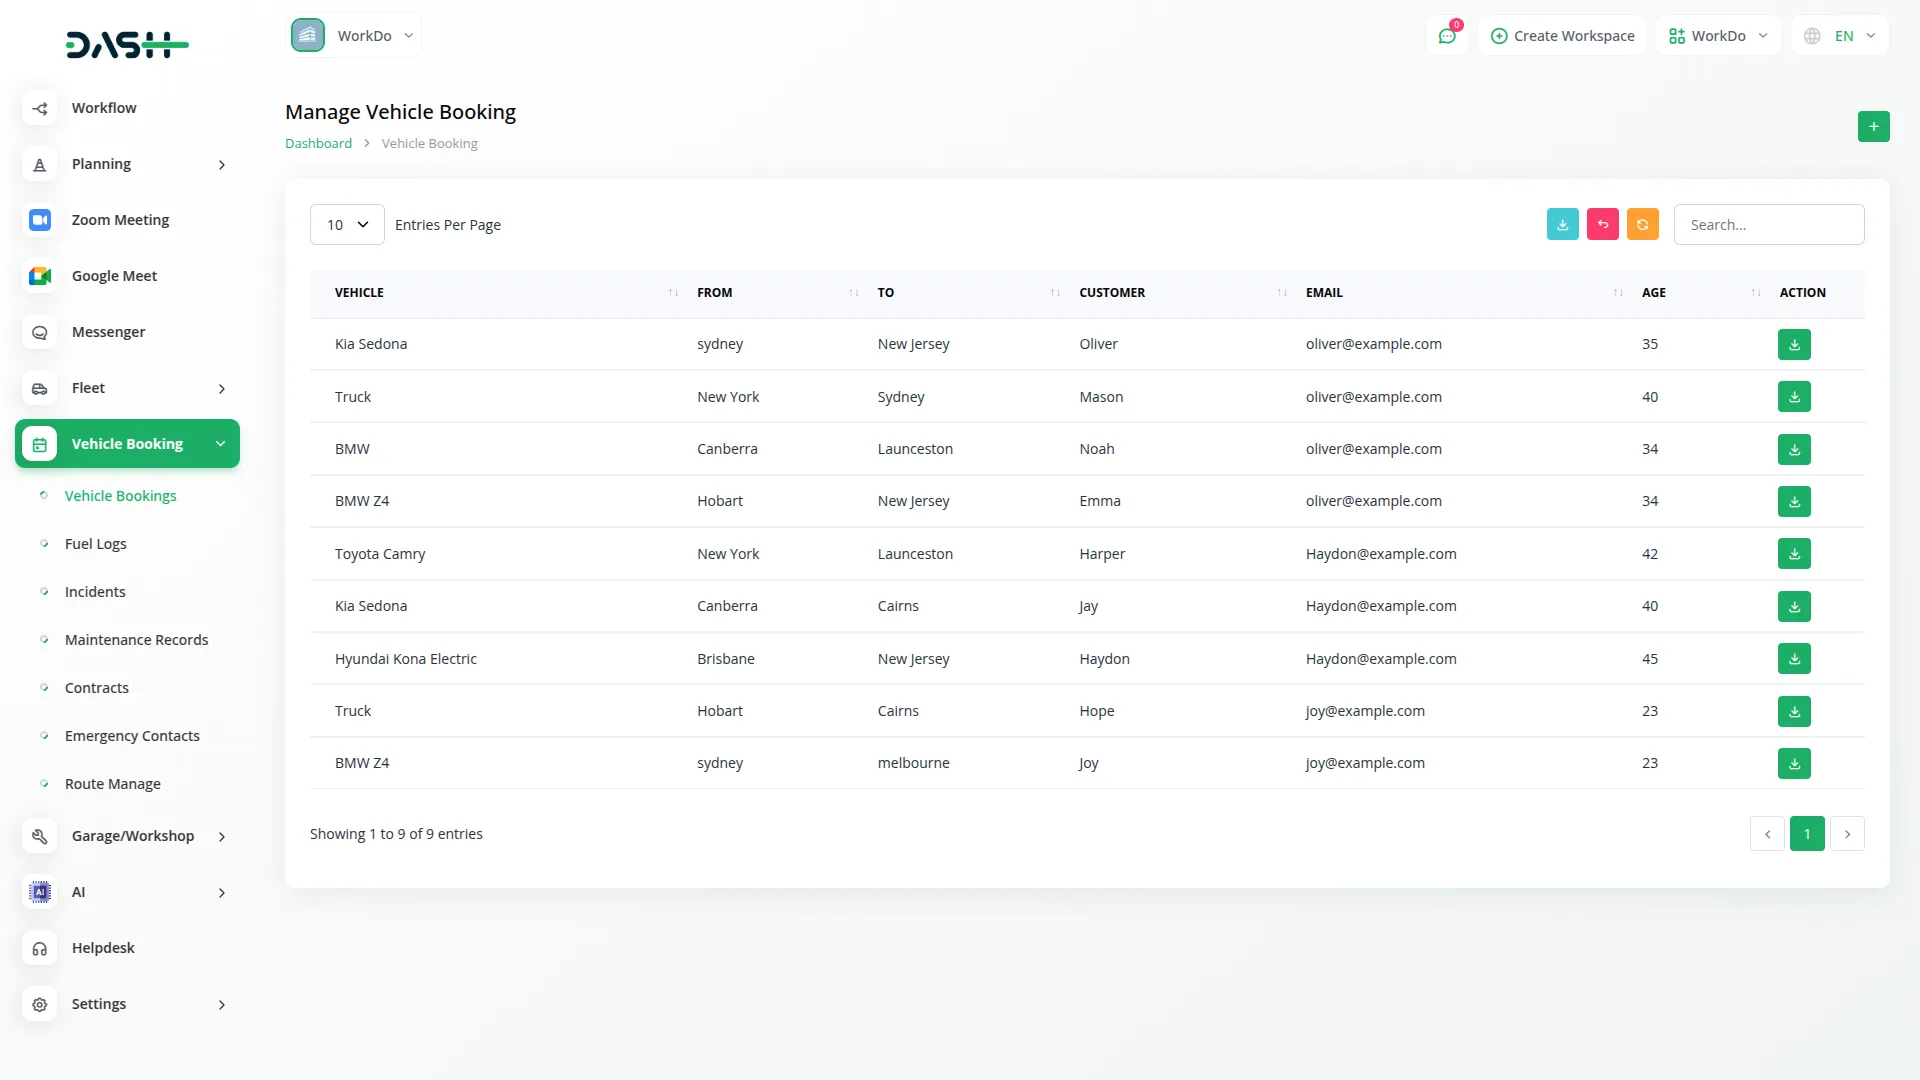
- The list page displays all bookings in a table with columns for Vehicle, From, To, Customer, Email, and Age. The page includes Search, Export, Reload, and Reset buttons for managing your bookings. Each booking has a “Download” action available for obtaining booking confirmations.
Fuel Logs
- After creating a vehicle booking, you will need to add fuel logs, so click on the “Create” button at the top of the fuel logs page.
- Fill in the information provided, such as selecting the Vehicle Name from the dropdown (populated from Fleet Add-On’s Vehicles section), choosing the Fuel Type from the dropdown (sourced from Fleet Add-On’s Fuel Type section), entering the Quantity of fuel purchased, specifying the Cost, and setting the Refuel Date.
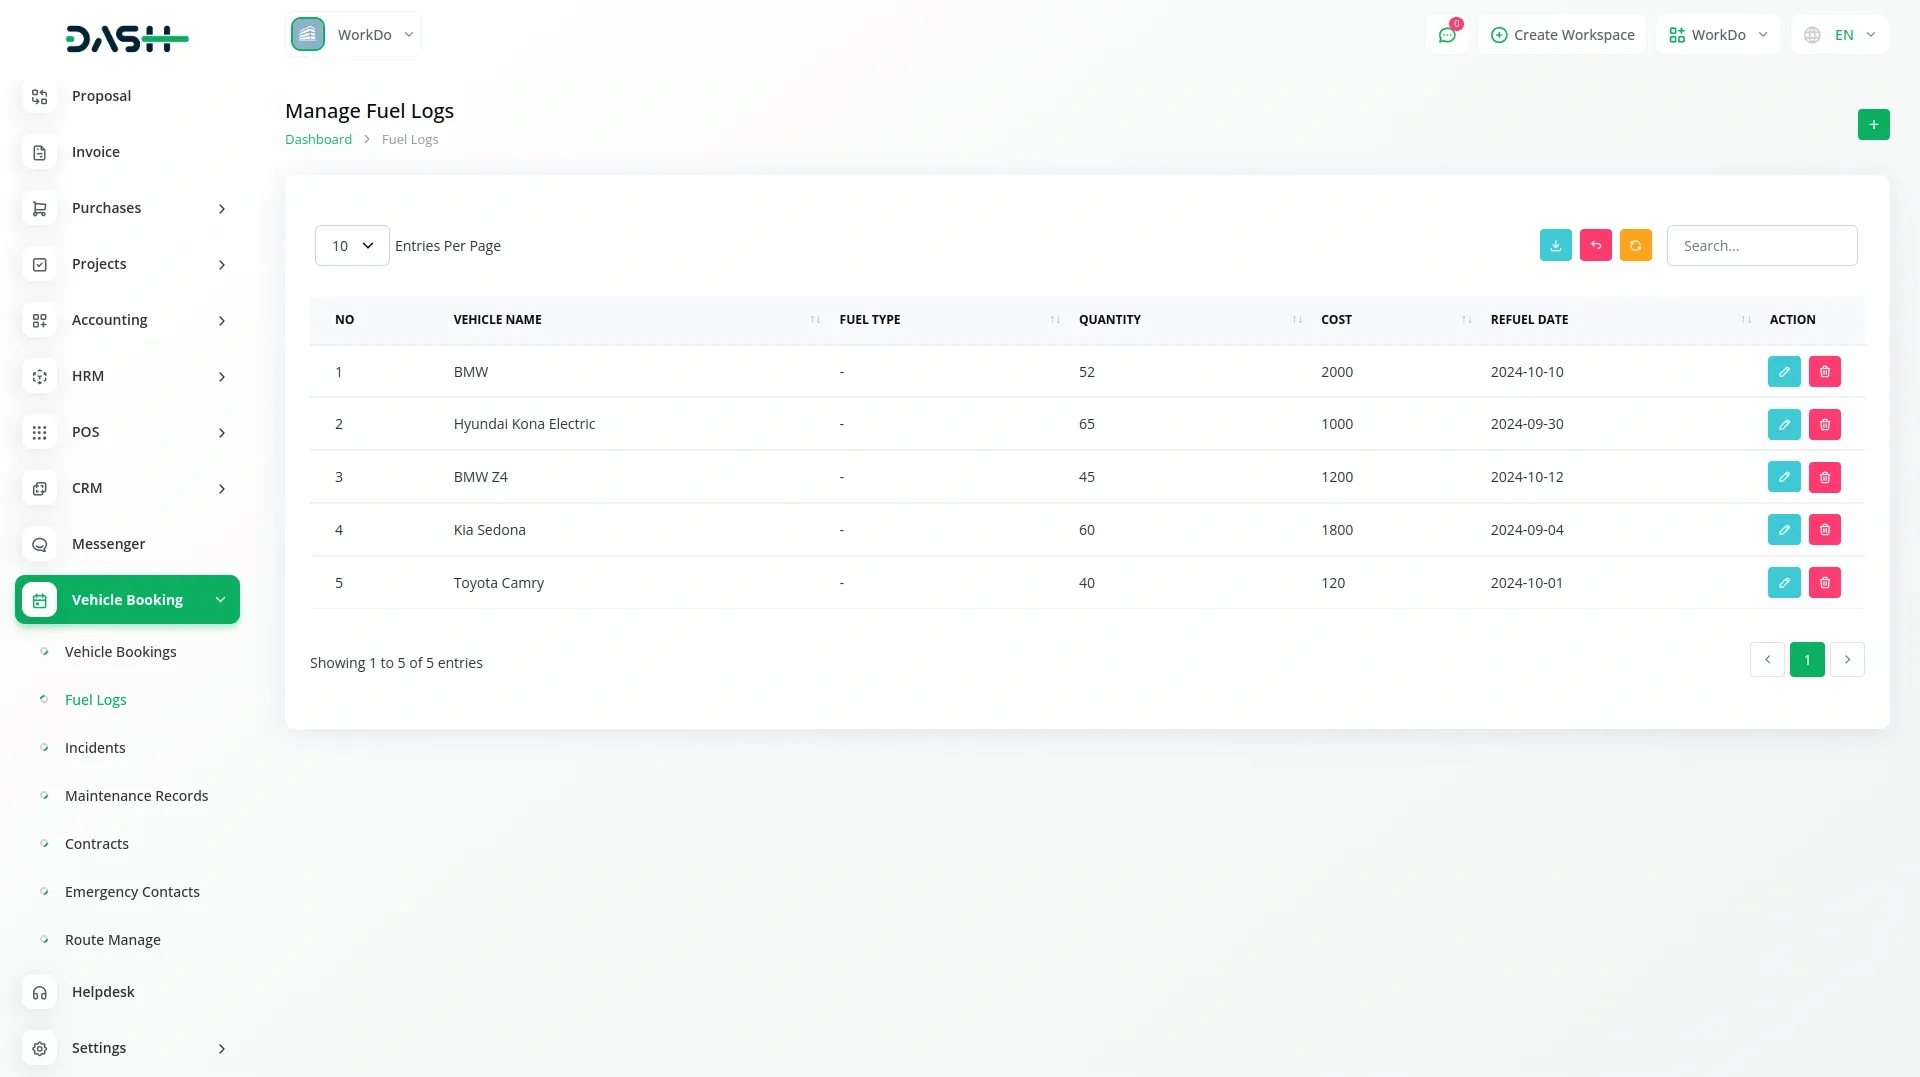
- The fuel log list page displays all records in a well-organized table with columns for Vehicle Name, Fuel Type, Cost, and Refuel Date. You can efficiently manage your fuel logs using these functions, such as search, export, reload, and reset buttons, and edit or delete fuel log entries directly from the action column.
Incidents Management
- On the incident management page, if you want to add a new incident record, click the “Create” button at the top of the incident management page.
- After that, fill in the incident details, such as selecting the Vehicle Name from the dropdown (generated from Fleet Add-On’s Vehicles section), setting the Incident Date, entering detailed Damage information, specifying the Cost, choosing the Status as either “Resolved” or “Unresolved”, and then writing a Description.
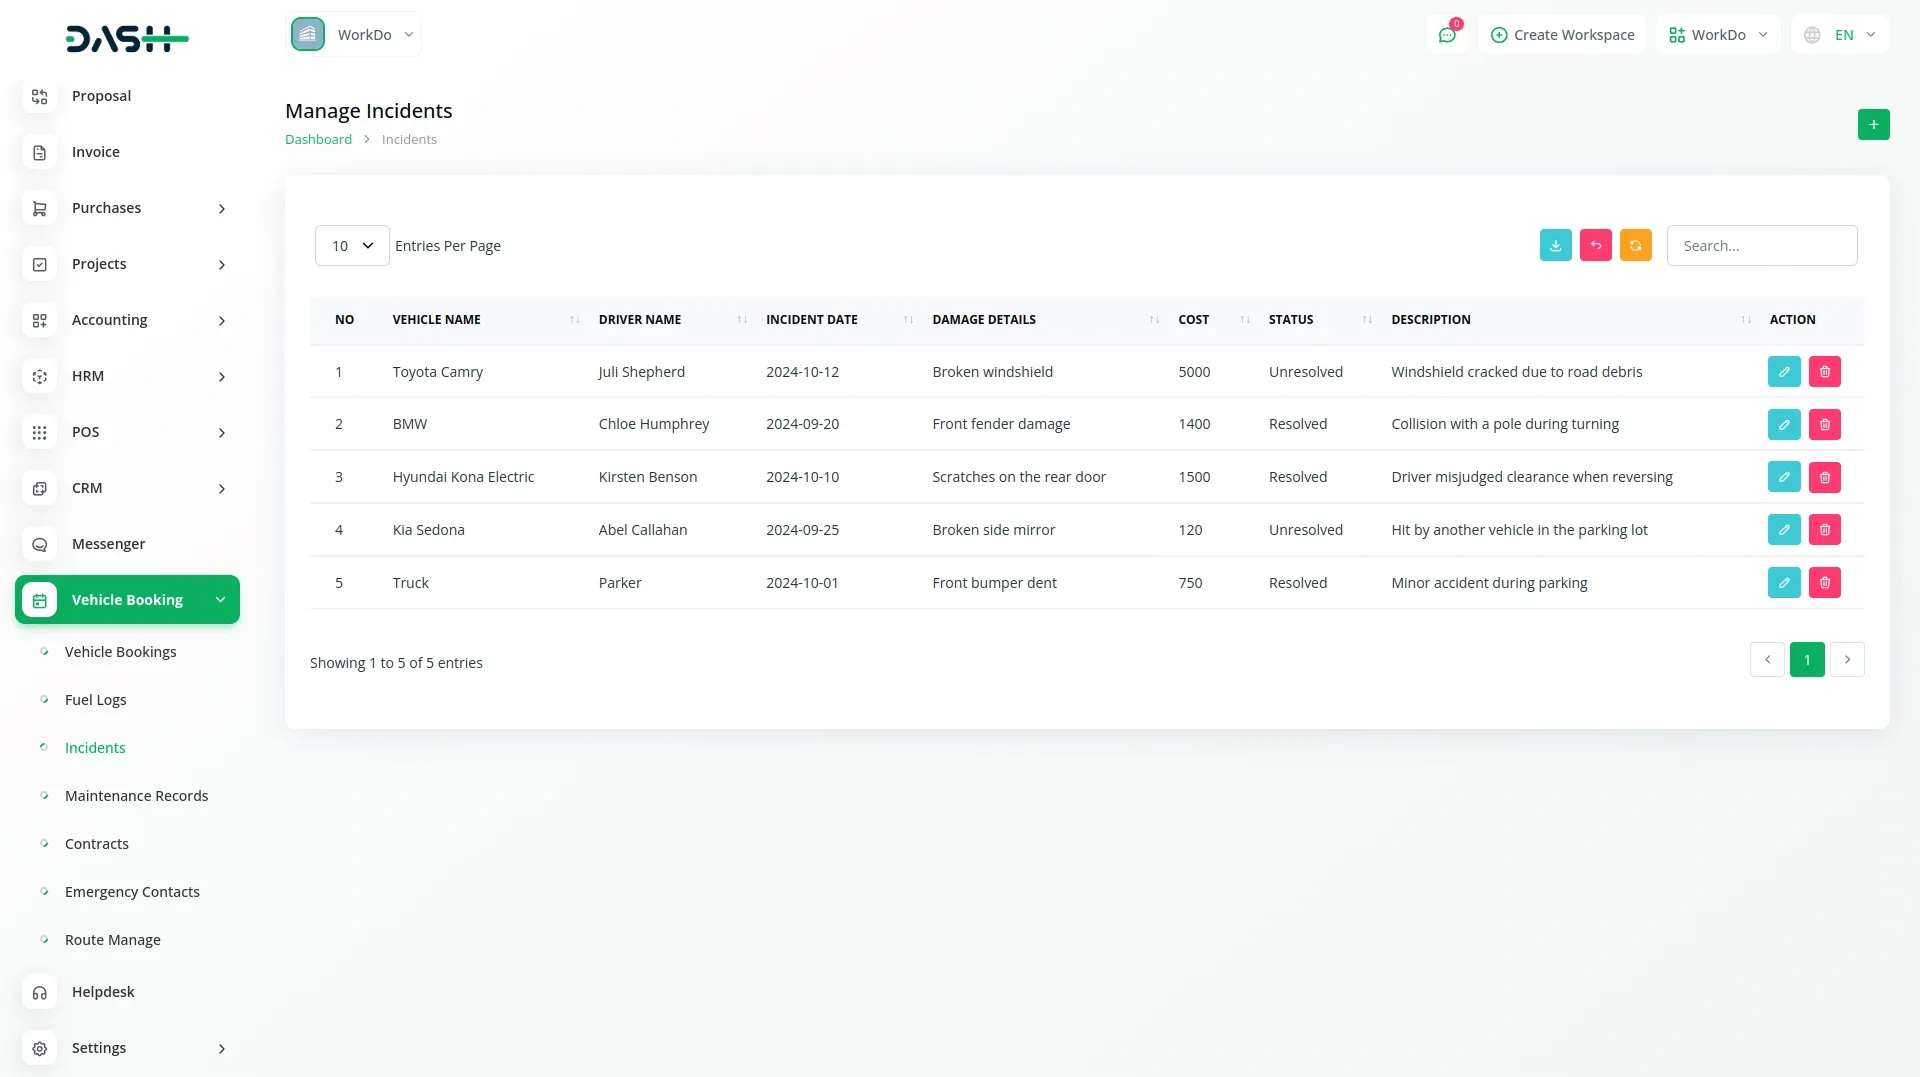
- The incident list page presents all records in a table showing Vehicle Name, Driver Name, Incident Date, Damage Details, Cost, Status, and Description. The page includes Search, Export, Reload, and Reset buttons for managing incidents. You can also edit or delete the incident details from the action column whenever you want.
Maintenance Records
- On the maintenance page, you can add your maintenance record by clicking on the “Create” button at the top of the maintenance records page.
- After adding maintenance information, such as selecting the Vehicle Name from the dropdown (sourced from Fleet Add-On’s Vehicles section), entering the Service Type, Next Maintenance Due date, Cost of maintenance, and finally, putting a detailed Description.
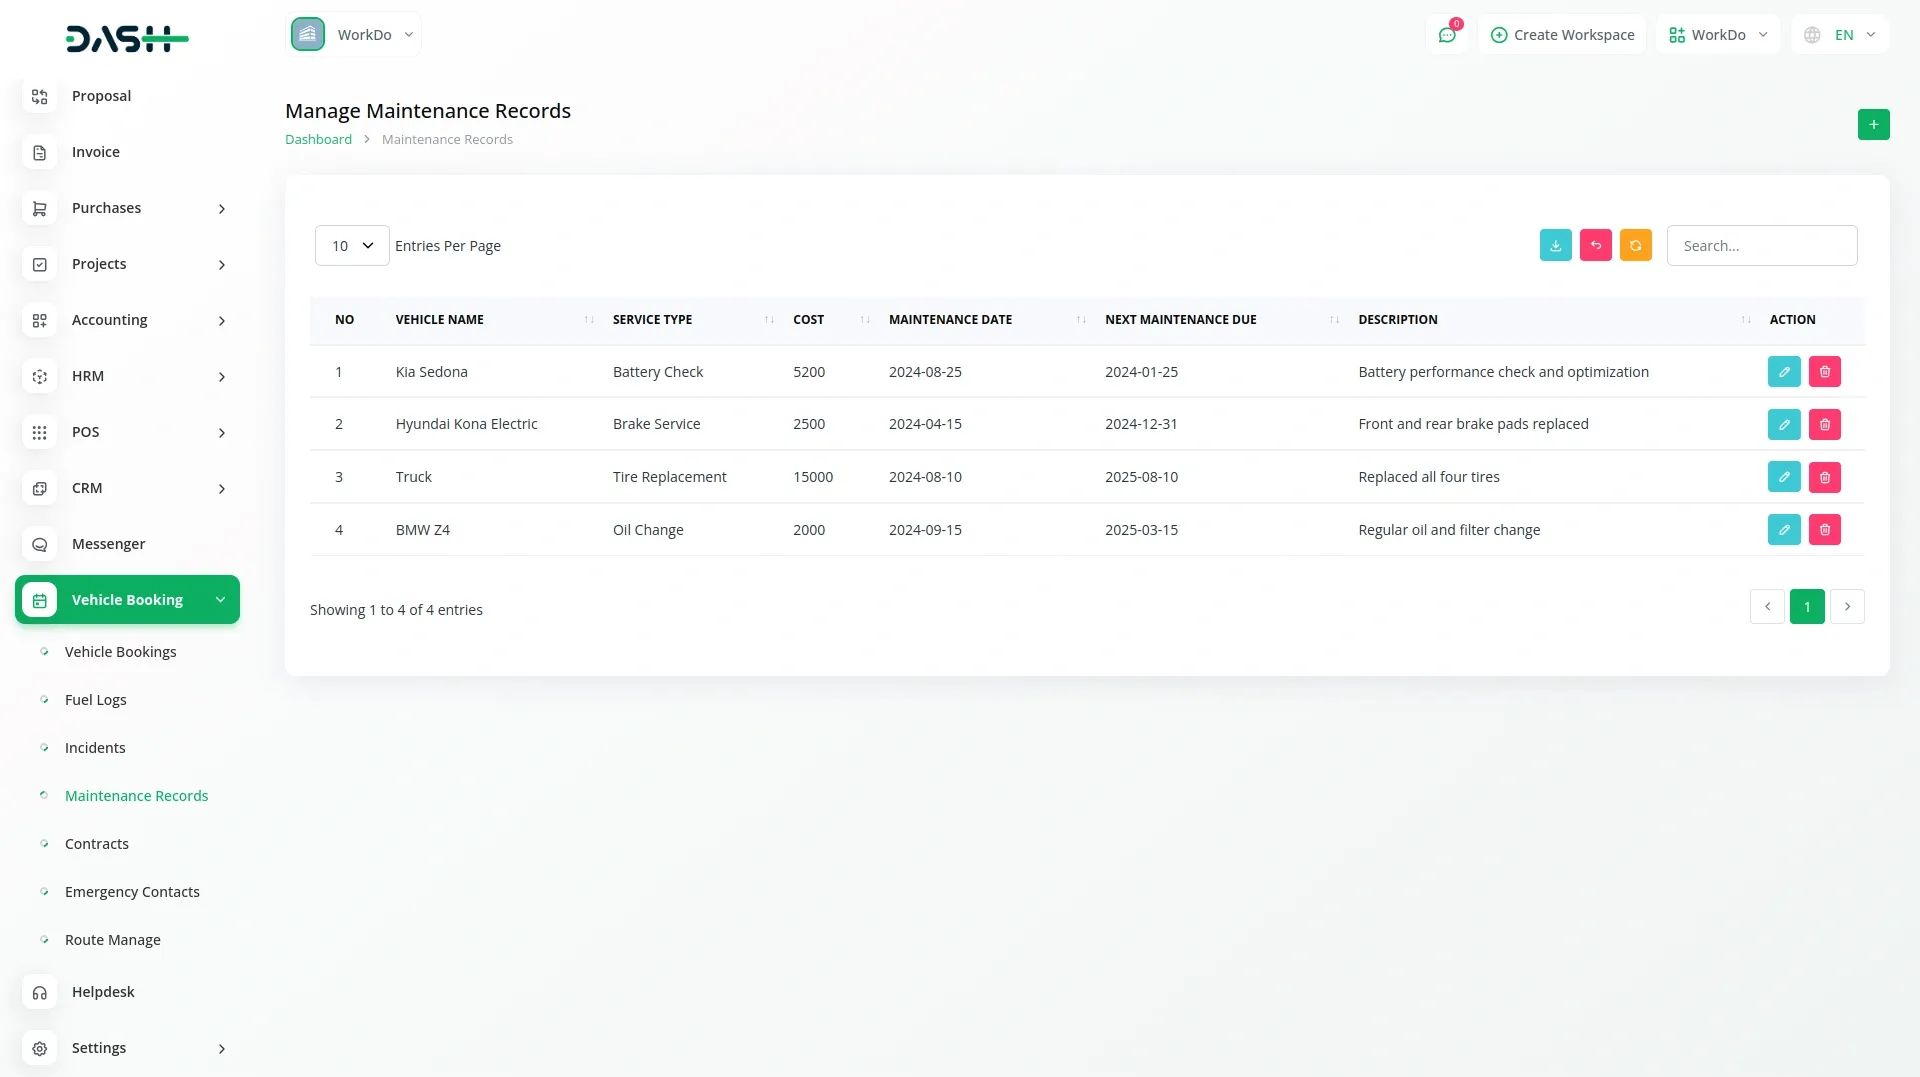
- On the list page, you will see the list of all maintenance records in a structured table with columns including Vehicle Name, Service Type, Cost, Maintenance Date, Next Maintenance Due, and Description.
- With the help of the Action column, you can click edit to modify maintenance records, and delete to remove the maintenance data. You can also filter records using the search, and use reset, reload, or export buttons to easily manage maintenance data.
Contracts Management
- To add a new contract record, click the “Create” button on the contracts management page. Fill in the required details such as selecting the Vehicle Name from the dropdown (generated from Fleet Add-On’s Vehicles section).
- Choose the Customer Name from the dropdown that is connected with the user section, set the Start Date and End Date, select the Status (Active, Terminated, or Expired), and finally add the contract Terms.
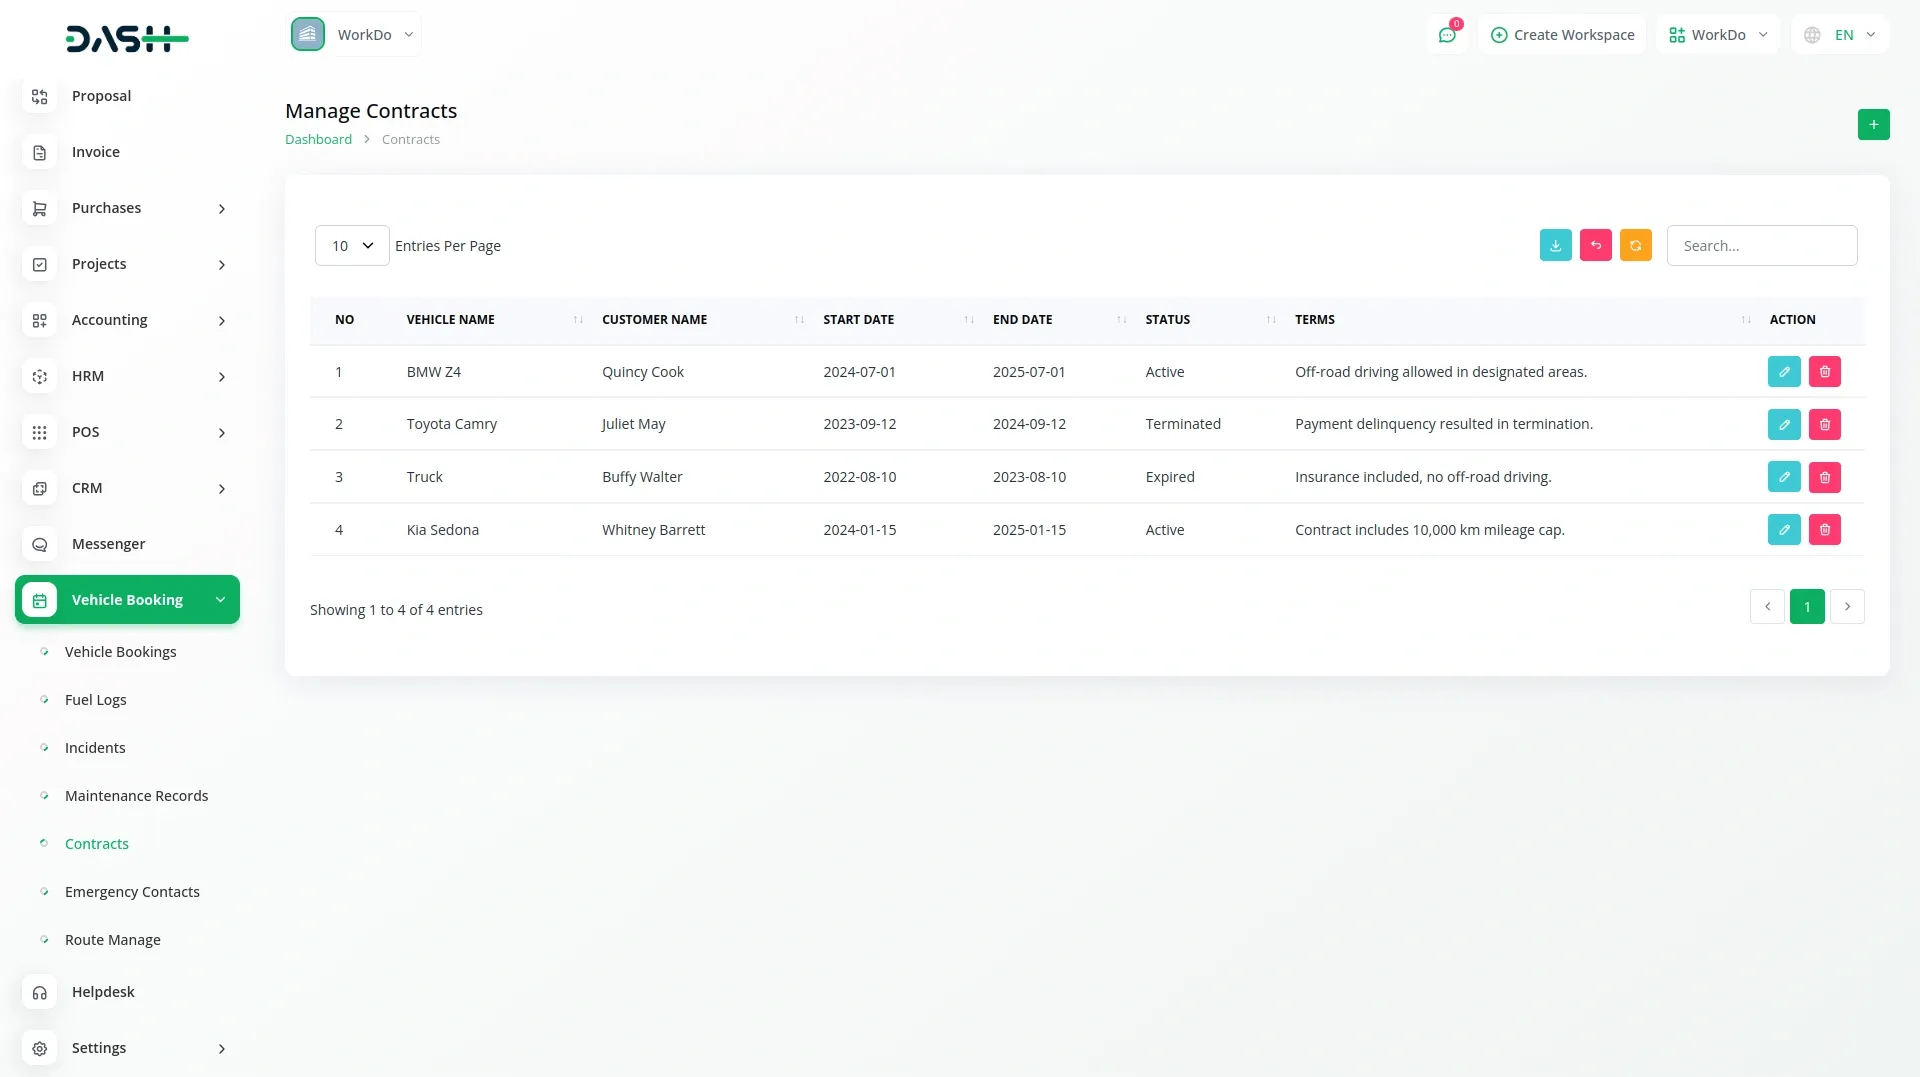
- The contract list page shows all records in a table with columns for Vehicle Name, Customer Name, Start Date, End Date, Status, and Terms. You can manage contracts using the Search, Export, Reload, and Reset buttons. Available actions for each contract include Edit and Delete options.
Emergency Contacts
- On the emergency contact page, click the “Create” button to start a new emergency contact record, and add emergency contact details, such as selecting the Vehicle Name from the dropdown (generated from Fleet Add-On’s Vehicles section).
- Choose the Driver Name from the dropdown; it would be generated in both fleet and user sections, enter the Contact Name, specify the Relationship to the driver, and provide the Mobile Number.
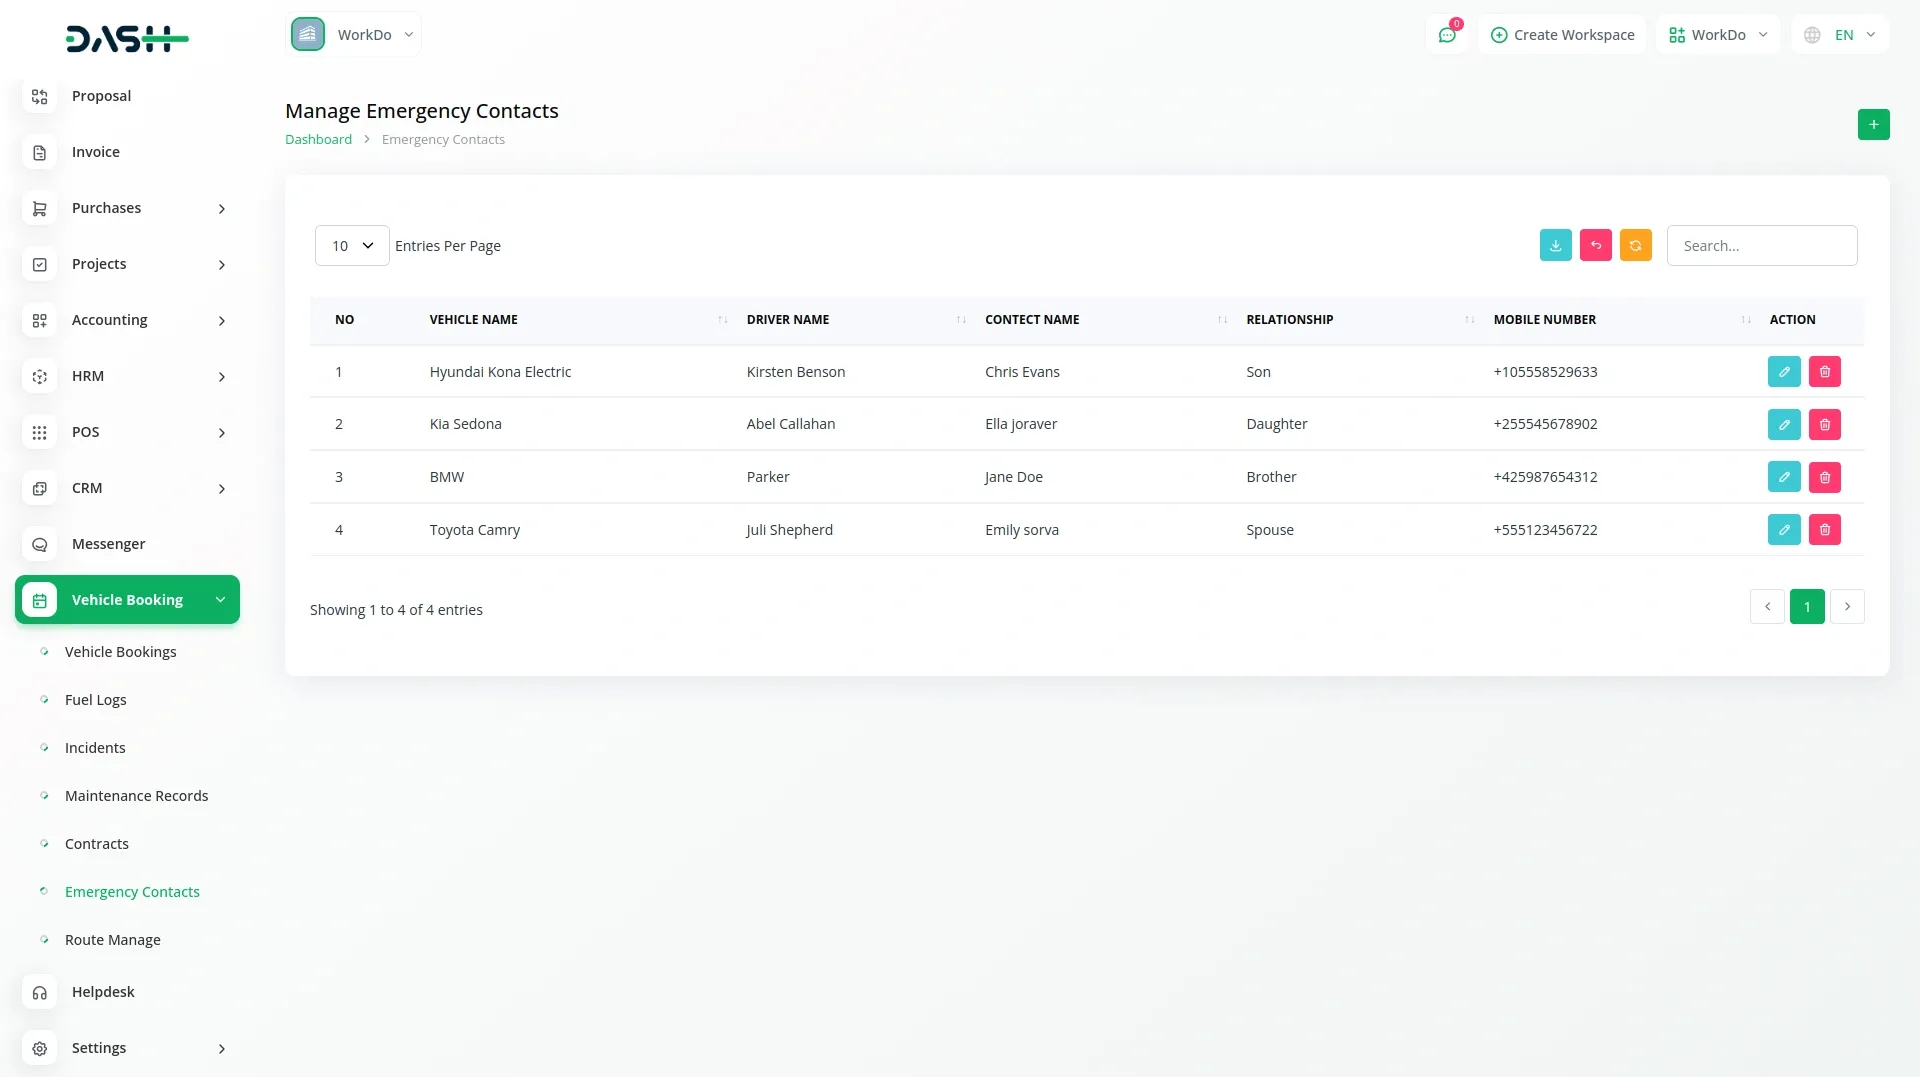
- The emergency contact list page displays all records in a clear table format with columns for Vehicle Name, Driver Name, Contact Name, Relationship, and Mobile Number.
- You can manage these contacts using the Search, Export, Reload, and Reset buttons. Available actions include Edit and Delete for each emergency contact record.
Routes Management
- In the Route Management section, if you want to add a new route, then click the “Create” button at the top of the route management page, and fill in the required details such as selecting the Vehicle Name from the dropdown (generated from Fleet Add-On’s Vehicles section).
- Enter the Starting Point and Dropping Point for the route, specify the start location and end location, add a price for the specific route, and set the Start Time and End Time.
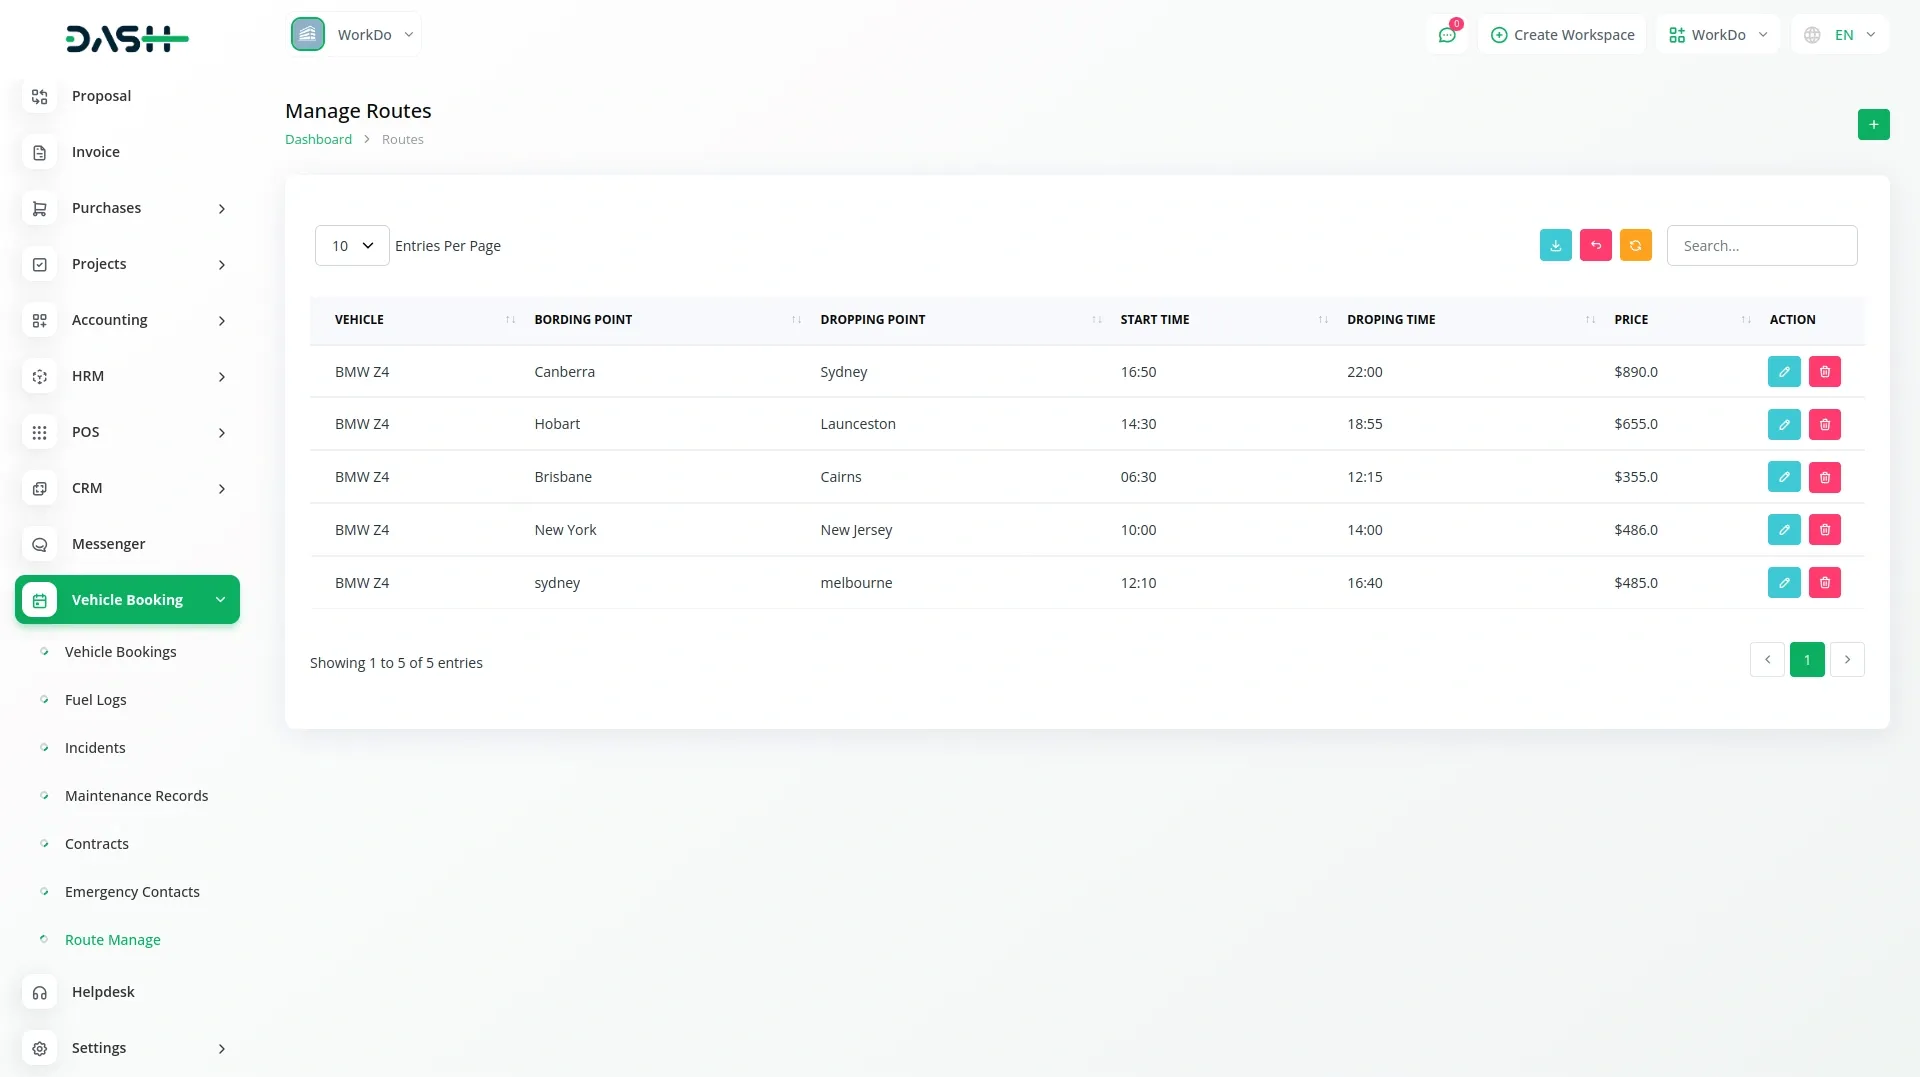
- The route list page displays all records in an organized table with columns for Vehicle, Starting Point, Dropping Point, Start Time, End Time, and Price.
- You can manage routes using the Search, Export, Reload, and Reset buttons. Available actions for each route include Edit to modify route details, and Delete to remove routes.
Vehicle Booking (Website)
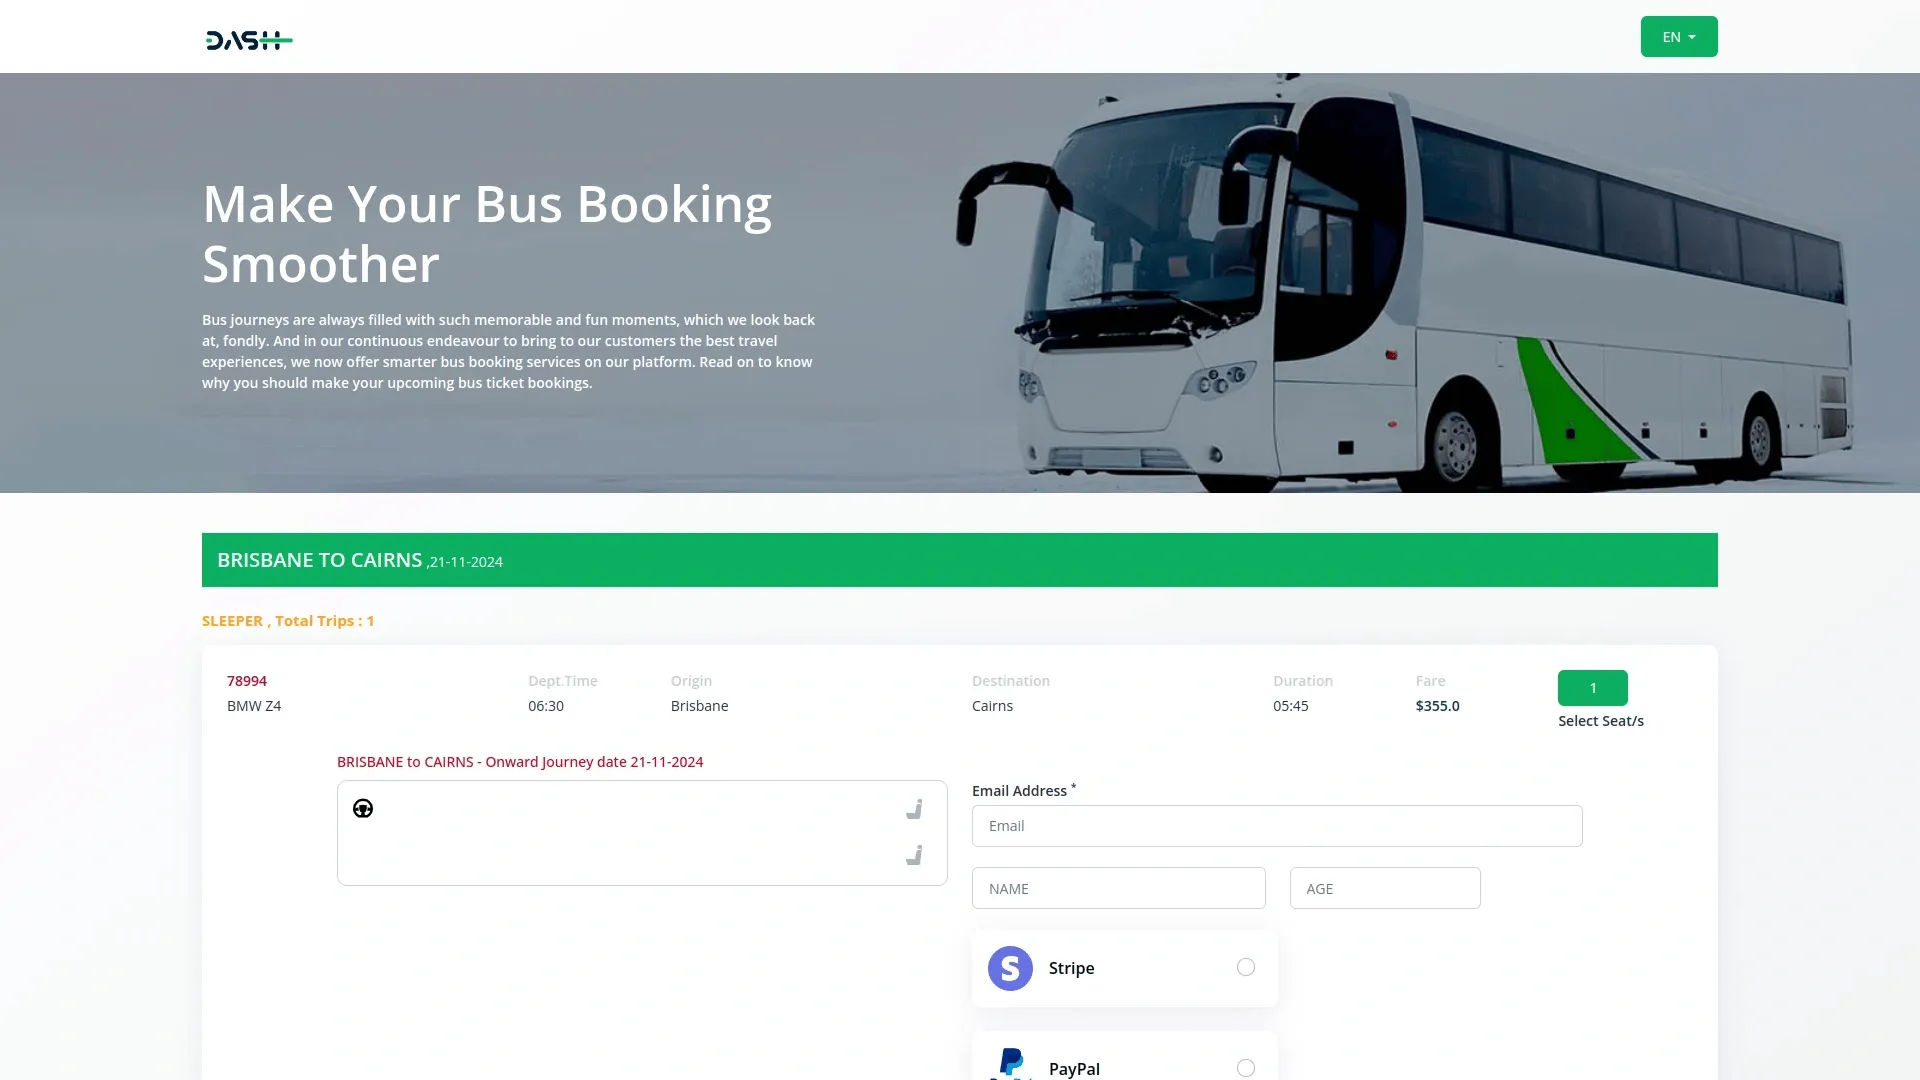
- To make a journey booking, you need to copy the link from the dashboard, after that customers select their “From location” and “To location” from the dropdown connected with the route section. They can set their Onward date for travel and select the number of Seats needed (options range from 1 to 6)
- After clicking the “Search” button, customers see available vehicles displayed in a table showing Vehicle Plate Number & Vehicle Name, Departure Time, Origin, Destination, Duration, and Fare for each option.
- When customers click “Select Seat”, a booking form opens where they can choose their seats and enter passenger details, including name, age, and email. The number of seats they can select is limited to what they specified during the search. The form also includes online payment options through Stripe , PayPal and more.
- After completing payment successfully, customers are redirected to a success page where they can click the “Download” button to get their booking confirmation PDF. This same download functionality is available in the backend Vehicle Booking section in the action button.
Categories
Related articles
- Zatca Integration in Dash SaaS
- Porter’s Five Model Integration in Dash SaaS
- Coworking Space Management Detail Documentation
- Make Integration Detailed Documentation
- PESTEL Analysis Integration in Dash SaaS
- Video Hub Integration in Dash SaaS
- Freight Management System Integration in Dash SaaS
- Recruitment Integration in Dash SaaS
- How to Generate the Credentials from Rocket.Chat
- Fleet Integration in Dash SaaS
- Team Workload Integration in Dash SaaS
- Contract Template Integration in Dash SaaS
Reach Out to Us
Have questions or need assistance? We're here to help! Reach out to our team for support, inquiries, or feedback. Your needs are important to us, and we’re ready to assist you!


Need more help?
If you’re still uncertain or need professional guidance, don’t hesitate to contact us. You can contact us via email or submit a ticket with a description of your issue. Our team of experts is always available to help you with any questions. Rest assured that we’ll respond to your inquiry promptly.
Love what you see?
Do you like the quality of our products, themes, and applications, or perhaps the design of our website caught your eye? You can have similarly outstanding designs for your website or apps. Contact us, and we’ll bring your ideas to life.
