Hotel and Room management in Dash SaaS
The Hotel & Room Management Add-On offers a comprehensive platform for managing hotel operations, integrating administrative dashboards with a public-facing website
Introduction
The Hotel & Room Management Add-On offers a comprehensive platform for managing hotel operations, integrating administrative dashboards with a public-facing website. It enables hotel managers to handle room bookings, customer management, amenities, facilities, and payment processing. The website includes customizable sections, such as the Header, Room, About Us, and Footer, all of which are managed from the backend Hotel Settings (Settings → System Settings → Hotel Settings) for seamless content control. Integrated features like multi-language support, secure payment options (Bank Transfer, Stripe, PayPal, etc.), booking management, and customizable themes ensure a professional, user-friendly experience for both administrators and guests.
How to Install the Add-On?
To Set Up the Hotel & Room Management Add-On, you can follow this link: Setup Add-On.
How to use the Hotel & Room Management Add-On?
Hotel Dashboard
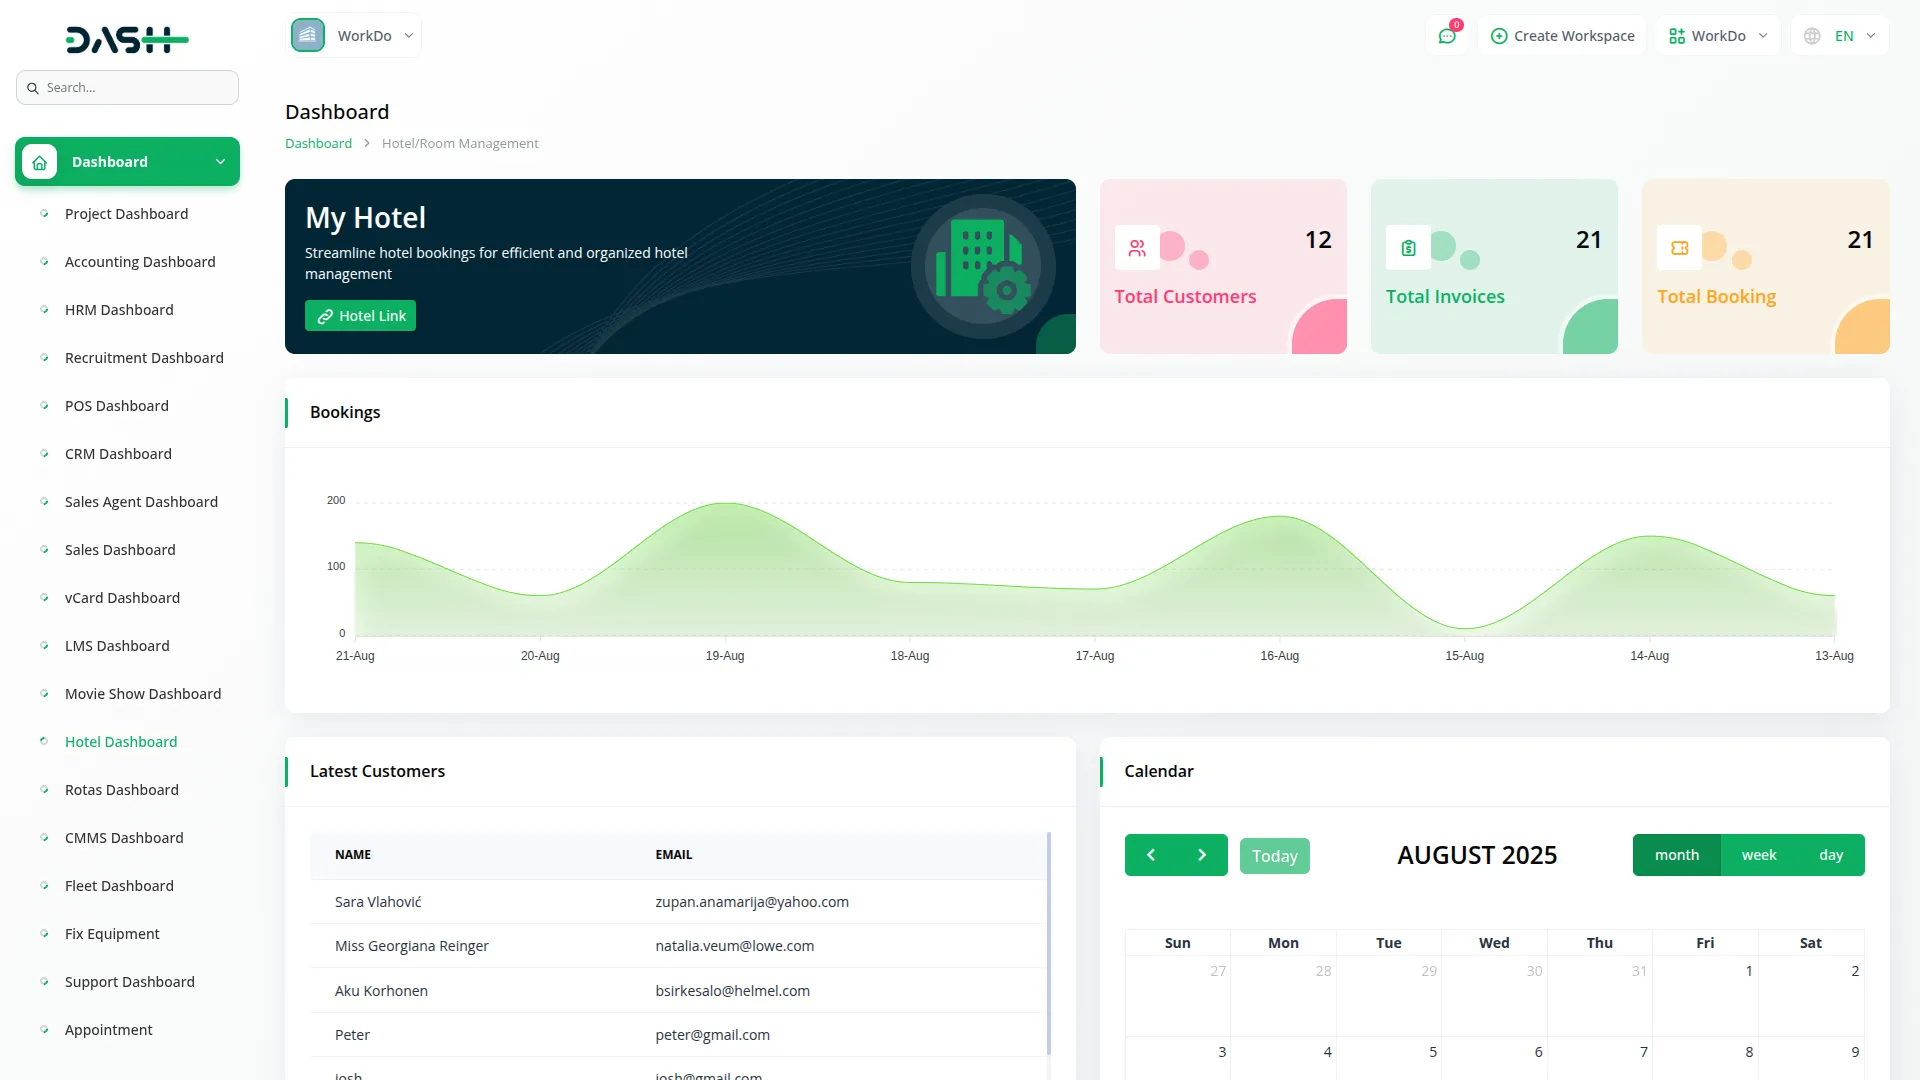
- After purchasing and installing the Add-On, go to your sidebar and search for the Hotel & Room Management Add-On.
- The dashboard provides three metric glass cards to see all data, which are Total Customer, Total Invoice, and Total Booking. On the left, you can use the “Hotel link” to access the frontend page.
- Below the cards, there is the Latest Customers section, displaying a table of recently registered guests with their names and email addresses.
- The dashboard also includes a booking chart that visualizes the booking trend over the date or their reservation booking number. After that, you can also see the recent invoice lists which were generated for customers, and to see the invoice, click the invoice button, and you can see the particular customer’s invoice.
- On the right side, you’ll get to see the Calendar view. You can configure between day, week, and month views using the toggle buttons.
Hotel Management
Amenities
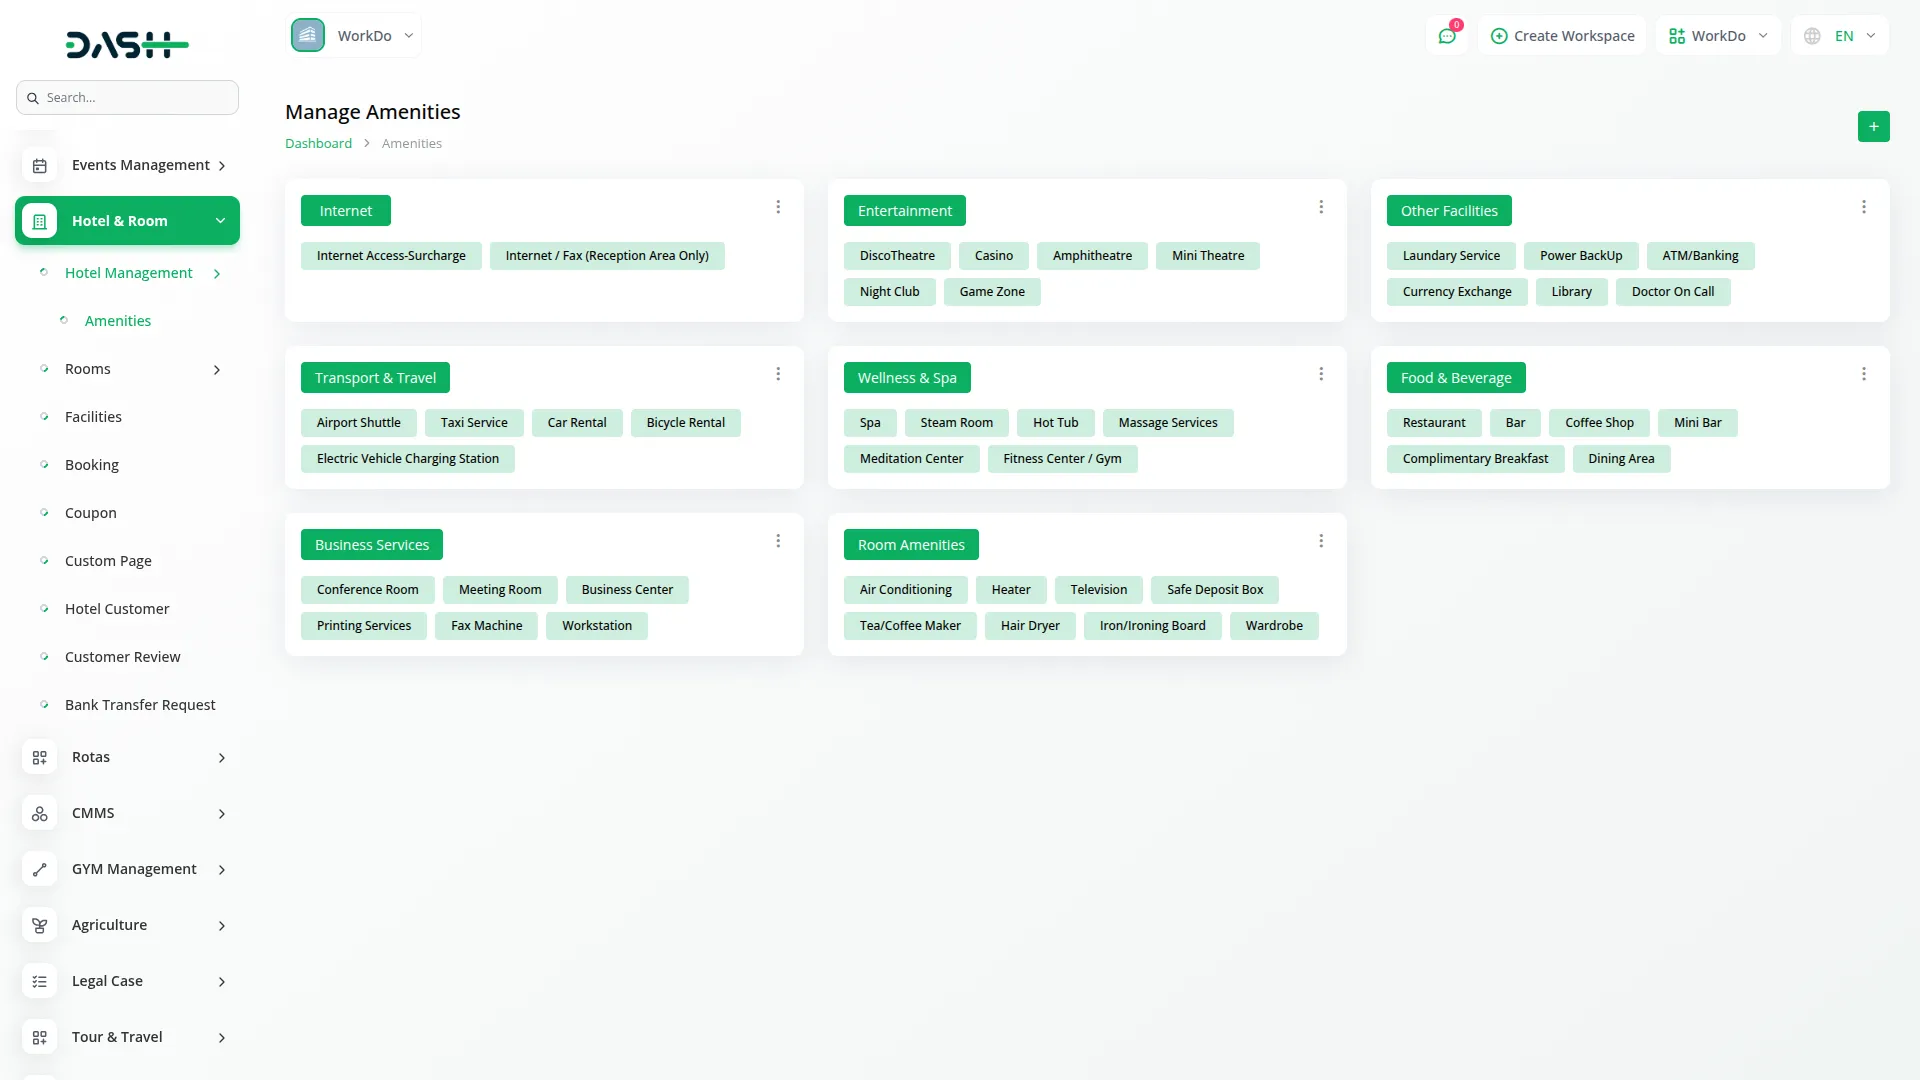
- In the Hotel Management section, there is an Amenities sub-section. In that section, to create a new amenity, click the “Create” button at the top of this page.
- You need to add a parent service name, upload an image, select an icon, and also add multiple child services under each parent service, with options to add or remove child services as needed.
- The main interface displays all data in grid view, which shows a parent service’s name and multiple child services. You can use the edit to modify the data or delete to remove them.
Room Management
Room Types
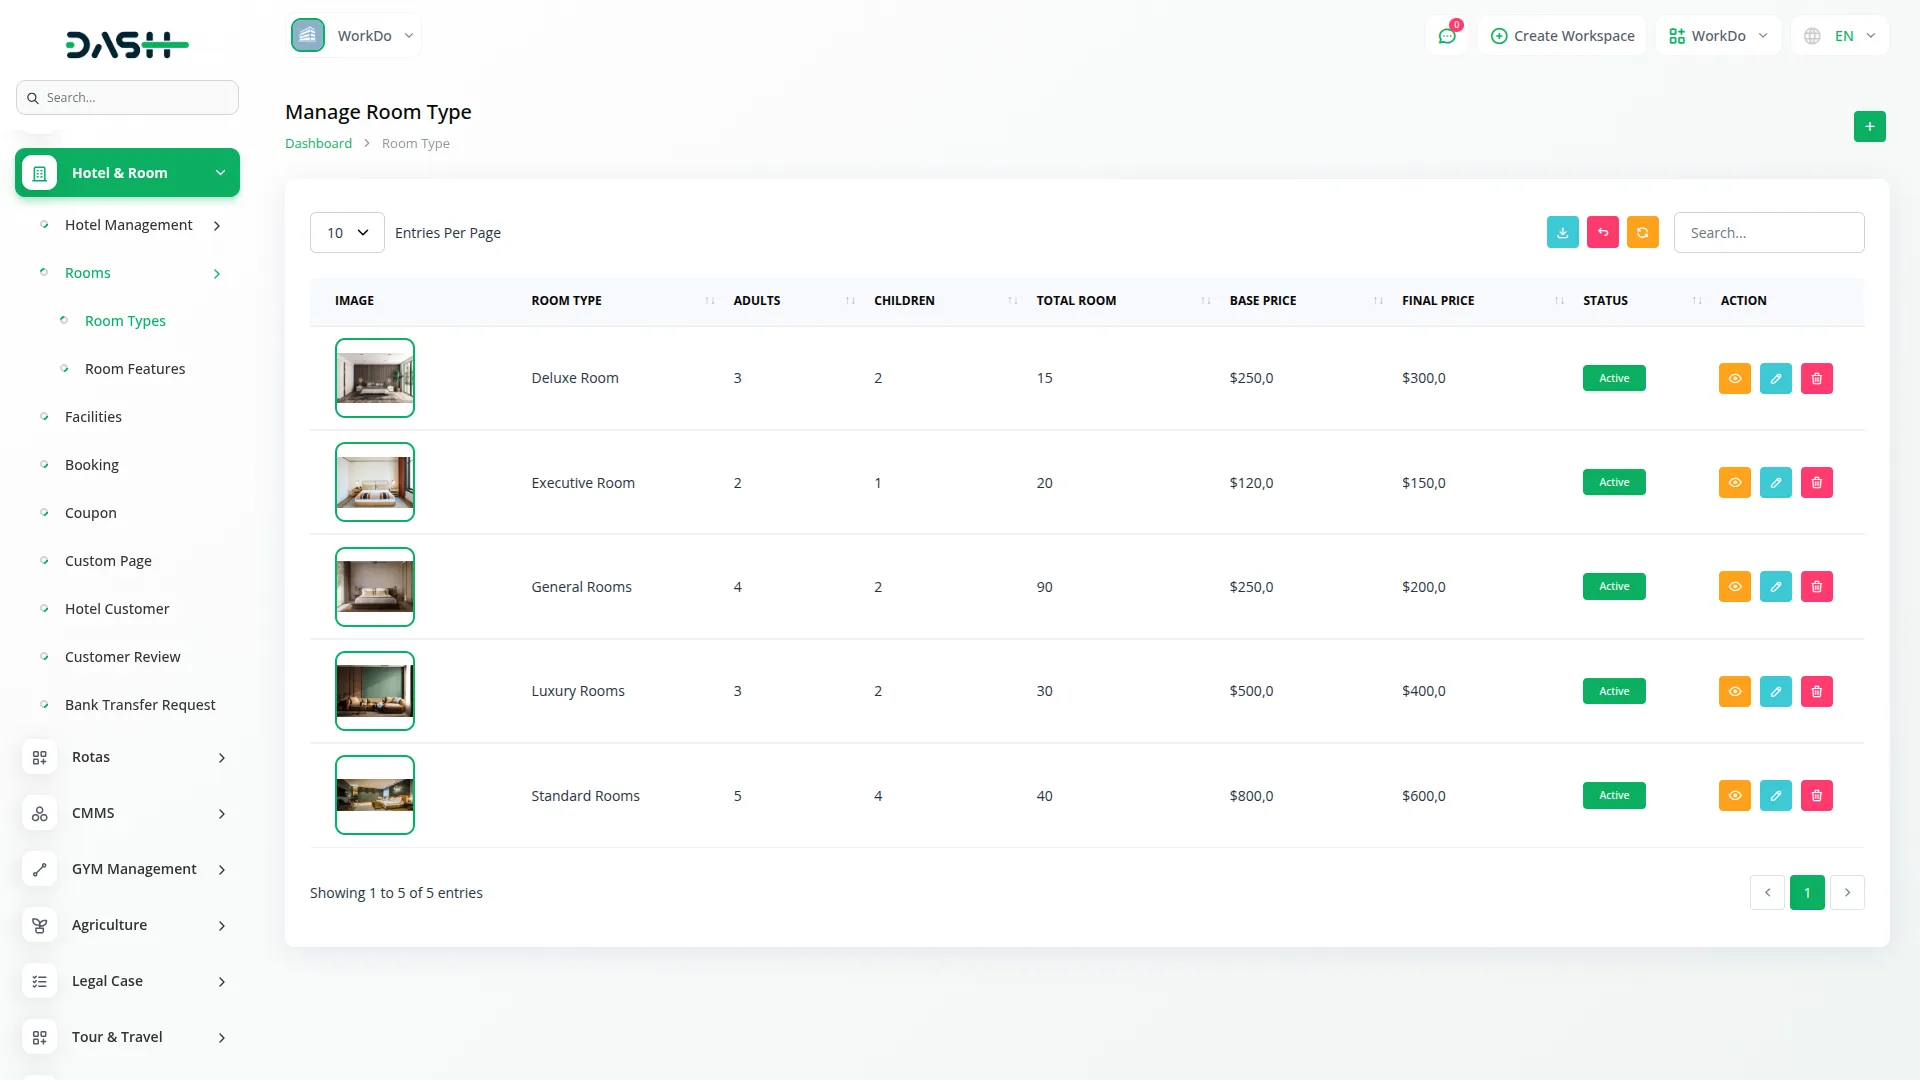
- On this page, you can create new room types by clicking the “Create” button at the top of a room type page. Fill in the details, including the room type name, enter the tags, adult and children capacity, total room count, base price, final price, upload an image, use the status toggle button (on/off), write a short description, and at the last, add a description or upload multiple images.
- The list page displays all available room types in a table format showing room image, name, adult, children, total room, base price, final price, and status. Use the search, export, reset, and reload buttons to manage this list page.
- In the Action column, click View to see the room type details, click the edit button to modify the record, or the delete button to remove it.
Room Features
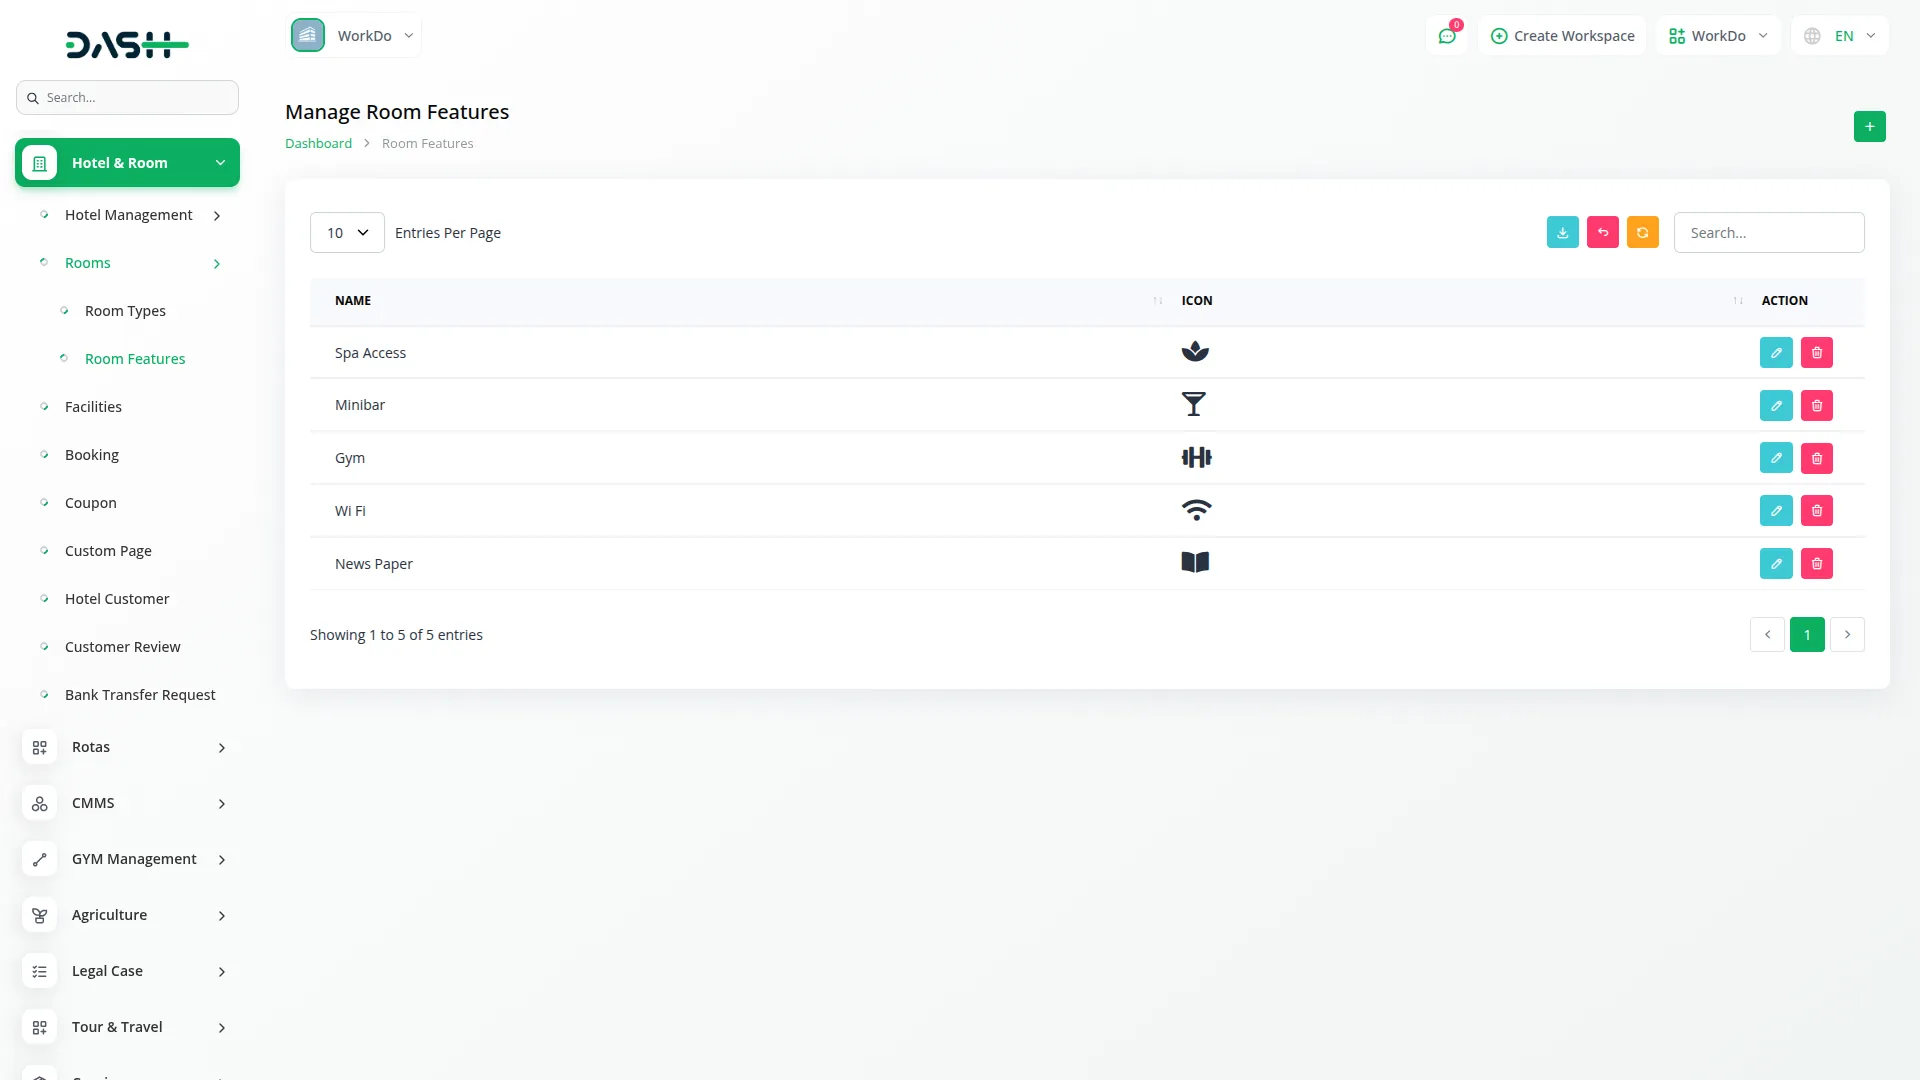
- To create a new room feature, click the “Create” button at the top of a room feature page. Enter a feature name, select an icon from the extensive library of over 1300 available icons to represent each feature visually.
- On the room features page, you’ll get to see all the available amenities, including their name or icons. You can use the search, export, reset, and reload buttons to manage the list on this page.
- In the Action column, you can use the edit to modify existing features, and delete to remove them.
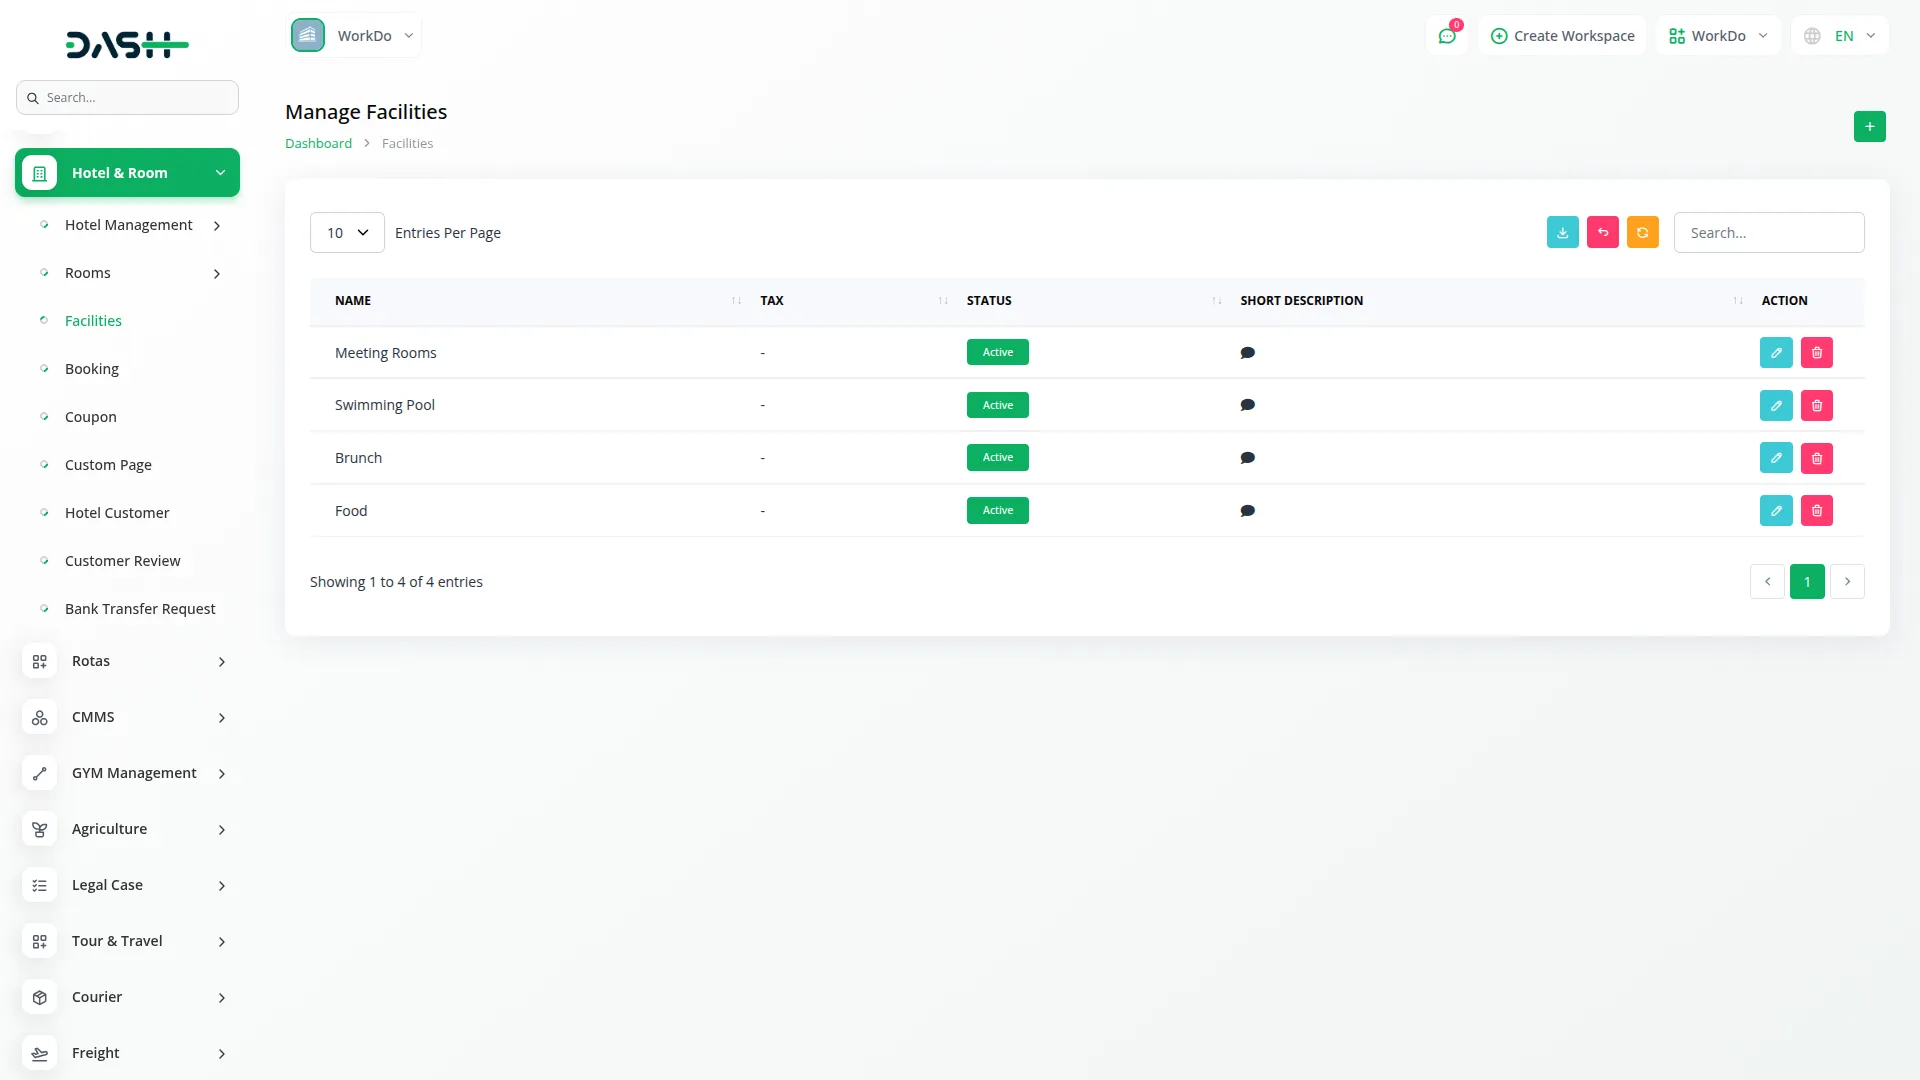
Manage Facilities
- After creating a room, navigate to the managed facilities page to add a new facility by clicking the “Create” button given at the top of this page.
- Fill in the required details, like enter name, add a short description, select tax from the dropdown, use the status toggle button to turn on/off, and create a child facility with a delete option.
- The list page displays all facilities, including name, status, tax, and a short description with a view icon. Use the search, export, reset, and reload buttons to manage a facilities list page.
- Apart from that, with the help of the action column, you can use edit to modify data or delete to remove it.
Booking Management
- To create a new booking, click the “Create” button at the top of a booking management page. Start by selecting a room from the dropdown (comes from the room type section), and set up the Check In and Check Out dates.
- Next, enter the booking details, including the Total Room count, number of Adults and Children, and the automatically generated Total Rent amount (based on the selected Room). Select the Customer from the dropdown menu and choose the Payment Method (such as Cash, Bank Transfer, Stripe, PayPal, etc.) along with the Payment Status (Paid or Unpaid).
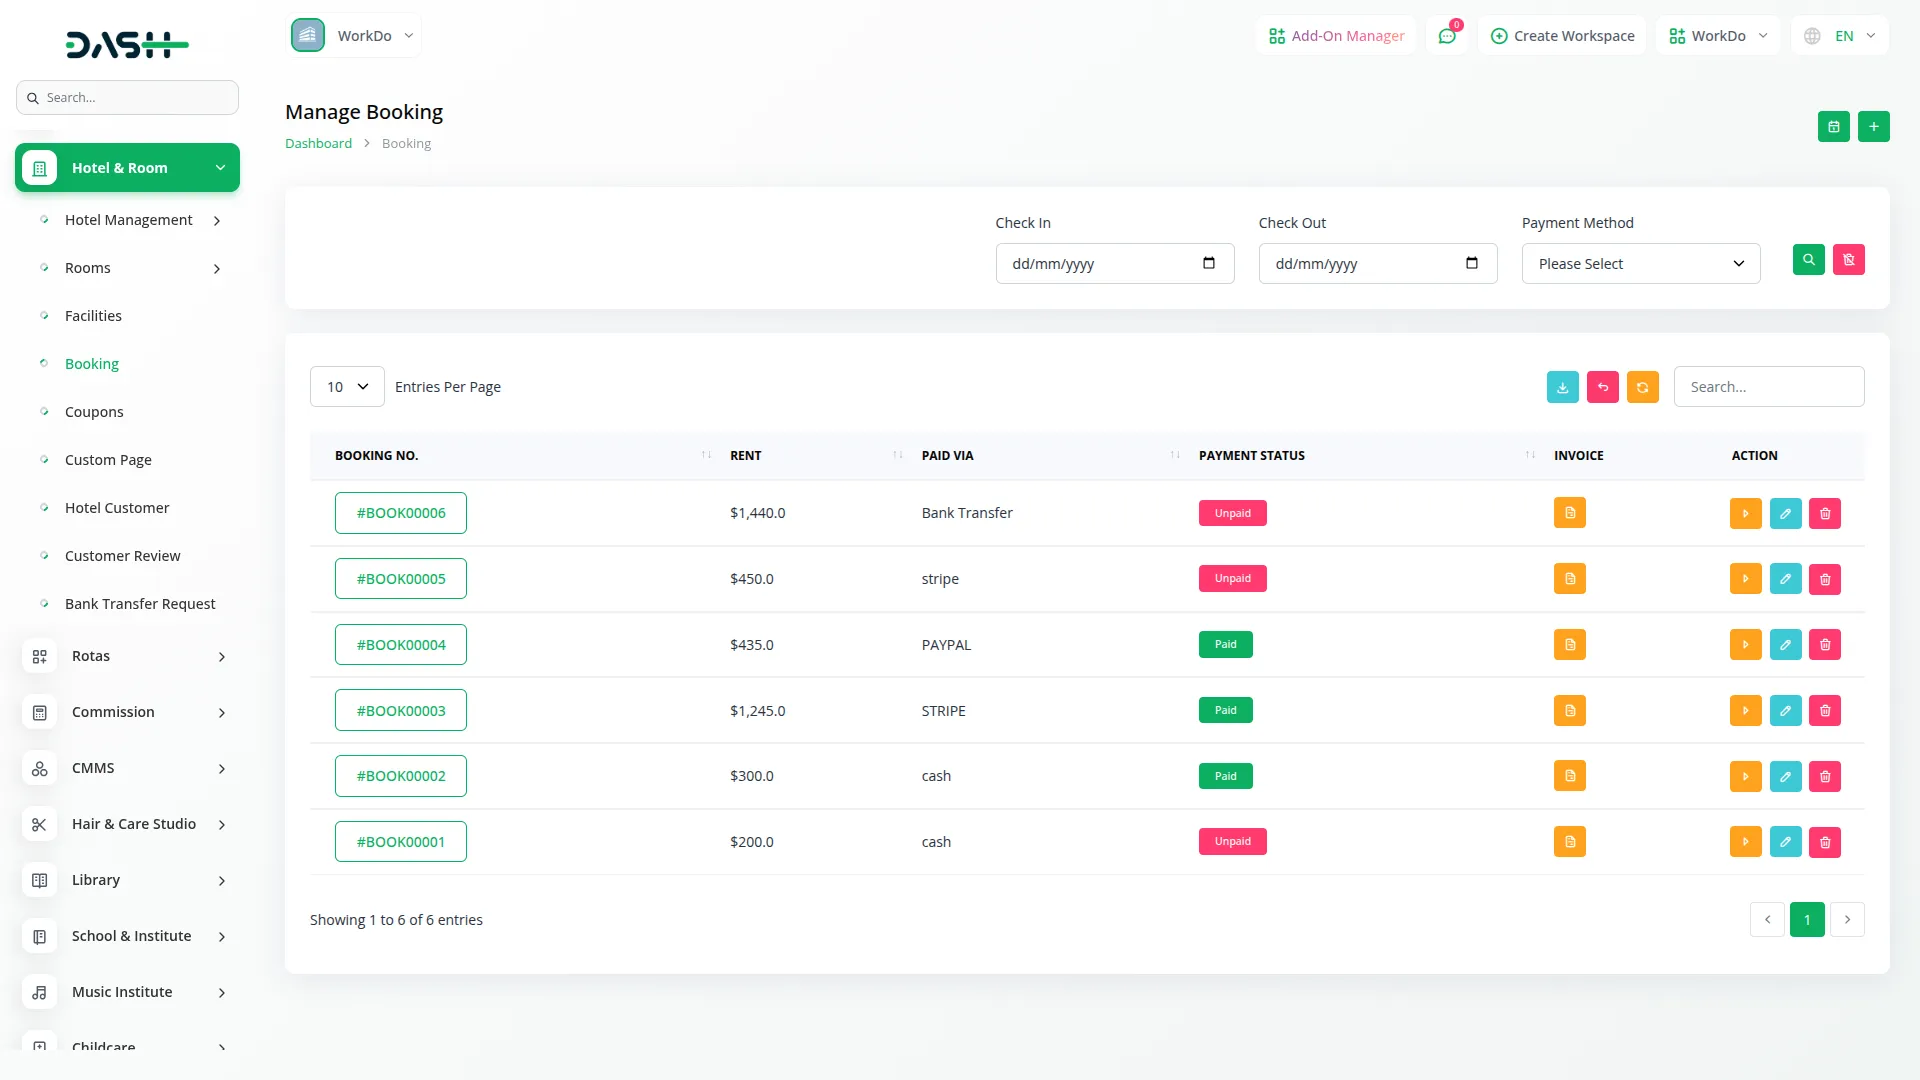
- The booking management page includes filter options at the top where you can search bookings by Check In date, Check Out date, and select Payment Method from the dropdown. With the apply or close option. Use the search, export, reset, and reload buttons to filter and manage your booking record.
- The bookings list displays all reservations in a table format showing Booking Number, Rent amounts, Payment via, Payment Status (Paid or Unpaid), and Invoice information with a view icon.
- In the Actions column, you can click the change booking status button to change the payment method, payment status, click the edit button, and navigate to the booking edit page. This page shows all the data of the booking order. In action, you can also edit or delete order data, with a search and back option to manage data. Also, click the delete button to remove unwanted data.
- On the top of the list page, you’ll get to see the Calendar view or booking list that provides a visual representation of detailed booking schedules. You can navigate between day, week, and month using the toggle buttons to view the booking. You can create a new booking by clicking the “create” button at the top of the page.
- Select a room from the dropdown (comes from the room section), set check-in or check-out date, total room, adults or children capacity, the automatically generated Total Rent amount (based on the selected Room), choose customer from the dropdown, choose payment method from the dropdown, and lastly choose the payment status.
Manage Coupon
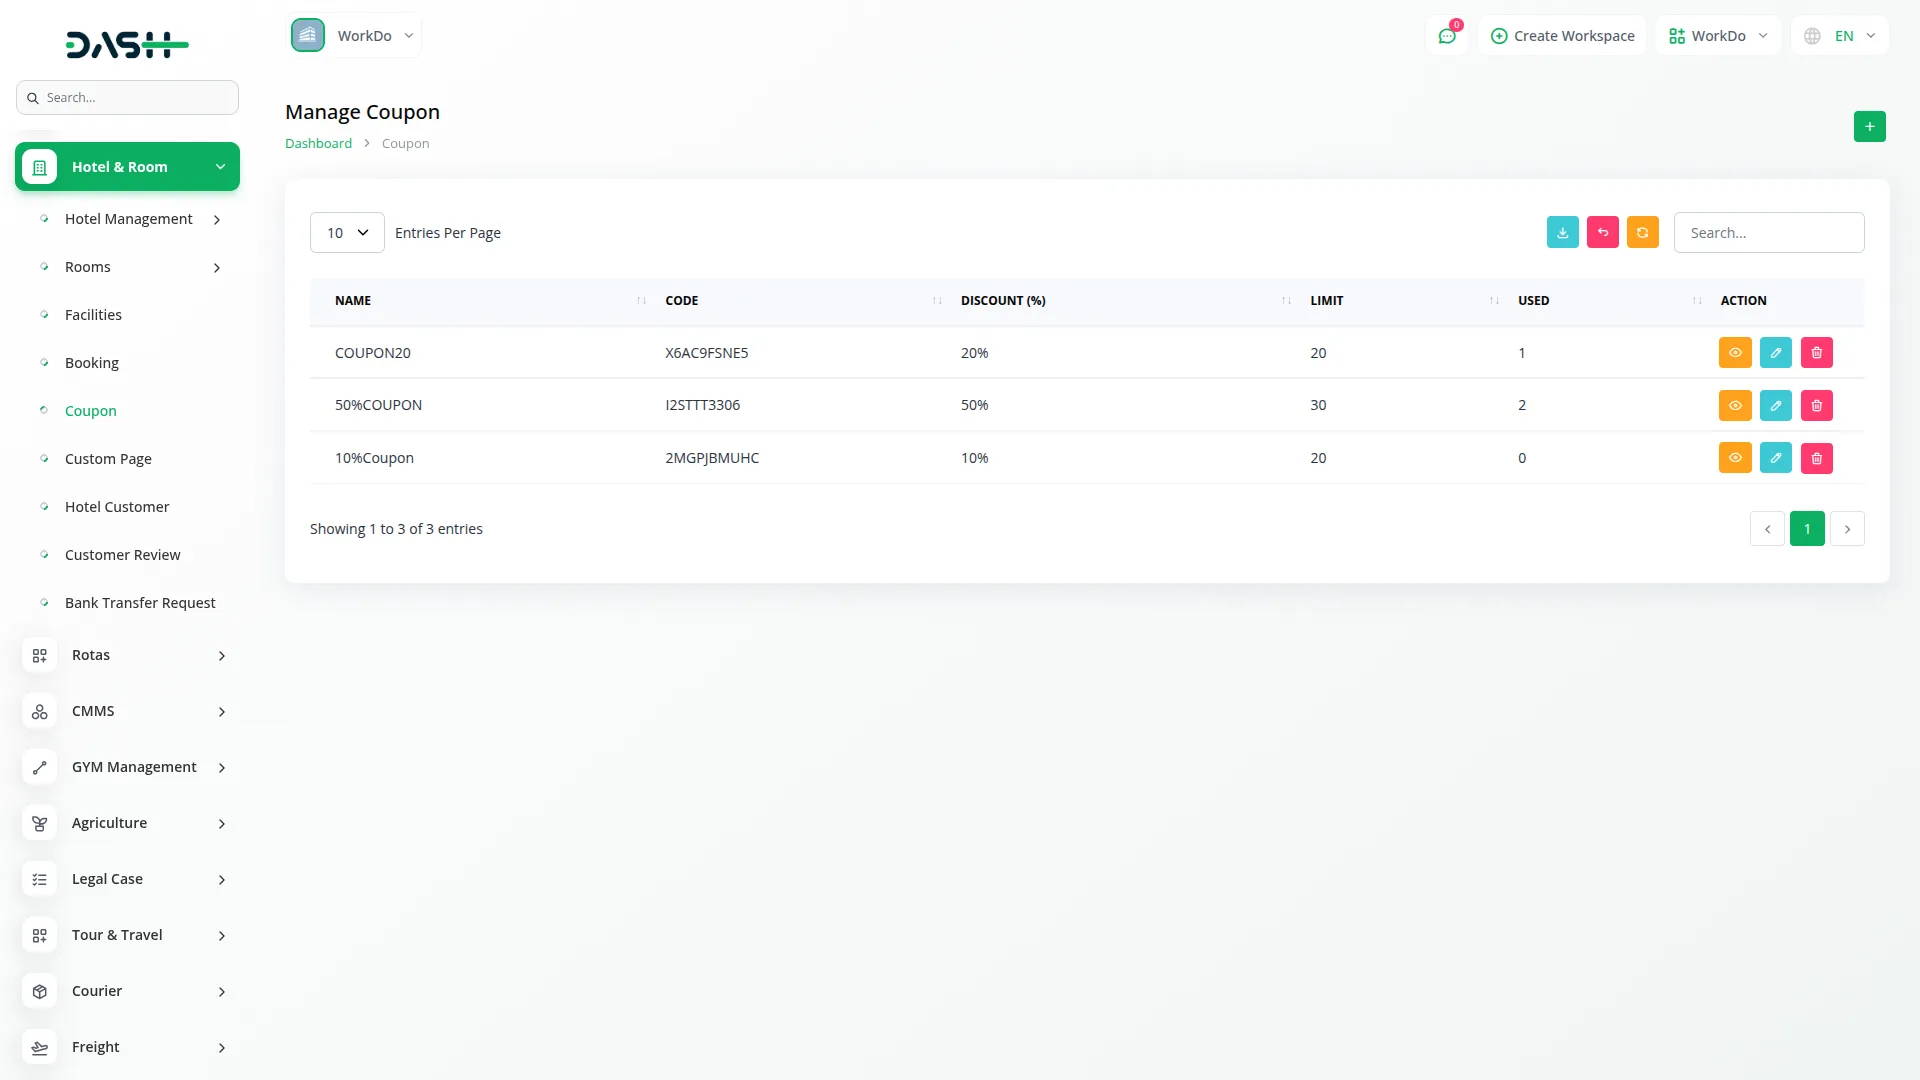
- After creating a booking, navigate to the manage coupon page to add a new coupon by clicking the “Create” button at the top of the page. Enter the coupon name, discount, and limit. Using the code radio button, you can choose Manual to enter a code or Auto-Generate to display a system-generated code.
- On this page, you’ll get to see the list of all coupons, including name, code, discount, limit, and usage. Use the search, export, reset, and reload buttons to manage this page list.
- In the Action column, click View to see which customers and guests have used this coupon, click the edit button to modify the record, or the delete button to remove it.
Manage Custom Pages
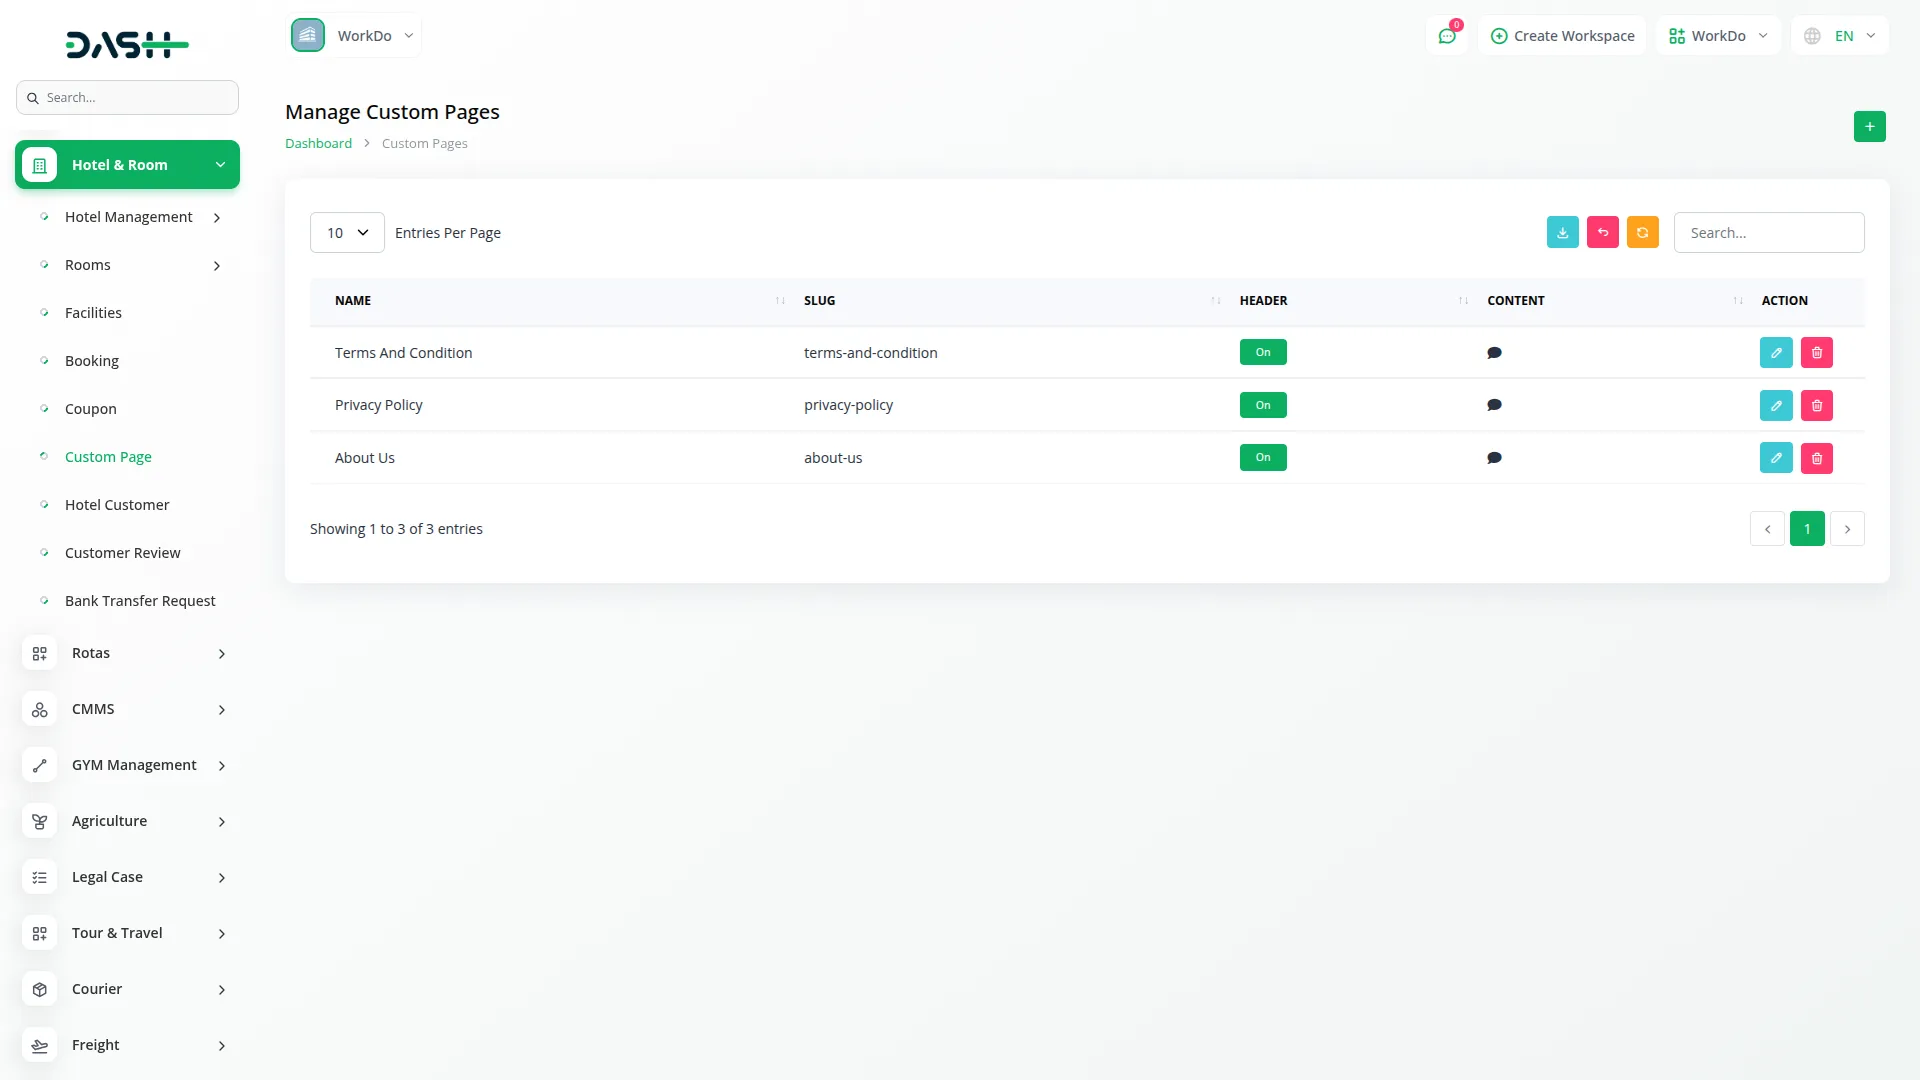
- To create a new custom page, click the “Create” button given at the top of the Manage Custom page. Fill in the name, use the page header display toggle to turn on/off, and add content.
- The list page displays all custom page records, including their name, slug, and header (on/off). You can easily manage this page list using search, export, reset, and reload buttons. With the help of an action column, use the edit to modify a detail, and delete to remove it.
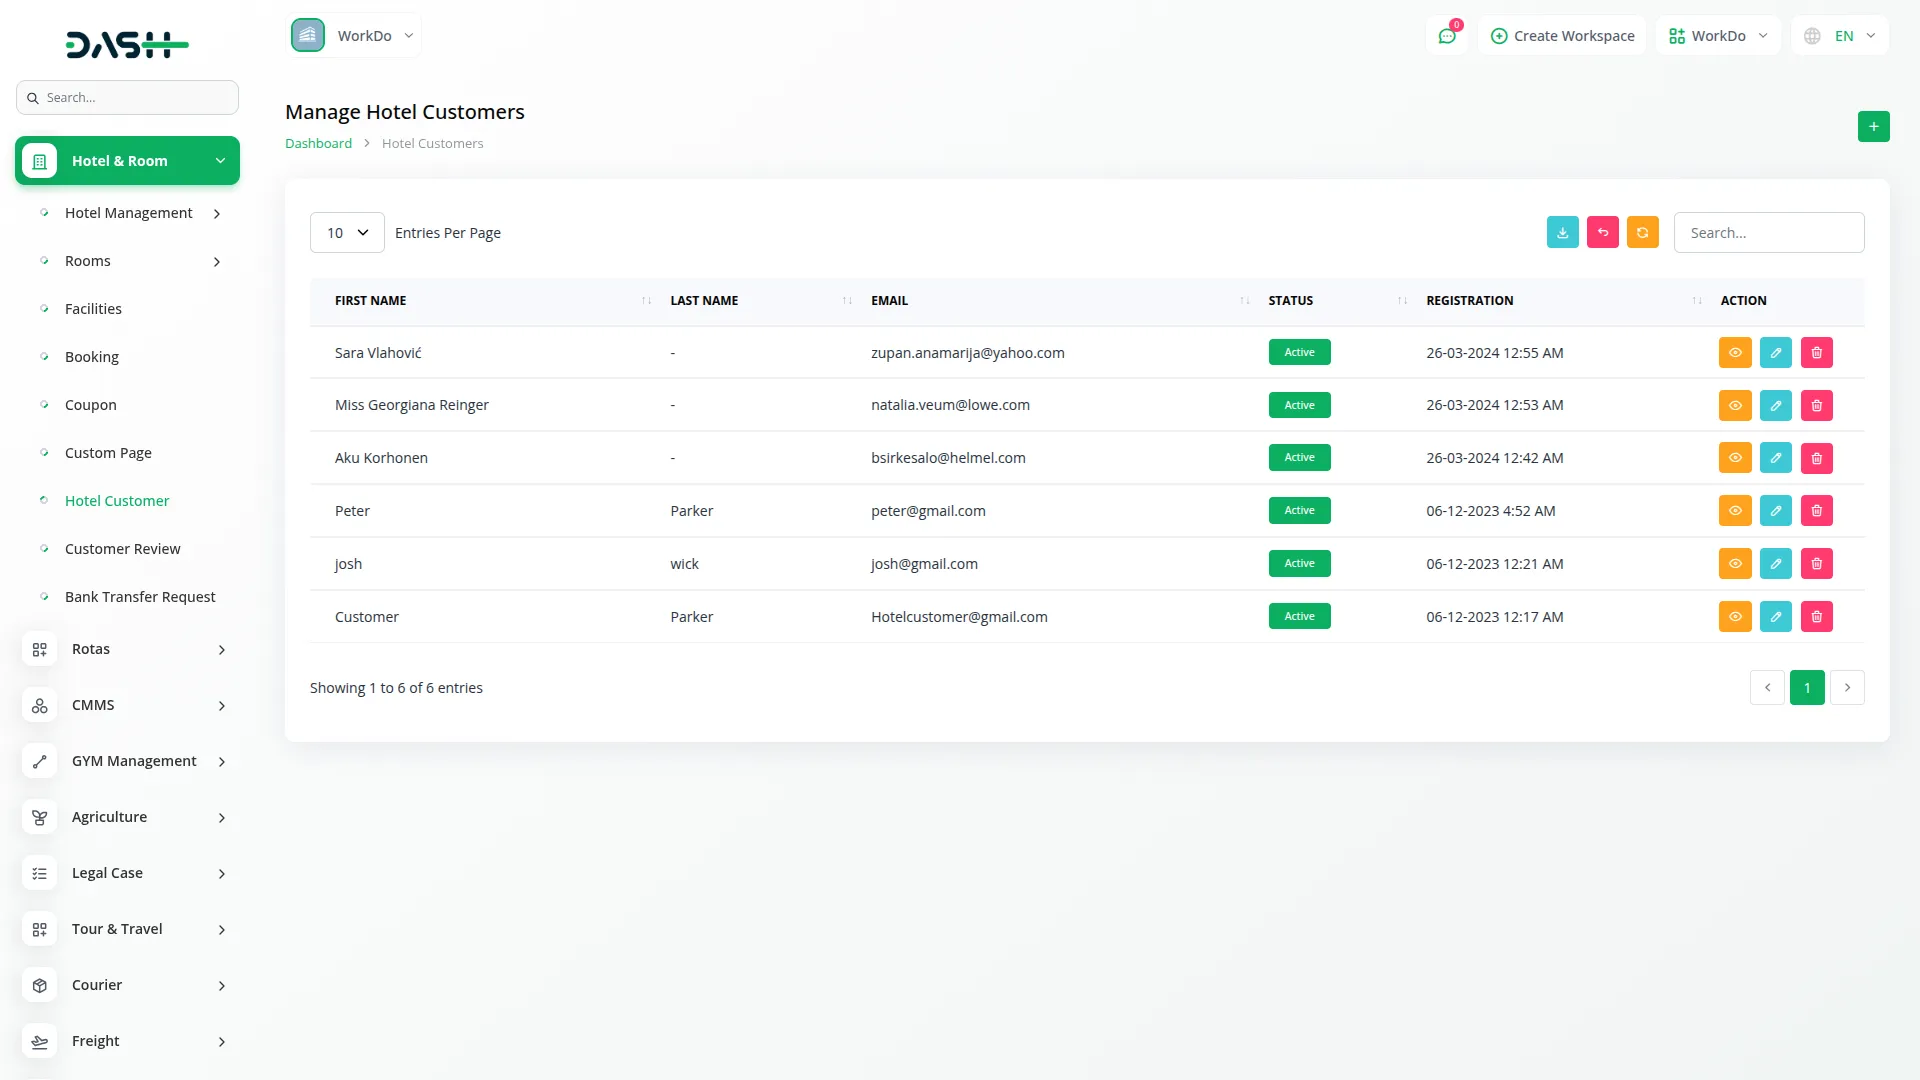
Manage Hotel Customers
- To create a new hotel customer, click the “Create” button at the top right of the Hotel Customers page. Fill in the required fields, such as First Name, Last Name, Email, Password, and Date of Birth (DOB).
- Next, Identification Number, VAT Number, Address details (Address, Address 2, Address alias), Company information, and location details (State, City, Zip/Postal Code).
- You also enter contact information like Home Phone and Mobile Phone, and other information, additional details, and a “Status” toggle to activate the customer account.
- The list page displays complete information, including First Name, Last Name, Email Address, Status (Active/Inactive), Registration date, and time. Use the search functionality, export, reset, and reload buttons to manage this page list.
- In the Actions column, each customer has three buttons: click View to see the customer details, an edit modify customer information, and a delete button to remove customer records from the system.
Manage Customer Review
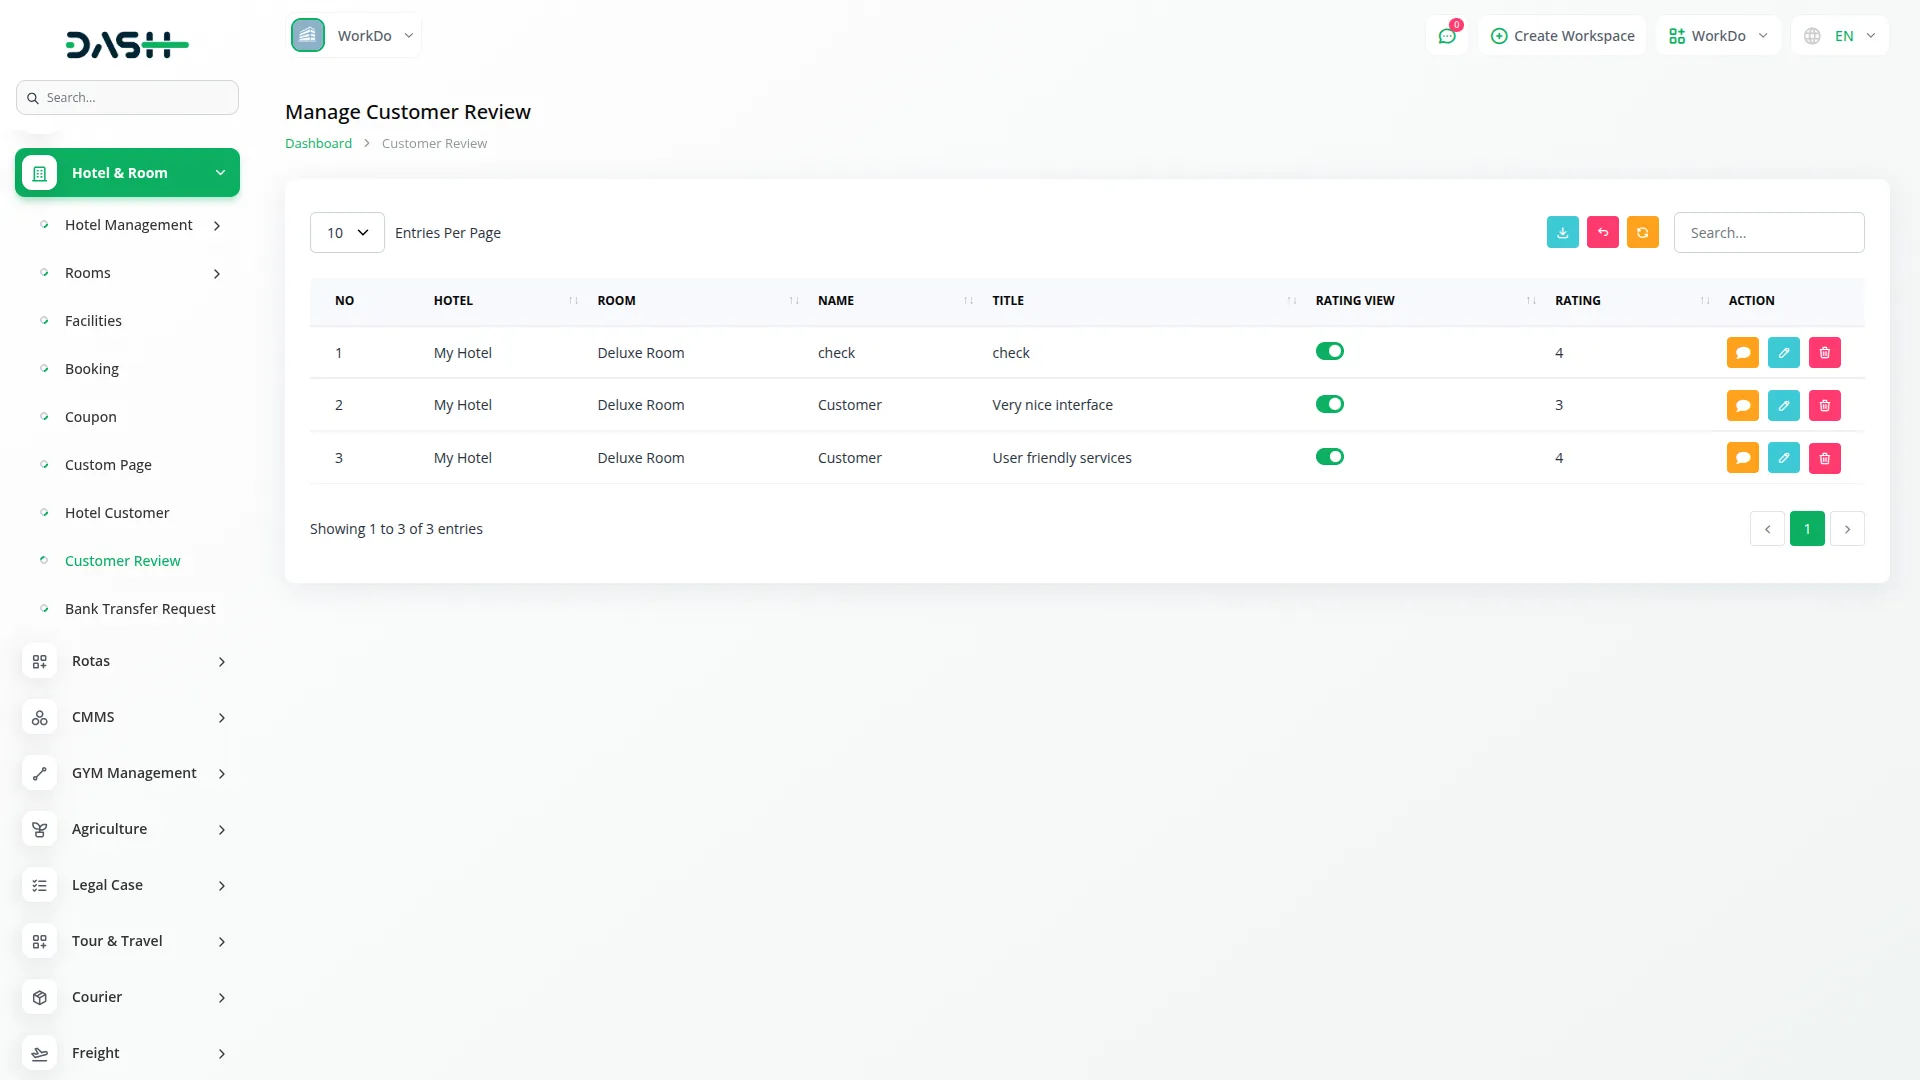
- On this page, you’ll get to see all the rating data, including Hotel, Room, Name, Title, Rating view, and the last rating, with an action column. Use the search, export, reset, and reload buttons to manage this rating list data.
- In the Action column, click Description to see the customer review, click the edit button to modify the record, or the delete button to remove it.
Bank Transfer Request
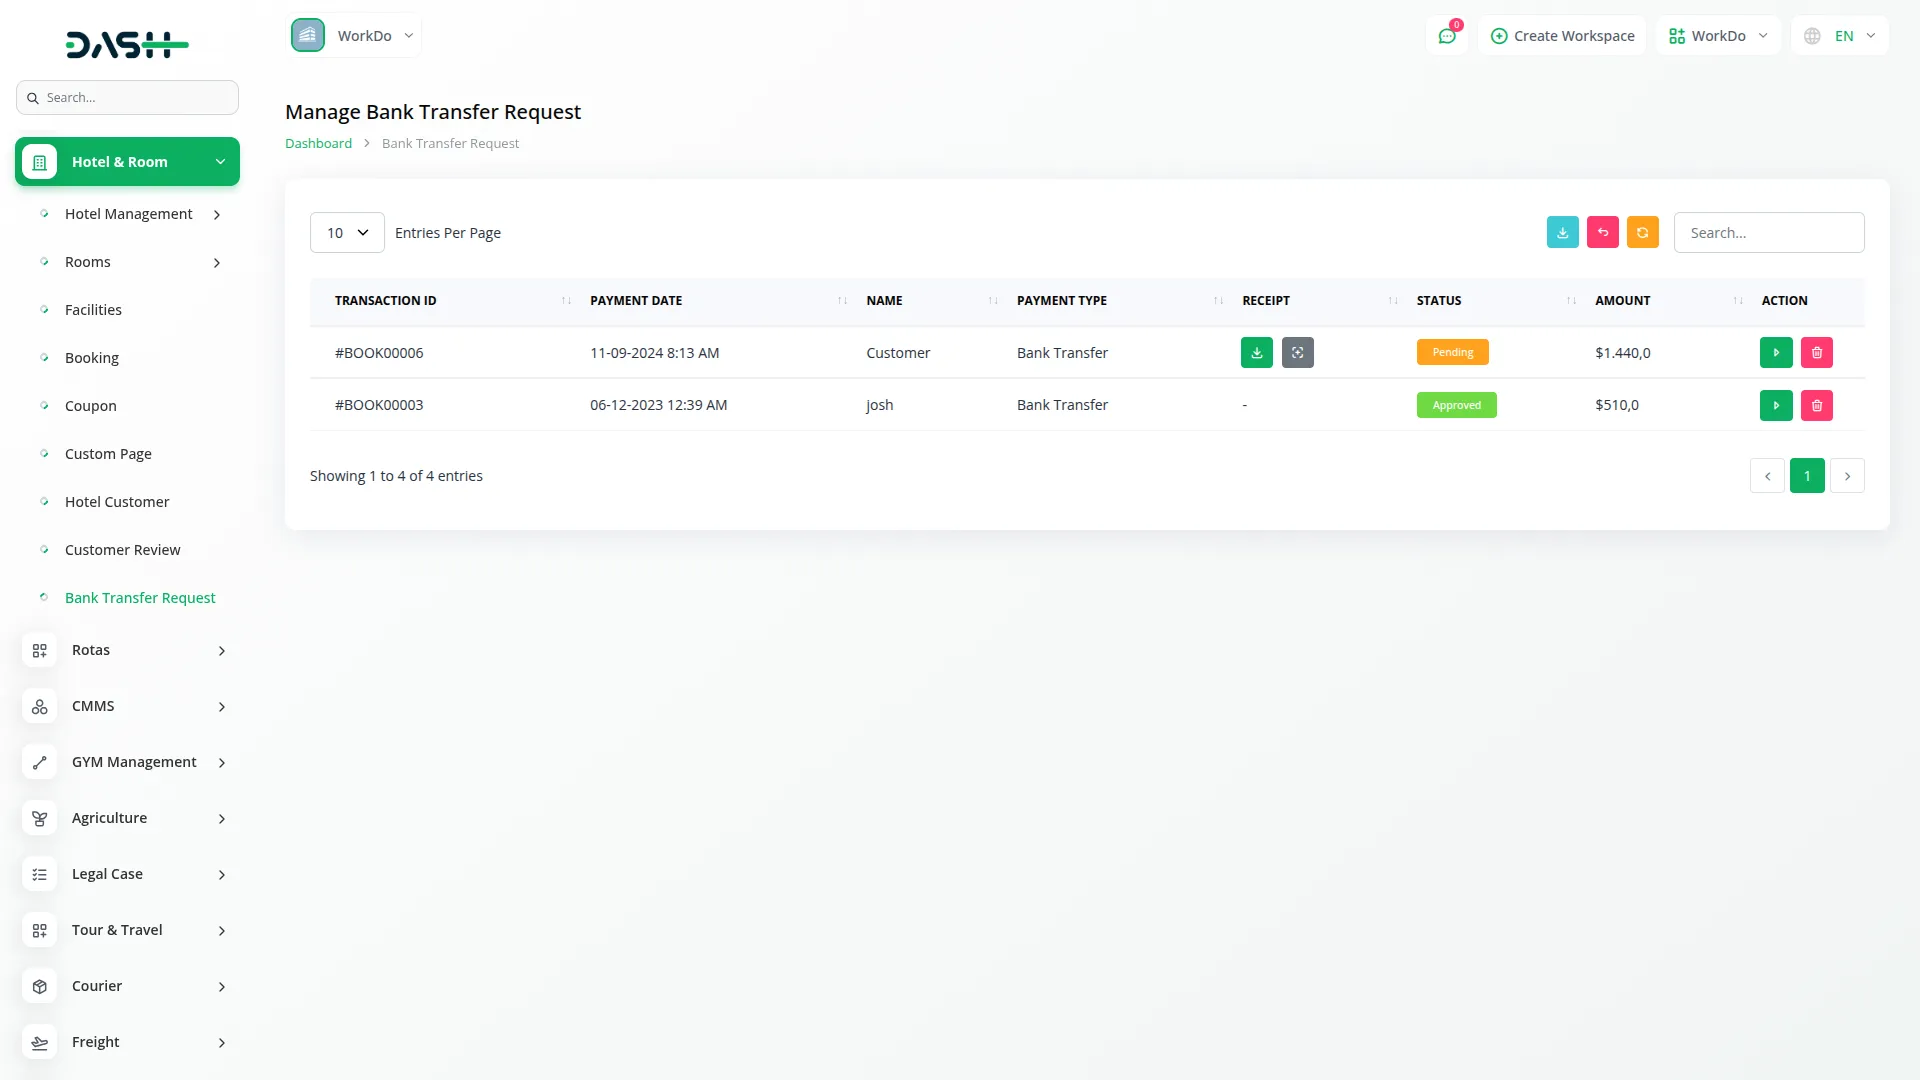
- The Bank Transfer Request page displays a list with Transaction ID, Payment Date, Customer Name, Payment Type, Receipt with download or preview options, Status (pending, rejected, or approved), and Amount information.
- Use the search, export, reset, and reload buttons to manage bank transfer records. With the help of the action column, you can click the action button to open the request action form that allows you to change the status to approved or rejected, and the delete button to remove data permanently from the system.
System Settings
- The System Settings section is the foundation of your hotel management system, where you configure all the basic settings and information that will appear on your website and throughout the system.
Hotel Settings
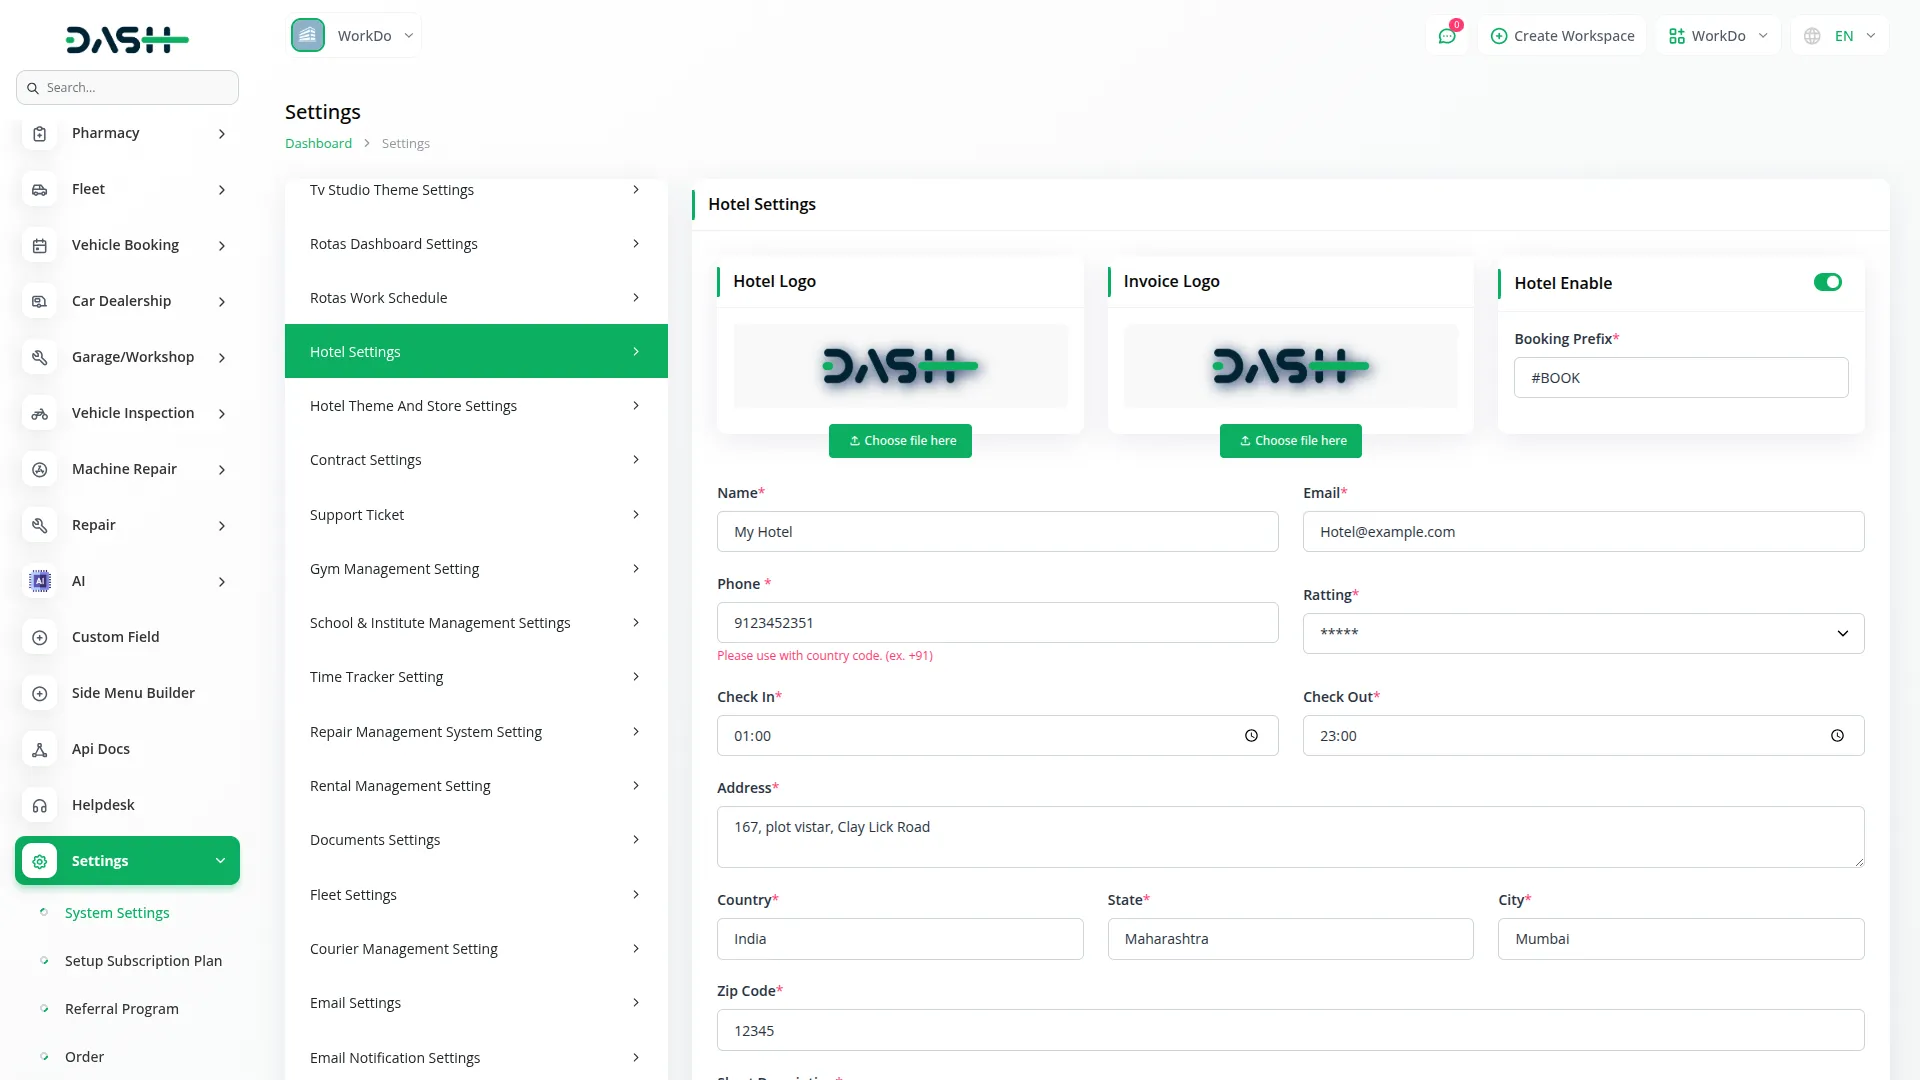
- In the Hotel Settings section, you configure your hotel’s basic information and branding elements. Upload your Hotel Logo for the website header and Invoice Logo for booking documents, and add a Favicon that will appear in browser tabs. Enter your hotel Name, Email, Phone number, and set your Rating display.
- Configure your check-in and check-out times, then add your complete Address, including Country, State, City, and Zipcode. Enter a Short Description for quick hotel highlights and a detailed Policy section explaining your hotel rules. Add a comprehensive Description that showcases your hotel’s features and amenities.
- Use the Hotel Enable toggle to control your hotel’s visibility – when ON, your hotel will be visible on the website; otherwise, it displays as not found to visitors.
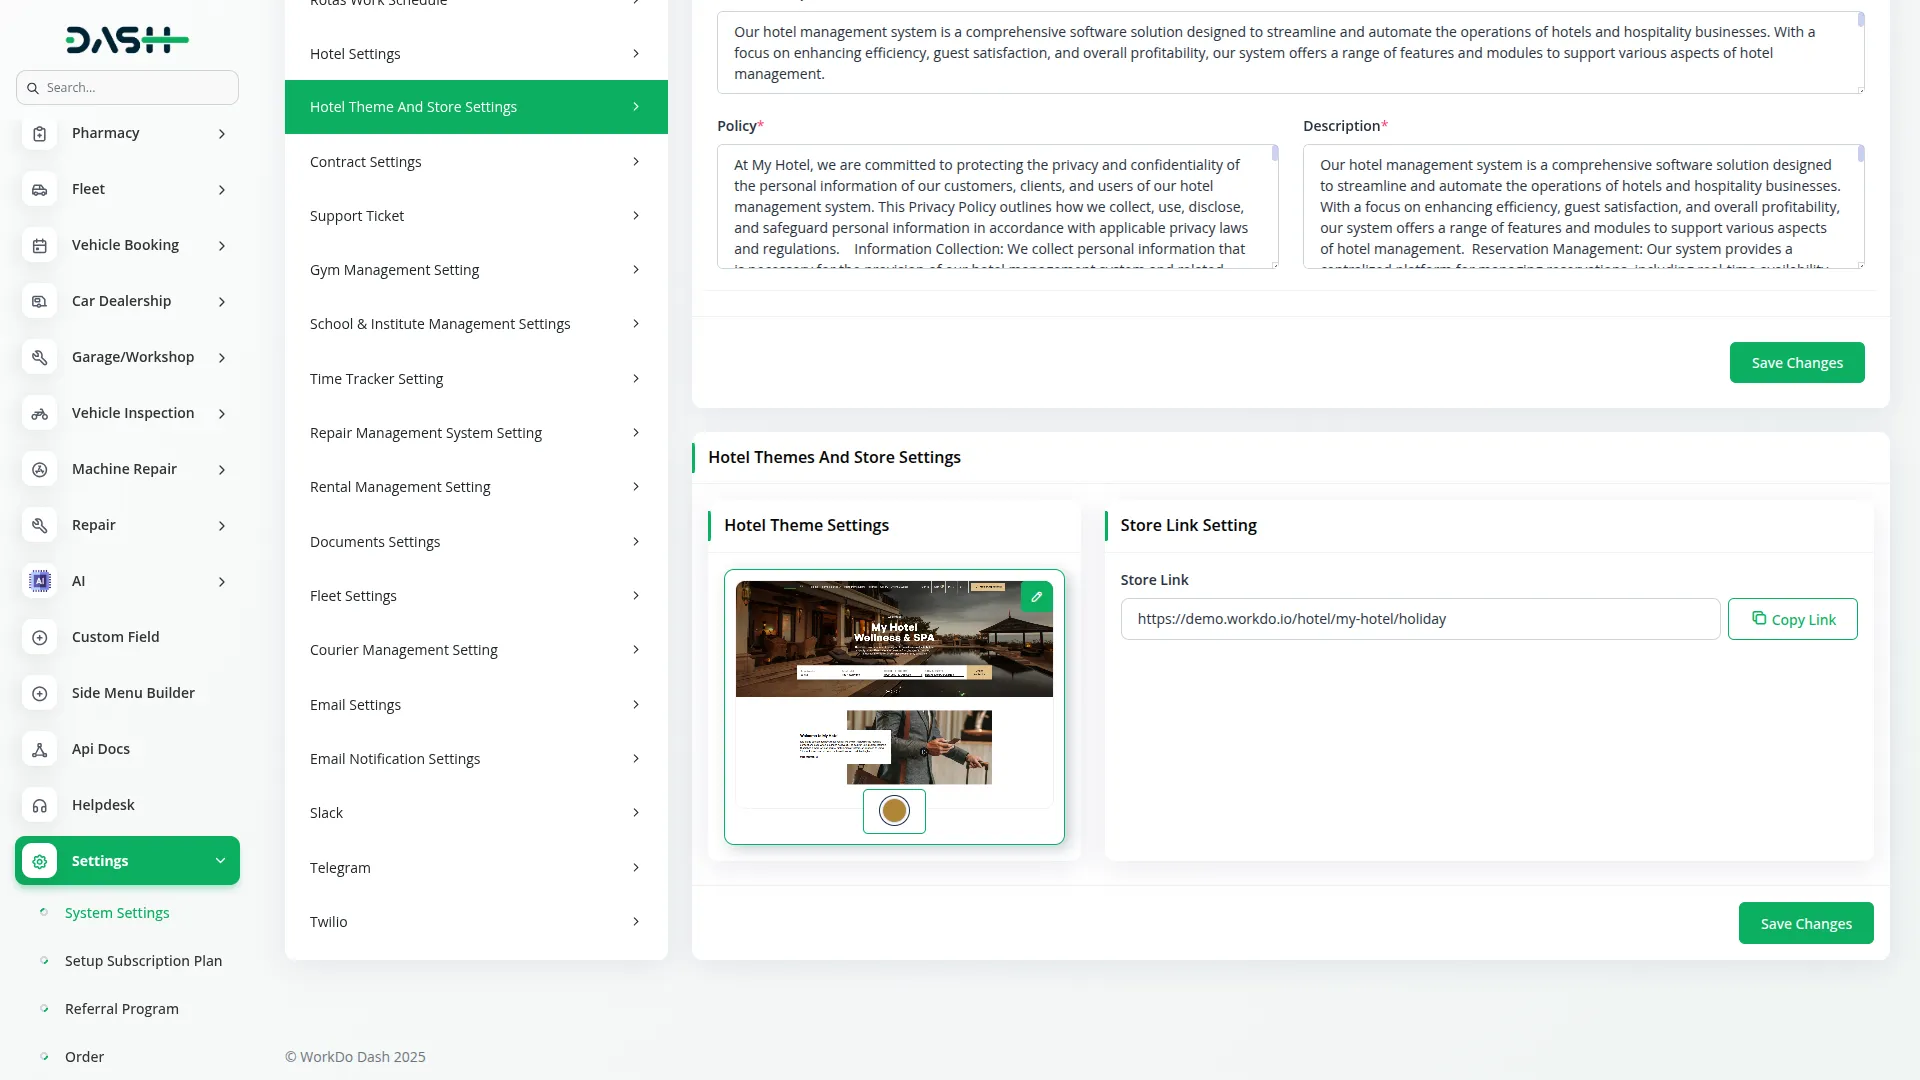
Hotel Themes And Store Settings
- To customize your website appearance, click the edit button in Hotel Themes and Store Settings to access the theme customization interface. The edit page displays four main sections on the right side: Header, Home, Footer, and Store Link Settings.
Store Link Setting
- Configure your hotel’s public website URL and accessibility settings. This section manages the frontend link generation and ensures your hotel website is properly accessible to visitors.
Header Section
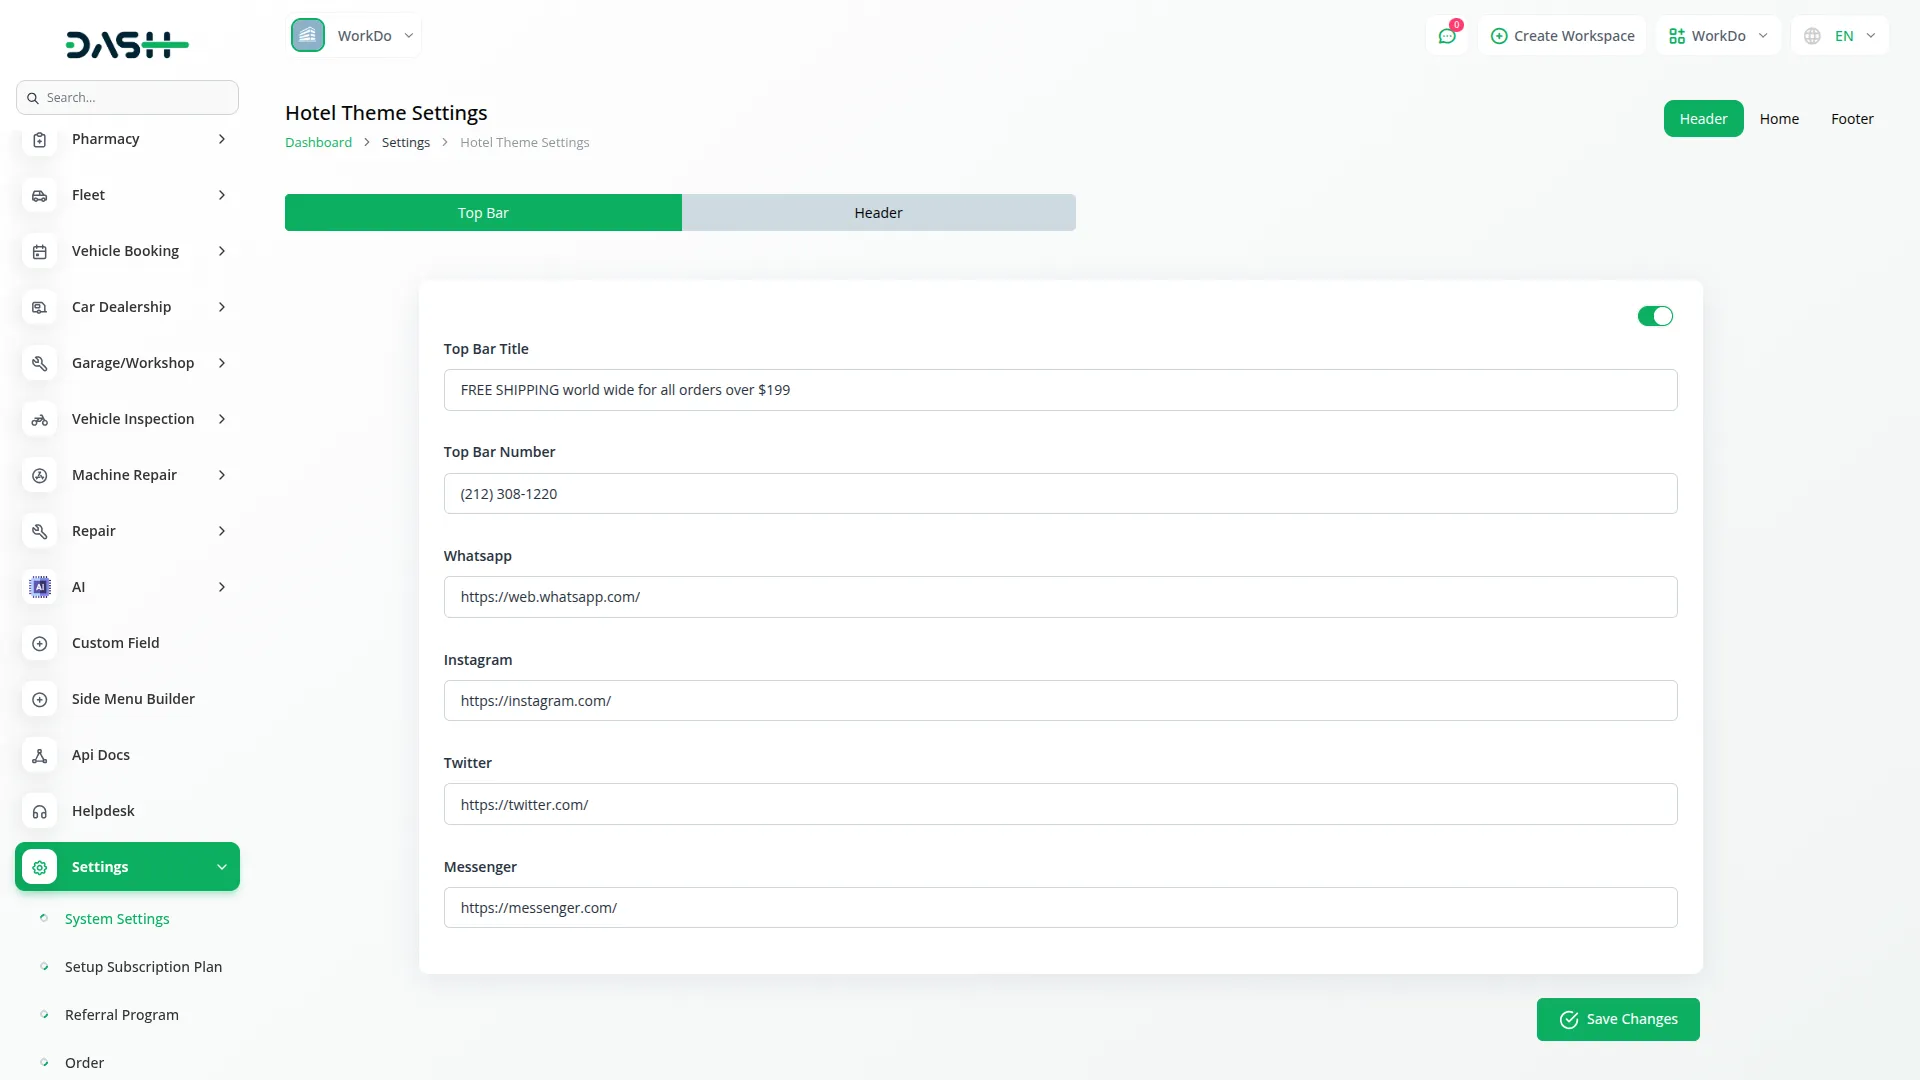
- Configure the Top Bar by using the Top Bar Section toggle to show or hide this area. Enter your Top Bar Title and Top Bar Number for contact display. Add social media links for WhatsApp, Instagram, Twitter, and Messenger to encourage customer engagement.
- Set up the Header area using the Header Section toggle, then add your main Title, Sub text, and upload a Background Image that represents your hotel’s atmosphere.
Home Section
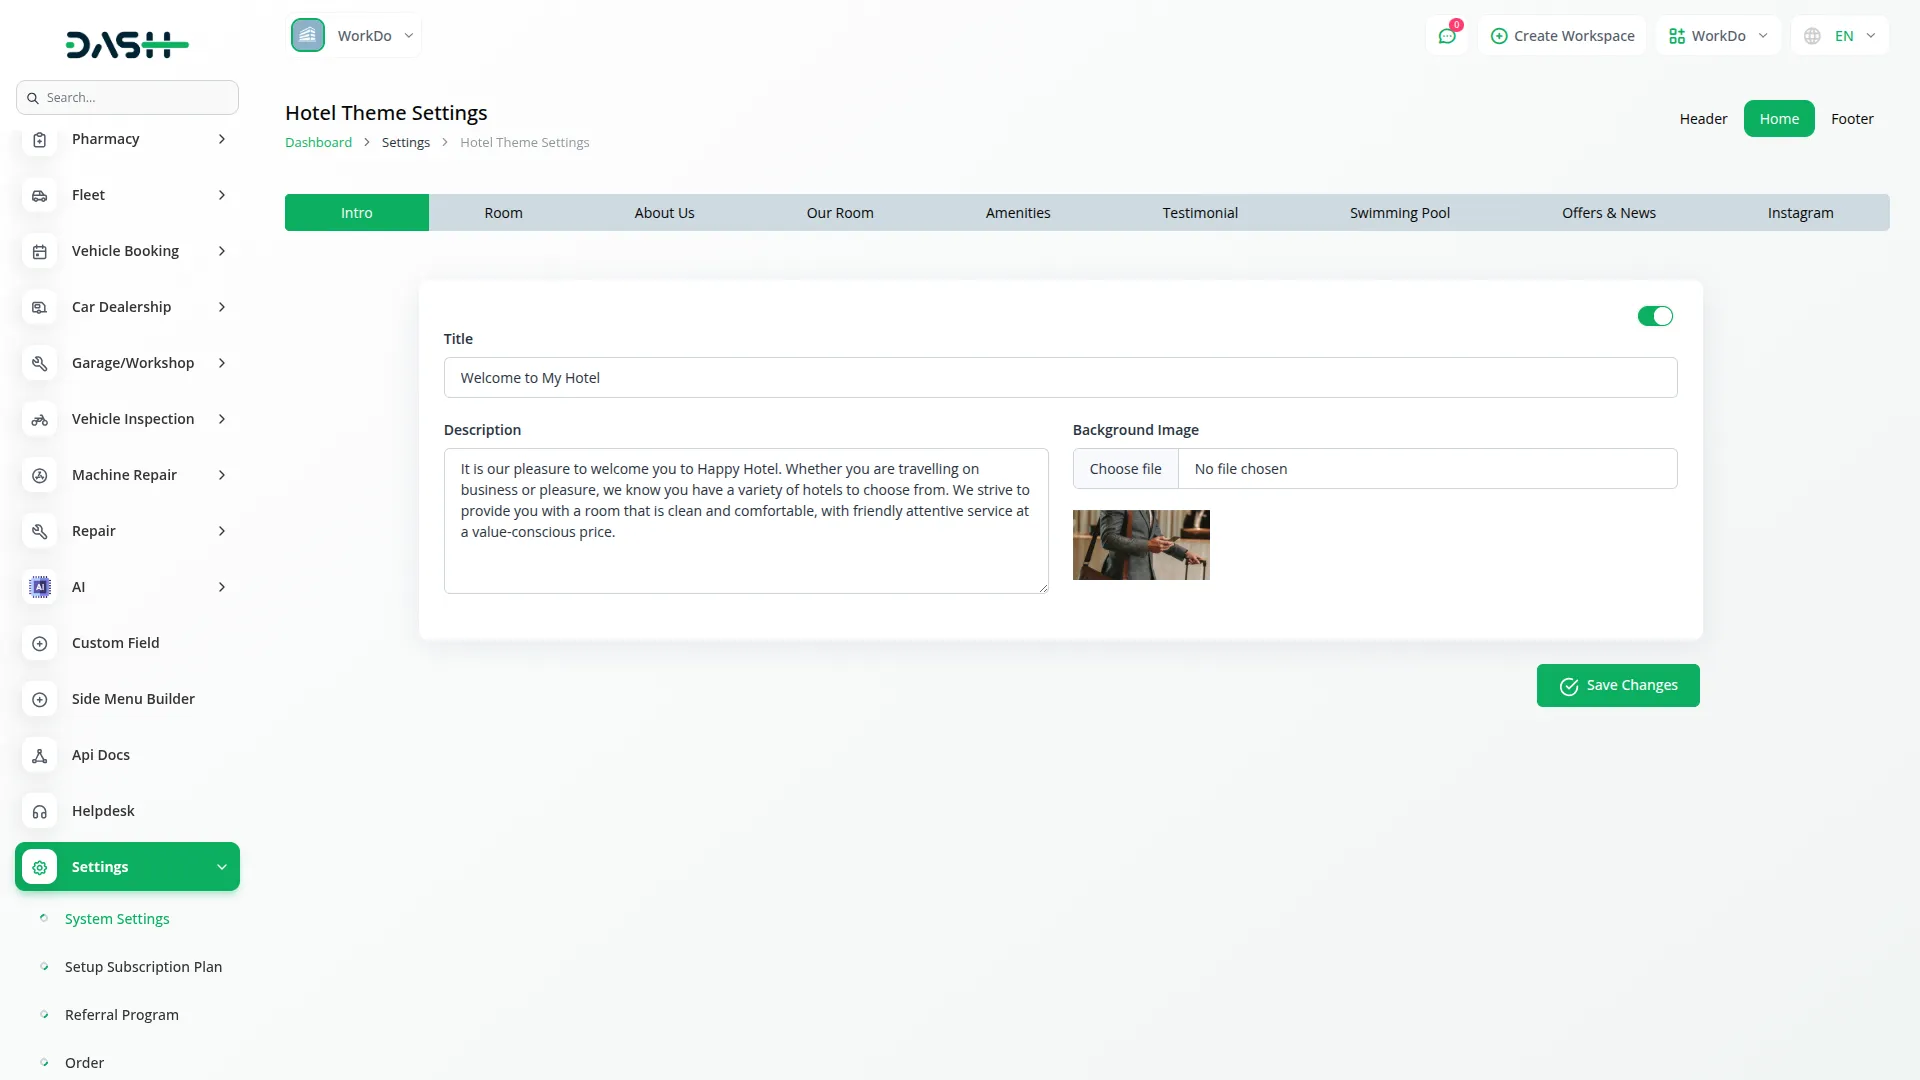
- Customize the Intro section using the toggle control, then enter your Title, Description, and upload a Background Image for the introduction area.
- Configure the Room section with the toggle and add your Title and Description to introduce your accommodation options.
- Set up the About Us section with toggle control, entering Title, Description, Sub Description, and Background Image to tell your hotel’s story.
- Configure the Our Room section similarly with toggle, Title, Description, Sub Description, and Background Image for room showcasing.
- Customize the Amenities section using the toggle and add a Title and Description to highlight your hotel facilities.
- In the Testimonial section, use the toggle control and add 5 sets of testimonial information, including Image, Title, Sub Text, and Description for customer feedback display.
- Set up the Swimming Pool section with a toggle, Title, Description, and Background Image to showcase this facility.
- Configure the Offers & News section with the toggle and add 5 sets of content, including Title, Sub Title, Date, and Image for promotional content.
- Customize the Instagram section using the toggle and upload multiple images to create a social media gallery.
Footer Section
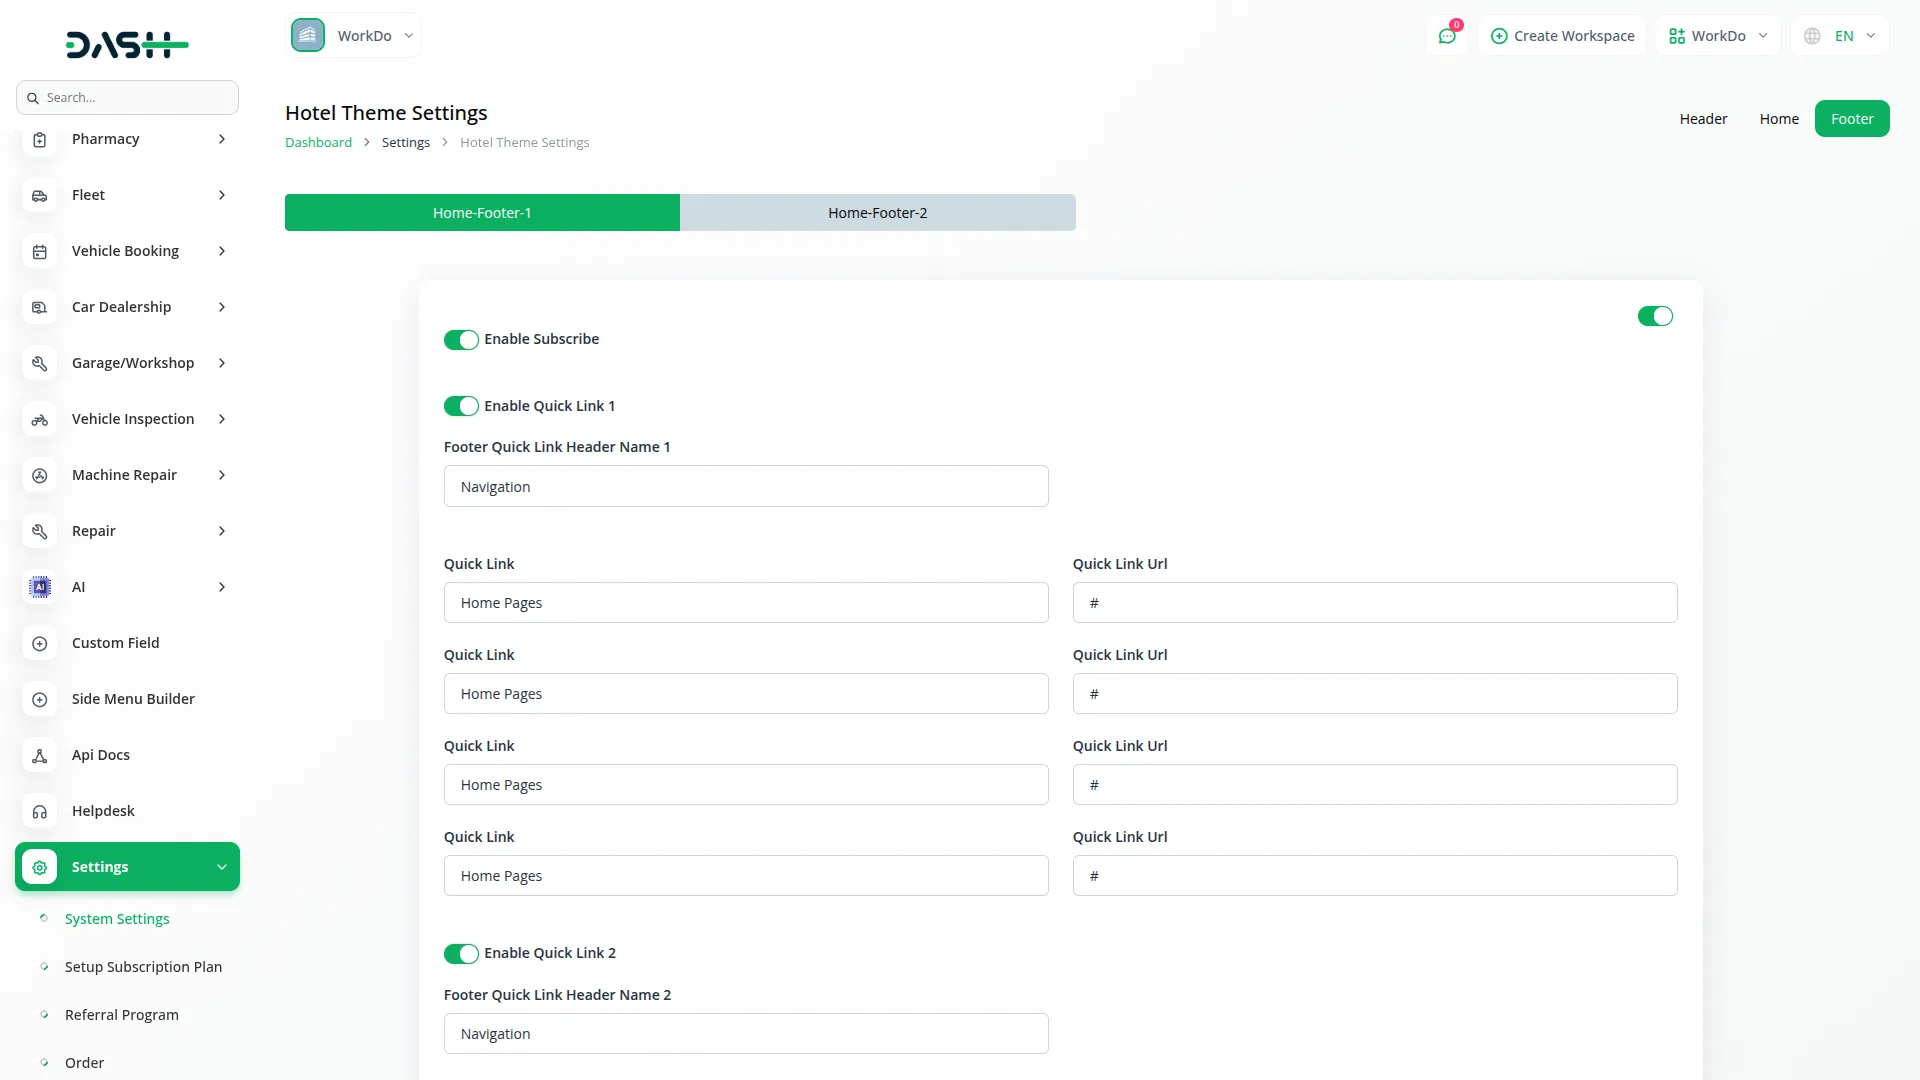
- Configure the Home-Footer-1 section using the toggle control. Enable the Subscribe toggle for newsletter functionality, then set up three quick link sections. For each section, use the Enable Quick Link toggle, enter the Footer Quick Link Header Name, and add 4 Quick Links with their corresponding Quick Link URLs. Enable the Payment Method toggle to display payment images in the footer.
- Set up the Home-Footer-2 section with the toggle control, add Footer Note for additional information, and configure 6 sets of Social Link Icon and Social Link combinations. Add Store Custom JS for any custom functionality needed on your website.
Hotel & Room Management Website
Important Note: Only the sections set through System Settings → Hotel Themes And Store Settings will be displayed on the website. Please ensure the desired sections are properly configured.
Favicon & Header
This section includes the small icon shown on the browser tab (favicon) and the main navigation header seen at the top of every page. The header displays the hotel logo and a menu linking to key sections like Home, Custom Pages, along with the cart icon, language selection dropdown, and authentication options.
- Go to System Settings → Hotel Settings to upload the favicon and hotel logo.
- The menu items are auto-linked to their respective page sections from the Custom Page Module.
- The logo file is retrieved dynamically and shown across all pages.
- The cart icon displays a real-time count badge showing cart quantity.
- Authentication shows “Sign In” for guests or “Account” dropdown for logged users (My Profile, My Bookings, Logout).
- The language selection dropdown is available for multi-language support.
Top Bar Section
This is the communication bar at the very top of the homepage, displaying contact information and social media links for quick customer access.
- Go to System Settings → Hotel Themes And Store Settings → Header → Top Bar Section.
- You can set the following values: Title, Phone Number, Social Icons & Links (WhatsApp, Instagram, Twitter, Messenger).
- These fields are dynamically displayed on the homepage top bar.
Header/Banner Section
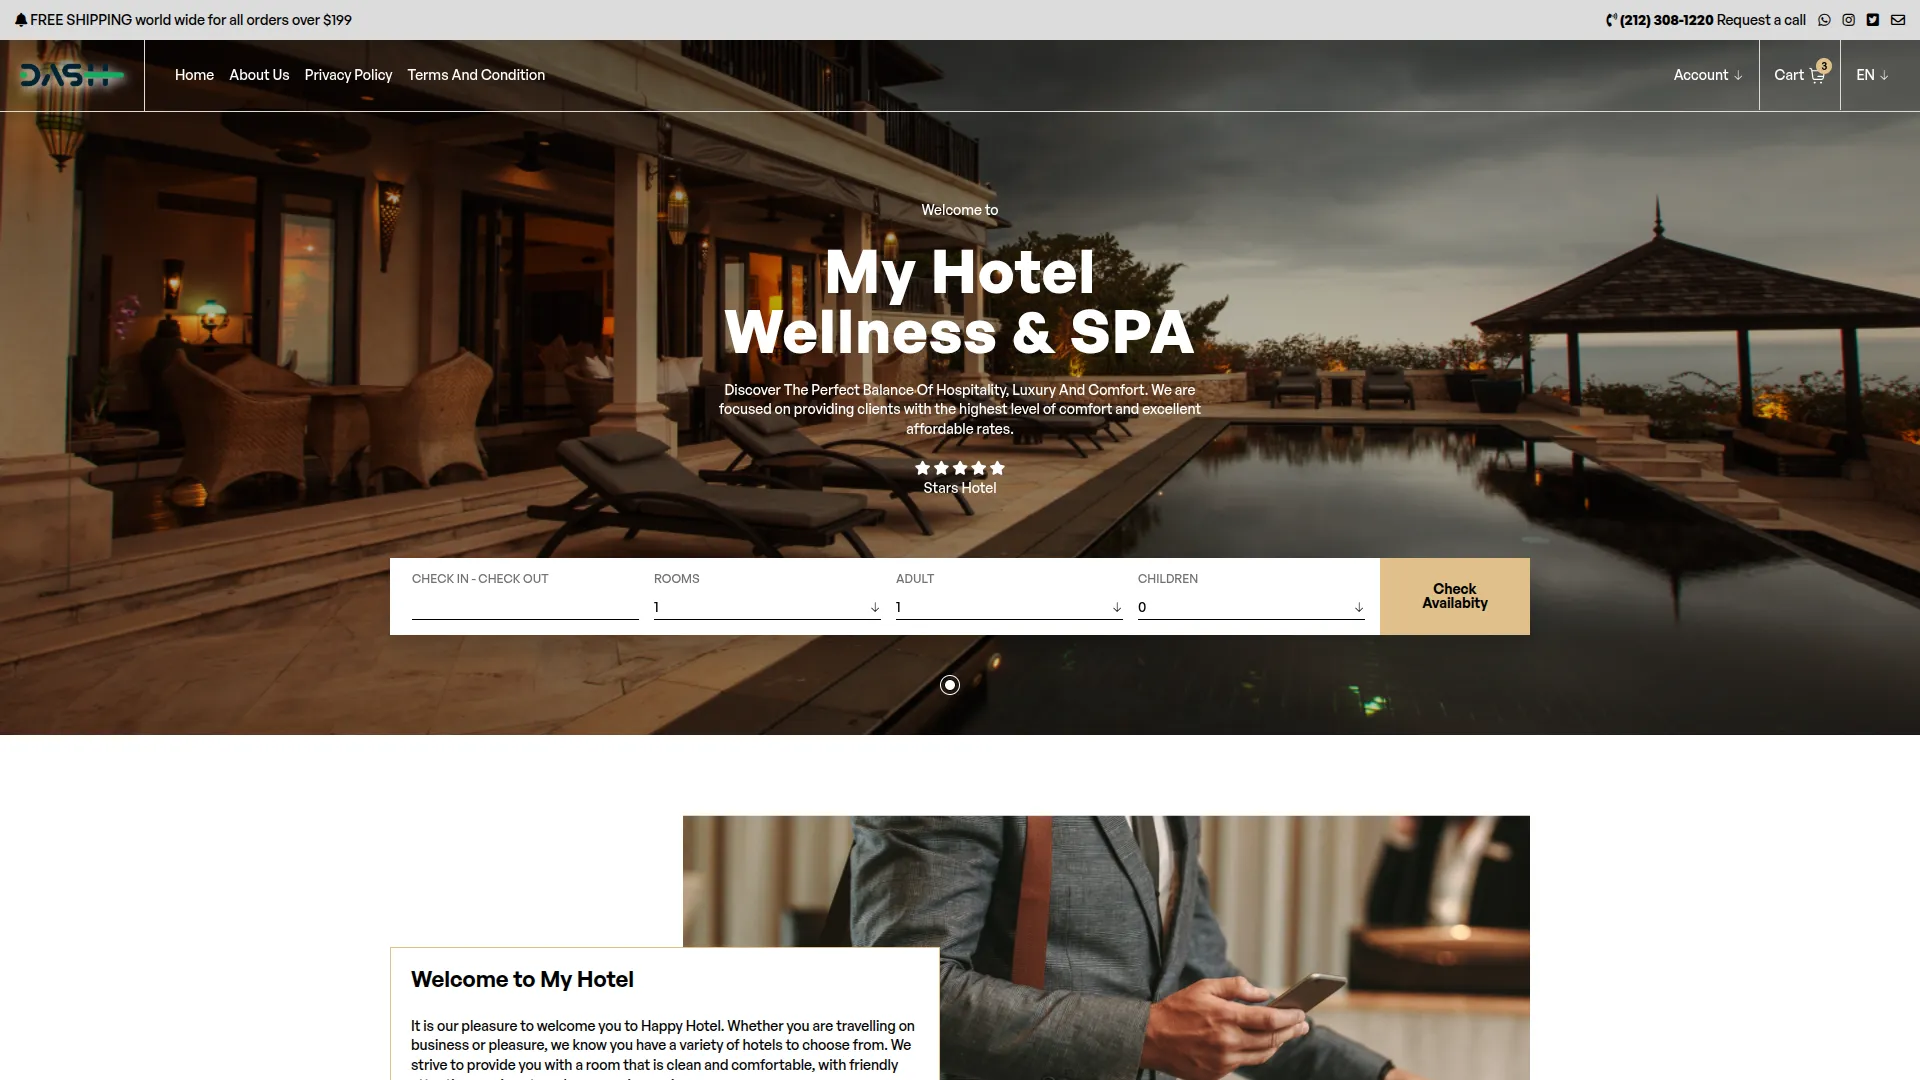
This is the main visual section of the homepage, usually showing a large background image with the hotel name, title, description, star rating, and the availability search form. It introduces visitors to the hotel and encourages booking interaction.
- Go to System Settings → Hotel Settings.
- You can set the following values: Hotel Name and Star Rating.
- Go to System Settings → Hotel Themes And Store Settings → Header → Header/Banner Section.
- You can set the following values: Title, Sub Text, and Background Image.
- Includes availability search form with Check-in/Check-out dates, Rooms, Adults, and Children fields.
- These fields are dynamically displayed on the homepage banner.
Intro Section
This section provides a brief introduction to your hotel with supporting imagery to create an appealing first impression.
- Go to System Settings → Hotel Themes And Store Settings → Home → Intro Section.
- You can update: Title, Description, and Background Image.
- These values will render dynamically within the homepage intro block.
Room Section
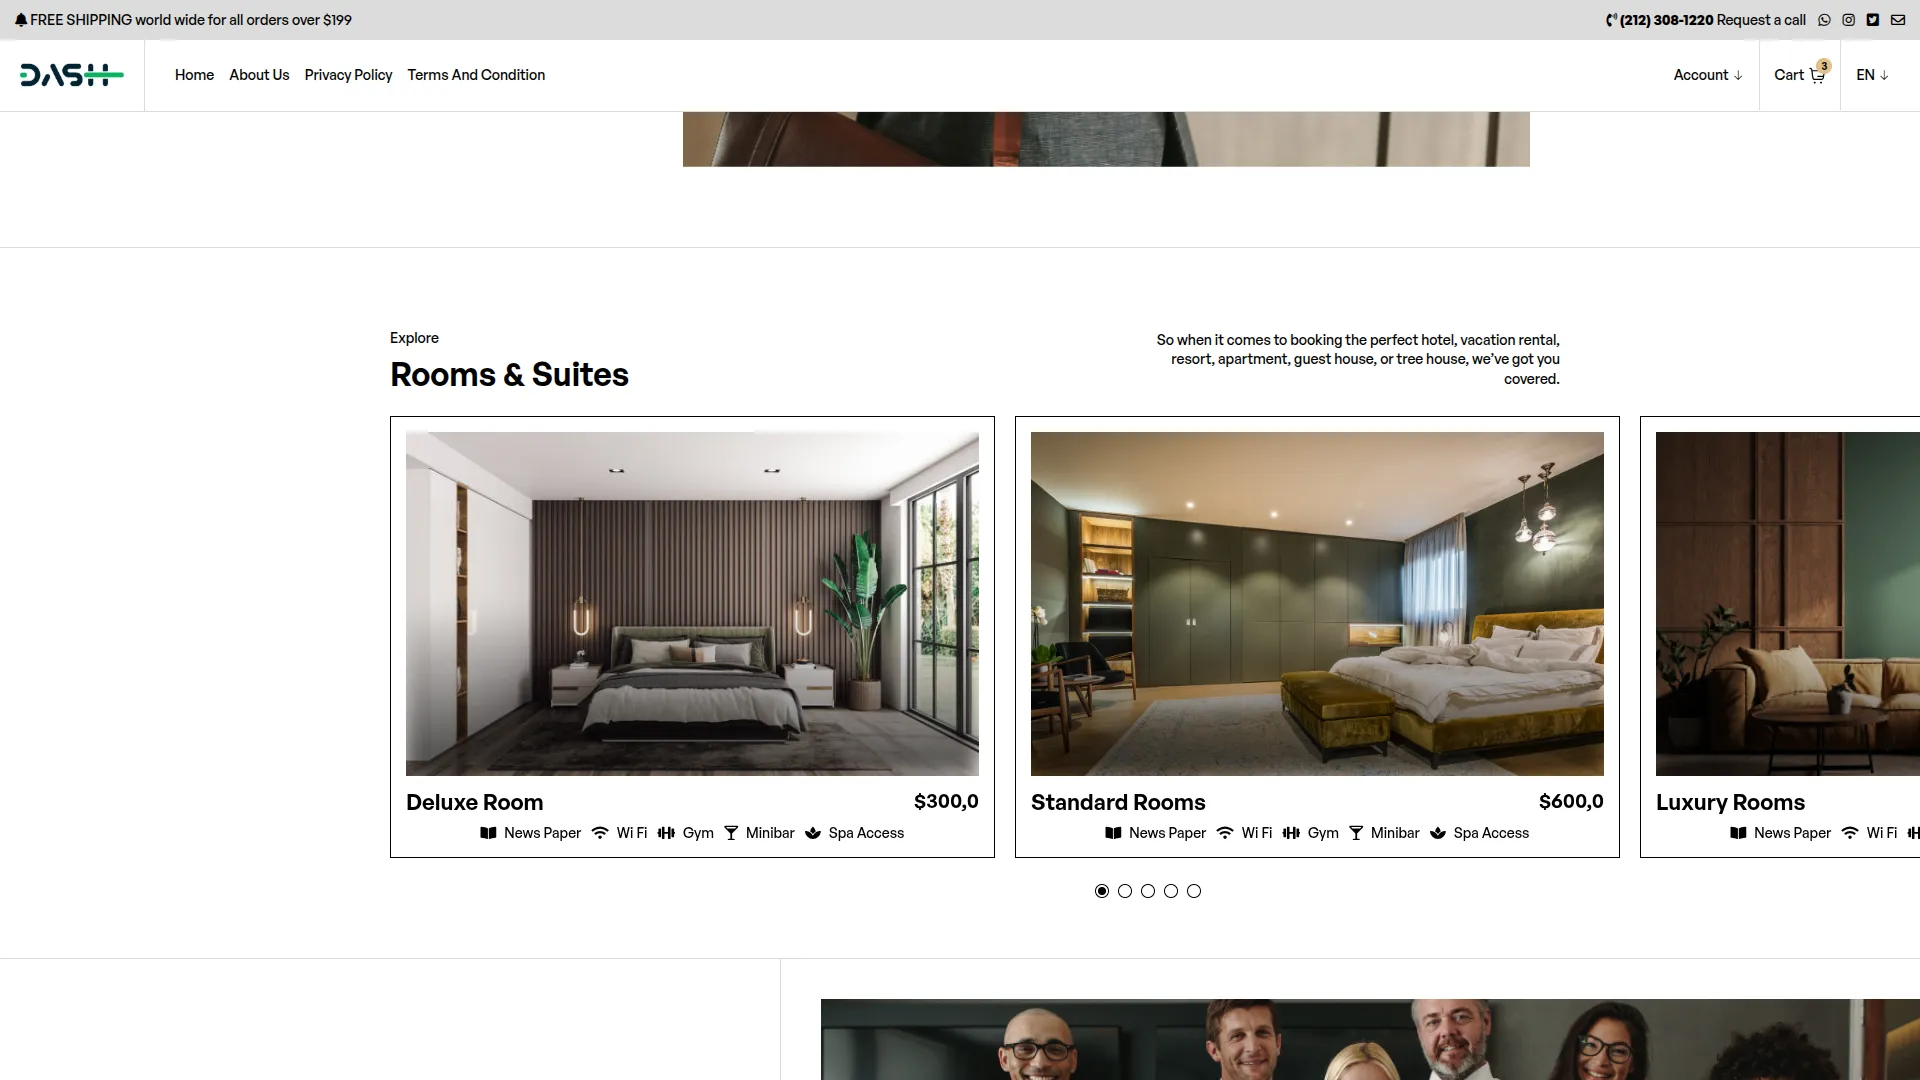
This section showcases featured rooms available at your hotel. Each room is displayed with images, room type, pricing, and key features to help guests make informed decisions.
- Go to System Settings → Hotel Themes And Store Settings → Home → Room Section.
- You can set: Section Title, Description.
- Featured rooms with images, room types, pricing, and features are pulled dynamically from the Room Types module.
- Clicking on room images or room types opens the detailed Room Detail page.
About Us Section
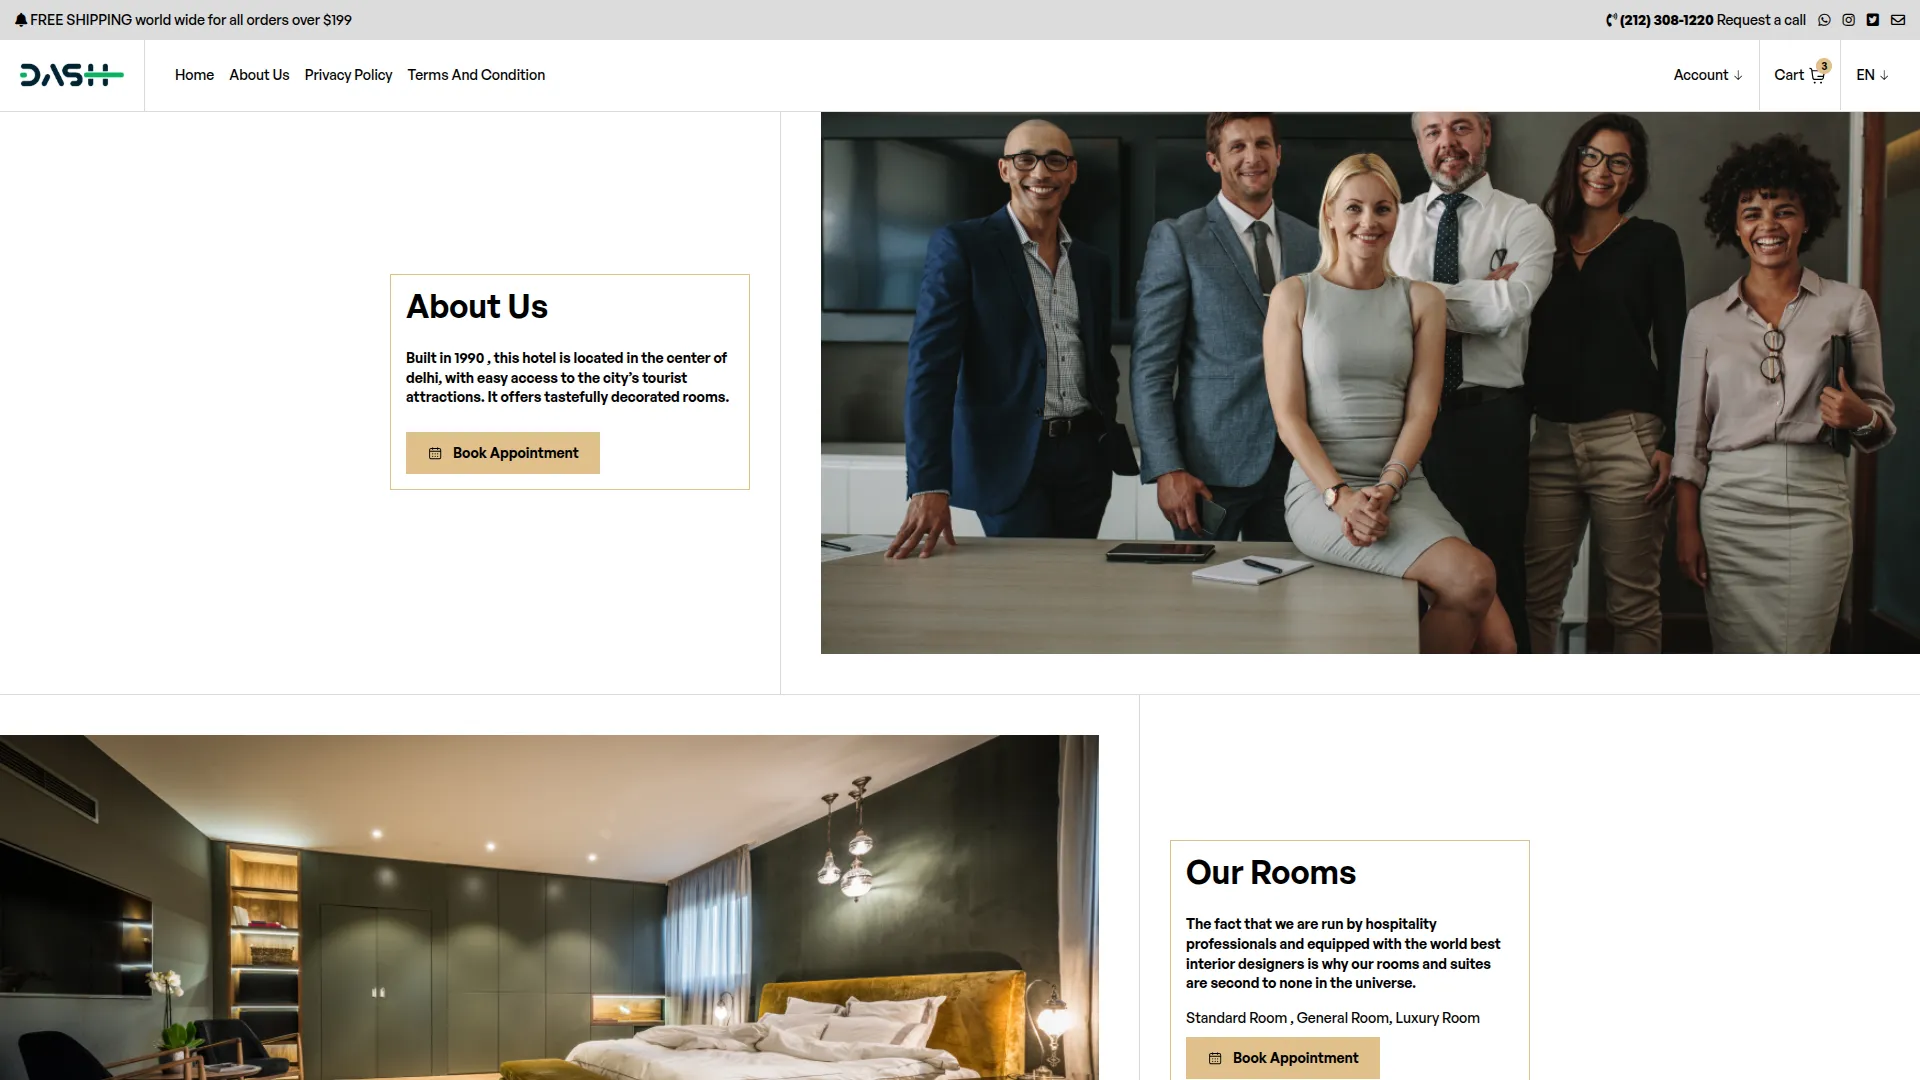
This section provides information about your hotel’s story, values, and what makes it special for potential guests.
- Go to System Settings → Hotel Themes And Store Settings → Home → About Us Section.
- You can update: Title, Description, Short Description, and Background Image.
- These values will render dynamically within the homepage About Us block.
Our Room Section
This is an additional room showcase section that highlights your accommodation offerings with visual appeal.
- Go to System Settings → Hotel Themes And Store Settings → Home → Our Room Section.
- You can set: Title, Description, Short Description, and Background Image.
- Content is displayed dynamically on the homepage.
Amenities Section
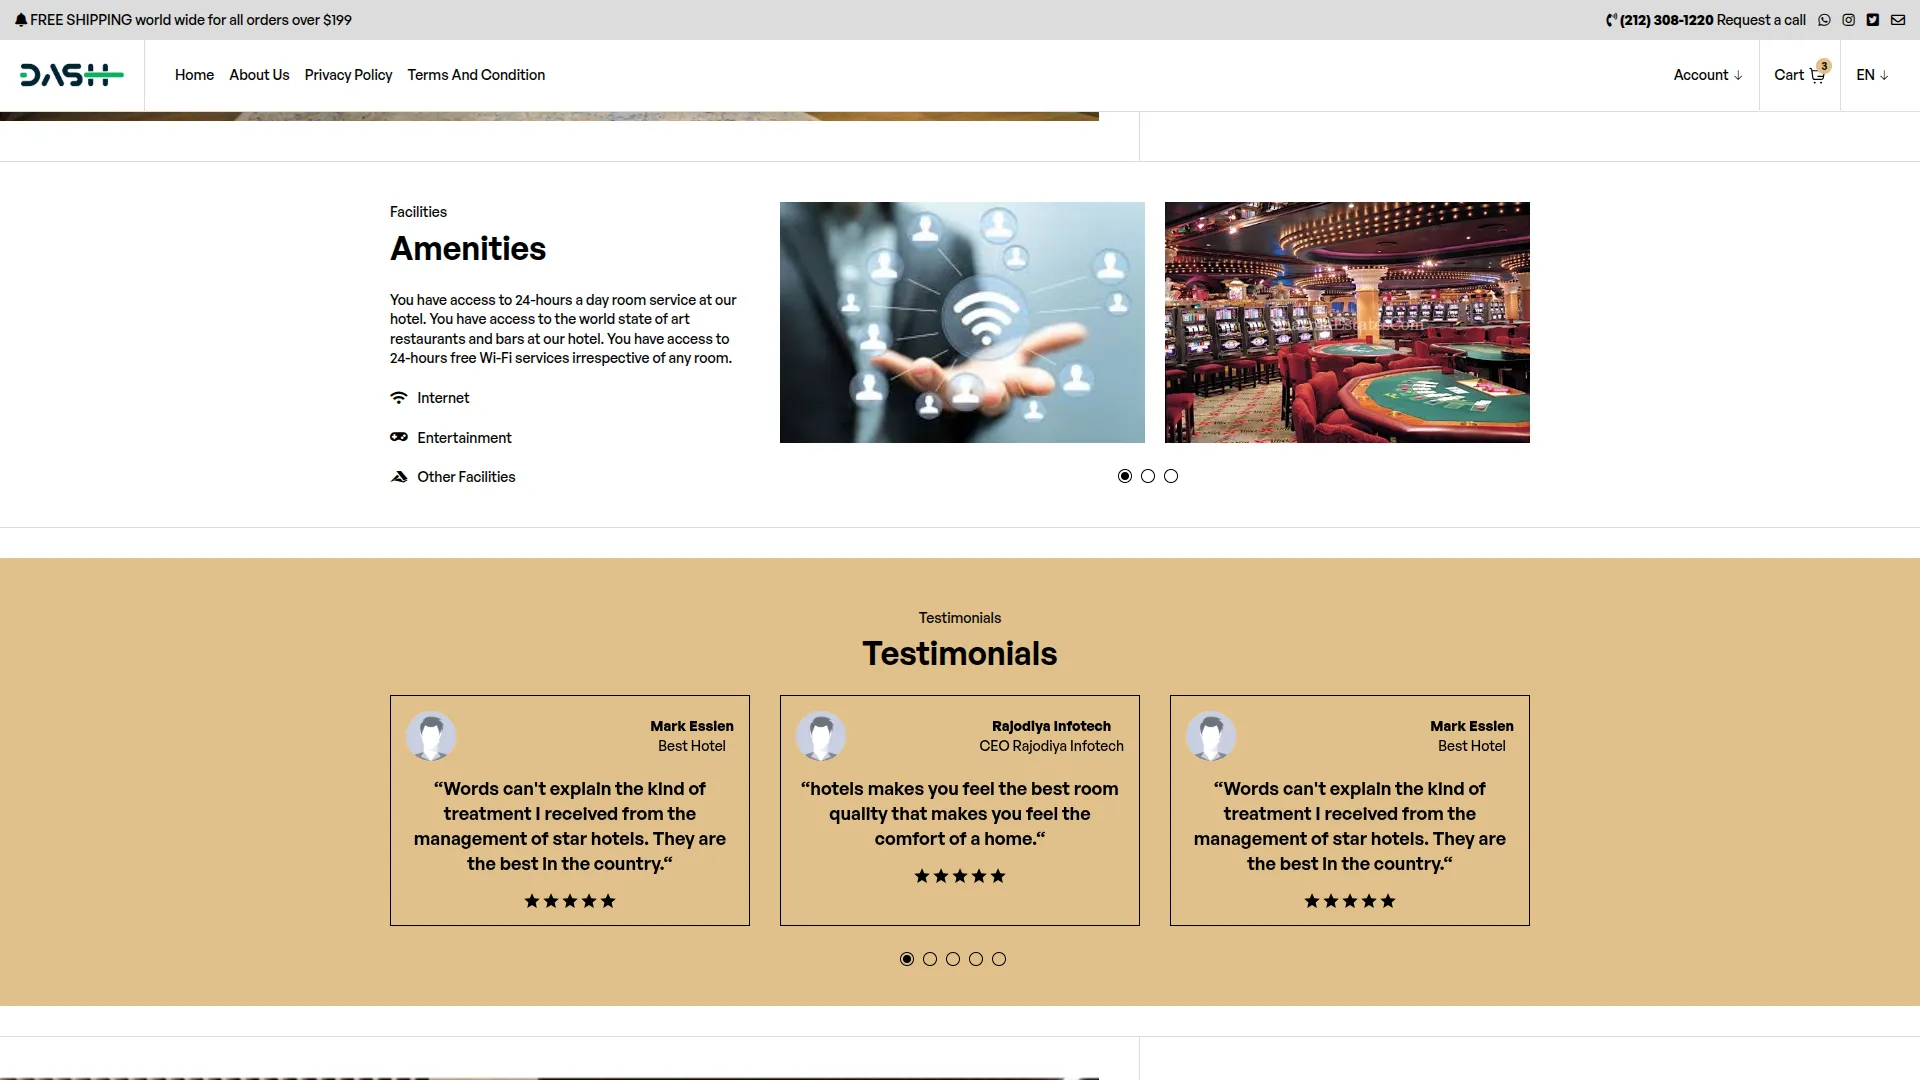
This section displays hotel facilities and amenities with visual icons and images to showcase what guests can expect during their stay.
- Go to System Settings → Hotel Themes And Store Settings → Home → Amenities Section.
- You can update: Section Title, Description.
- Hotel amenities with images and icons are managed through the Amenities module.
- Each amenity displays with its corresponding visual identifier and description.
Testimonials Section
This section displays reviews and feedback about guest experiences. It features testimonials that demonstrate your hotel’s quality and service excellence.
- Testimonials are managed through System Settings → Hotel Themes and Store Settings → Home → Testimonial Section.
- You can set: Image, Title, Sub Text, Description.
- These values will render dynamically within the homepage testimonial block.
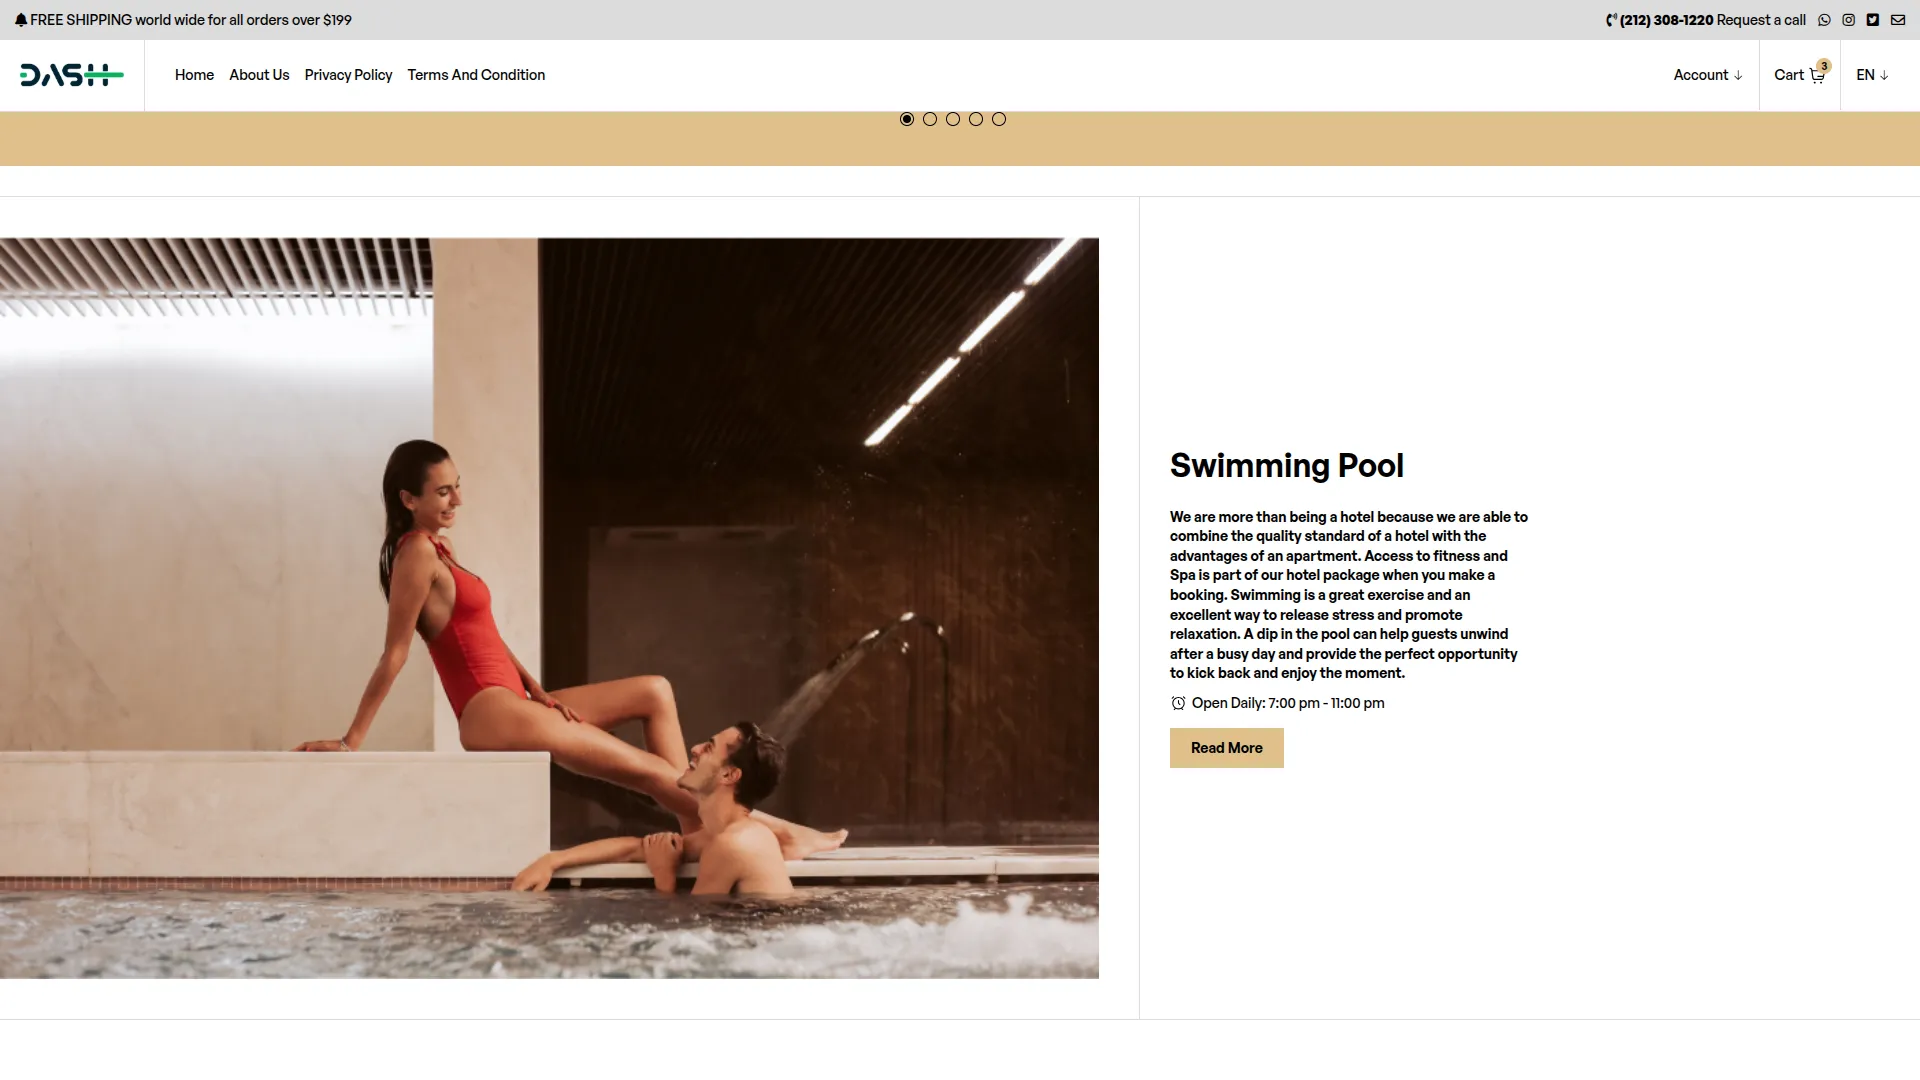
Swimming Pool Section
This section showcases your hotel’s swimming pool facility with appealing imagery and descriptions to highlight this amenity.
- Go to System Settings → Hotel Themes And Store Settings → Home → Swimming Pool Section.
- You can update: Title, Description, and Background Image.
- These values will render dynamically within the homepage facility showcase block.
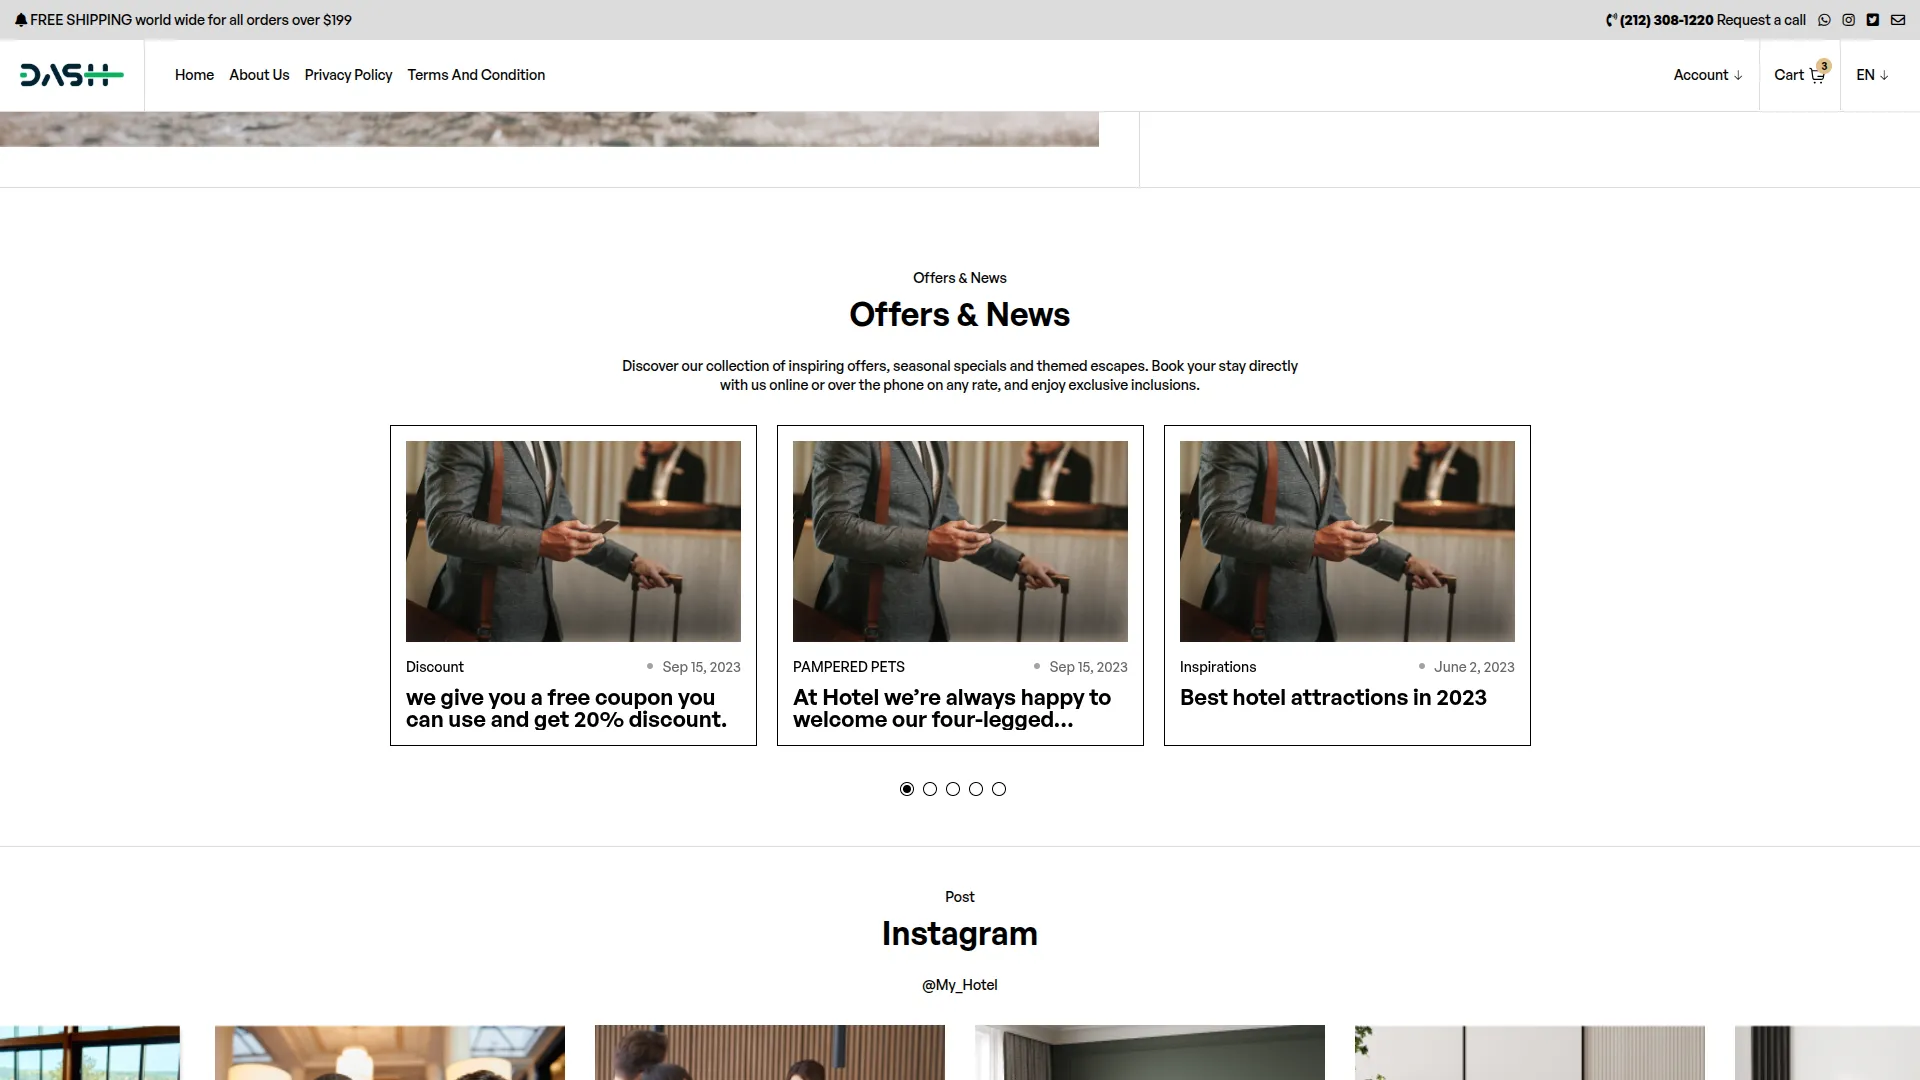
Offers & News Section
This section displays blog-style content about hotel offers, news, and updates. Visitors can read about special deals, events, and hotel announcements.
- Go to System Settings → Hotel Themes And Store Settings → Home → Offers & News Section.
- You can set: Title, Sub Title, Date, and Image.
Instagram Section
This section shows your hotel’s Instagram feed, displaying social media images in an attractive gallery layout to engage visitors.
- Instagram images are managed through System Settings → Hotel Themes And Store Settings → Home → Instagram Section.
- You can upload multiple images.
- Images are displayed in a visually appealing grid format.
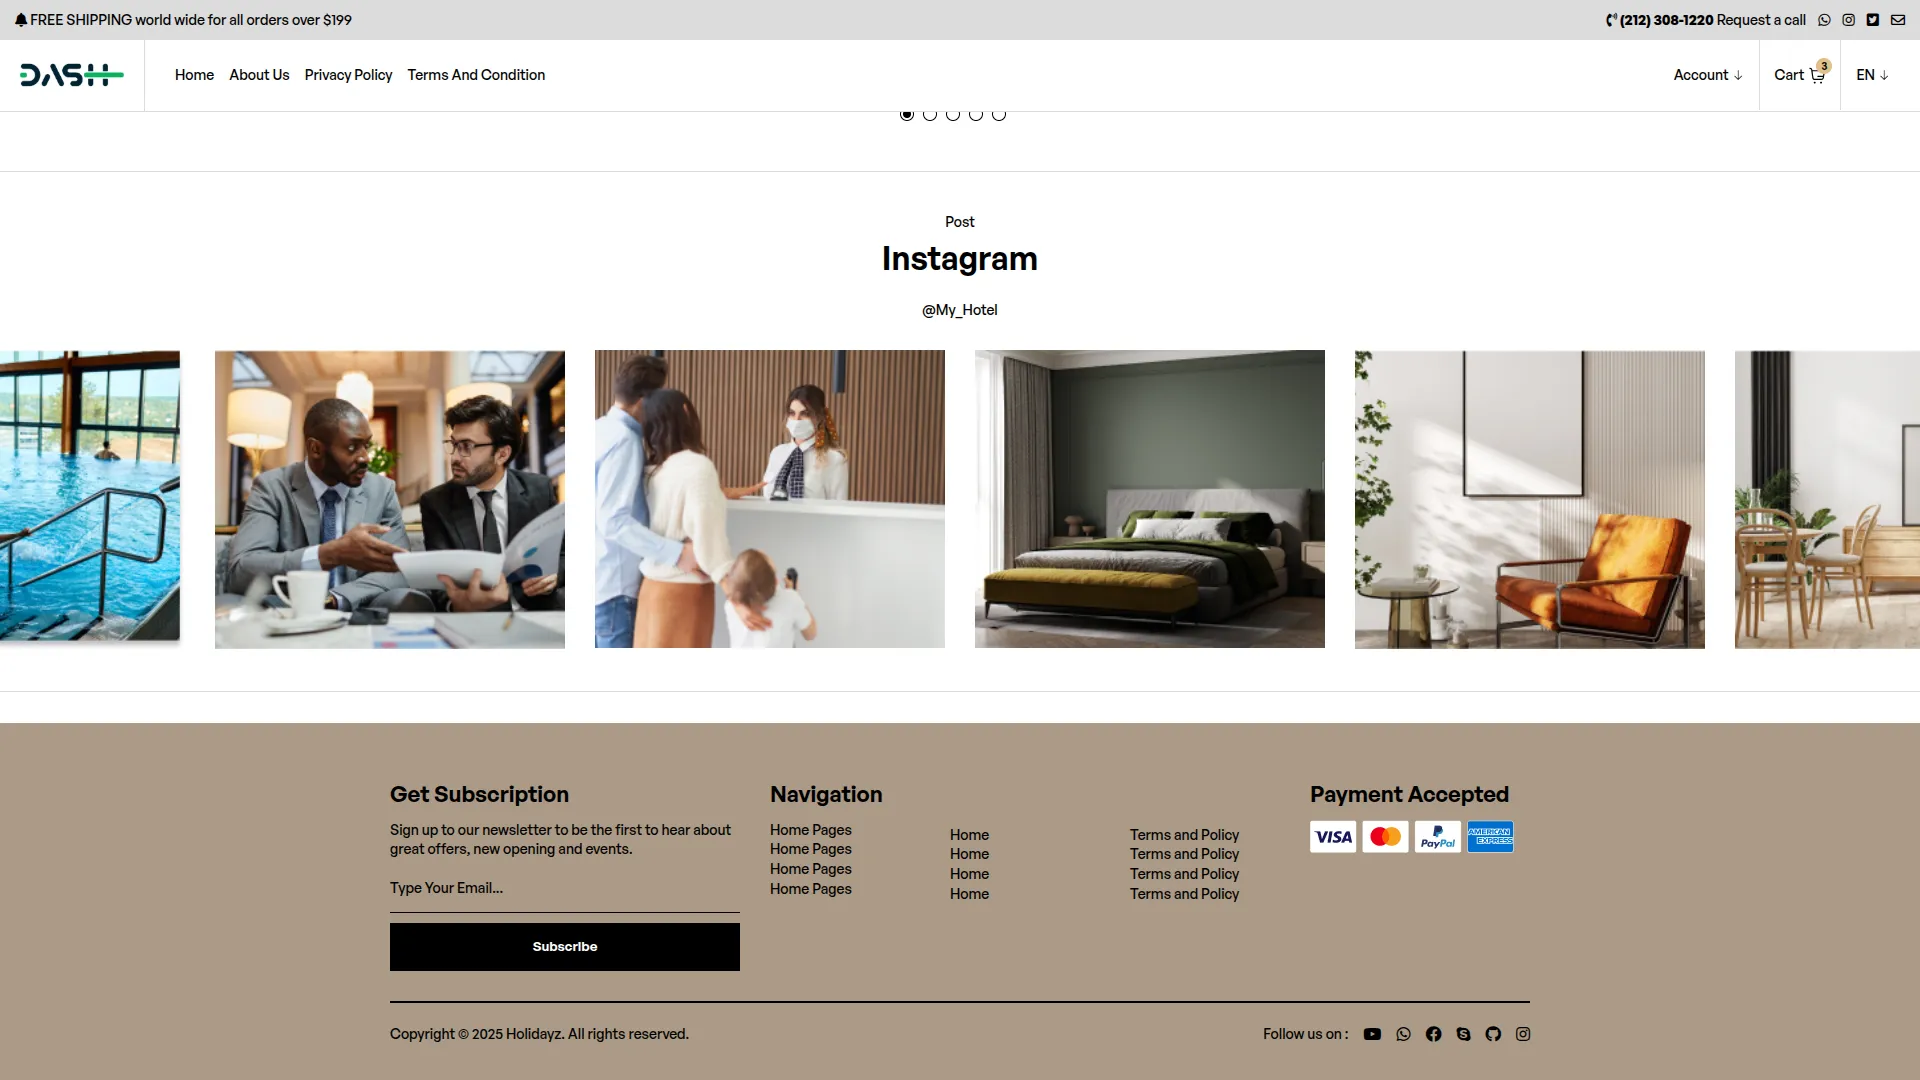
Footer Section
This is the bottom section of all pages, displaying the subscription form, navigation links, copyright information, and social media connections.
- Go to System Settings → Hotel Themes And Store Settings → Footer → Home-Footer-1 Section / Home-Footer-2 Section.
- Includes: Email subscription form with subscribe button, navigation menu, copyright text, social icons, and links.
Room Search & Booking System
This system handles room availability checking, search results display, and the complete booking process from search to confirmation.
Search Form Functionality:
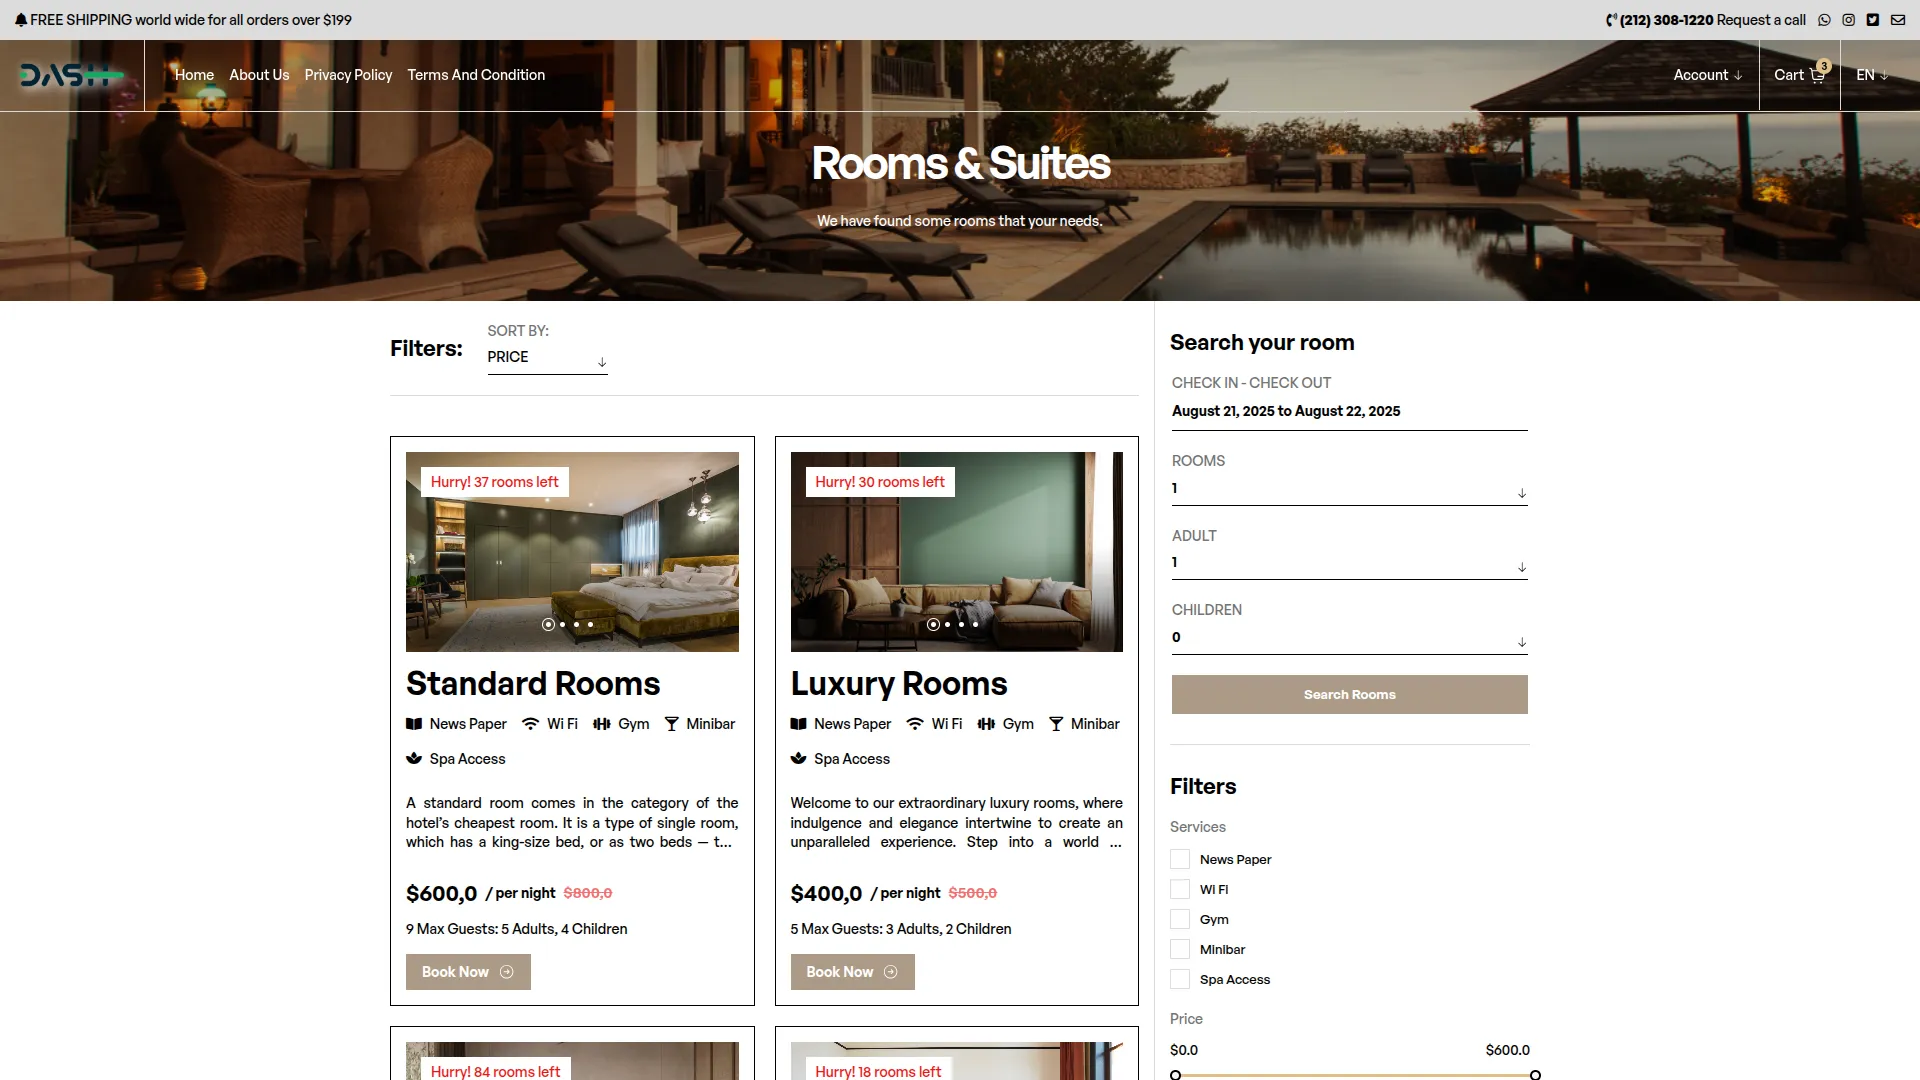
- Required Fields: Check-in/Check-out dates (date range picker), Number of rooms, Adults, and Children count.
- Availability Checking: Real-time checking against existing bookings to prevent conflicts.
Search Results Page:
- Sidebar Filters: Price range (min/max), Room features for refined searching.
- Room Display: Cards showing images, room types, features, descriptions, pricing, capacity, and “Book Now” buttons.
- Room Details: Clicking images or room types opens detailed Room Detail pages.
Room Detail Page:
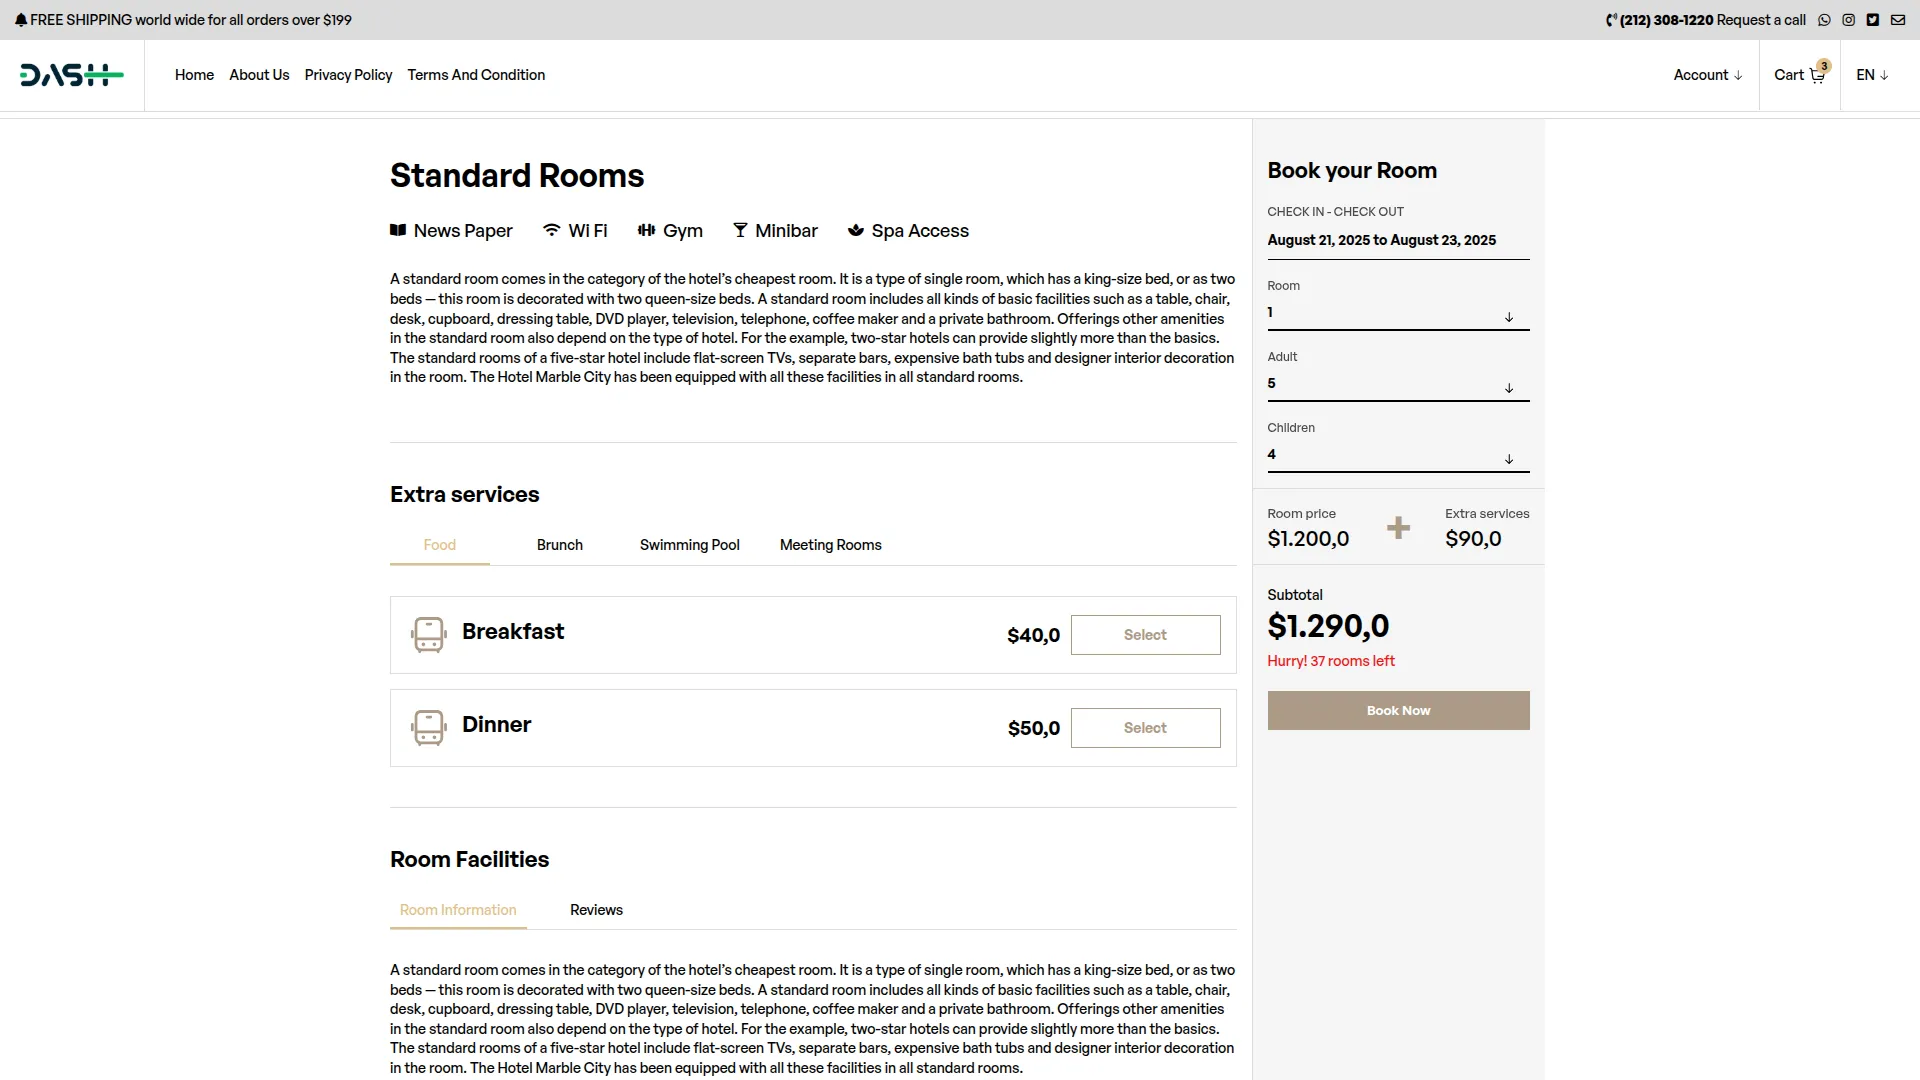
- Image Gallery: Multiple high-quality room images in slideshow format.
- Room Information: Room Type, features, short description, capacity details.
- Hotel Extra Services: Additional services with pricing that can be added to the cart. These services are pulled dynamically from the Facilities module.
- Extended Details:Full description, hotel images, hotel policies.
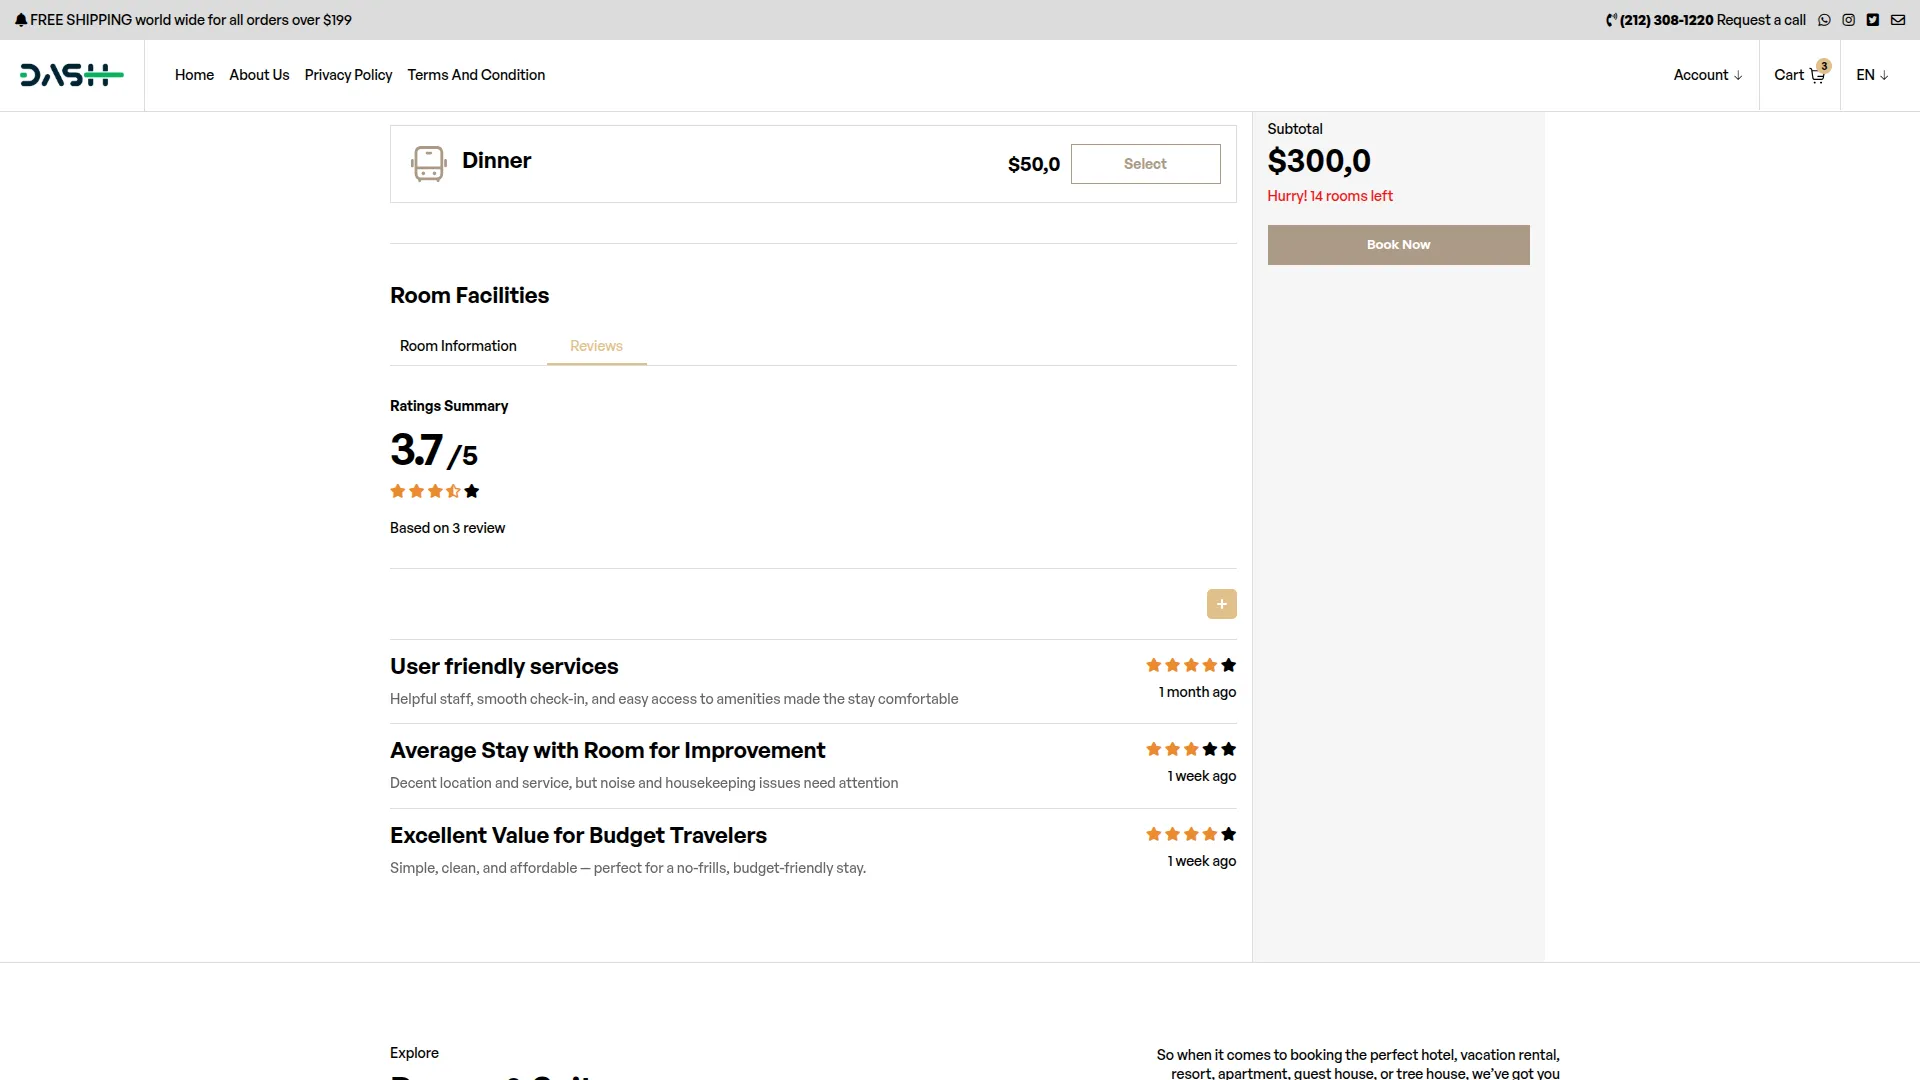
- Review System: “Add review” button and display of customer reviews and ratings.
- Booking Widget: Sidebar booking form with date selection, number of rooms, adults, and children count, and “Book Now” button.
Add To Cart System
This system manages the shopping cart functionality for both guest users and registered customers, handling room and service selections with dynamic pricing.
Cart Storage:
- Guest Users: Cookie-based cart storage for unregistered visitors.
- Logged-in Users: Database cart storage with persistent sessions.
- Cart Transfer: Cookie cart items automatically transfer to the user account upon login.
Cart Features:
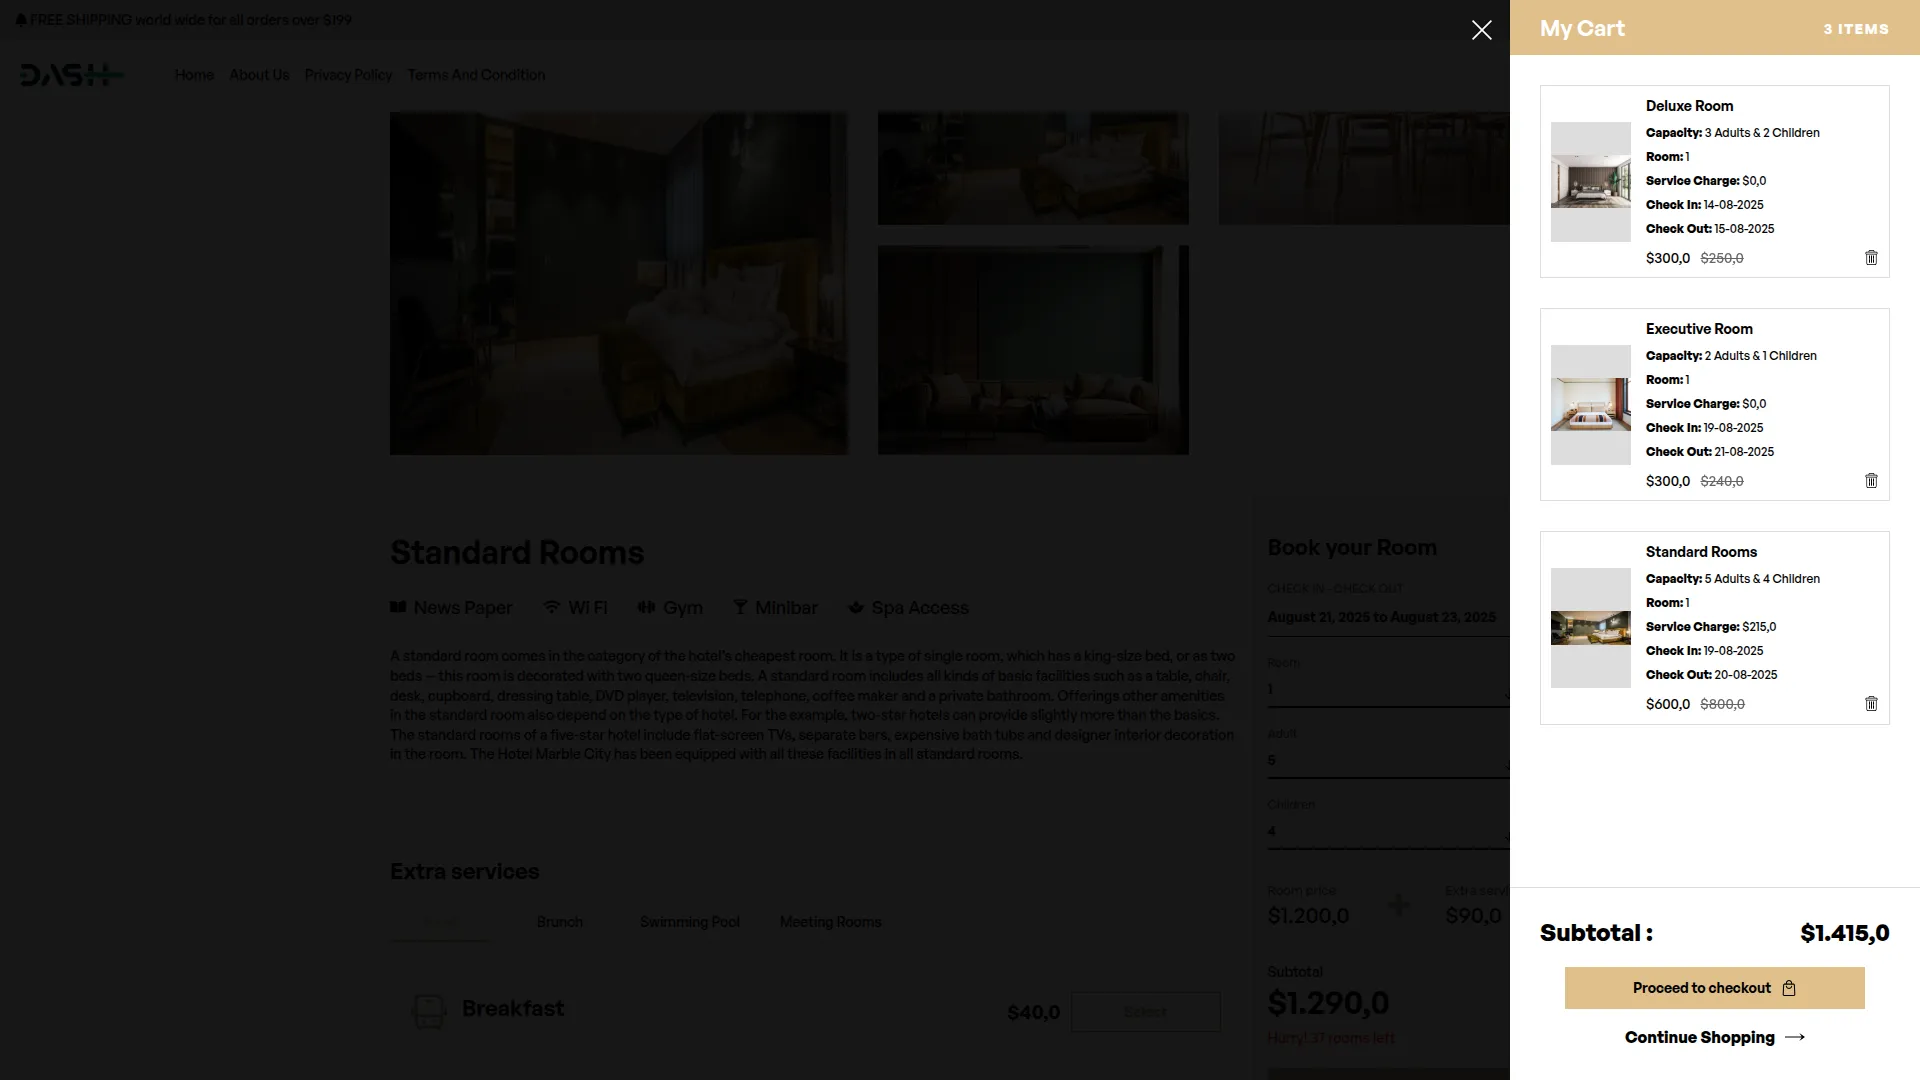
- Cart Drawer: Detailed breakdown showing room details, capacity, total rooms, service charges, check-in/check-out dates, and pricing.
- Service Management: Add hotel services to the cart with additional charges.
- Dynamic Pricing: Real-time price calculations based on date ranges and room quantity.
- Cart Updates: Add/remove rooms and services with live price updates.
- Header Integration: Cart count badge displays current cart quantity.
Checkout Process
This page contains the complete booking confirmation system, where customers finalize their reservations and make payments.
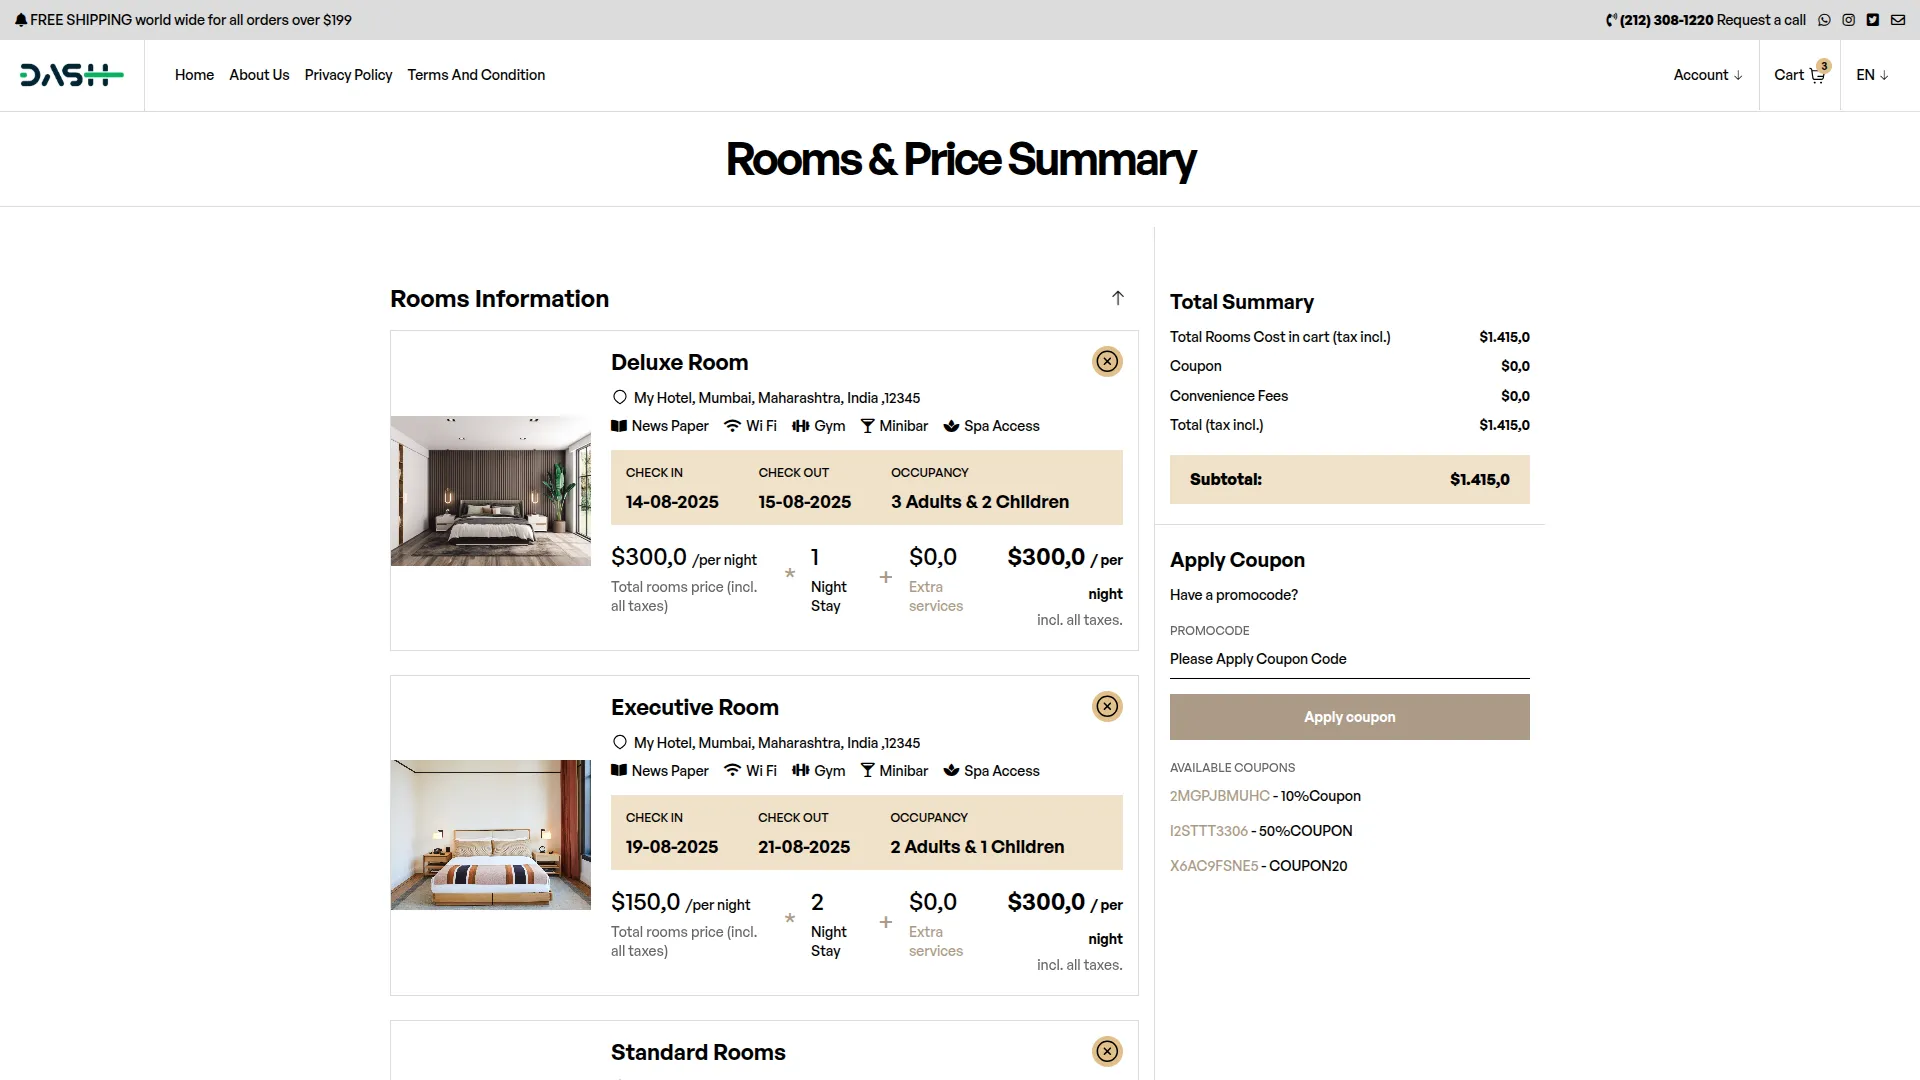
- Cart Summary: Complete breakdown of selected rooms and services with total pricing.
- Customer Information: Form for guest details (auto-filled for logged-in users).
- Coupon System: Discount code application with automatic price calculations.
- Payment Options: Online payments and bank transfer methods.
- Booking Confirmation: Final confirmation message.
Authentication System
This system handles user registration, login, and account management functionality throughout the booking process.
Login/Registration Page:
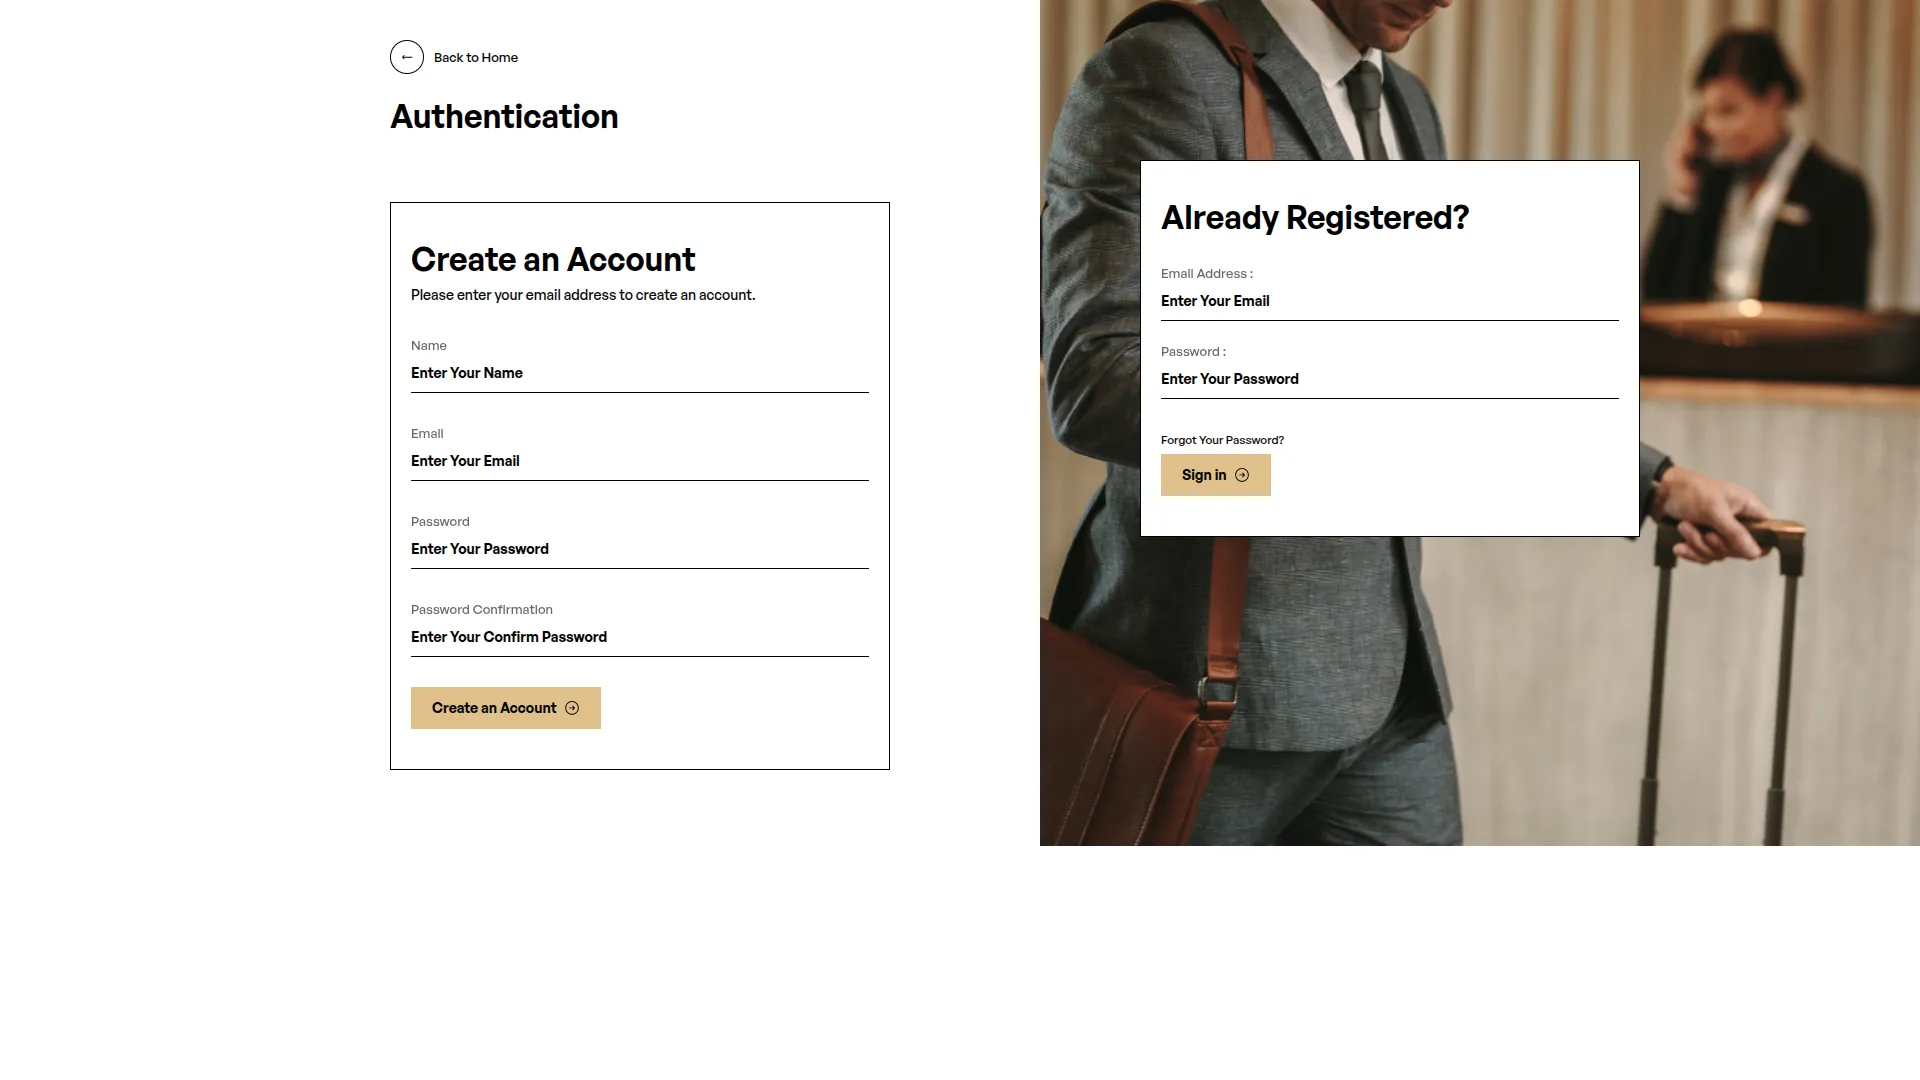
- Unified Interface: Combined registration and login forms on the same page.
- Protected Features: Review system requires user authentication.
- Post-Login Benefits: Access to My Bookings, My Profile, and review capabilities.
Customer Account Pages
These pages provide registered users with complete account management and booking history functionality.
My Profile Page:
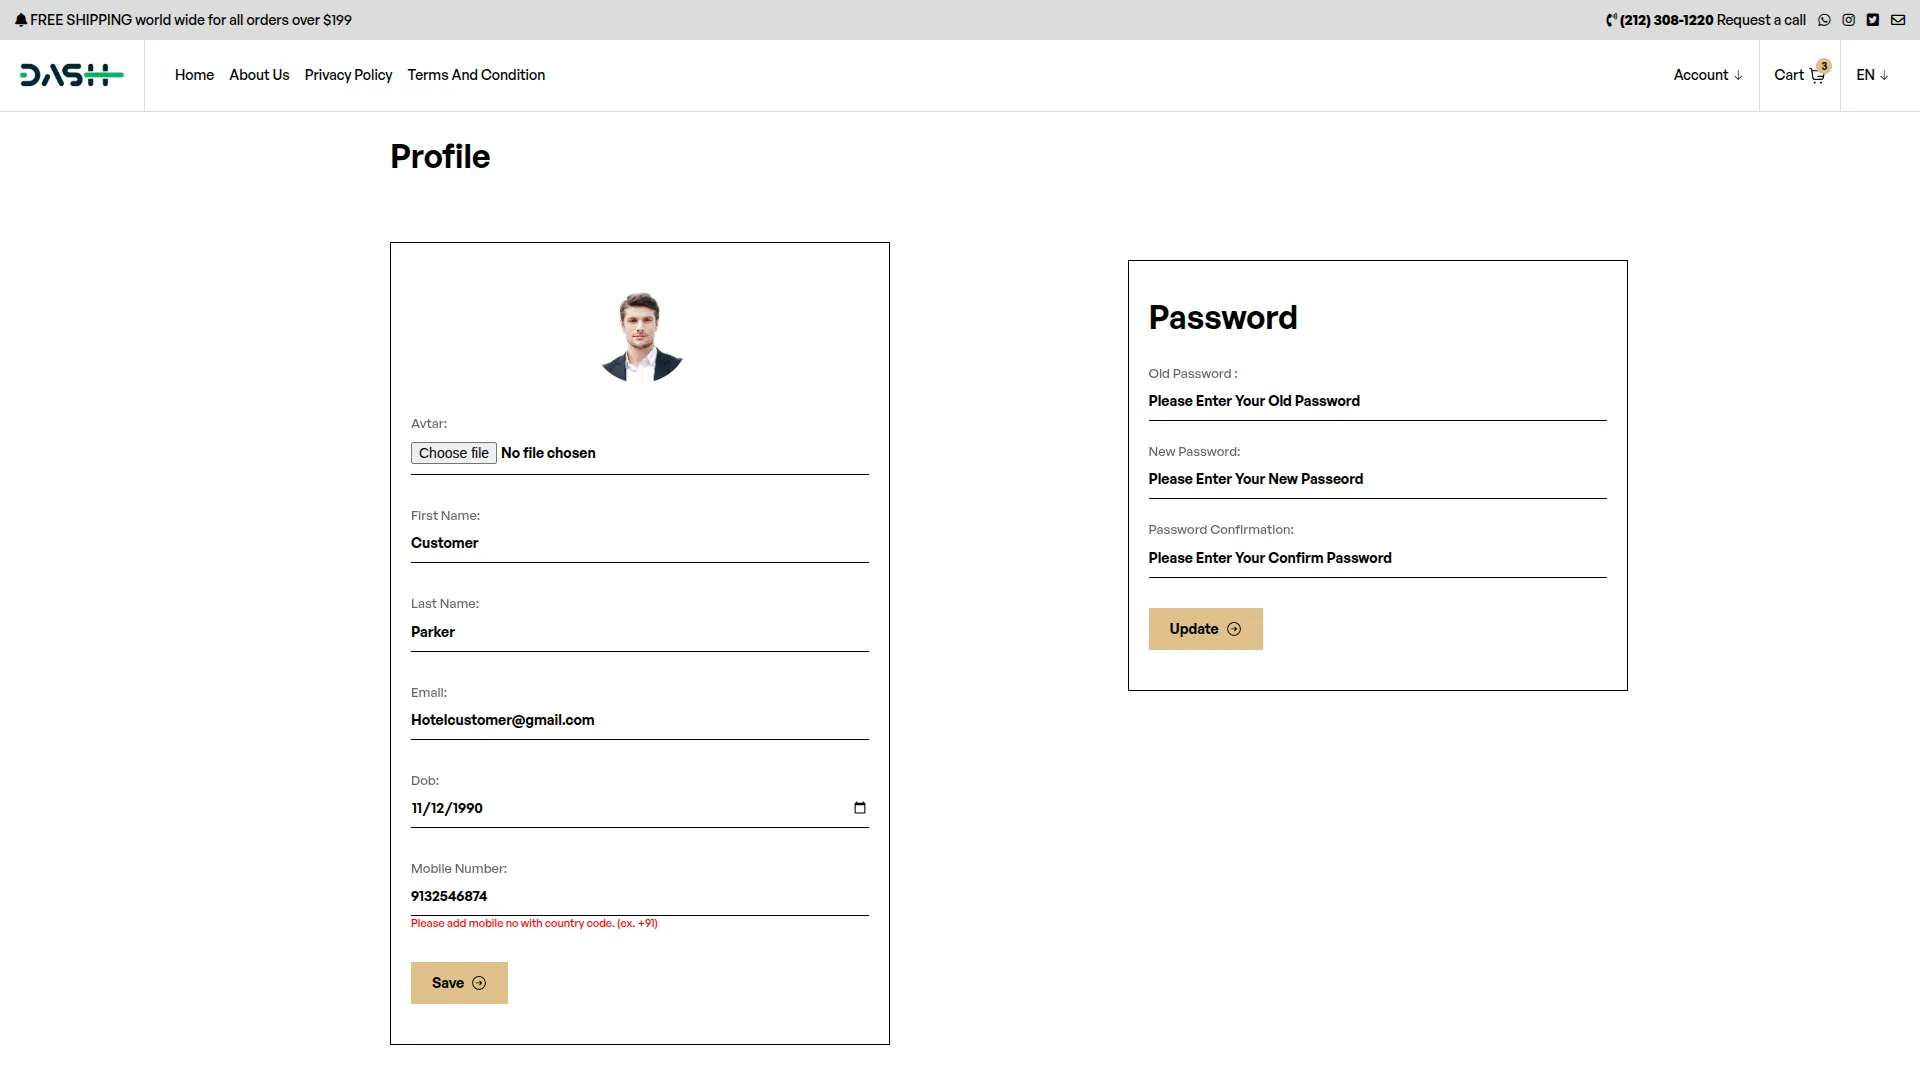
- Personal Information Management: First name, last name, email, date of birth, and mobile number editing.
- Avatar Upload: Profile picture upload functionality.
- Security Settings: Password change with current password verification.
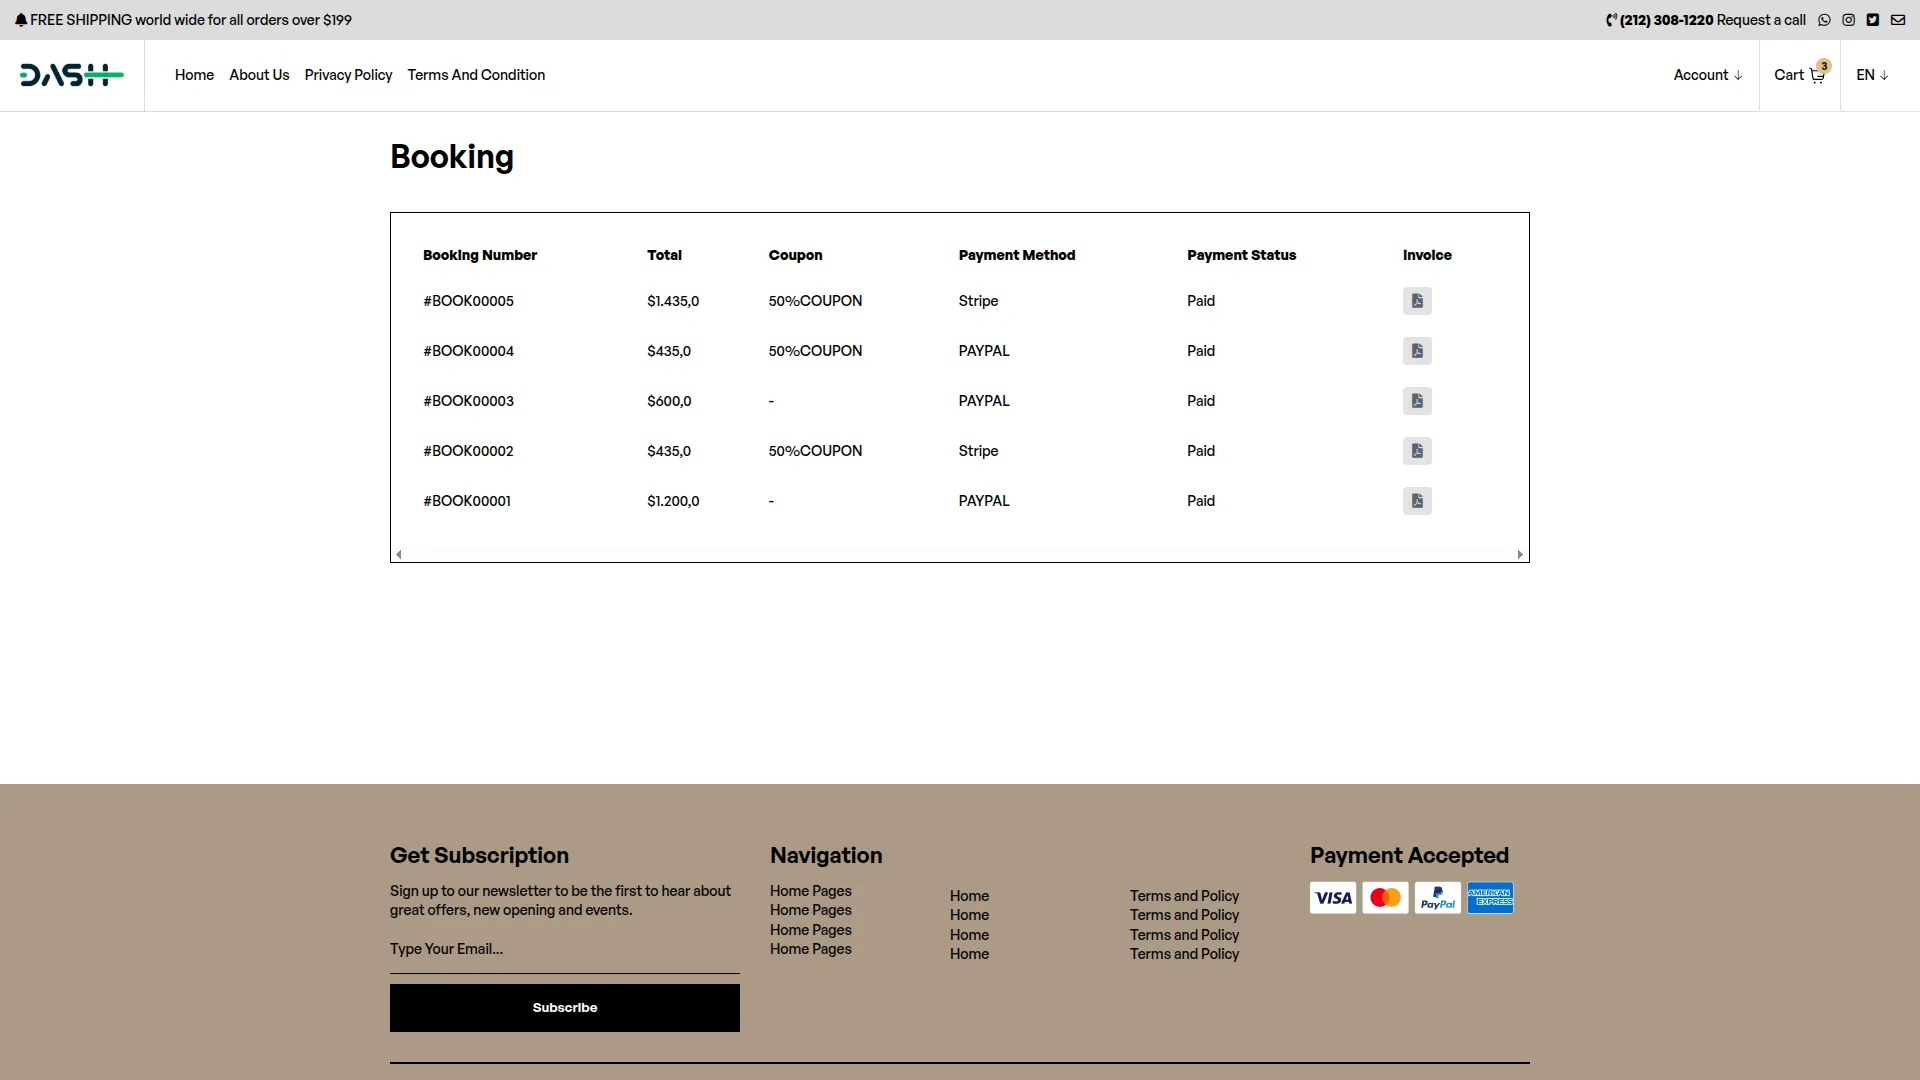
My Bookings Page:
- Booking History: Complete list of all bookings with booking numbers, totals, coupon usage, payment methods, and payment status.
- Invoice Access: View detailed invoices with booking details, customer information, and payment information.
Rating & Review System
This system allows customers to provide feedback about their room experiences after their stay is completed.
- Review Access: Customers can rate and review rooms after their booking period.
- Rating System: 5-star rating system with written review comments.
- Admin Moderation: Administrative show/hide functionality for review quality control.
- Rating Display: Average rating calculations automatically displayed on room pages.
Categories
Related articles
- Mailchimp Integration in Dash SaaS
- Consignment Integration in Dash SaaS
- Diet & Nutrition Consultant Integration in Dash SaaS
- Zoho Meeting Integration in Dash SaaS
- Call Hub Integration in Dash SaaS
- Zapier Integration in Dash SaaS
- Marketing Plan Integration in Dash SaaS
- Google Slides Detailed Documentation
- AI Image Integration in Dash SaaS
- PowerTranz Payment Gateway in Dash SaaS
- Agriculture Managemet Integration in Dash SaaS
- Mobile Service Management Integration in Dash SaaS
Reach Out to Us
Have questions or need assistance? We're here to help! Reach out to our team for support, inquiries, or feedback. Your needs are important to us, and we’re ready to assist you!


Need more help?
If you’re still uncertain or need professional guidance, don’t hesitate to contact us. You can contact us via email or submit a ticket with a description of your issue. Our team of experts is always available to help you with any questions. Rest assured that we’ll respond to your inquiry promptly.
Love what you see?
Do you like the quality of our products, themes, and applications, or perhaps the design of our website caught your eye? You can have similarly outstanding designs for your website or apps. Contact us, and we’ll bring your ideas to life.
