Hospital Management Integration in Dash SaaS
The Hospital Management System is a comprehensive Add-On designed to streamline hospital operations and improve patient care.
Introduction
The Hospital Management System is a comprehensive Add-On designed to streamline hospital operations and improve patient care. It enables healthcare staff to manage doctors, patients, appointments, medications, beds, and other critical hospital resources from a single platform. The system connects various departments and functions, making it easier to track patient journeys, maintain medical records, and manage day-to-day hospital activities efficiently.
How to Install the Hospital Management System Add-On?
To Set Up the Hospital Management System Add-On, you can follow this link: Setup Add-On
How To Use The Hospital Management Add-On?
Dashboard Overview
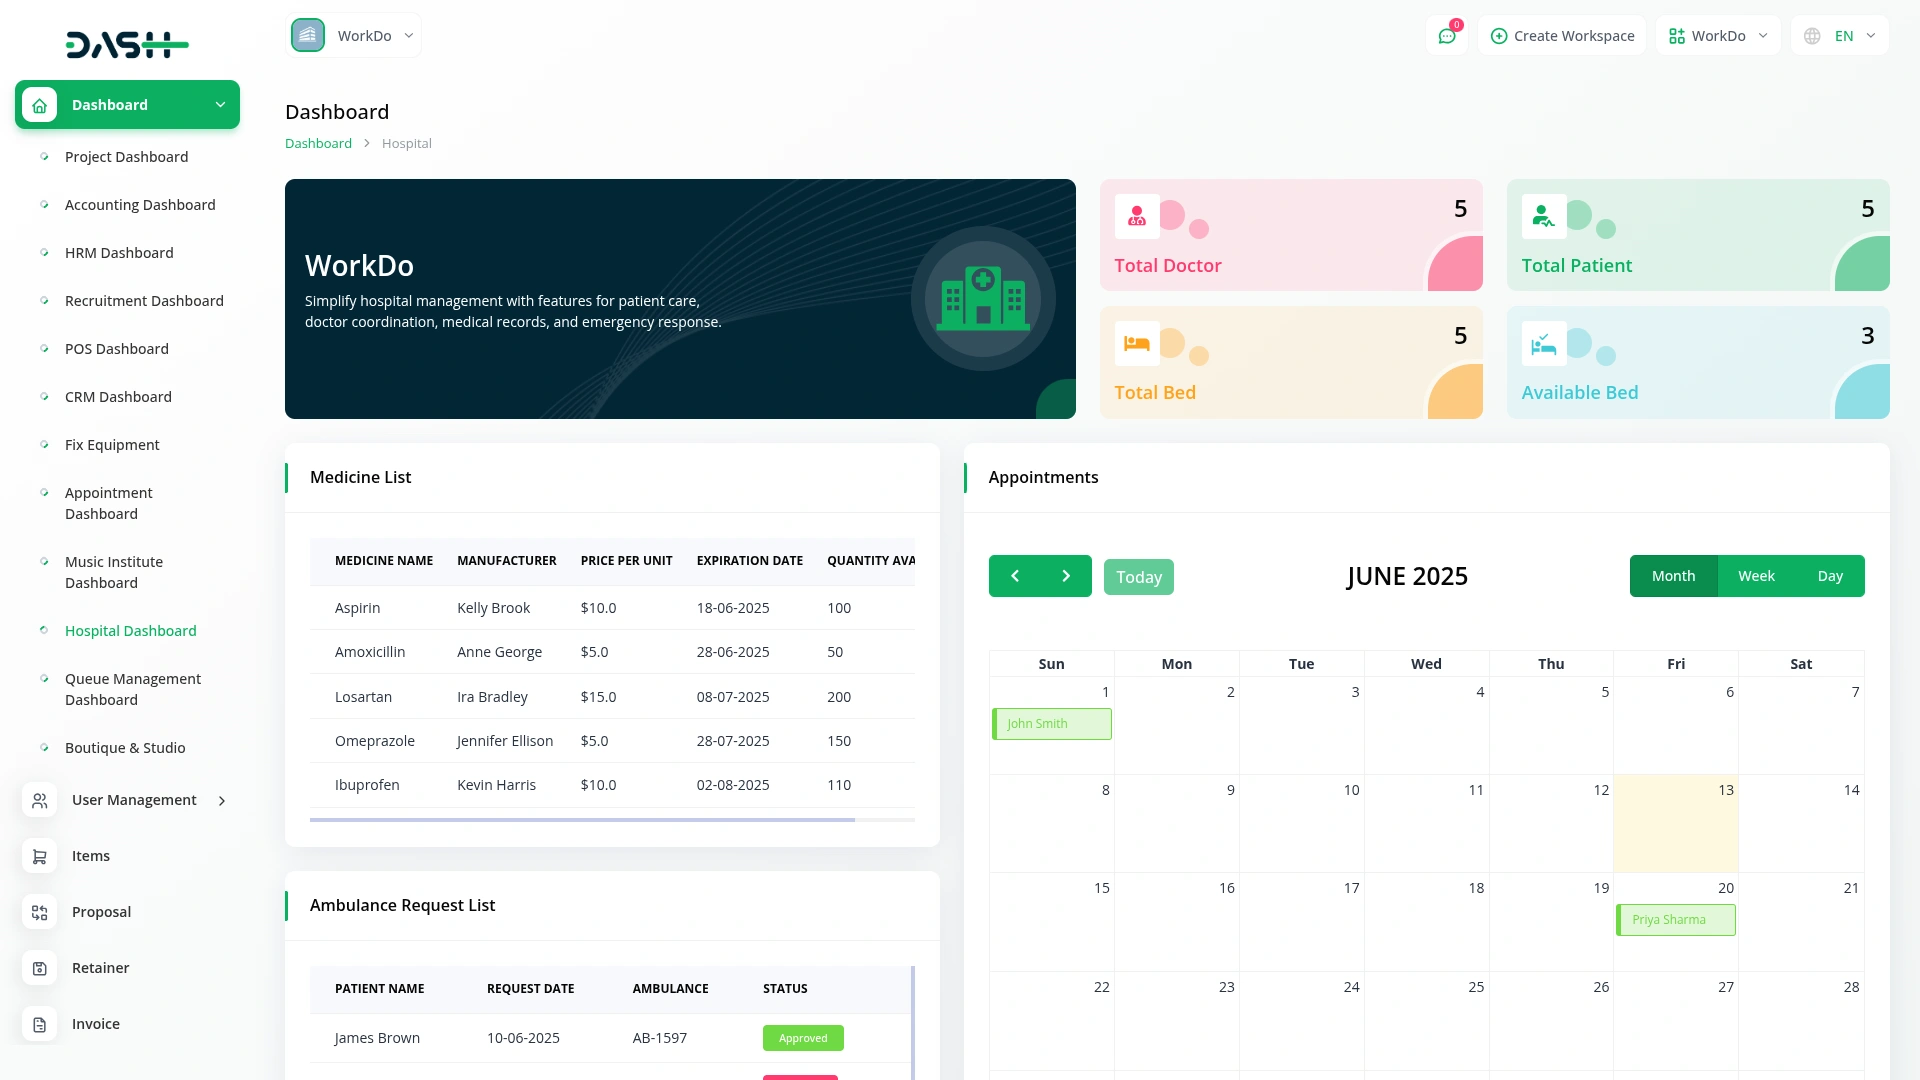
- The Hospital Dashboard provides a comprehensive overview of your hospital’s key operational metrics and current status.
- The main dashboard displays four important cards showing Total Doctor count of all registered doctors in your hospital, Total Patient count of all registered patients, Total Bed showing your hospital’s complete bed capacity, and Available Bed indicating how many beds are currently free for new patients.
- The dashboard includes an Appointments calendar that displays patient appointment data in a visual calendar format, allowing you to quickly see scheduled appointments for any specific date. This helps with daily planning and resource allocation across your hospital departments.
- You can view the Medicine List that shows all medicine data, including current inventory levels and expiration dates for quick reference.
- The dashboard also displays the Ambulance Request List, showing all ambulance request data with current status, helping you monitor emergency transportation needs and coordinate ambulance services effectively.
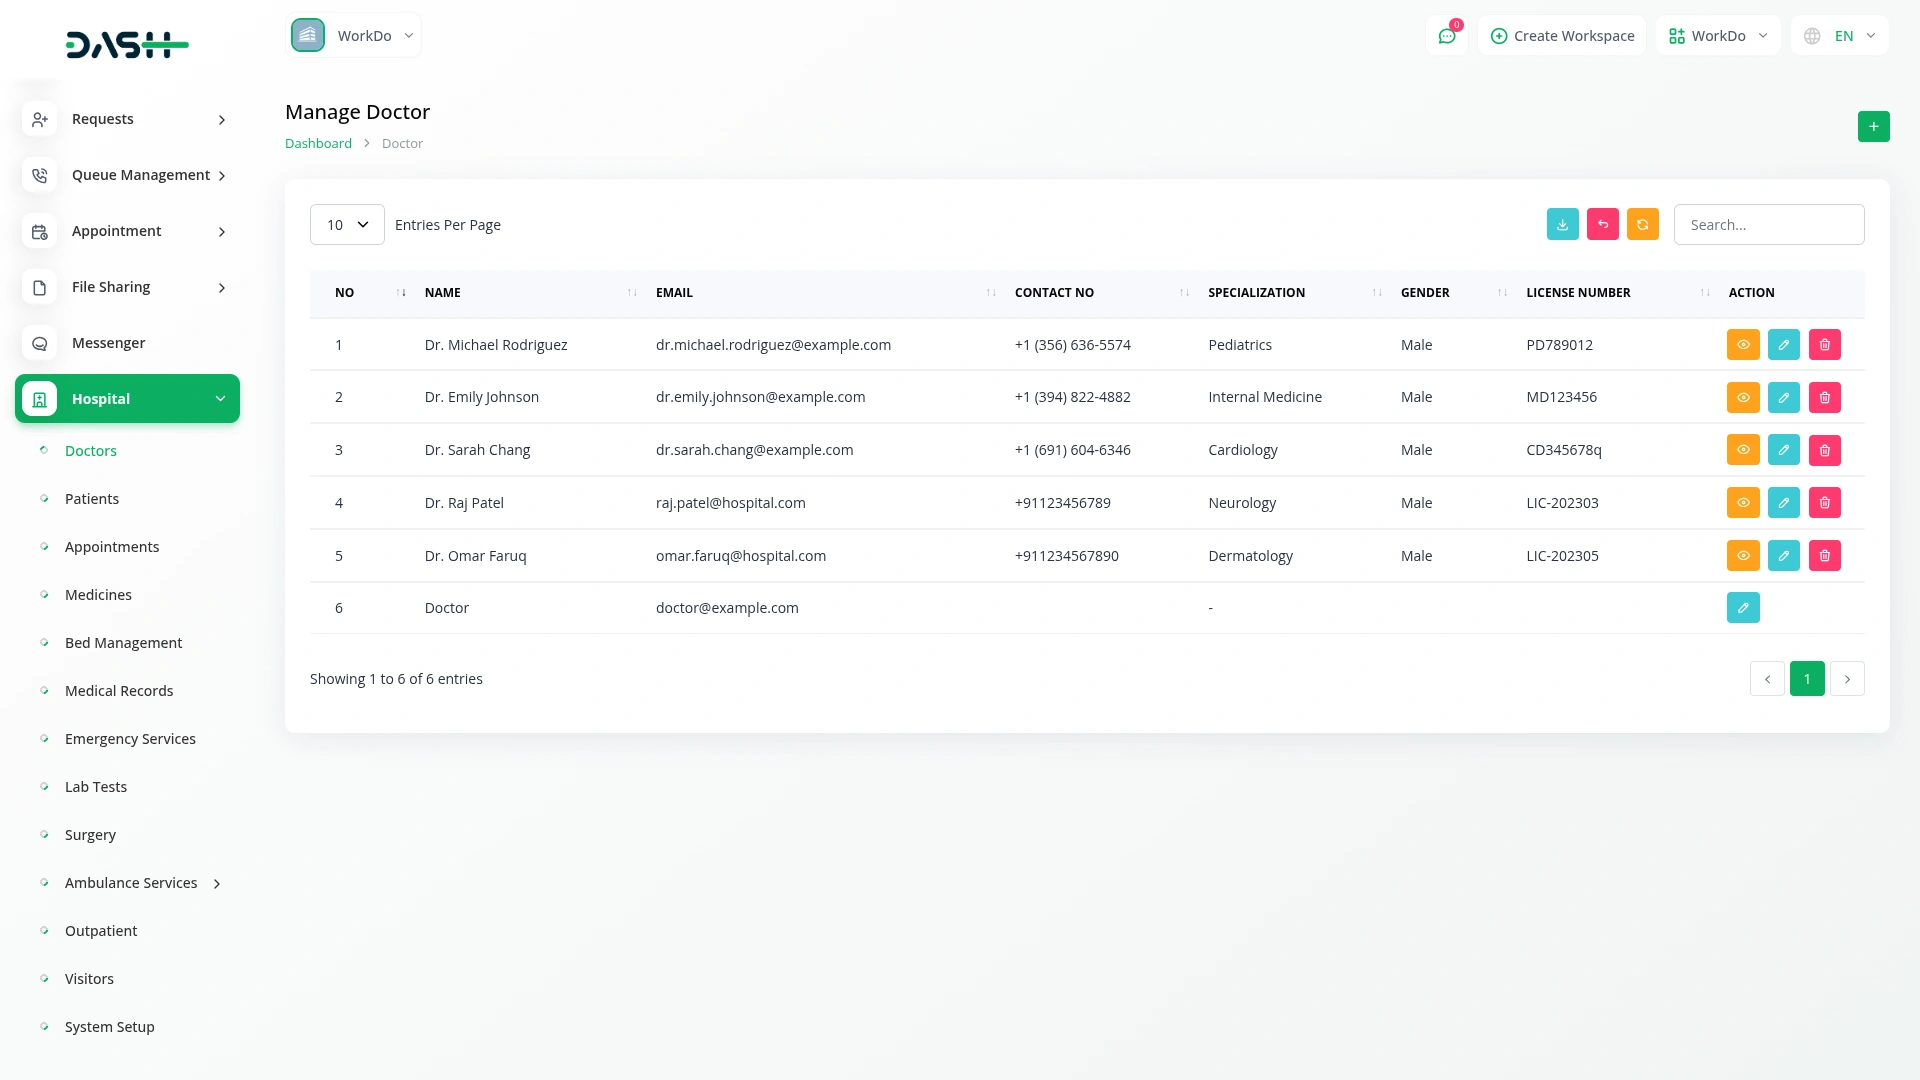
Manage Doctor
- To create a new doctor record, click the “Create” button at the top of the doctor page. Fill in the required details such as doctor name, specialization (select from the dropdown list that comes from the specialization section in system setup), phone number, email, license number, and gender. Also, enter years of experience, consultation fee, and password for the doctor’s account.
- The list page displays all doctors in a table with columns for No, Name, Email, Contact No, Specialization, Gender, and License Number. You can search for specific doctors, export the data, or view it as a spreadsheet using the buttons at the top. For each record, you can View, Edit, or Delete using the action buttons.
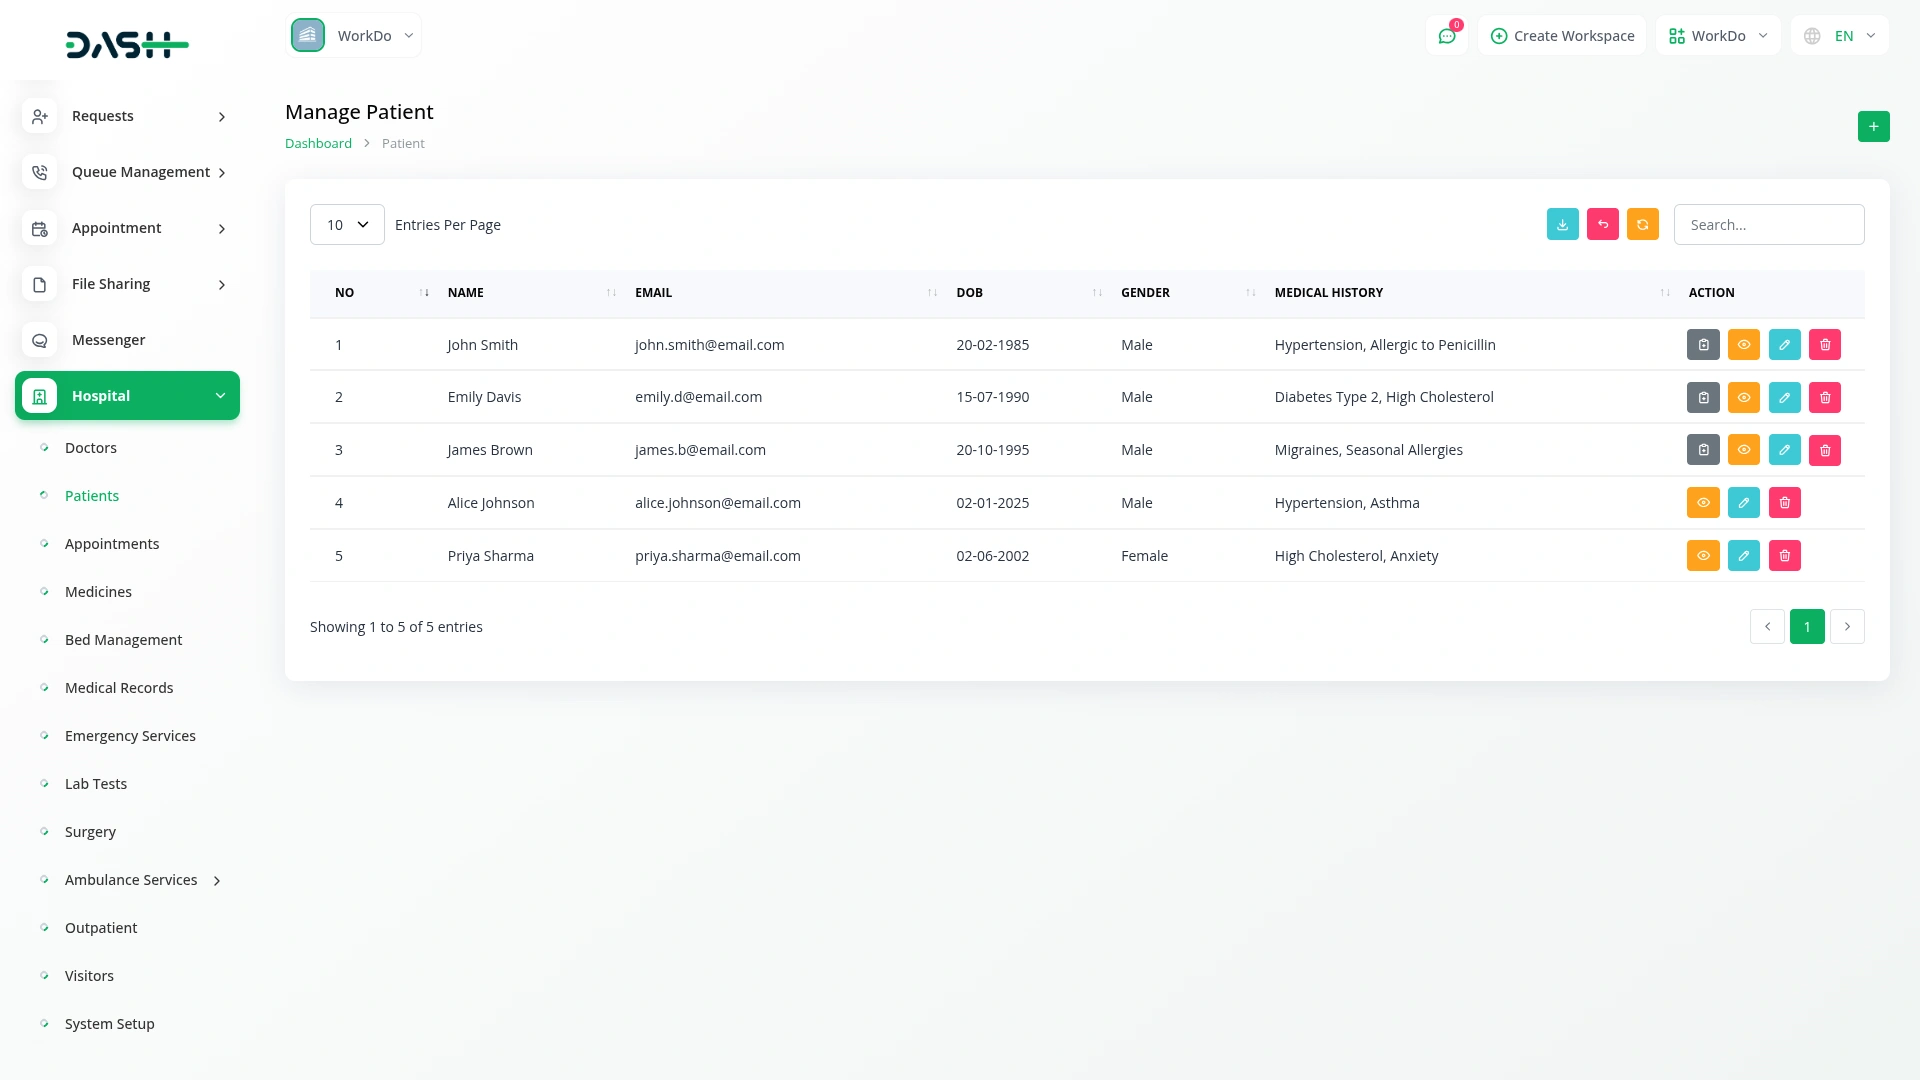
Manage Patient
- To add a new patient, click the “Create” button on the patient page. Enter the patient’s name, email, and select their doctor from the dropdown list that is populated from the doctor section. Input the date of birth using the date picker, select gender, and provide phone number. Include any relevant medical history, set a password for the patient’s account, and enter their address.
- The patient list page shows all patients with columns for No, Name, Email, DOB, Gender, and Medical History. Use the Search function to find specific patients or Export to download the data. Each patient record has View, Edit, and Delete options in the Actions column.
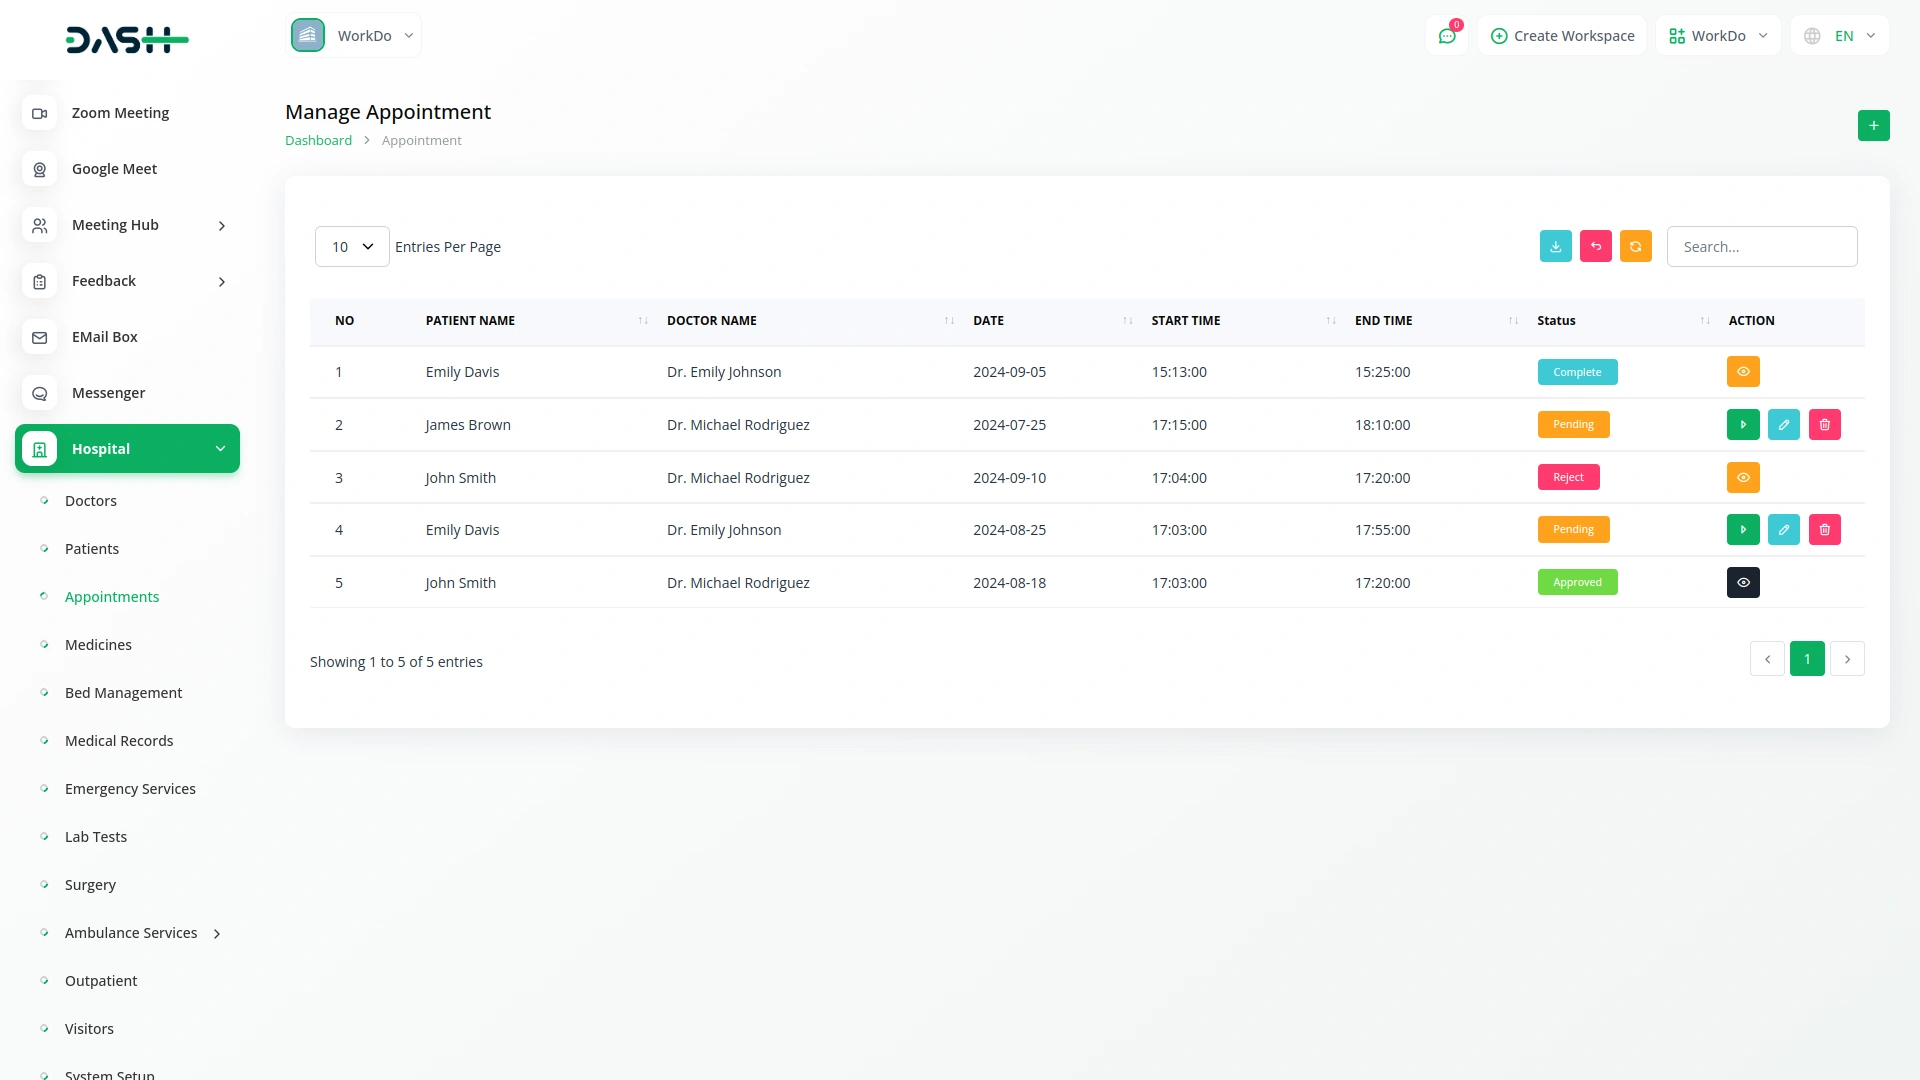
Manage Appointment
- To create a new appointment, click the “Create” button on the appointment page. Select the patient from the dropdown menu (comes from the patient section). The doctor field will automatically display the doctor’s name based on the selected patient and cannot be edited. Choose the appointment date using the date picker, then set the start time and end time using the time fields.
- Click “Submit” to schedule the appointment.
- The appointment list page displays all appointments with columns for No, Patient Name, Doctor Name, Date, Start Time, End Time, and Status (Pending, Approved, Complete, or Rejected). You can search for specific appointments or export the data using the buttons at the top.
- In the Actions column, different options appear based on the appointment status. For pending appointments, you can view appointment details and sync with Google and Outlook calendars (connected to the Google and Outlook Calendar Add-On). For approved appointments, you can confirm completion and send a feedback form (connects to the Feedback Add-On). All appointments have View, Edit, and Delete options.
Manage Medicine
- To add a new medicine to the inventory, click the “Create” button on the medicine page. Enter the medicine name, unit, and select the manufacturer from the dropdown (populated from the user type vendor). Input the expiration date, price per unit, and select the medicine category (comes from the medicine category section) from the dropdown.
- Enter the dosage, quantity available, potential side effects, and a description of the medicine.
- After completing all fields, click “Submit” to add the medicine to the system.
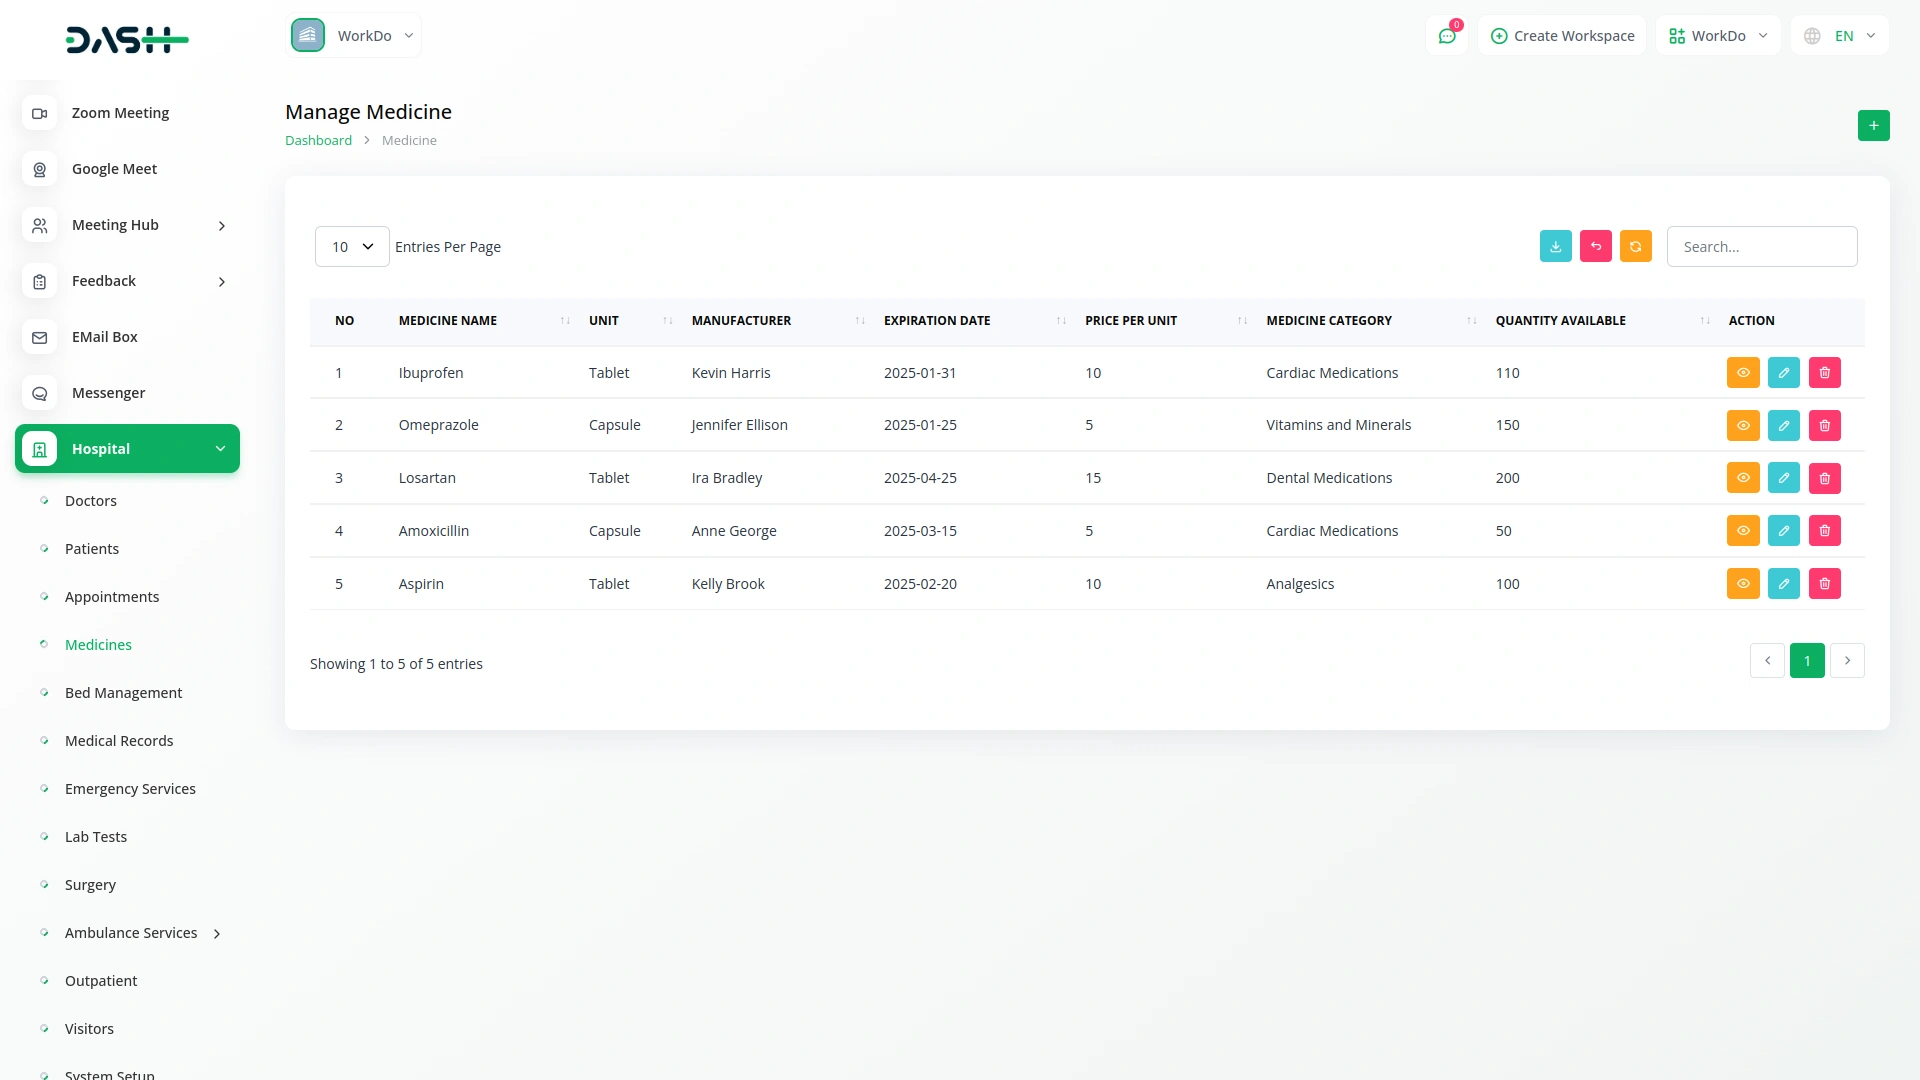
- The medicine list page shows all medications with columns for No, Medicine Name, Unit, Manufacturer, Expiration Date, Price Per Unit, Medicine Category, and Quantity Available. You can search for specific medicines or export the data. Each record has View (to see complete medicine details), Edit, and Delete options in the Actions column.
Manage Bed
- To assign or manage a hospital bed, click the “Create” button on the bed page. The bed number field will be automatically generated and cannot be edited.
- Select the bed type from the dropdown (comes from the patient section) and choose the ward from the dropdown which comes from the bed type section.
- Select the patient from the dropdown list, enter the daily charges, and set the admission date and discharge date using the date pickers. Select the status and add any comments if needed.
- Click “Submit” to create or update the bed record.
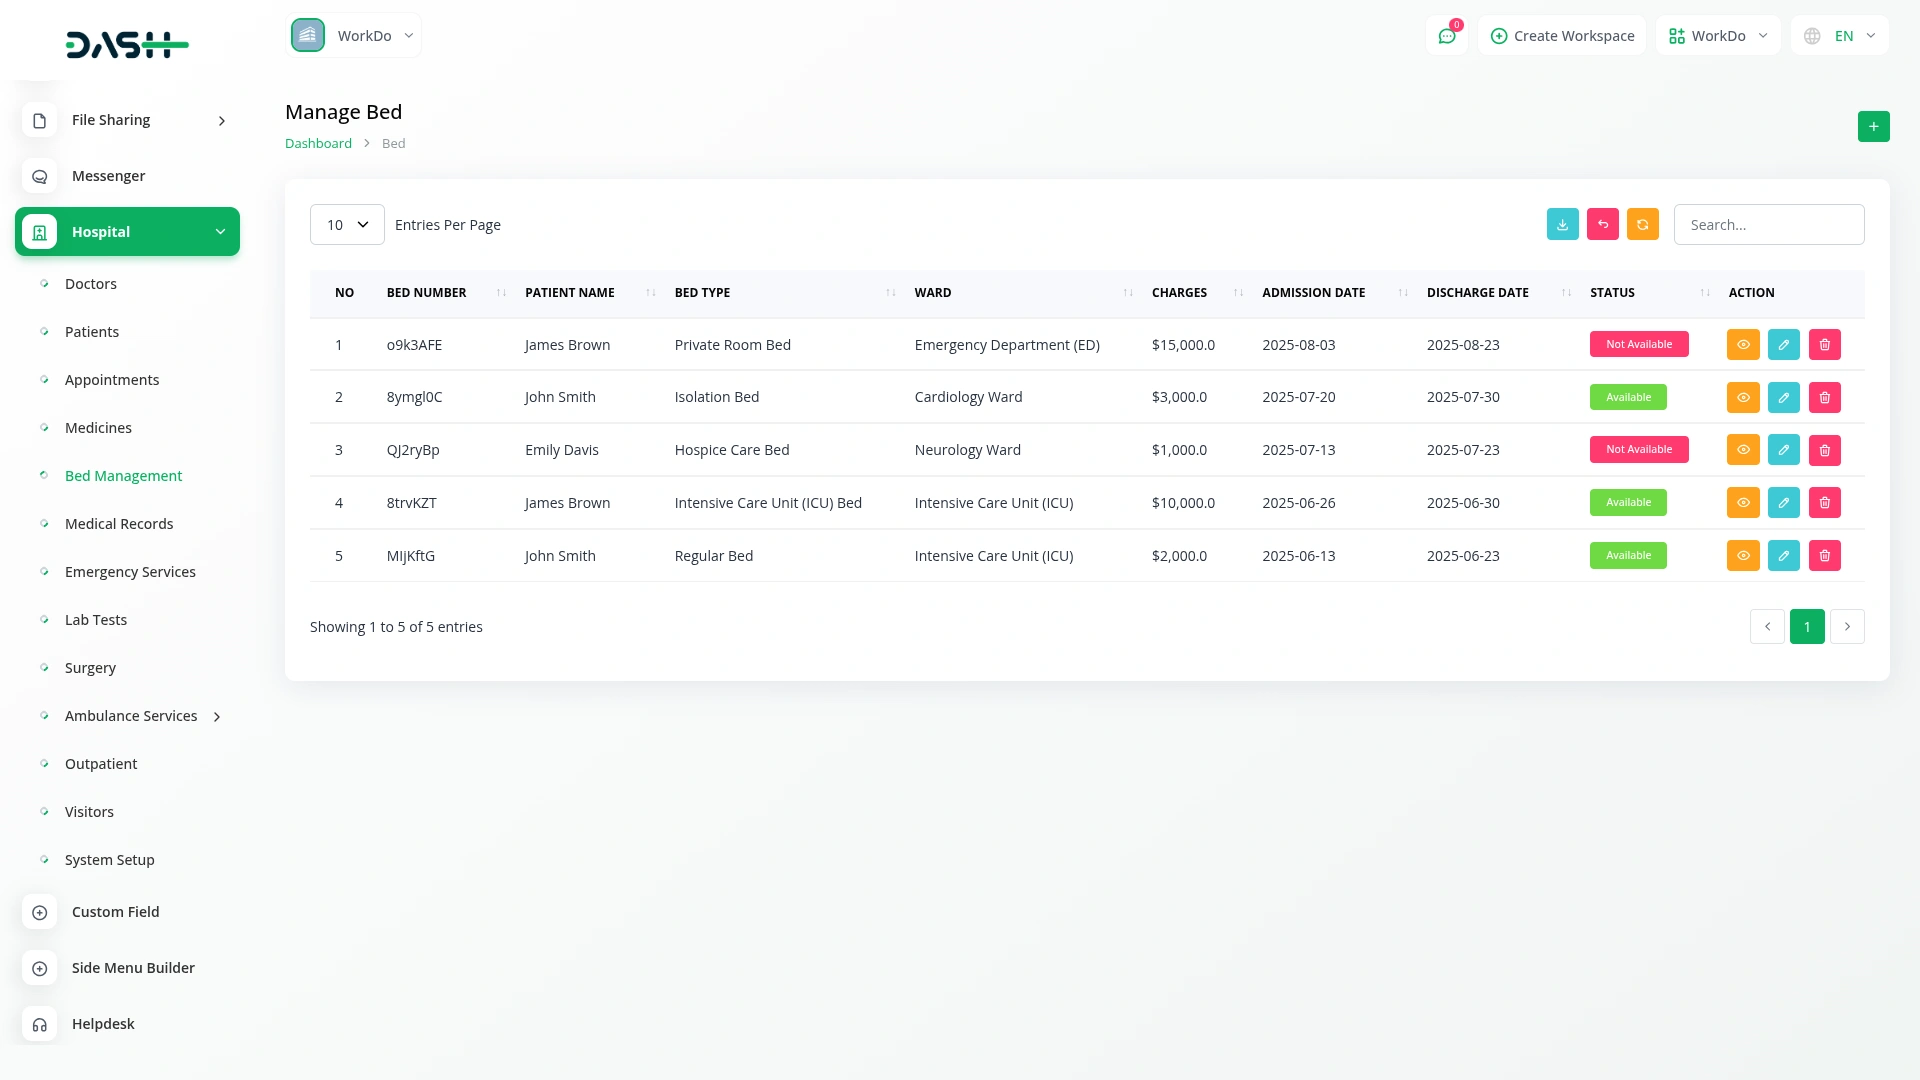
- The bed list page displays all beds with columns for No, Bed Number, Patient Name, Bed Type, Ward, Charges, Admission Date, Discharge Date, and Status. You can search for specific beds or export the data. Each bed record has View, Edit, and Delete options in the Actions column.
Manage Medical Records
- To create a new medical record, click the “Create” button on the medical records page. Select the patient name from the dropdown menu (comes from the patient section). The Doctor field will automatically display the doctor assigned to the selected patient and cannot be edited.
- Enter the patient’s symptoms, select the date using the date picker, and provide the diagnosis details. Include the prescription, follow-up instructions, and any test results.
- After completing all fields, click “Submit” to create the medical record.
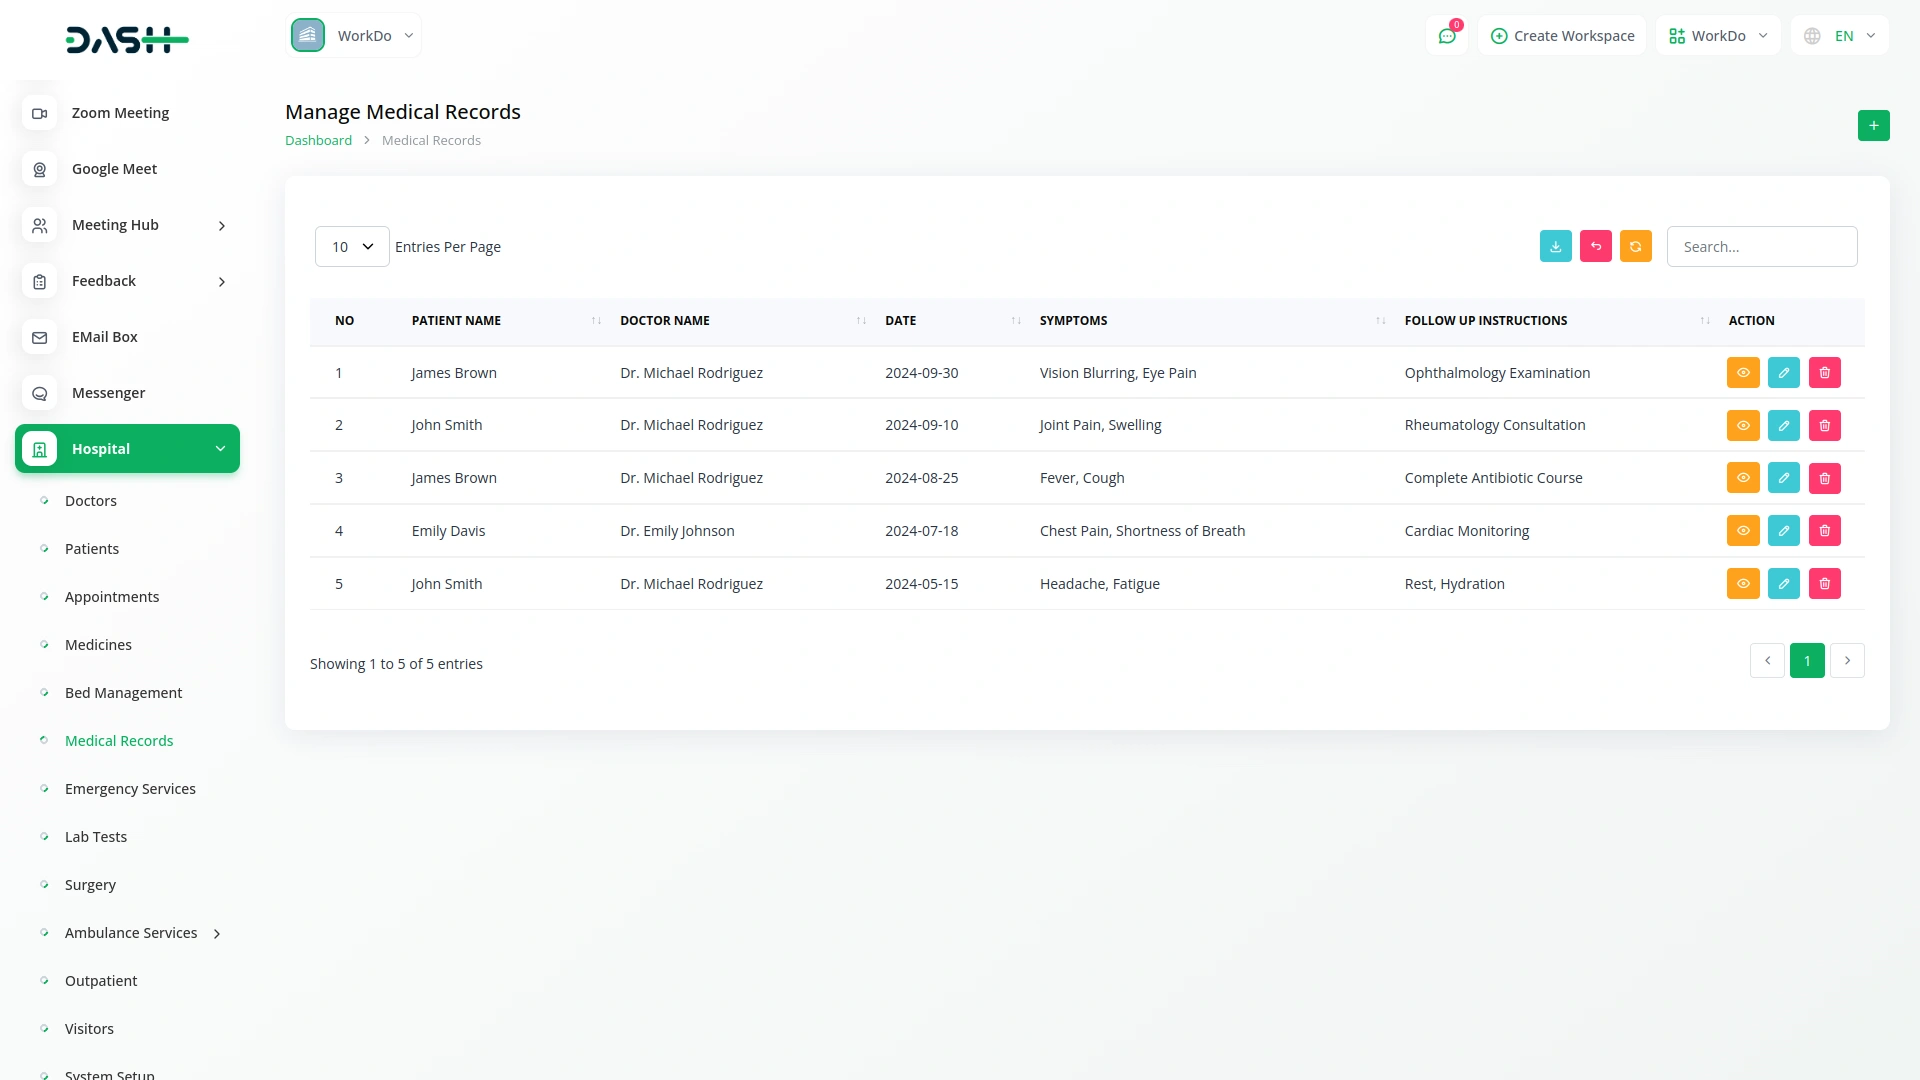
- The medical records list page shows all records in a table with columns for No, Patient Name, Doctor Name, Date, Symptoms, and Follow Up Instructions.
- You can search for specific records or export the data using the buttons at the top. Each record has View, Edit, and Delete options in the Actions column.
Manage Emergency Services
- To register a new emergency case, click the “Create” button on the emergency services page. Select the patient from the dropdown menu populated from the patient section, set the admission date using the date picker, and choose the priority status from the dropdown (High, Medium, or Low).
- Enter the emergency type to categorize the nature of the emergency.
- Click “Submit” to register the emergency service.
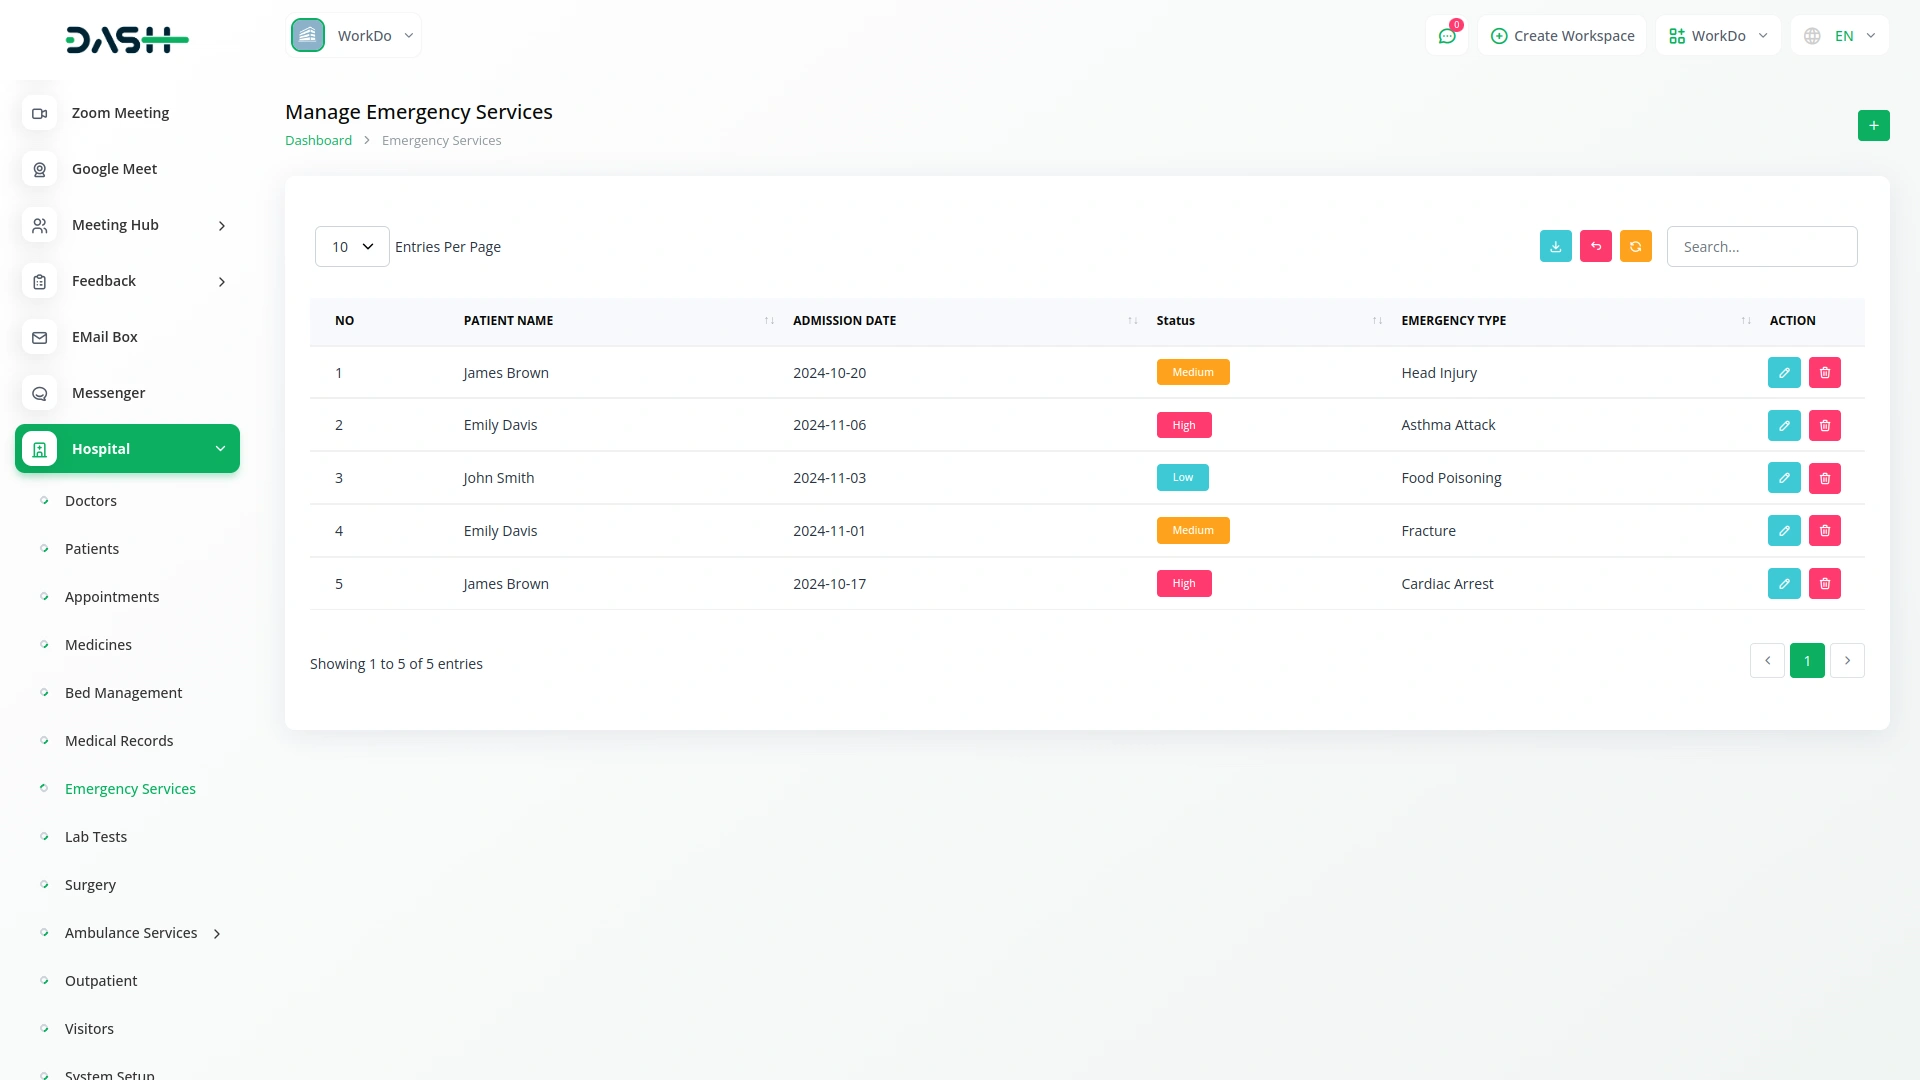
- The emergency services list page displays all emergency cases with columns for No, Patient Name, Admission Date, Status (High, Medium, or Low), and Emergency Type. You can search for specific cases or export the data. Each emergency record has Edit and Delete options in the Actions column.
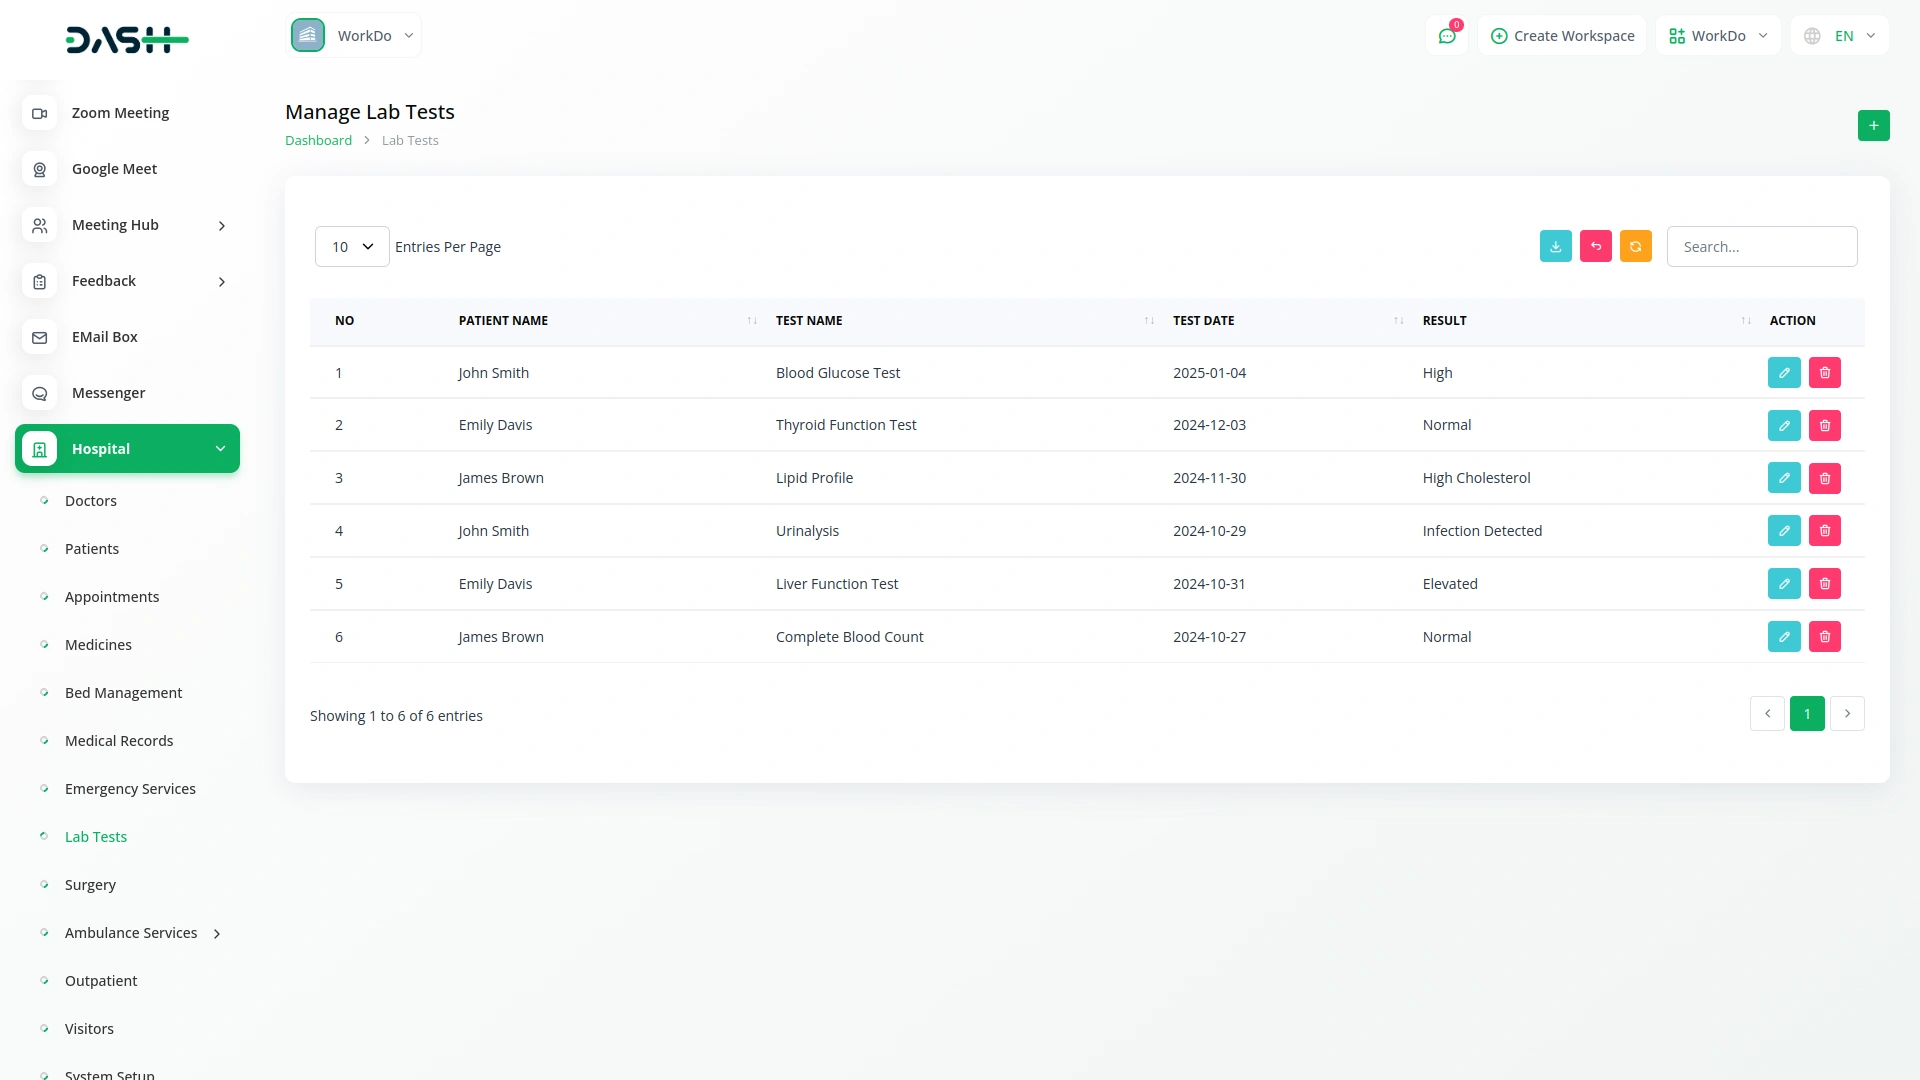
Manage Lab Tests
- To record a new lab test, click the “Create” button on the lab tests page. Select the patient from the dropdown menu which comes from the patient section, enter the test name, choose the test date using the date picker, and input the result of the test.
- After entering all details, click “Submit” to create the lab test record.
- The lab tests list page shows all tests in a table with columns for No, Patient Name, Test Name, Test Date, and Result. You can search for specific tests or export the data using the buttons at the top. Each test record has Edit and Delete options in the Actions column.
Manage Surgery
- To schedule a new surgery, click the “Create” button on the surgery page. Select the patient from the dropdown menu (comes from the patient section) and choose the doctor who will perform the surgery.
- Set the surgery date using the date picker, enter the surgery type (comes from the surgery type section), and select the status from the dropdown (Requested, Approved, or Rejected).
- Click “Submit” to create the surgery record.
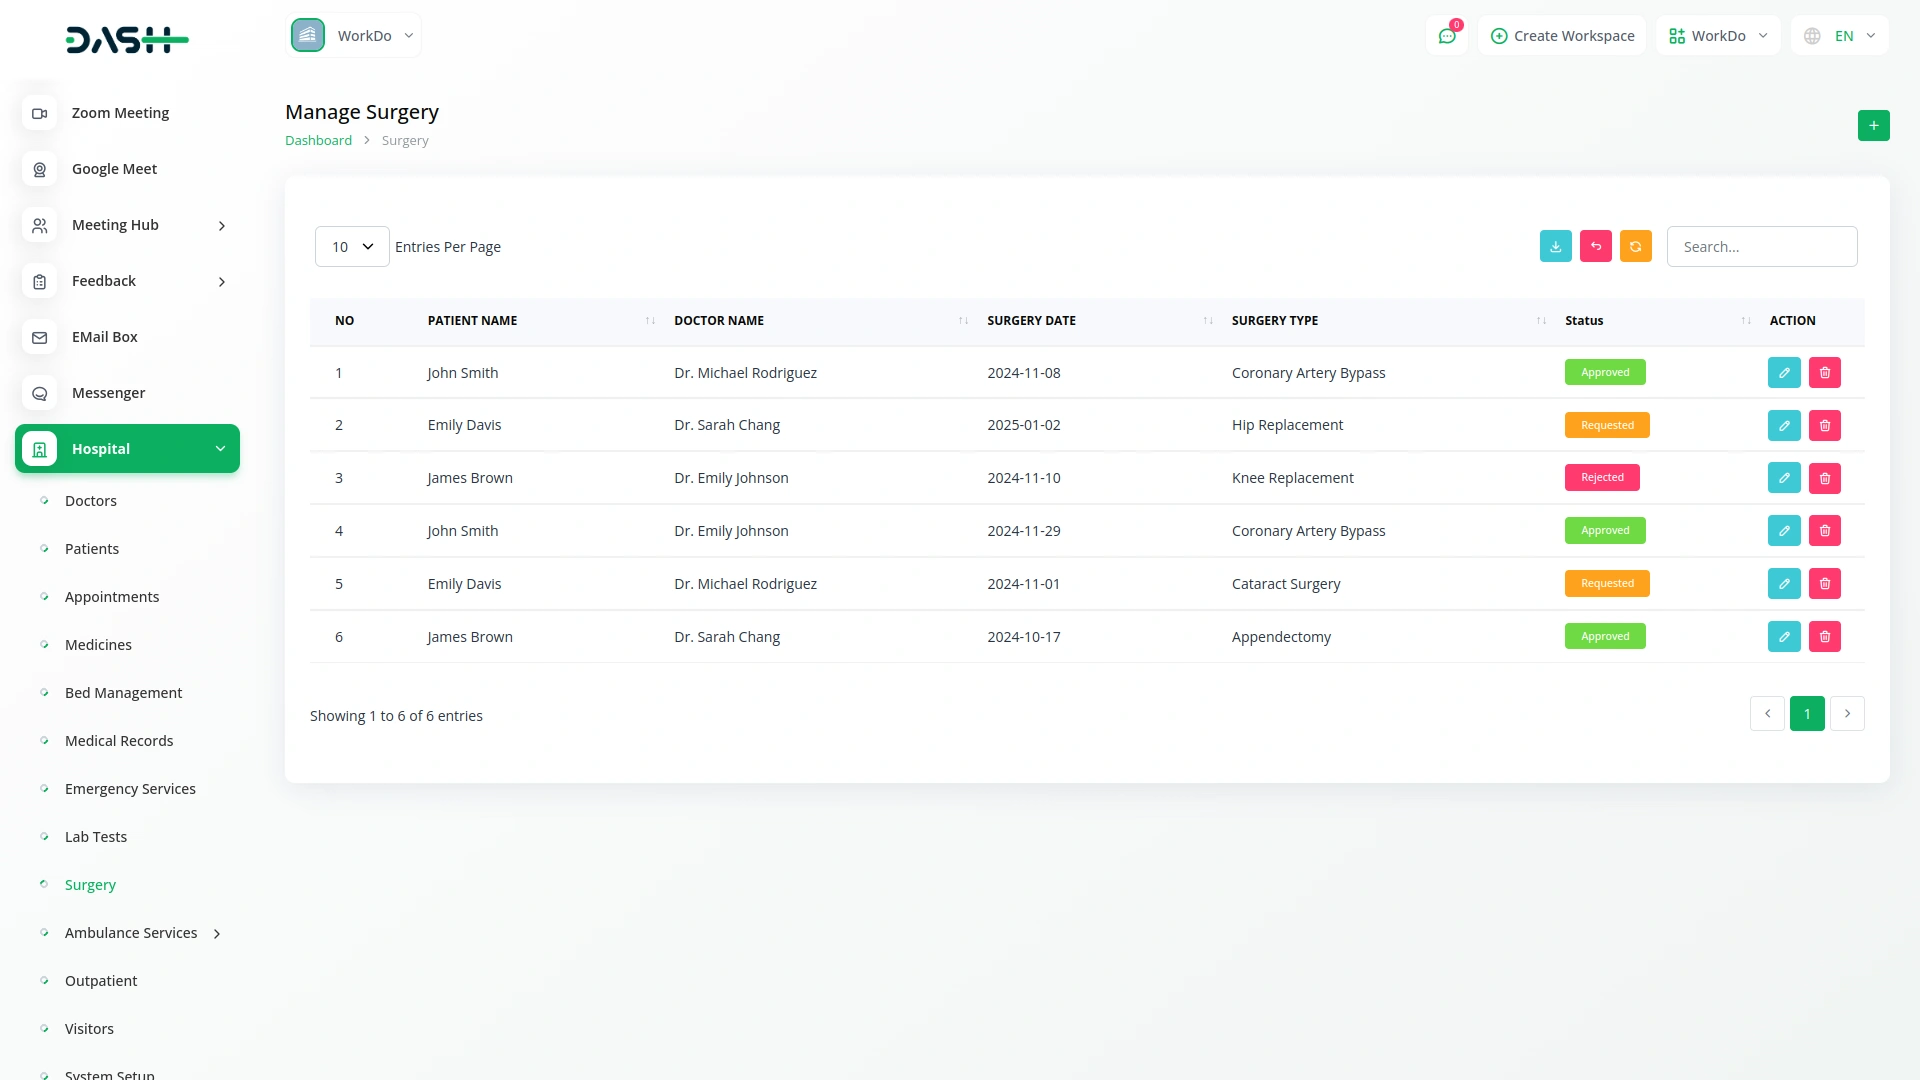
- The surgery list page displays all surgeries with columns for No, Patient Name, Doctor Name, Surgery Date, Surgery Type, and Status.
- You can search for specific surgeries or export the data. Each surgery record has Edit and Delete options in the Actions column.
Manage Ambulance
- To add a new ambulance to the system, click the “Create” button on the ambulance page. Enter the vehicle number, driver name, and contact information of the driver.
- Select the status from the dropdown menu (Requested, Approved, or Rejected).
- After filling in all details, click “Submit” to add the ambulance to the system.
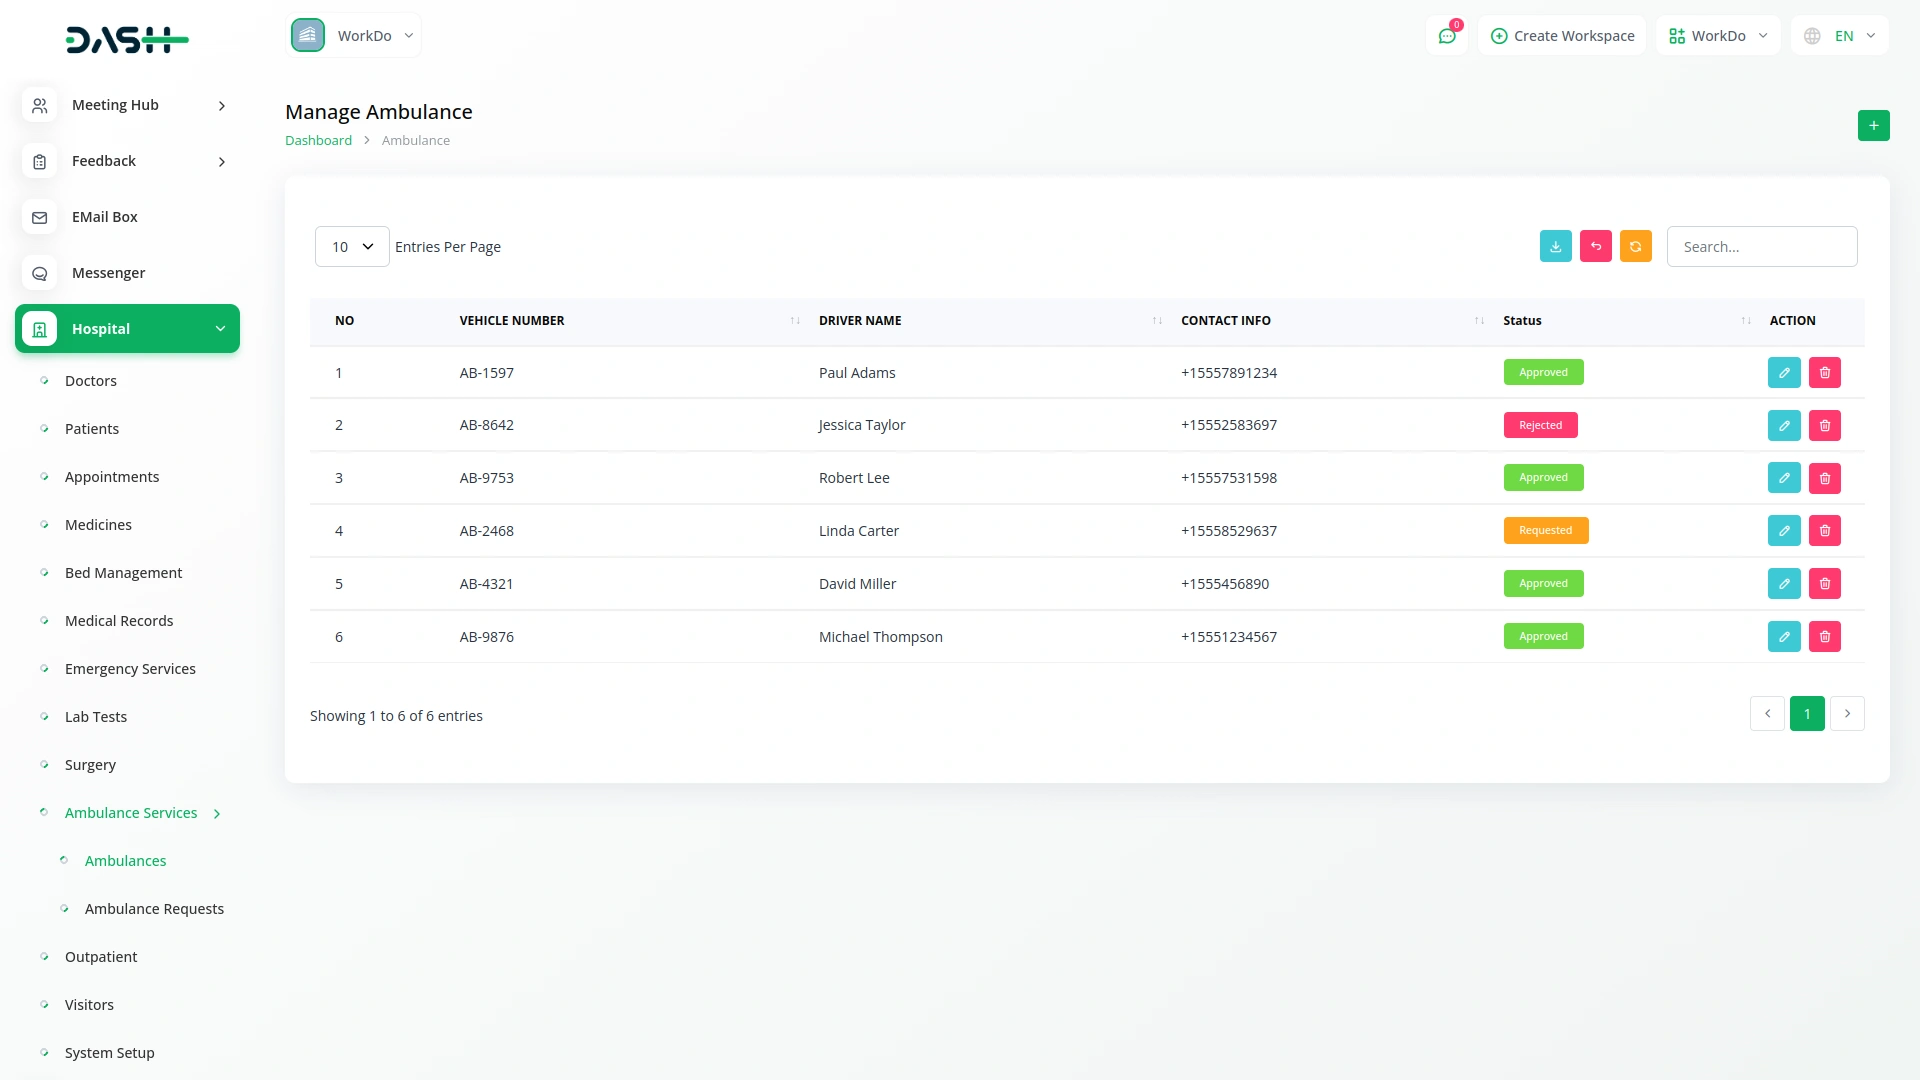
- The ambulance list page shows all ambulances in a table with columns for No, Vehicle Number, Driver Name, Contact Info, and Status (Requested, Approved, or Rejected).
- You can search for specific ambulances or export the data using the buttons at the top. Each ambulance record has Edit and Delete options in the Actions column.
Manage Ambulance Request
- To create a new ambulance request, click the “Create” button on the ambulance request page. Select the patient from the dropdown menu (comes from the patient section) and set the request date using the date picker. Enter the pickup location and destination details.
- Select the ambulance from the dropdown menu (populated from the ambulance section).
- Click “Submit” to create the ambulance request.
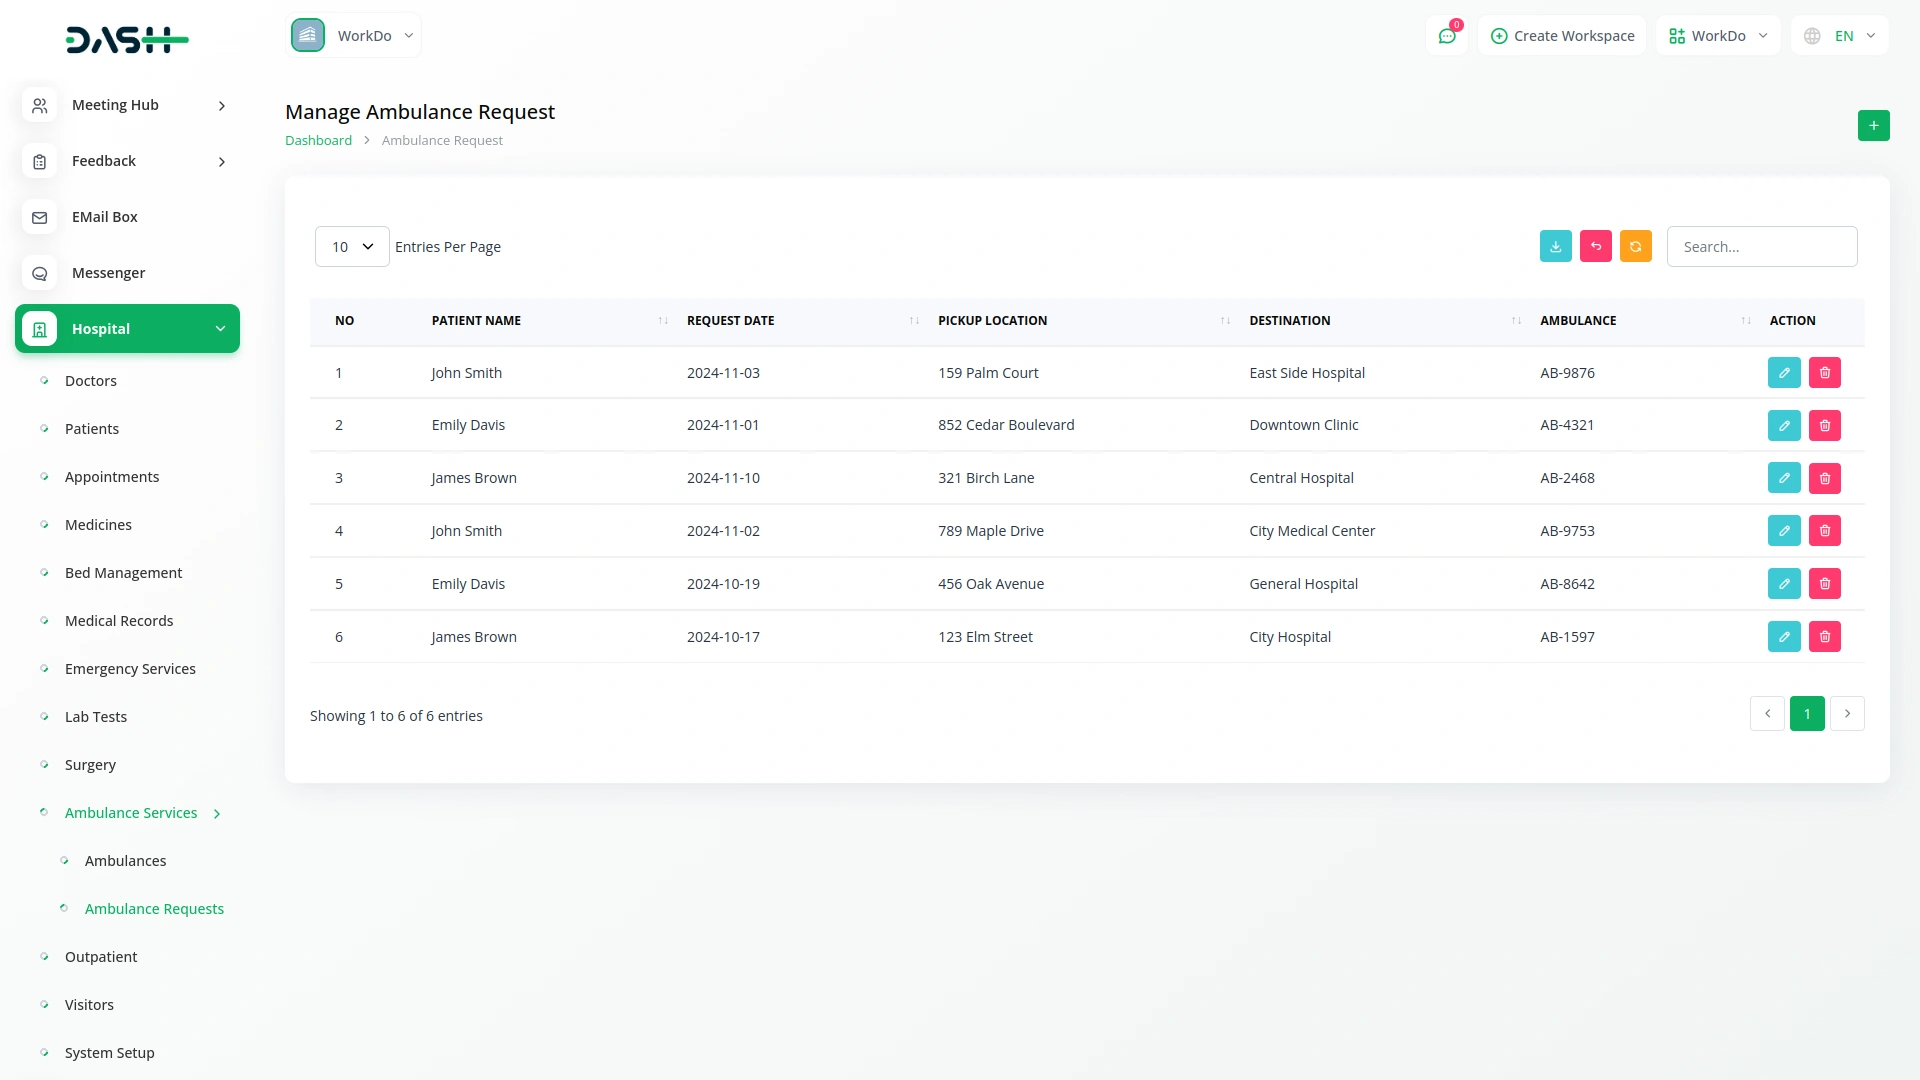
- The ambulance request list page displays all requests with columns for No, Patient Name, Request Date, Pickup Location, Destination, and Ambulance.
- You can search for specific requests or export the data. Each request record has Edit and Delete options in the Actions column.
Manage OutPatient
- To register a new outpatient visit, click the “Create” button on the outpatient page. Select the patient from the dropdown menu (comes from the patient section) and choose the doctor for consultation populated from the doctor’s page.
- Set the visit date using the date picker, enter the prescription details, and note the reason for the visit.
- After completing all fields, click “Submit” to create the outpatient record.
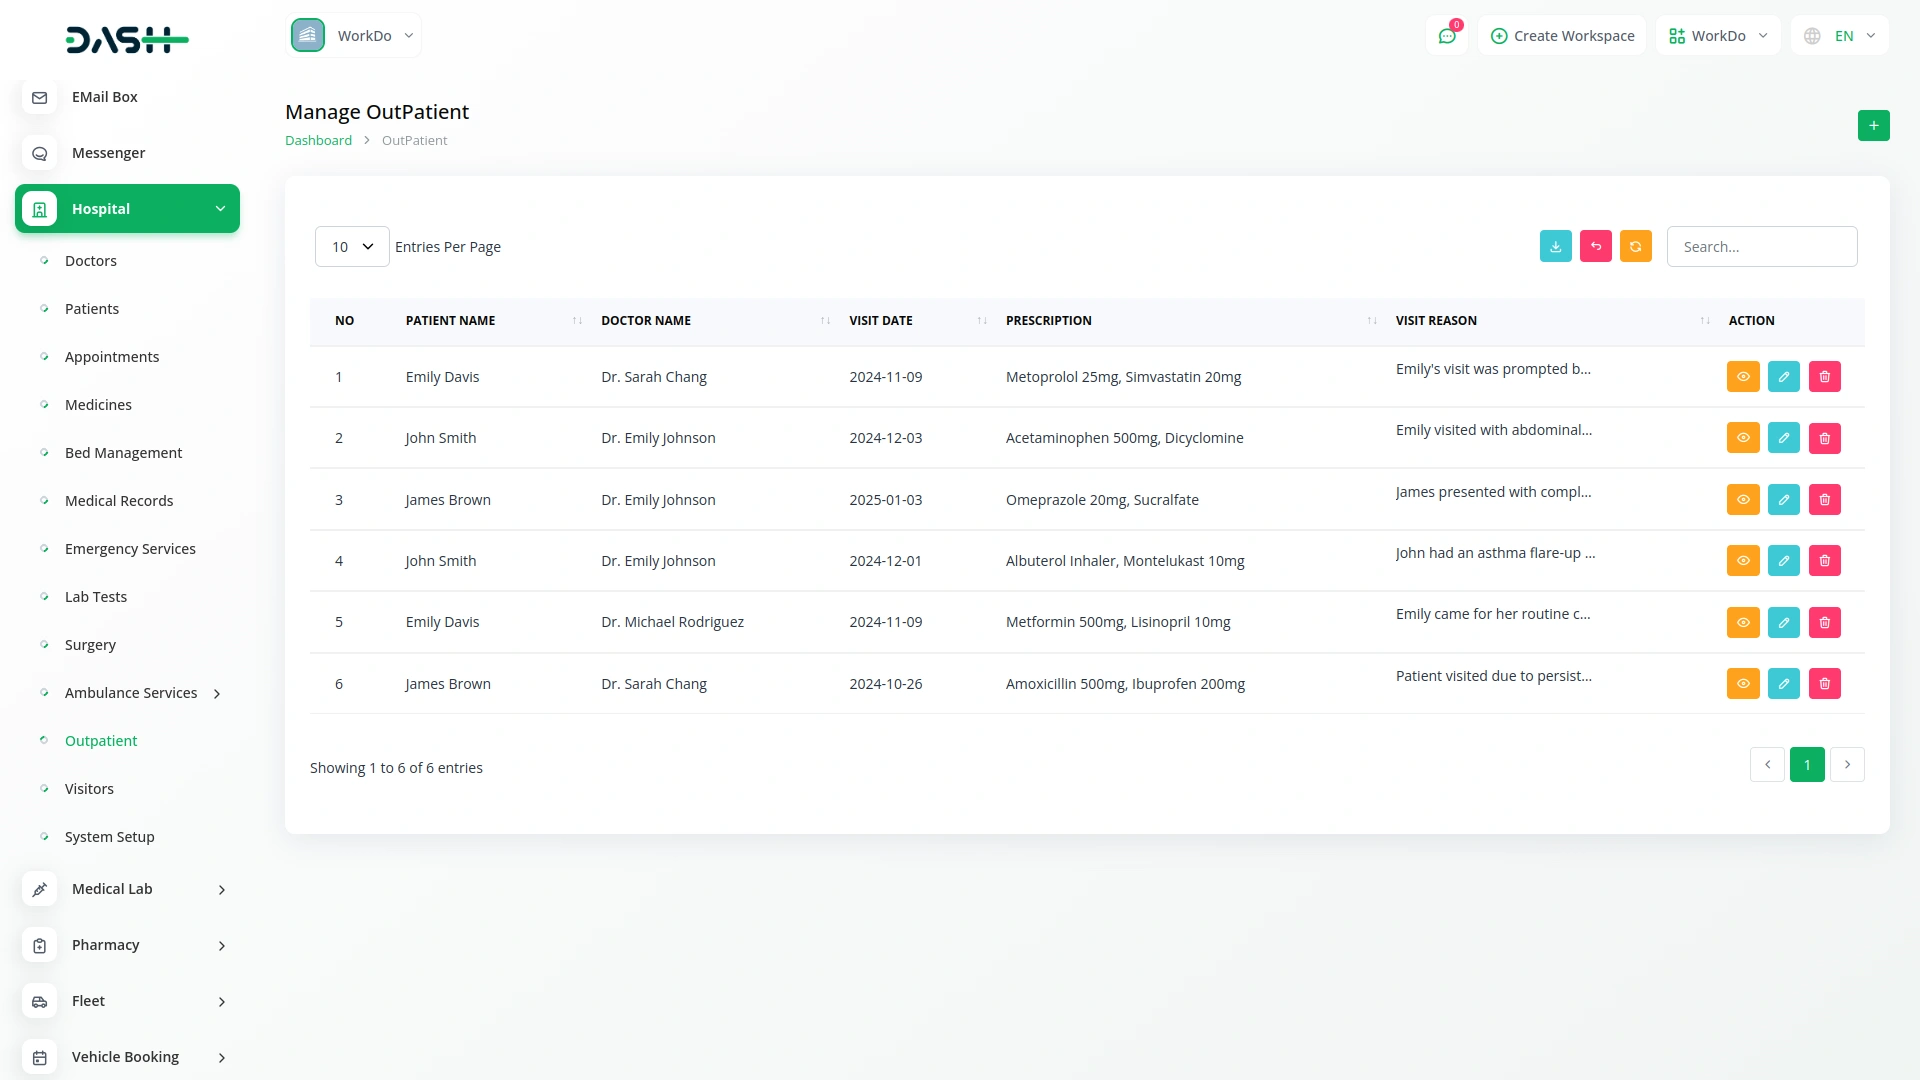
- The outpatient list page shows all outpatient visits in a table with columns for No, Patient Name, Doctor Name, Visit Date, and Prescription.
- You can search for specific visits or export the data using the buttons at the top. Each outpatient record has View, Edit, and Delete options in the Actions column.
Manage Visitors
- To register a new visitor, click the “Create” button on the visitors page. Enter the visitor’s name, contact information, and their relationship to the patient. Select the patient being visited from the dropdown menu that comes from the patient section. Set the visit date using the date picker, and enter check-in time and check-out time using the time fields.
- Click “Submit” to register the visitor.
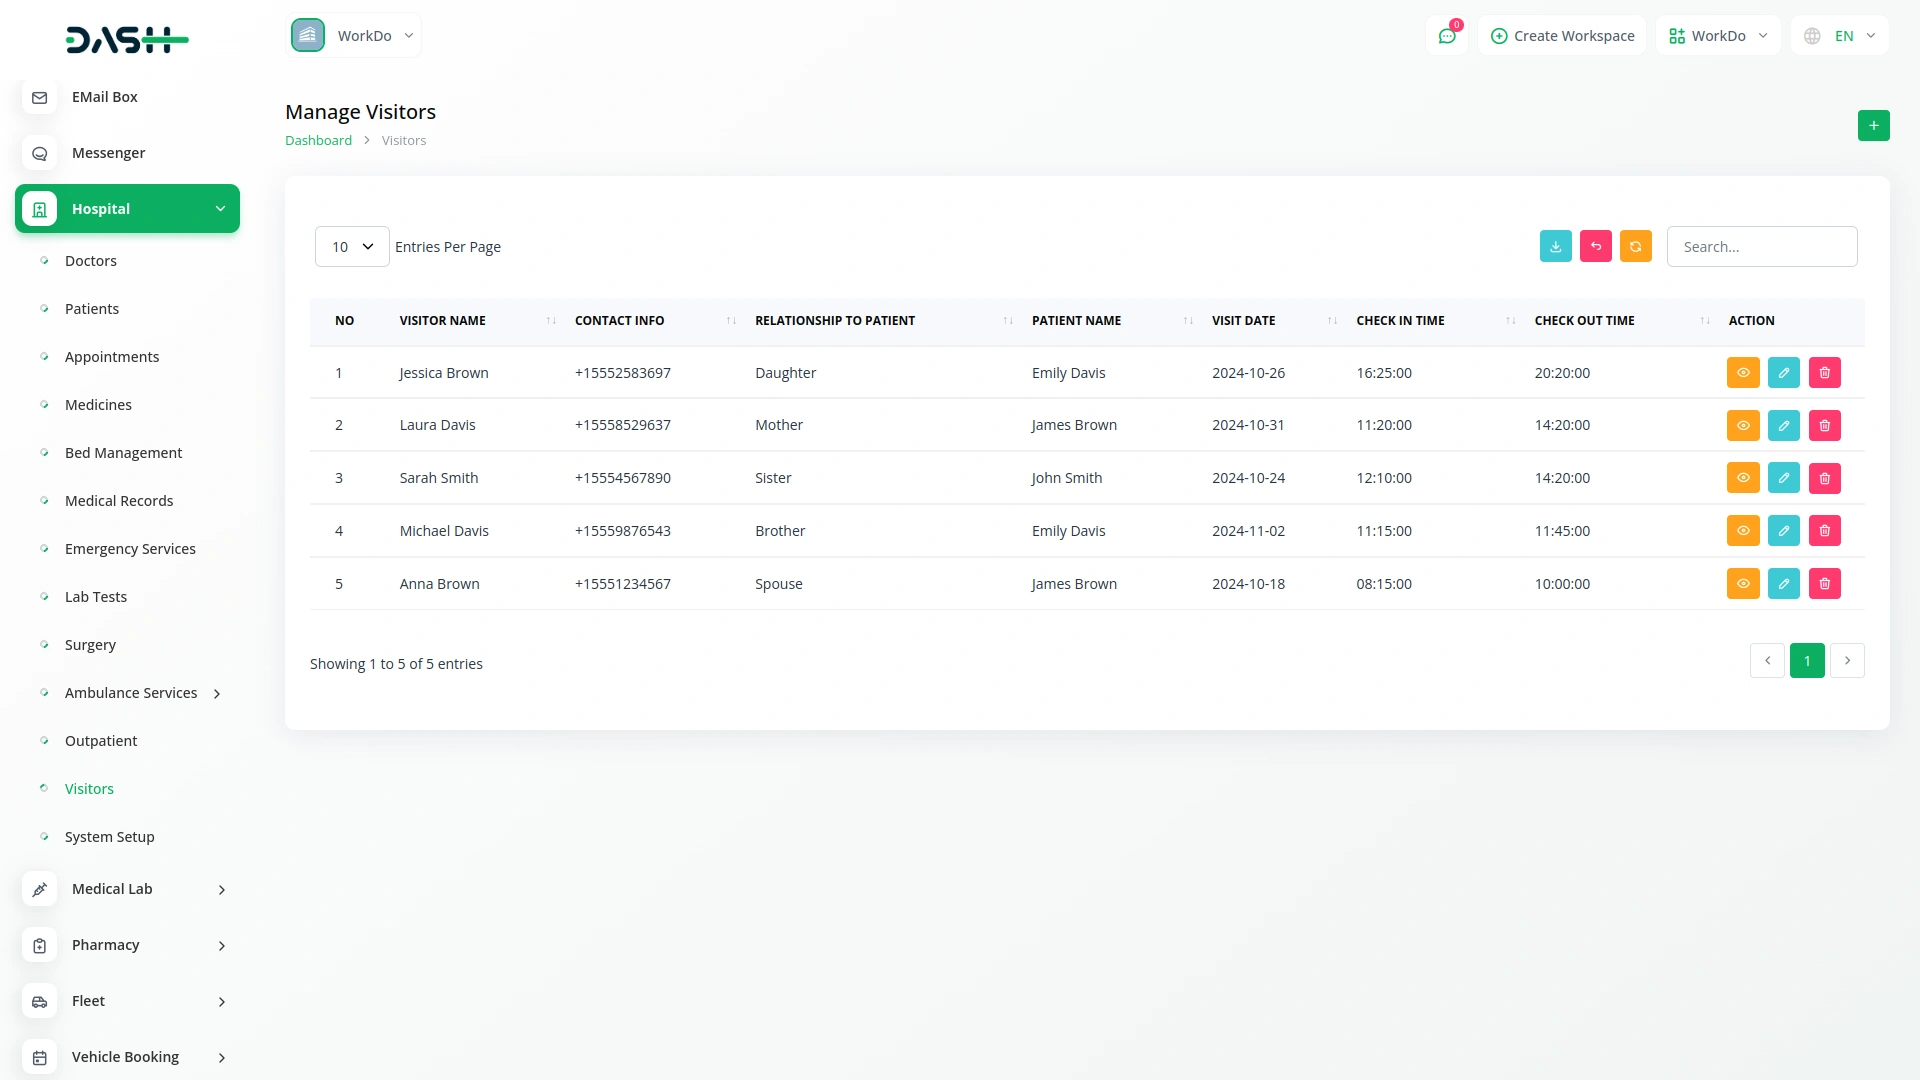
- The visitors list page displays all visitor records with columns for No, Visitor Name, Contact Info, Relationship To Patient, Patient Name, Visit Date, Check In Time, and Check Out Time.
- You can search for specific visitors or export the data. Each visitor record has View (to see complete visitor details), Edit, and Delete options in the Actions column.
Manage Specialization
- To add a new medical specialization, click the “Create” button on the specialization page. Enter the name of the specialization in the provided field.
- Click “Submit” to create the specialization.
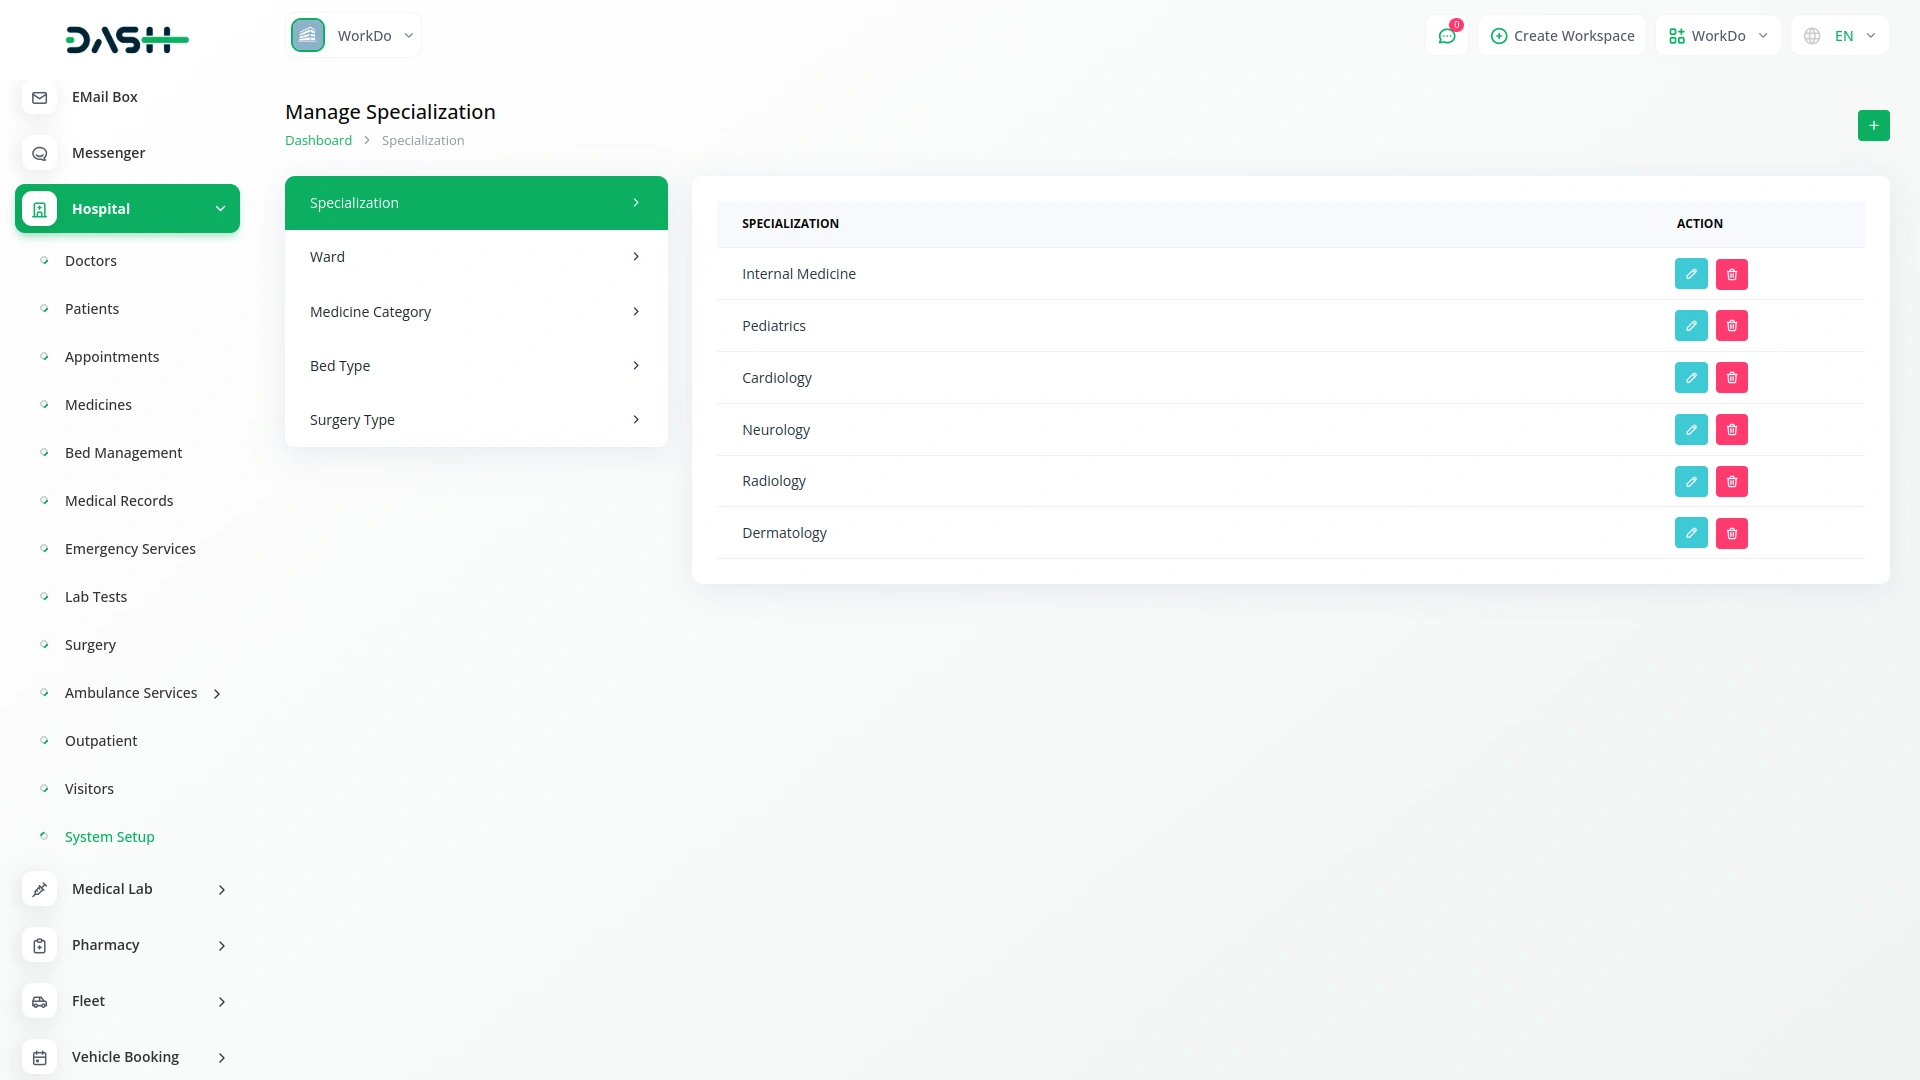
- The specialization list page shows all specializations in a simple table with a column for Specialization. Each specialization record has Edit and Delete options in the Actions column.
Manage Ward
- To create a new hospital ward, click the “Create” button on the ward page. Enter the name of the ward in the provided field.
- Click “Submit” to create the ward.
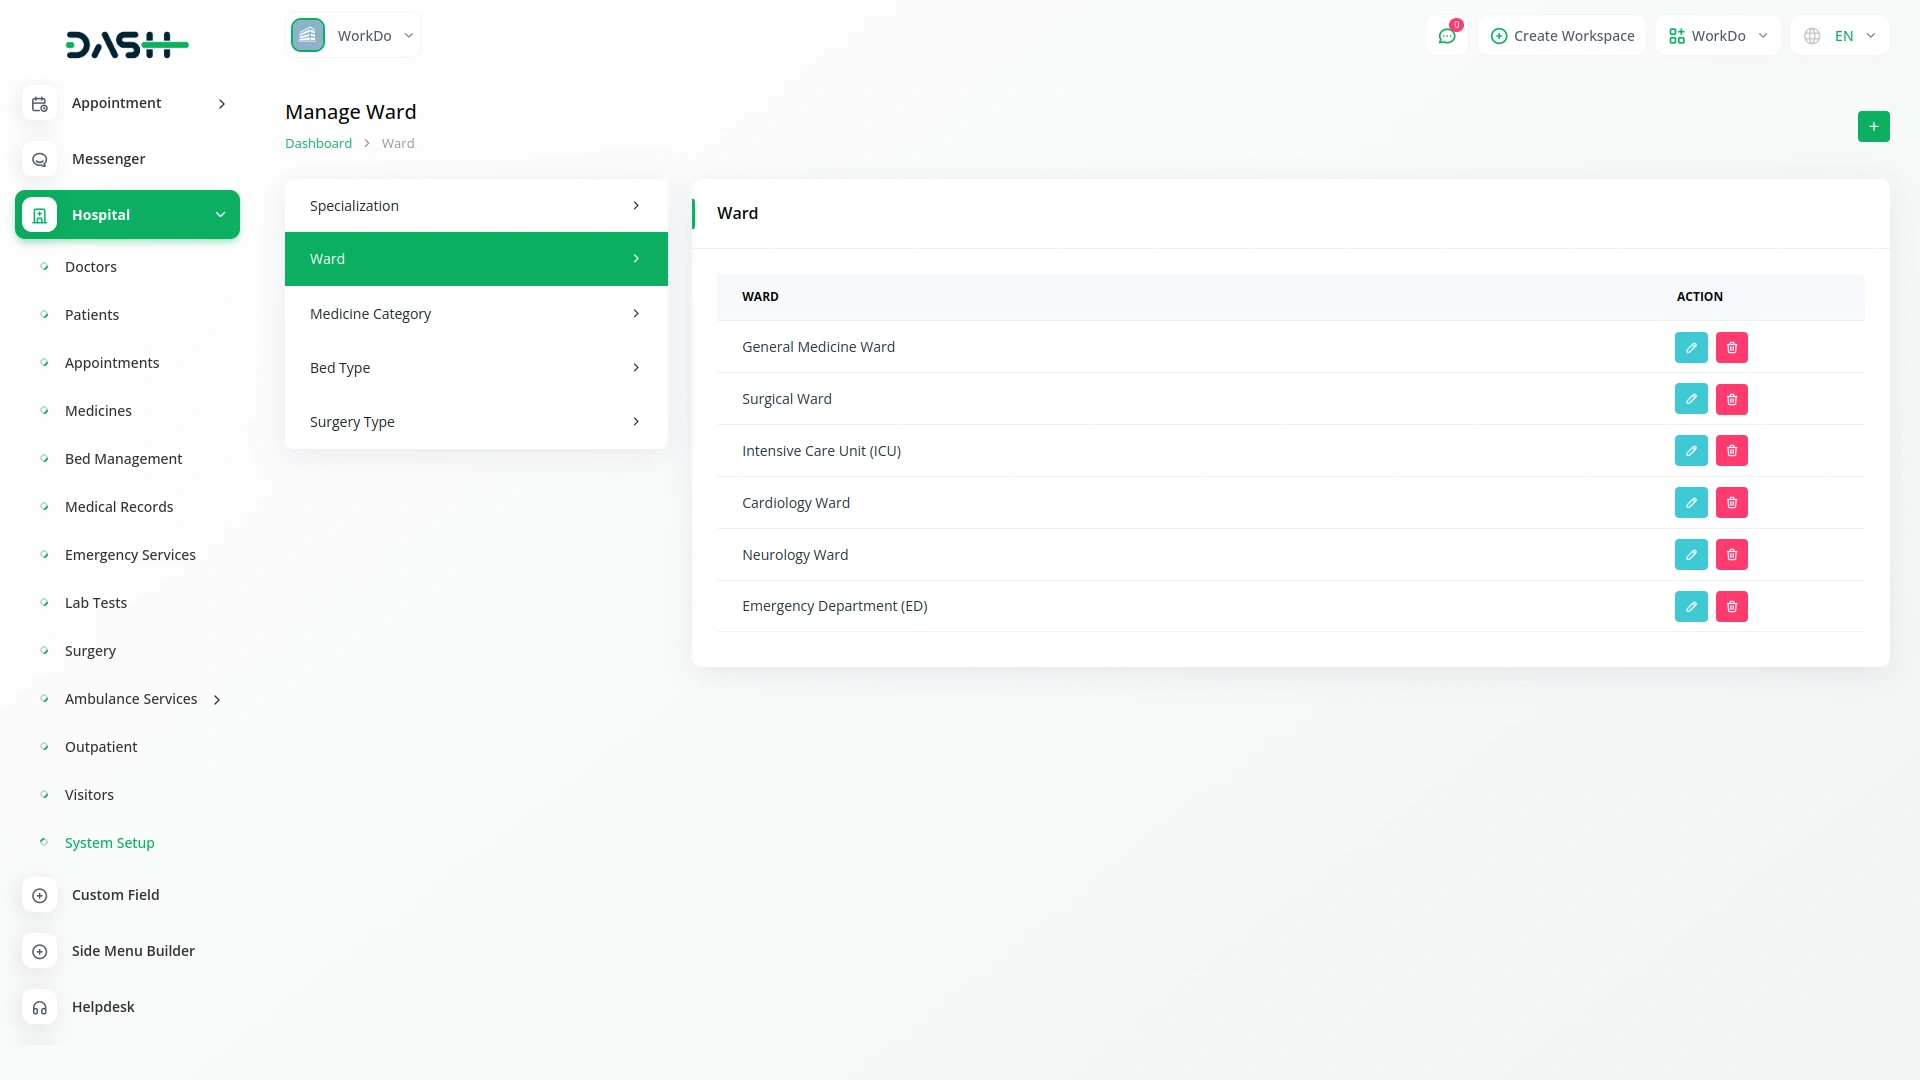
- The ward list page displays all wards in a table with a column for Ward. Each ward record has Edit and Delete options in the Actions column.
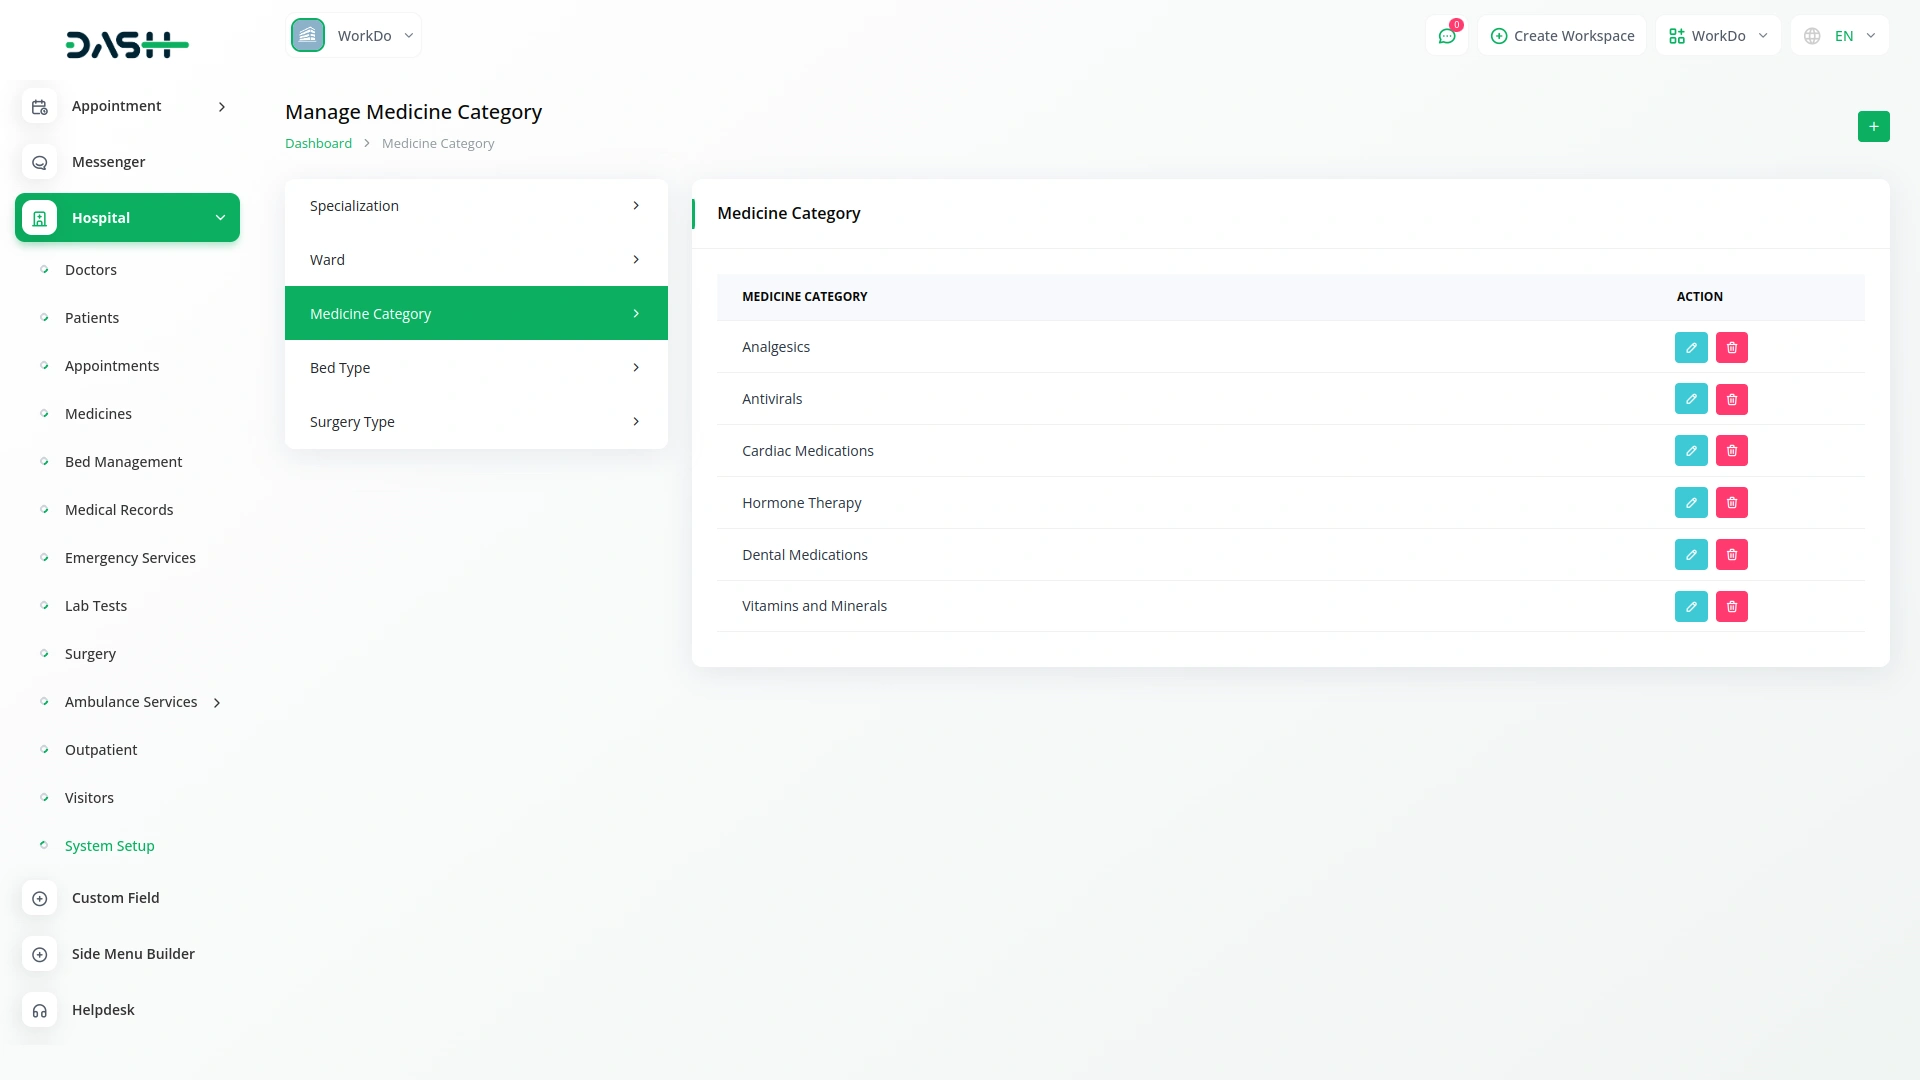
Manage Medicine Category
- To add a new medicine category, click the “Create” button on the medicine category page. Enter the name of the category in the provided field.
- Click “Submit” to create the medicine category.
- The medicine category list page shows all categories in a table with a column for Medicine Category. Each category record has Edit and Delete options in the Actions column.
Manage Bed Type
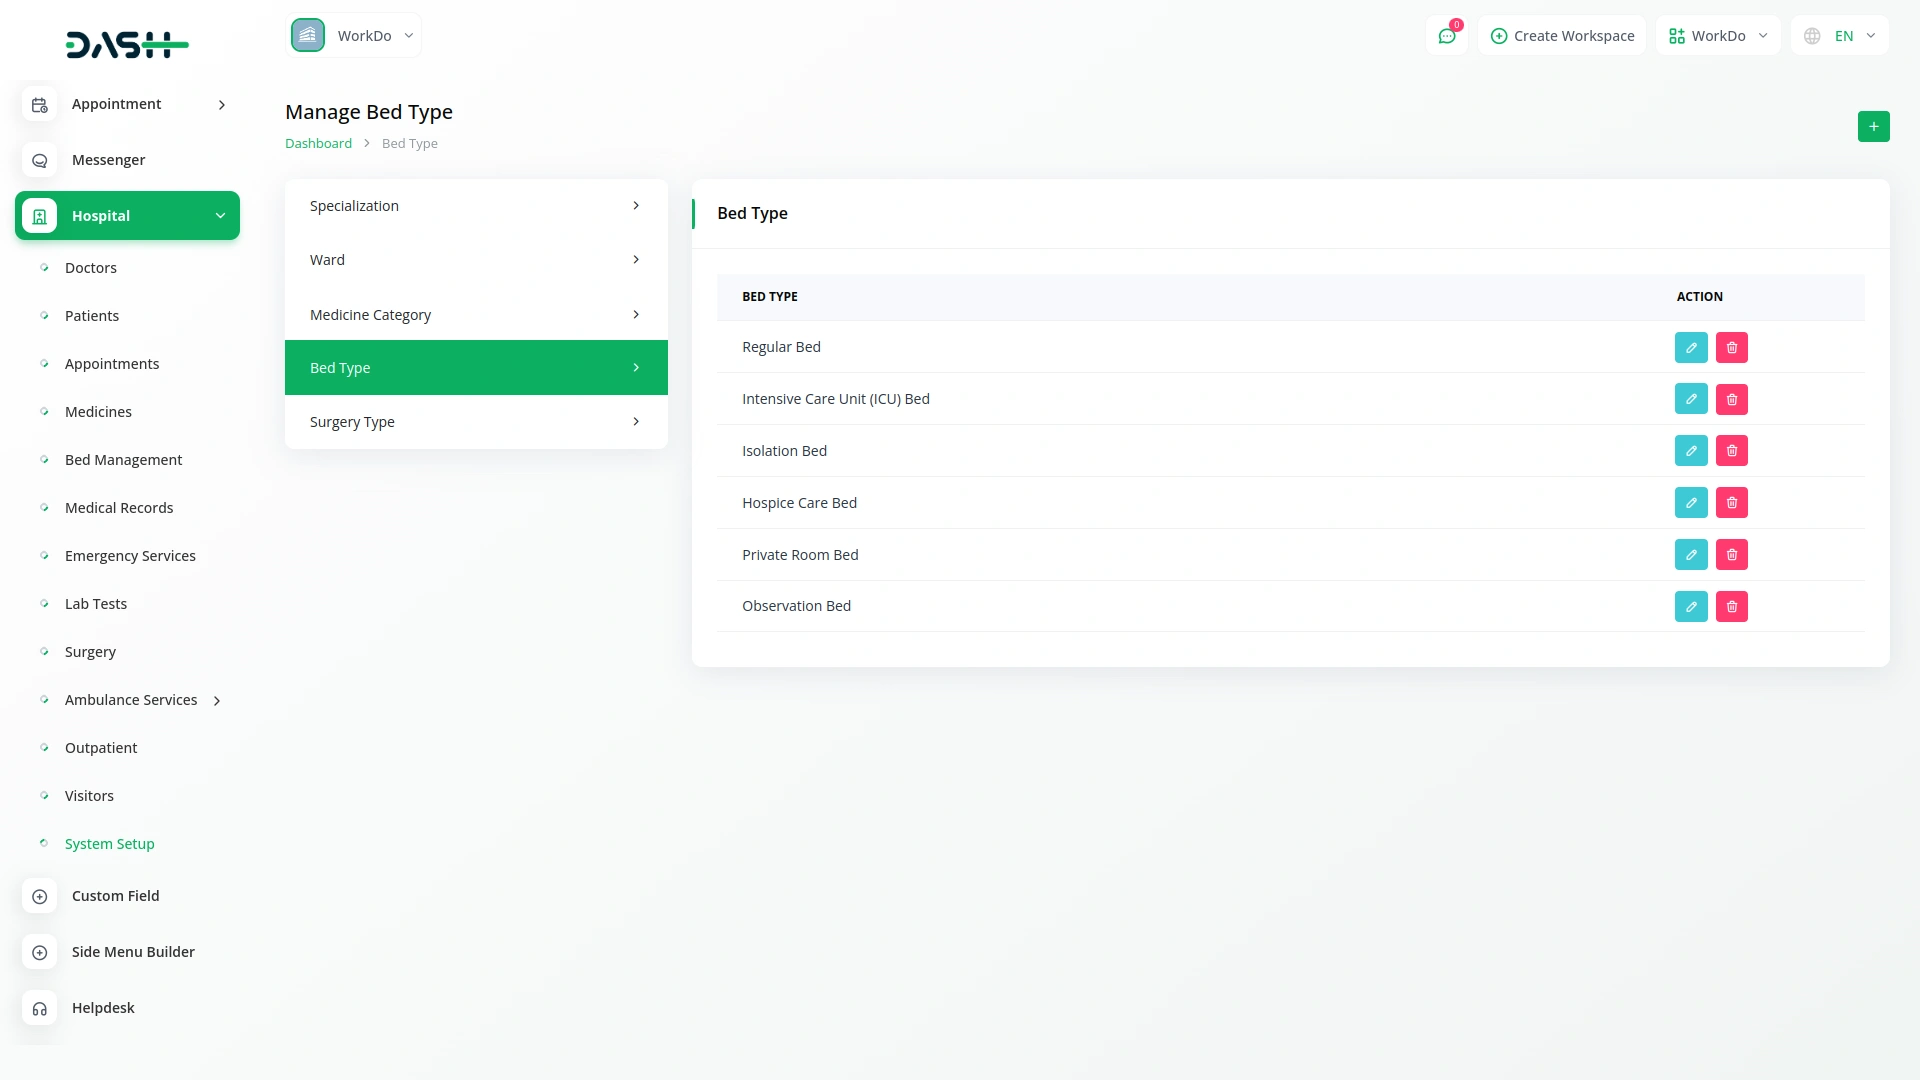
- To create a new bed type, click the “Create” button on the bed type page. Enter the name of the bed type in the provided field.
- Click “Submit” to create the bed type.
- The bed type list page displays all bed types in a table with a column for Bed Type. Each bed type record has Edit and Delete options in the Actions column.
Manage Surgery Type
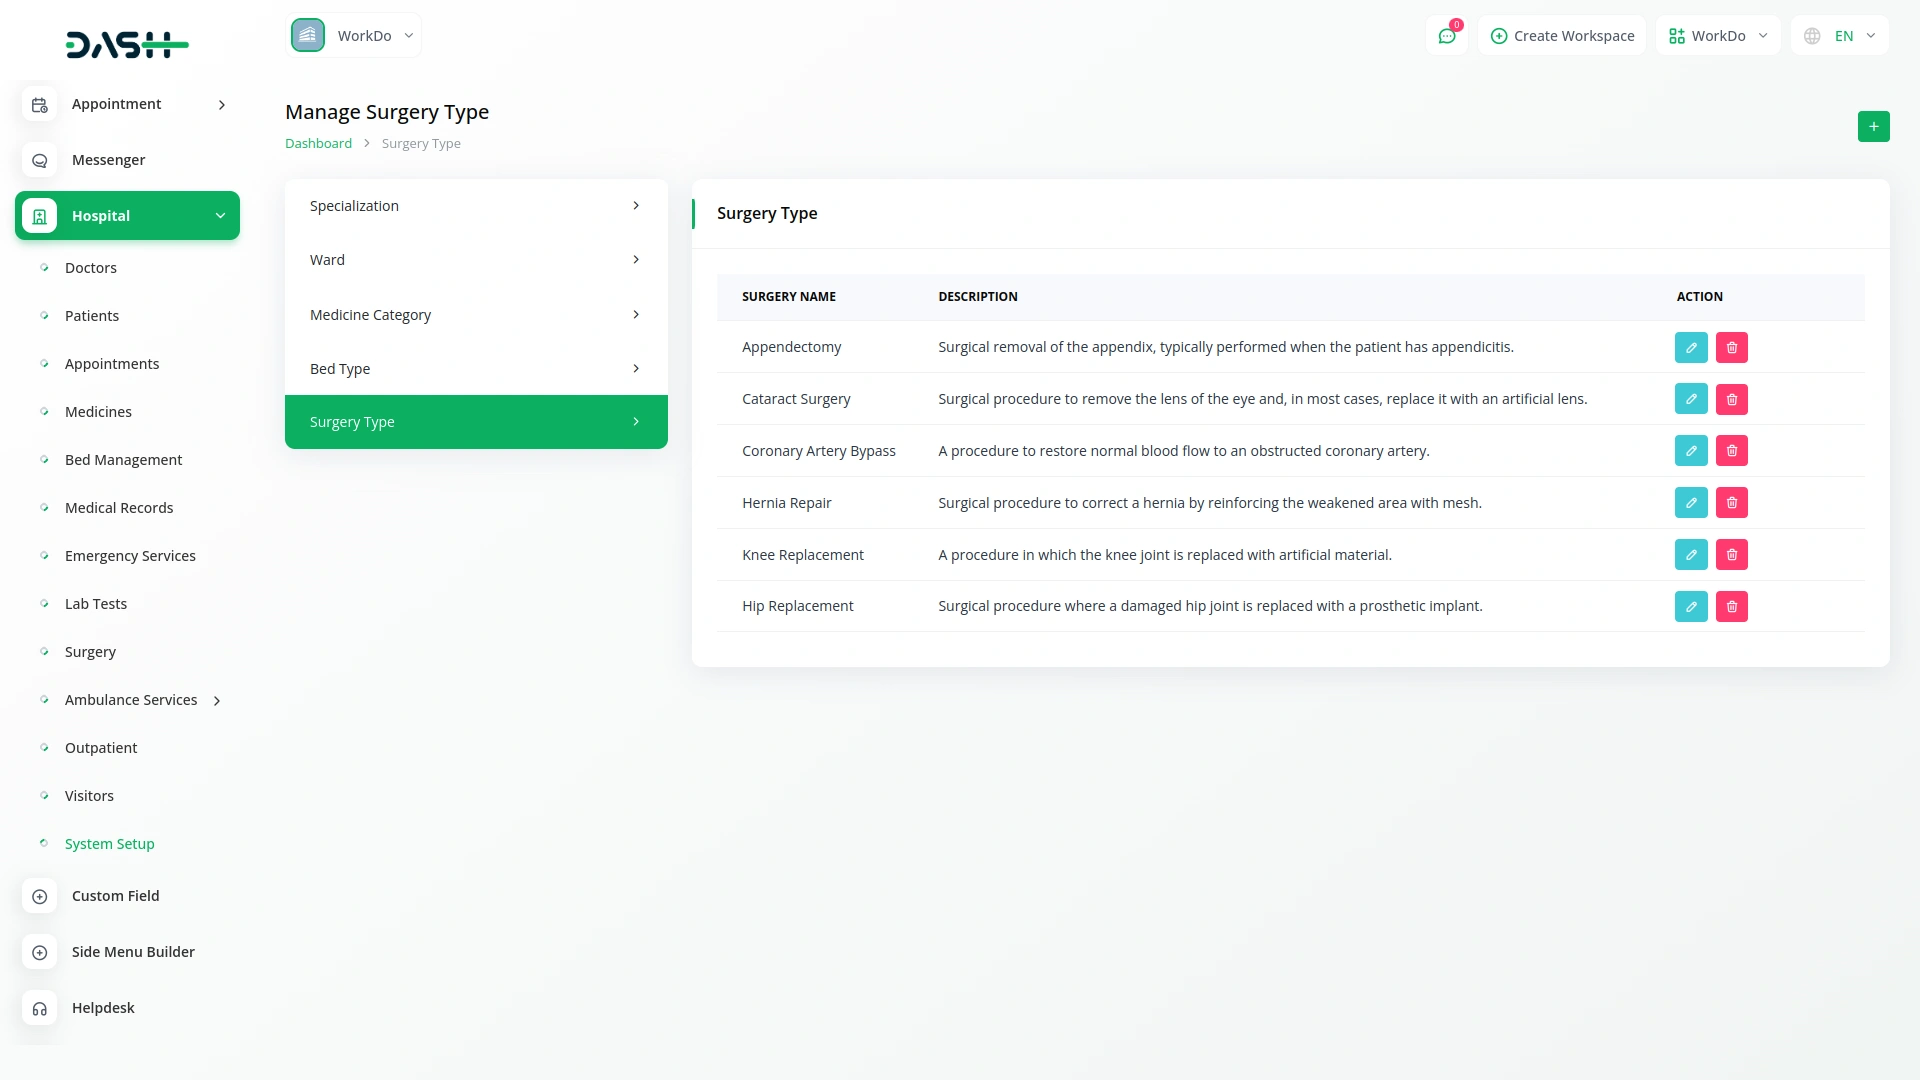
- To add a new surgery type, click the “Create” button on the surgery type page. Enter the name of the surgery type and provide a description of the procedure.
- Click “Submit” to create the surgery type.
- The surgery type list page shows all surgery types in a table with columns for Surgery Name and Description. Each surgery type record has Edit and Delete options in the Actions column.
Categories
Related articles
- Zatca Integration in Dash SaaS
- Jewellery Store Management Detailed Documentation
- Hotel and Room management in Dash SaaS
- Parking Management Integration in Dash SaaS
- CMMS Integration in Dash SaaS
- SinchSMS Integration in Detailed Documentation
- PetCare Integration in Dash SaaS
- Make Integration Detailed Documentation
- Commission Integration in Dash SaaS
- PayPay Payment Gateway
- SalesForce Integration in Dash SaaS
- Coworking Space Management Detail Documentation
Reach Out to Us
Have questions or need assistance? We're here to help! Reach out to our team for support, inquiries, or feedback. Your needs are important to us, and we’re ready to assist you!


Need more help?
If you’re still uncertain or need professional guidance, don’t hesitate to contact us. You can contact us via email or submit a ticket with a description of your issue. Our team of experts is always available to help you with any questions. Rest assured that we’ll respond to your inquiry promptly.
Love what you see?
Do you like the quality of our products, themes, and applications, or perhaps the design of our website caught your eye? You can have similarly outstanding designs for your website or apps. Contact us, and we’ll bring your ideas to life.
