
Mail2Ticket – TicketGo Add-On Guide
Learn how to configure and use the Mail2Ticket Add-On in TicketGo easily.
Introduction
The Mail2Ticket Add-On is designed to automatically convert incoming emails into support tickets within the system. This powerful feature ensures that customer queries, complaints, or requests sent via email are never missed and are seamlessly transformed into manageable support tickets for tracking and resolution. It helps streamline customer communication by connecting your email inbox directly to the ticketing system. The Add-On supports email parsing, ticket assignment, and status updates, ensuring that your support team stays organized and responsive without manually creating tickets from emails.
How to Install the Mail2Ticket Add-On?
Follow these steps for Installation : Setup Mail2Ticket.
Note: This Add-On Only works with Gmail or Outlook accounts.
To generate the credentials of outlook and gmail you can follow this link: Documentation link.
How To Use The Mail2Ticket Add-On?
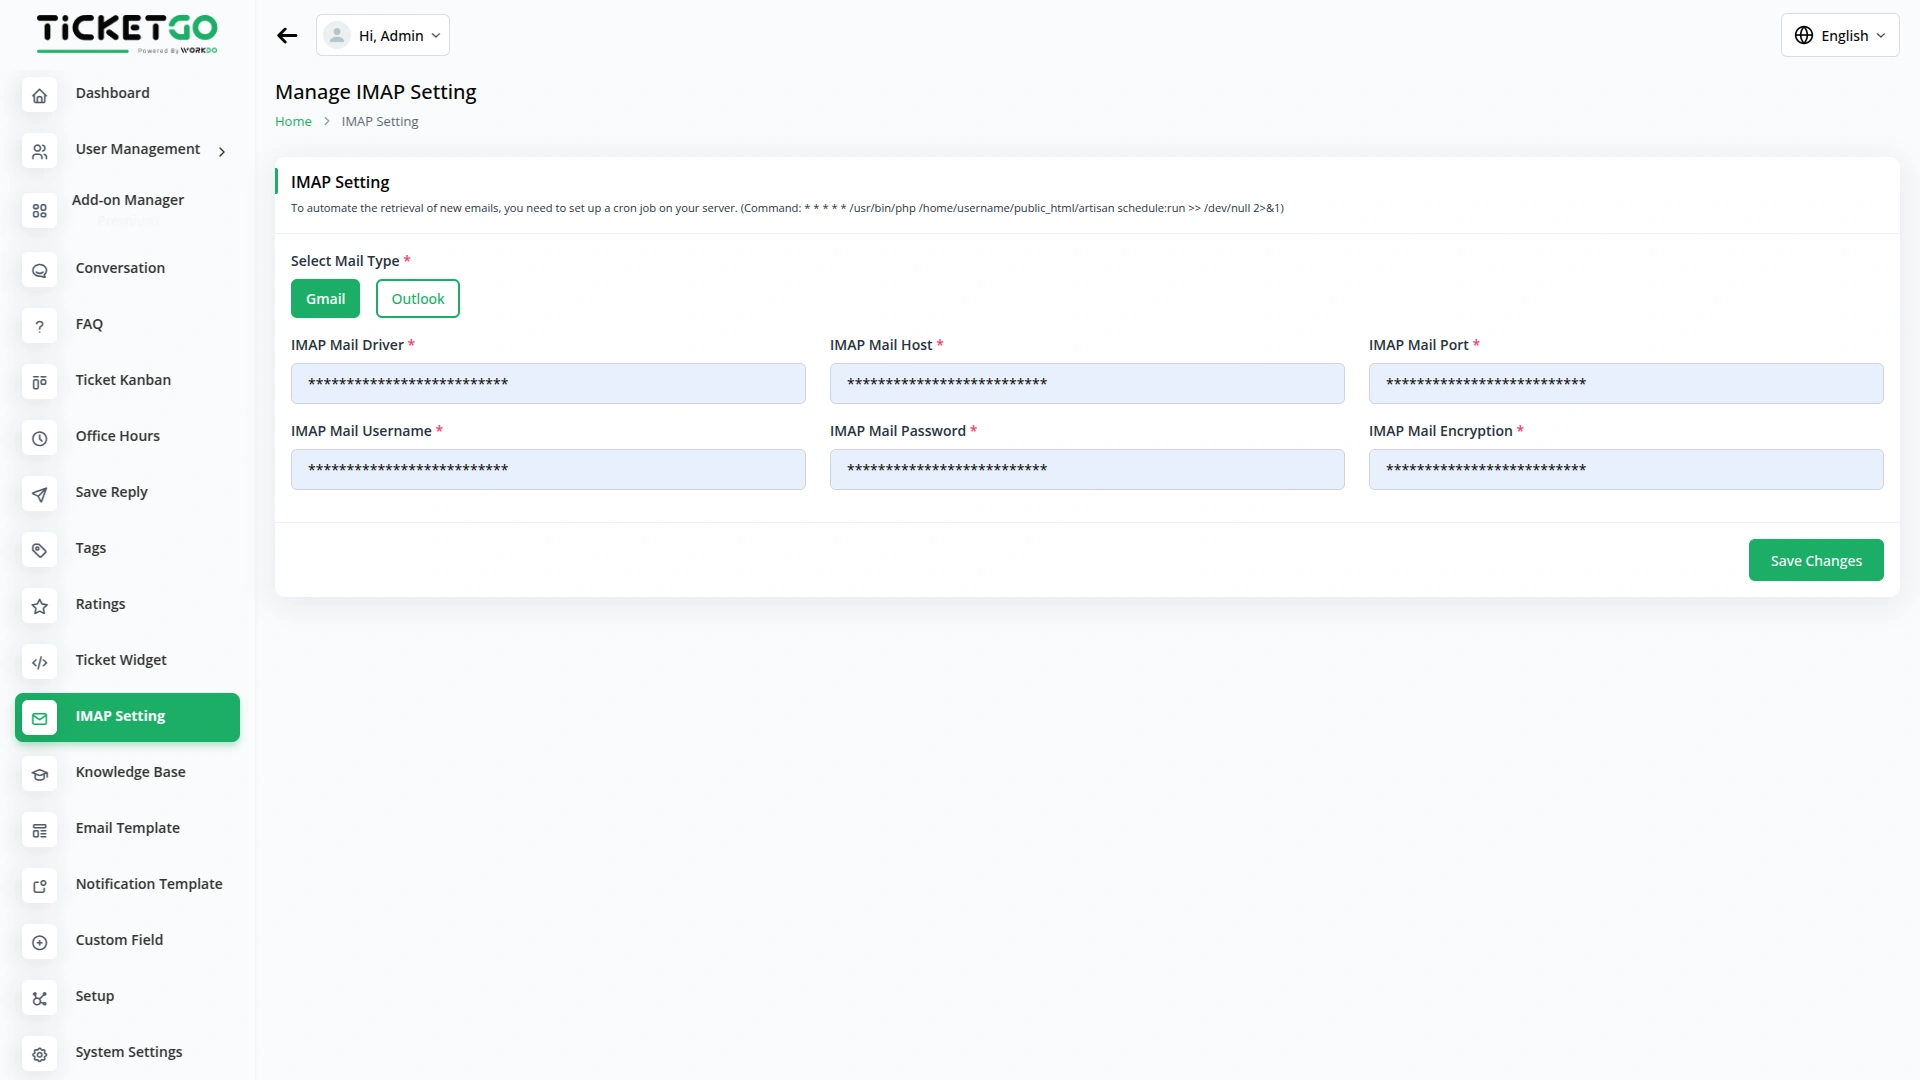
- Once you purchase the Add-On, go to the sidebar and find the IMAP settings page in it.
- On this page you will get an option of selecting the mail type, between gmail and outlook.
- If you select the gmail type, you will need to add credentials like IMAP mail driver, IMAP Mail host, IMAP Mail Port, IMAP Mail username, IMAP Mail password, and IMAP Mail description, once you add the credentials click the save changes button after which your tickets will be converted into mail easily.
- Next, if you select the Outlook option you will need to add the Outlook Client ID, and Outlook Client Secret. After you add the credentials click the save changes button. Once you save the credentials, a sync button will be visible to you at the top.
- Once you click the sync button the portal will be synced with the Microsoft outlook account. After which you will need to add the IMAP setting credentials like IMAP Mail driver, IMAP Mail Host, IMAP Mail Port, IMAP Mail Username, IMAP Mail Password (the password will be auto generated while you sync the account, it will generated in the form of token which can’t be edited, you can only view it), IMAP Mail Encryption, and IMAP Mail Authentication.
-
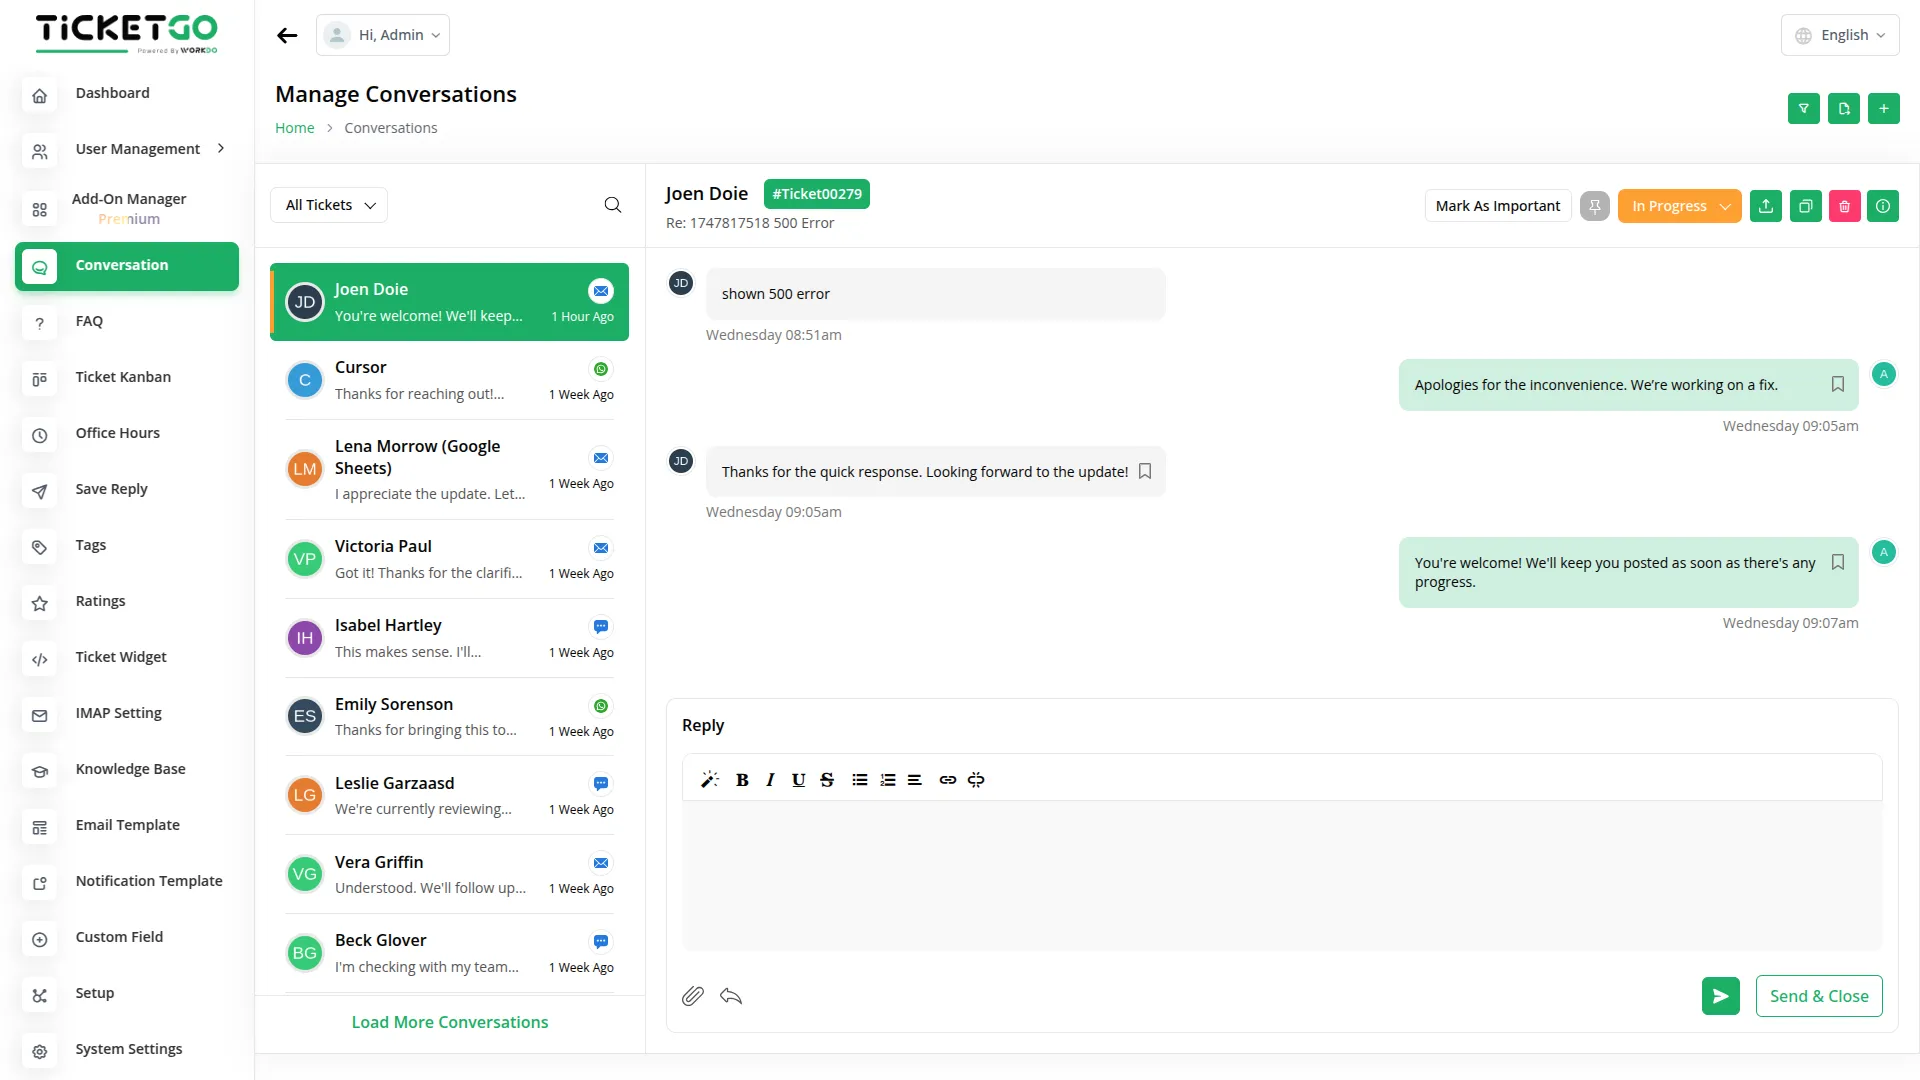
- All the pending emails from the customers will be converted into the tickets after you set up the cron job.
- These tickets will be visible in the conversation page. You can reply to that mail from the conversation page itself.
- The reply that you send, will be visible to the customer on their email, in the form of reply to that mail, and if the custom replies back it will be visible to you on the conversation page.
- The user and customer can also have conversation easily.
-
To install IMAP Extension for Ubuntu and PHP, follow these steps:
-
Install the IMAP extension for PHP 8.3:
sudo apt update

sudo apt install php8.3-imap -
Enable the IMAP extension:
sudo phpenmod imap -
Restart PHP and your web server (if applicable):
If you’re using Apache:
sudo systemctl restart apache2 -
Verify it’s enabled:
php -m | grep imap
This should output:
nginx

            imap
To install IMAP Extension for macOS, follow these steps:
-
Install IMAP extension (if not installed):
If you’re using Homebrew & PHP via brew:
brew install imap-uw

            brew reinstall php
If you’re using Valet, PHP is already installed but may require enabling IMAP. -
Enable IMAP in PHP:
Edit yourphp.ini(find it withphp --ini) and uncomment:
extension=imap
If it’s missing, add this line manually. -
Restart PHP:
Depending on your setup:
brew services restart php
Or if using Valet:
valet restart
To install IMAP Extension for Windows, follow these steps:
-
Enable IMAP in
php.ini:
Find yourphp.inifile (runphp --ini).
Open it in a text editor and uncomment this line:
extension=imap -
Restart your web server:
If you’re using:
- XAMPP: Stop & Start Apache
- Laragon or others: Restart the server manager
-
Test if it works:
Run:
php -i | grep -i imap
You should see output like:
IMAP c-Client Version => 2007f

imap -
Check Composer dependency:
Make surephp-imap/php-imapis installed via Composer:
composer require php-imap/php-imap
So, this is how you can use the Mail2Ticket Add-On easily.
Categories
Related articles
- Boutique & Designer Studio – WorkDo Dash SaaS Add-On Guide
- Flexible Duration – BookingGo SaaS Add-On Guide
- Frequently Product – eCommerceGo SaaS Add-On Guide
- Spreadsheet – WorkDo Dash SaaS Add-On Guide
- MSG91 – TicketGo Add-On Guide
- User Manual – StoreGo SaaS
- Google Analytics – WorkDo Dash SaaS Add-On Guide
- Compound Service – BookingGo SaaS Add-On Guide
- WhatsApp API Permanent Access Token Generation Guide
- Pusher Configuration Guide
- Procurement – WorkDo Dash SaaS Add-On Guide
- Requests – WorkDo Dash SaaS Add-On Guide
We're Here to Help - Let's Talk
Have questions about our solutions, customization services, or business tools? Our team is here to help you. let's talk.