
Attendance Management in WorkDo HRM
Learn to manage attendance records, biometric sync, shifts, and policies.
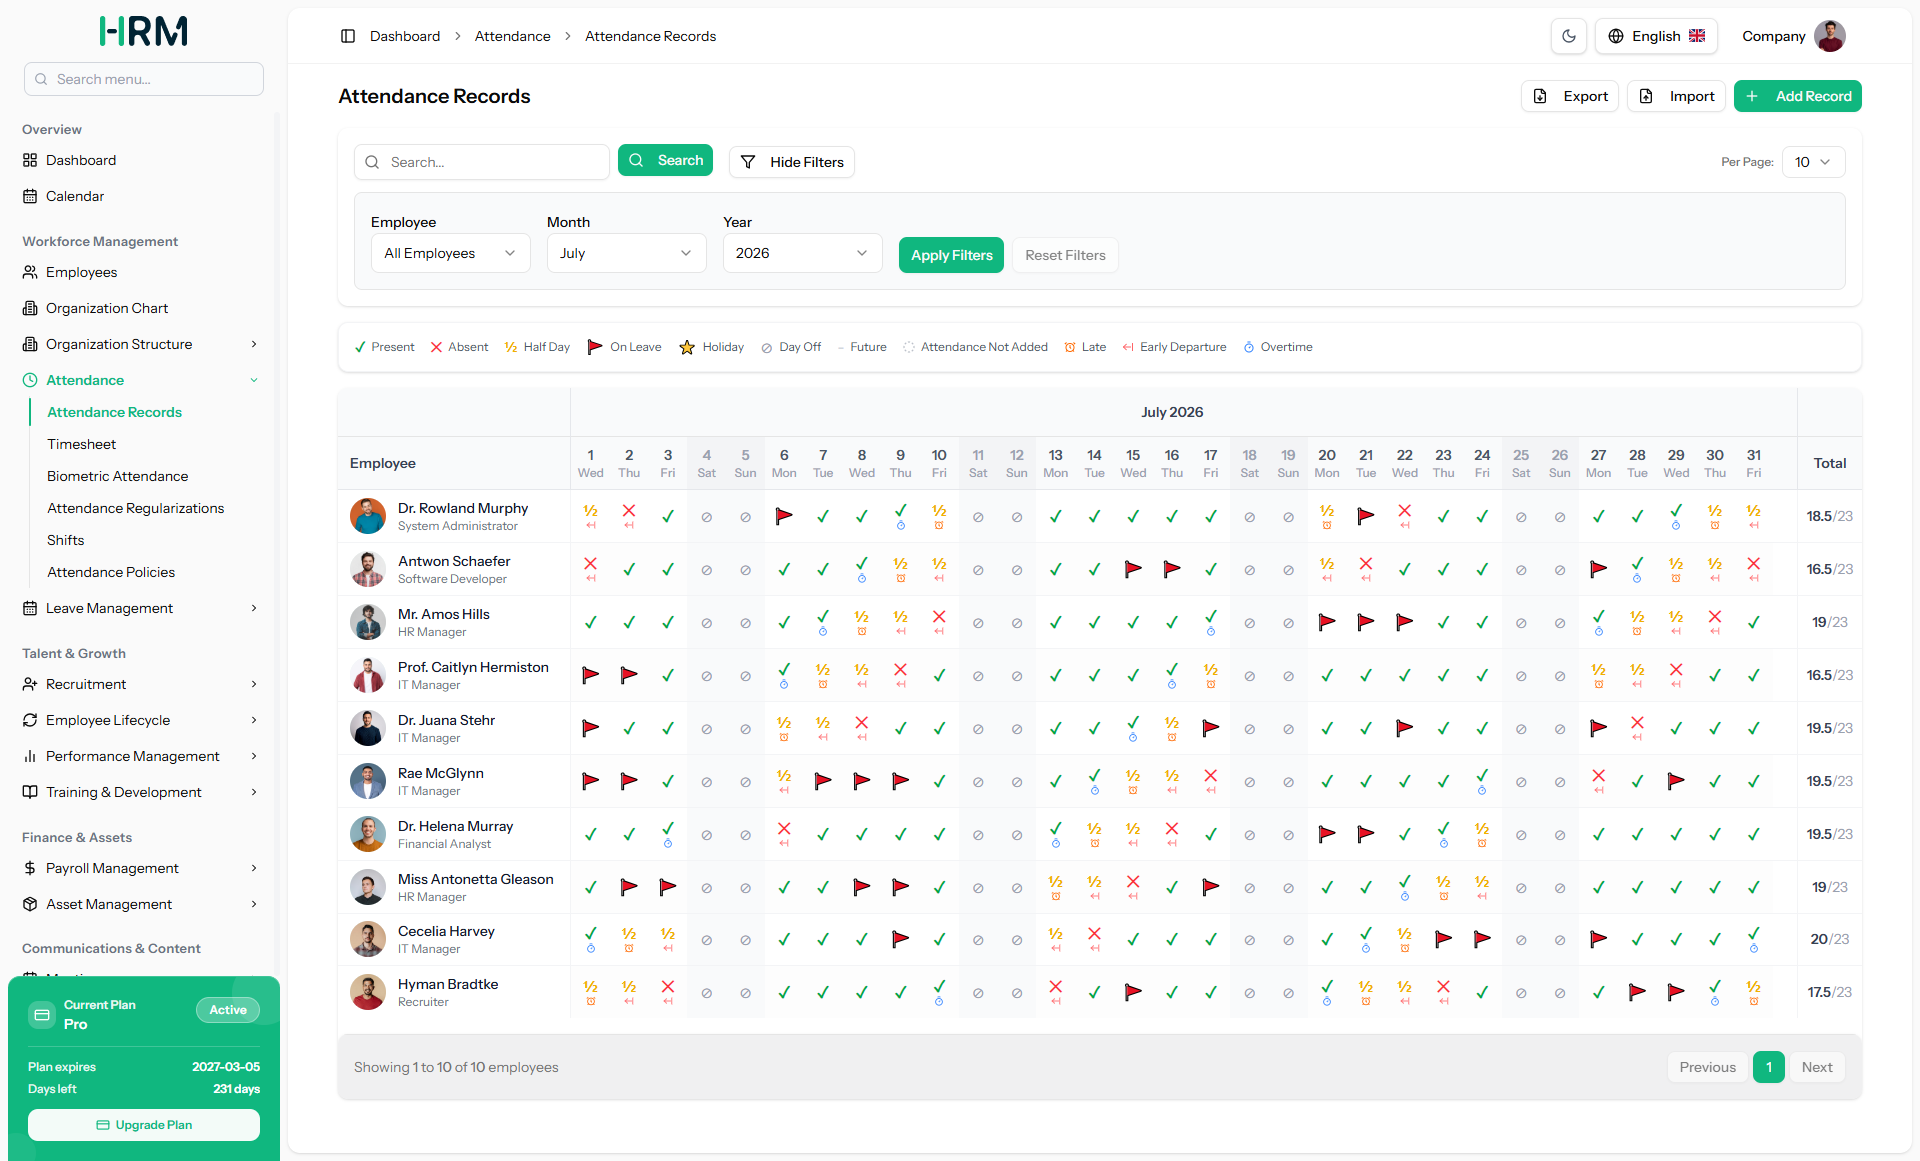
Step 1: To view and manage attendance, navigate to the Attendance Records page from the Attendance menu. This page displays a comprehensive calendar-style view of all employees’ attendance for the selected month and year.
You can use the filters at the top of the page to view records for a specific Employee, Month, or Year, then click Apply Filters to update the view. To clear your selection and start over, click Reset Filters.
Each day in the calendar will be marked with a specific symbol based on the employee’s attendance status. If the employee came to work, the day will show Present. If an employee does not come to work without approval, they will be marked as Absent. Also, if an employee leaves before half a day, they will still be marked as Absent. If the employee worked only half the day, it will show Half Day.
If the employee is on an approved paid or unpaid leave, the day will be marked as On Leave. If that day is a declared public or company holiday, it will show Holiday. If it is the employee’s scheduled weekly off, like Saturday or Sunday, it will show Day Off (this option is available in the settings).
For dates that have not yet arrived, the day will simply show as Future. If an employee has not added attendance for the day, it will show as Attendance Not Added.
If the employee arrived after the Late Arrival Grace, the day will show Late. If the employee left before the Early Departure Grace, it will show Early Departure. And if the employee worked beyond their shift hours, the day will show Overtime.
At the far right of the calendar, the Total column shows the total attendance count for each employee out of the total working days in the month.
Step 2: To add an attendance entry manually, click the “Add Record” button at the top-right corner, fill in the Employee, Date, Clock In Time, Clock Out Time, and optional Notes, then click Save.
You can also use the Export button to download attendance records or the Import button to upload bulk attendance data.
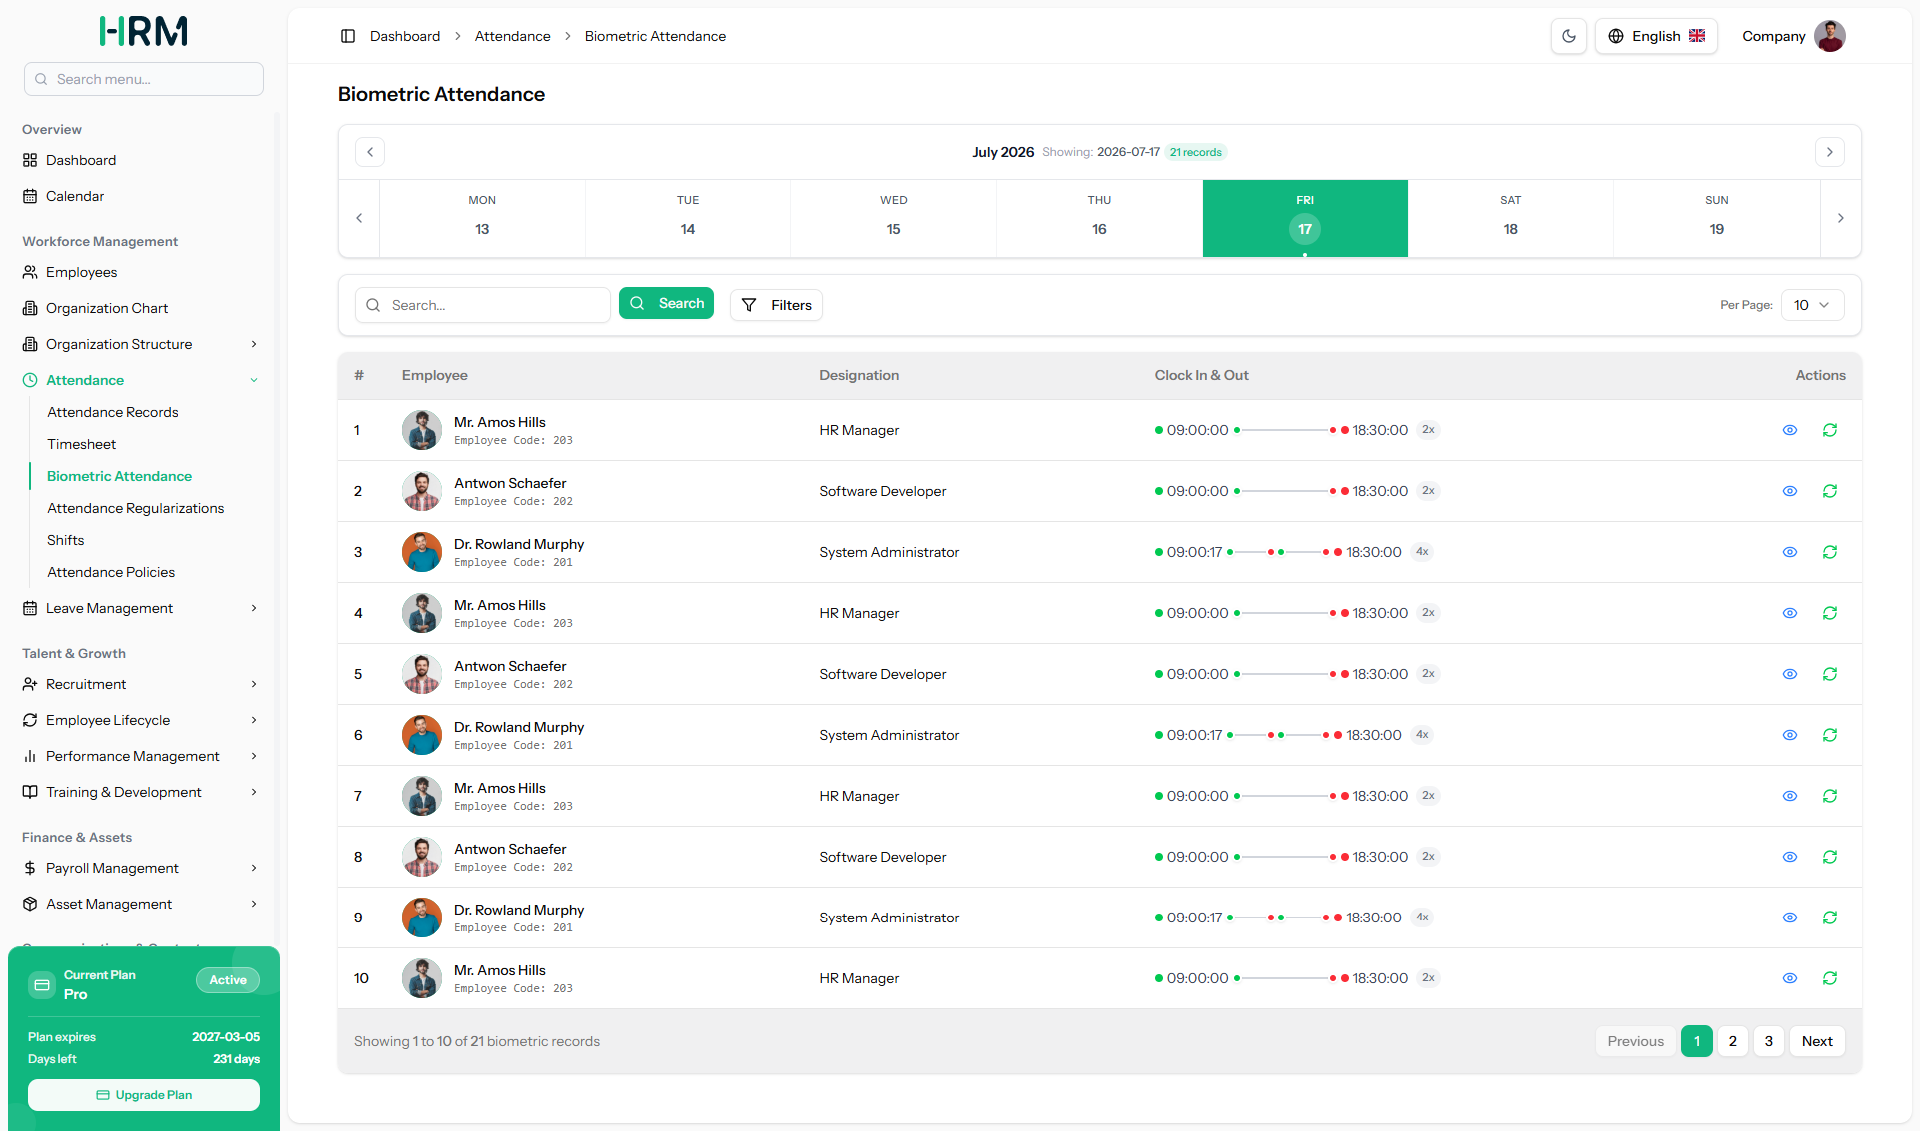
Step 3: To track attendance directly from your biometric device, go to the Biometric Attendance page under the Attendance menu. This page displays all attendance data fetched from the connected biometric device, including the Employee Code, Employee Name, Date, Clock In, Clock Out, and Total Entries for each record.
You can use the Search bar to quickly find a specific record, or click the Filters option to filter records by Start Date and End Date. Click Apply Filters to update the view or Reset Filters to clear your selection.
Step 4: Each record comes with action buttons on the right side. Click the View button to see the detailed entry, or click the Sync button to sync the latest attendance data from the biometric device into the system.
Once synced, the records will automatically reflect on the Attendance Records page for the respective employees.
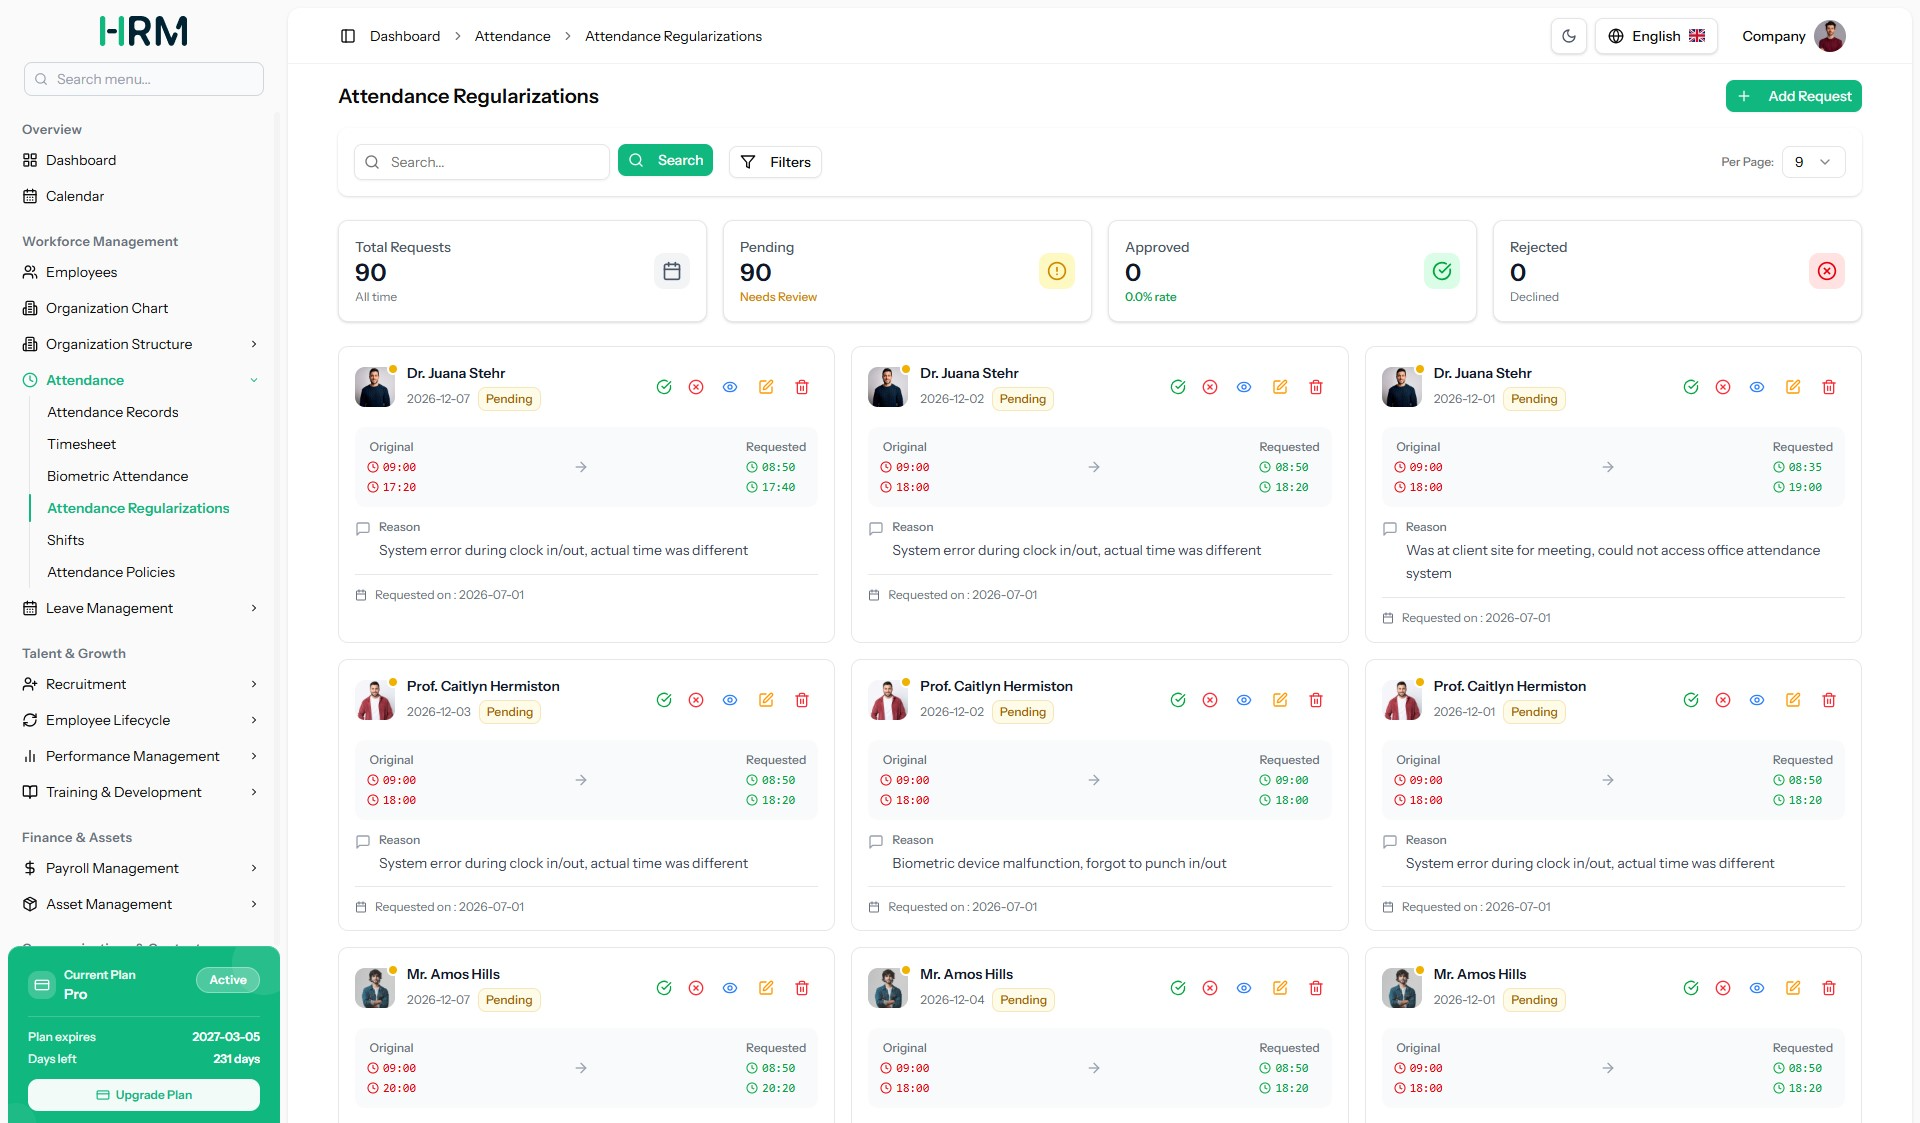
Step 5: If an employee’s attendance has any incorrect or missing clock-in/clock-out time, it can be corrected through the Attendance Regularizations page under the Attendance menu. This page lets you view, add, approve, or reject regularization requests in one place.
At the top of the page, you’ll see a quick summary showing Total Requests, Pending, Approved, and Rejected counts. You can use the filters to view records by Employee, Status, or a specific Date Range, then click Apply Filters to update the view or Reset Filters to clear your selection.
Each request card shows the employee’s name, request date, current status, the original vs. requested clock-in/clock-out times, and the Reason provided by the employee.
Step 6: To add a new regularization request manually, click the “Add Request” button at the top-right. In the Add New Regularization Request pop-up, select the Employee, choose the Attendance Record, enter the Requested Clock In and Requested Clock Out times, and provide a Reason for the change. Click Save to submit the request or Cancel to discard it.
Step 7: Each request card includes action buttons on the top-right. Click the Approve button to approve a request once verified, or the Reject button if the request is invalid. You can also use the View, Edit, and Delete icons to manage requests as needed.
Once approved, the employee’s attendance record will automatically be updated with the new clock-in and clock-out times.
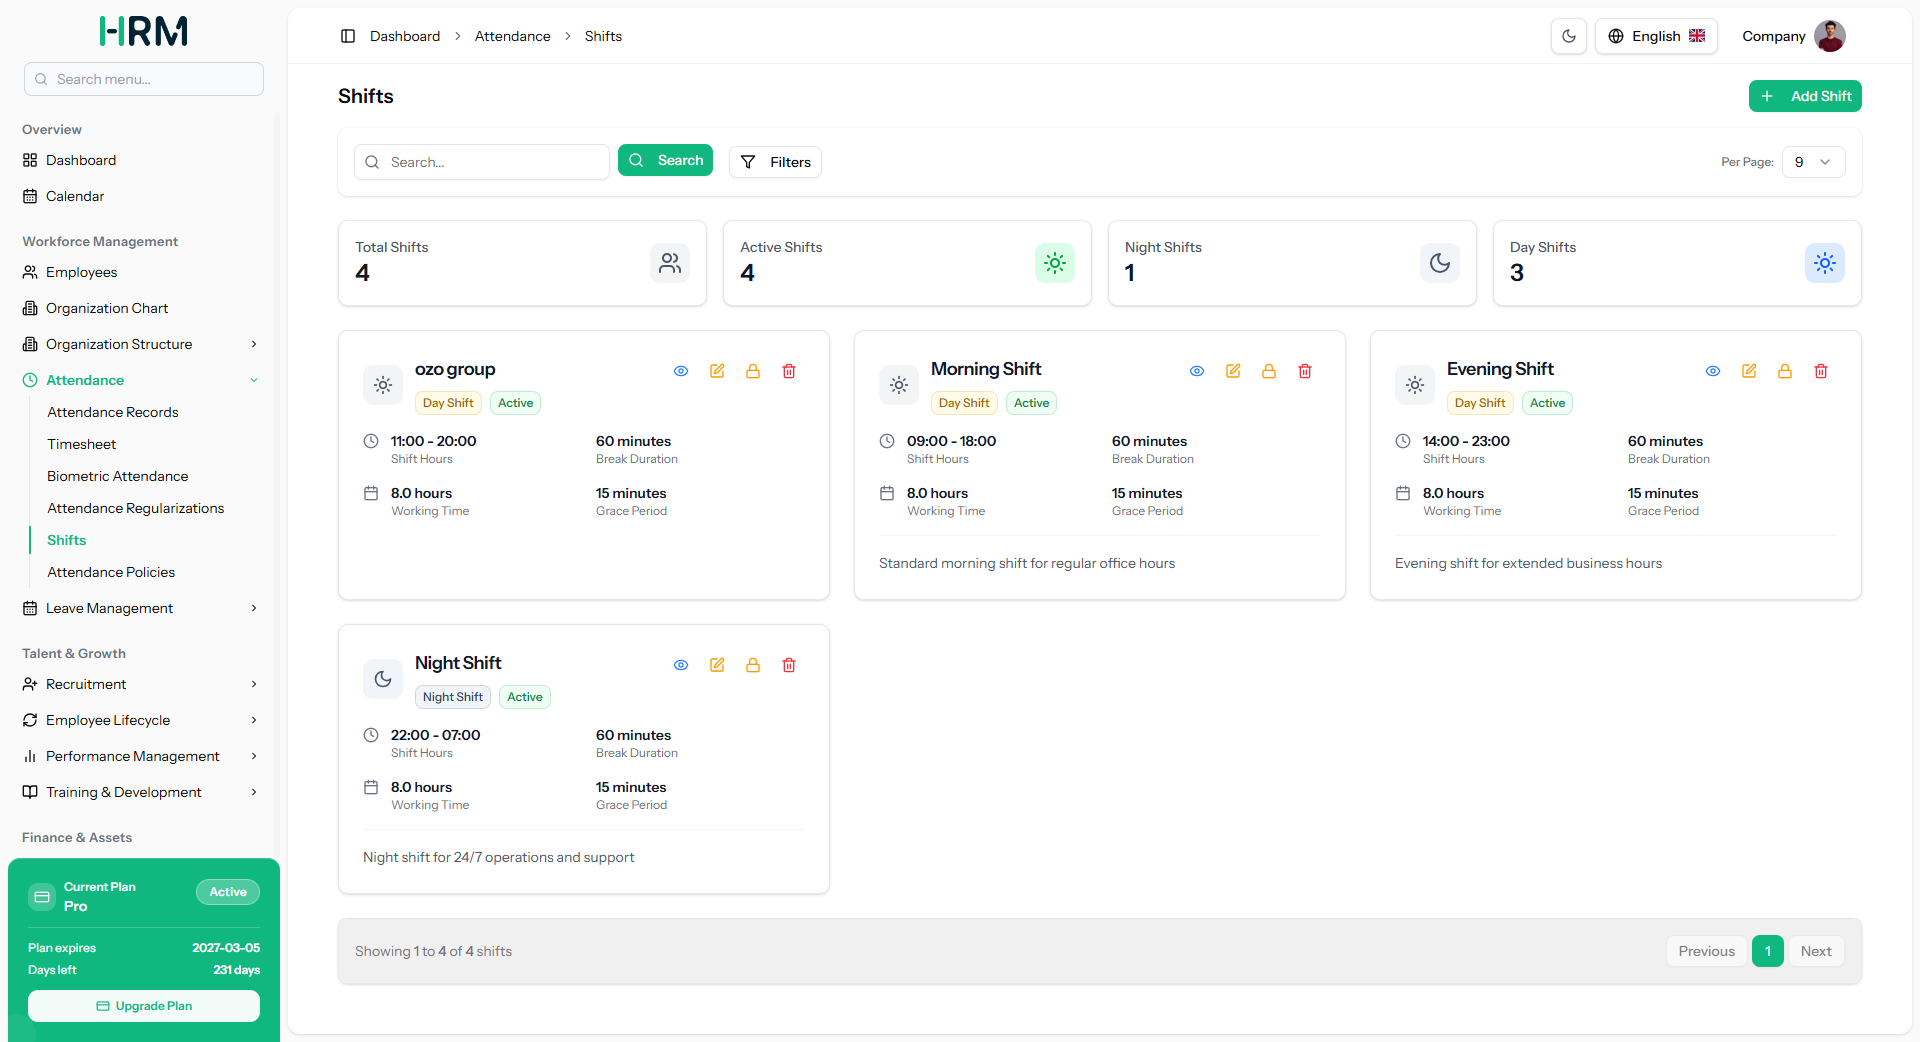
Step 8: To define working hours for your employees, go to the Shifts page under the Attendance menu. This page lets you create, manage, and assign different work shifts based on your company’s schedule.
At the top, you’ll see a summary showing the Total Shifts, Active Shifts, Night Shifts, and Day Shifts counts. You can use the filters to view shifts by Status or Shift Type, then click Apply Filters to update the view or Reset Filters to clear your selection.
Each shift card displays the Shift Name, type (Day Shift or Night Shift), status, Shift Hours, Break Duration, Working Time, Grace Period, and a short description.
Step 9: To create a new shift, click the “Add Shift” button at the top-right. In the Add New Shift pop-up, enter the Shift Name, add a short Description, and set the Start Time, End Time, Break Duration, Break Start Time, Break End Time, and Grace Period. Click Save to create the shift or Cancel to discard it.
Step 10: Each shift card includes action buttons on the top-right. Use the View button to see full shift details, the Edit button to update shift information, the Deactivate Shift button to make a shift inactive, or the Delete button to remove it.
Once created, shifts can be assigned to employees so that their attendance, working hours, and grace periods are calculated according to the assigned shift.
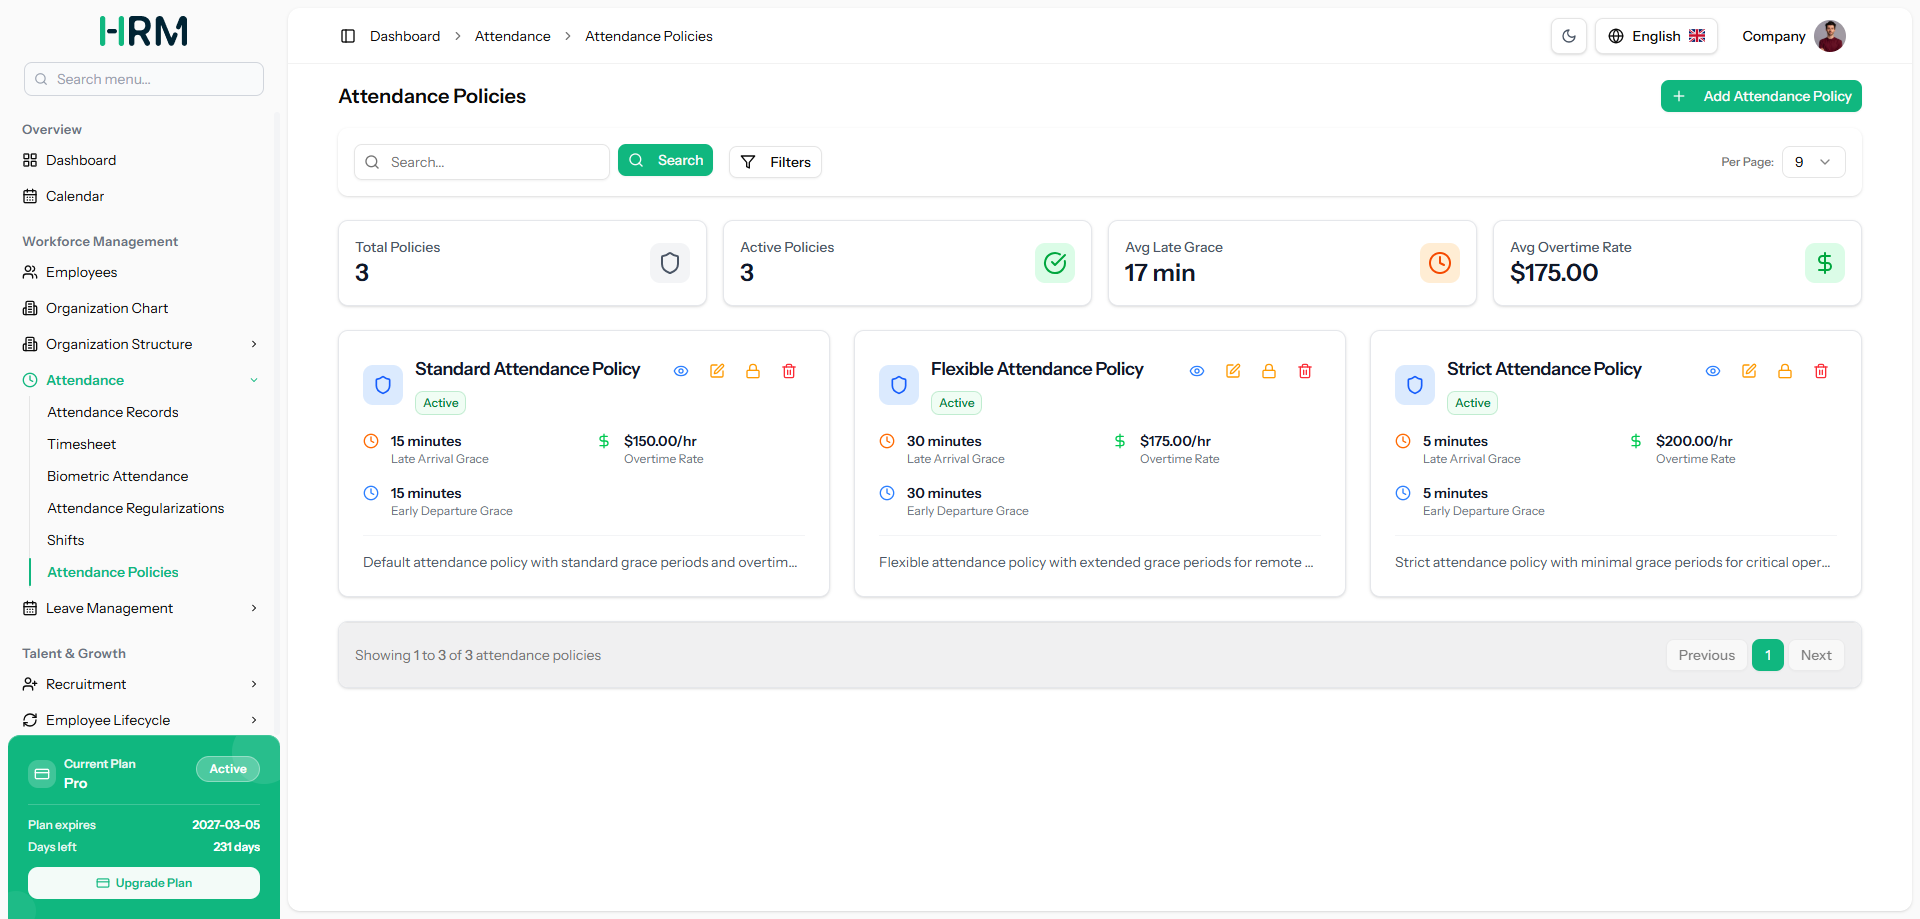
Step 11: To define the rules for late arrivals, early departures, and overtime, go to the Attendance Policies page under the Attendance menu. This page lets you create and manage attendance policies that apply to your employees.
At the top, you’ll see a summary showing the Total Policies, Active Policies, Avg Late Grace, and Avg Overtime Rate. You can use the Status filter to view policies by their current status, then click Apply Filters to update the view or Reset Filters to clear your selection.
Each policy card displays the Policy Name, status, Late Arrival Grace, Early Departure Grace, Overtime Rate, and a short description.
Step 12: To create a new policy, click the “Add Attendance Policy” button at the top-right. In the Add New Attendance Policy pop-up, enter the Policy Name, add a short Description, and set the Late Arrival Grace (minutes), Early Departure Grace (minutes), Overtime Rate Per Hour, and Status. Click Save to create the policy or Cancel to discard it.
Step 13: Each policy card includes action buttons on the top-right. Use the View button to see full policy details, the Edit button to update policy information, the Deactivate Policy button to make a policy inactive, or the Delete button to remove it.
Once created, these policies will automatically apply when calculating attendance, late marks, early departures, and overtime hours for employees.
Categories
Related articles
- Mercado Pago – BookingGo SaaS Add-On Guide
- Sign in with GitHub – eCommerceGo SaaS Add-On Guide
- CoinGate – WorkDo Dash SaaS Add-On Guide
- Spreadsheet – WorkDo Dash SaaS Add-On Guide
- PayPal – WorkDo Dash SaaS Add-On Guide
- Digital Product – eCommerceGo SaaS Add-On Guide
- AI Document – WorkDo Dash SaaS Add-On Guide
- SWOT Analysis Model – WorkDo Dash SaaS Add-On Guide
- Outlook Mail – WorkDo Dash SaaS Add-On Guide
- Benefit – BookingGo SaaS Add-On Guide
- Newsletter – WorkDo Dash SaaS Add-On Guide
- FedaPay – WorkDo Dash SaaS Add-On Guide
We're Here to Help - Let's Talk
Have questions about our solutions, customization services, or business tools? Our team is here to help you. let's talk.