
Product & Service – WorkDo Dash SaaS Add-On Guide
Create products, services, and parts while organizing pricing, stock, categories, and inventory.
Introduction
The Product & Service Add-On helps you manage your business catalog and inventory in one place. You can set up basic system settings like categories, taxes, and units, then use them to create and organize your products, services, and parts. Each item can include pricing, stock details, images, and descriptions, making it easy to track and manage everything from a single dashboard.
How to Use The Product & Service Add-On?
System Setup
Category
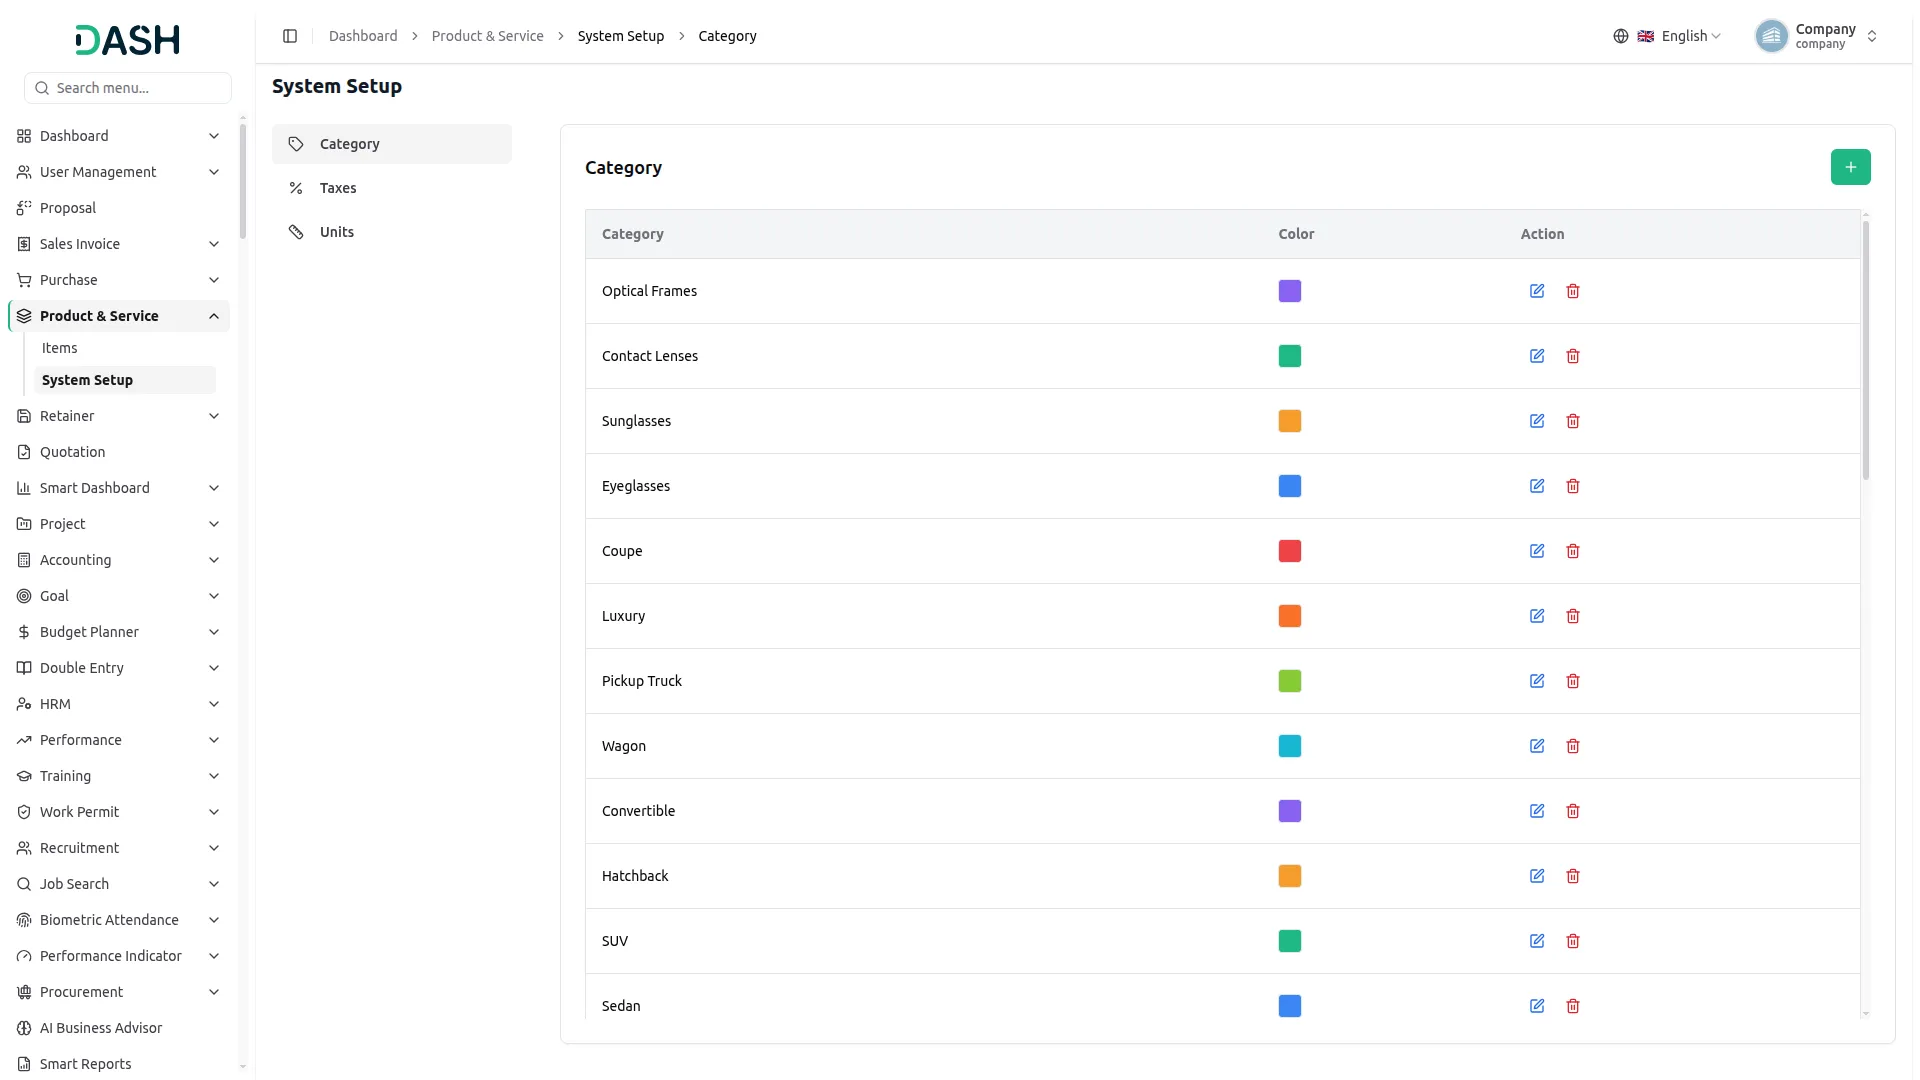
- To add a new category, click the “Create” button on the Category page. Enter the category name, then choose a color using the color picker. Click “Create” to save.
- The list page shows each category with Category, Color, and Action columns. Use the Action column to edit or delete a category. The colors shown in this category will correspond to the category from which the report is generated.
Taxes
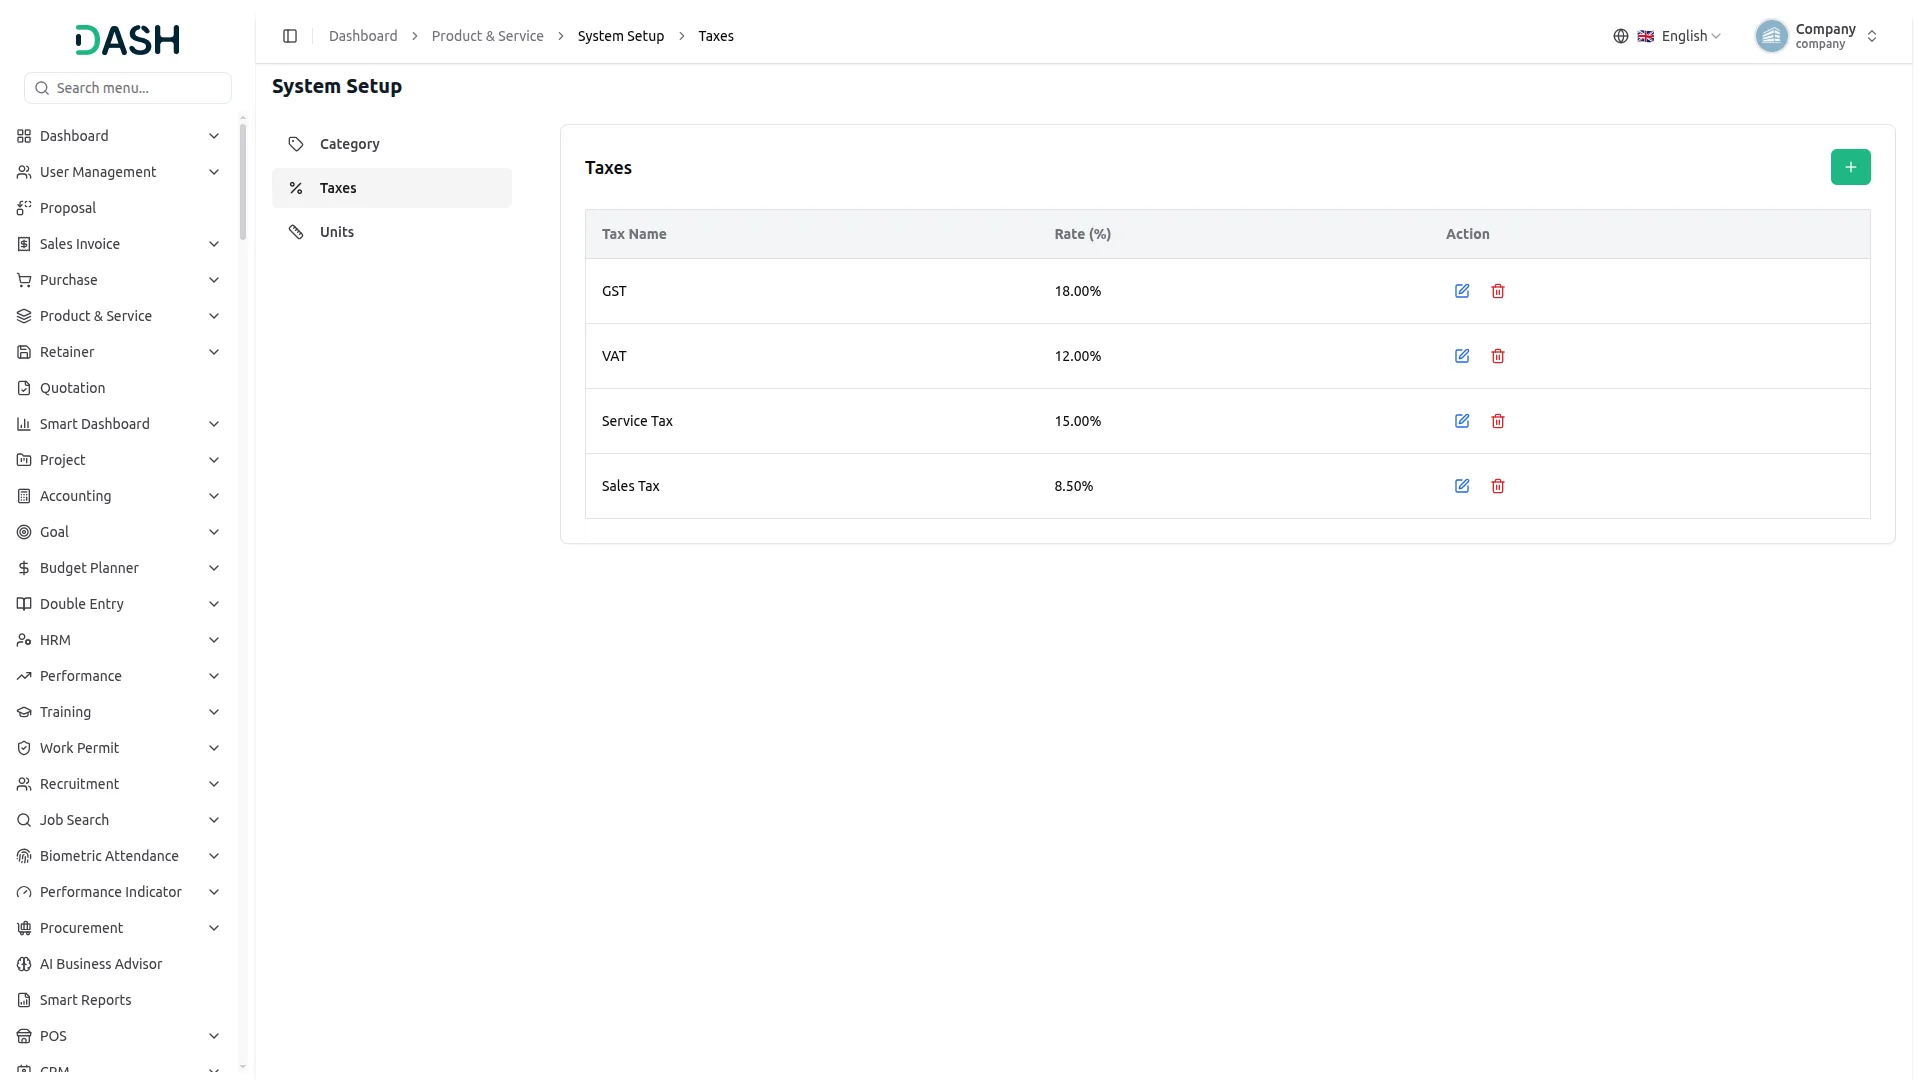
- To add a new tax, click the “Create” button on the Taxes page. Enter the tax name, then set the rate (%). Click “Create” to save.
- The list page shows each tax with Tax Name, Rate (%), and Action columns. Use the Action column to edit or delete a tax. The tax-wise report will use the same tax that was applied when the report is generated.
Units
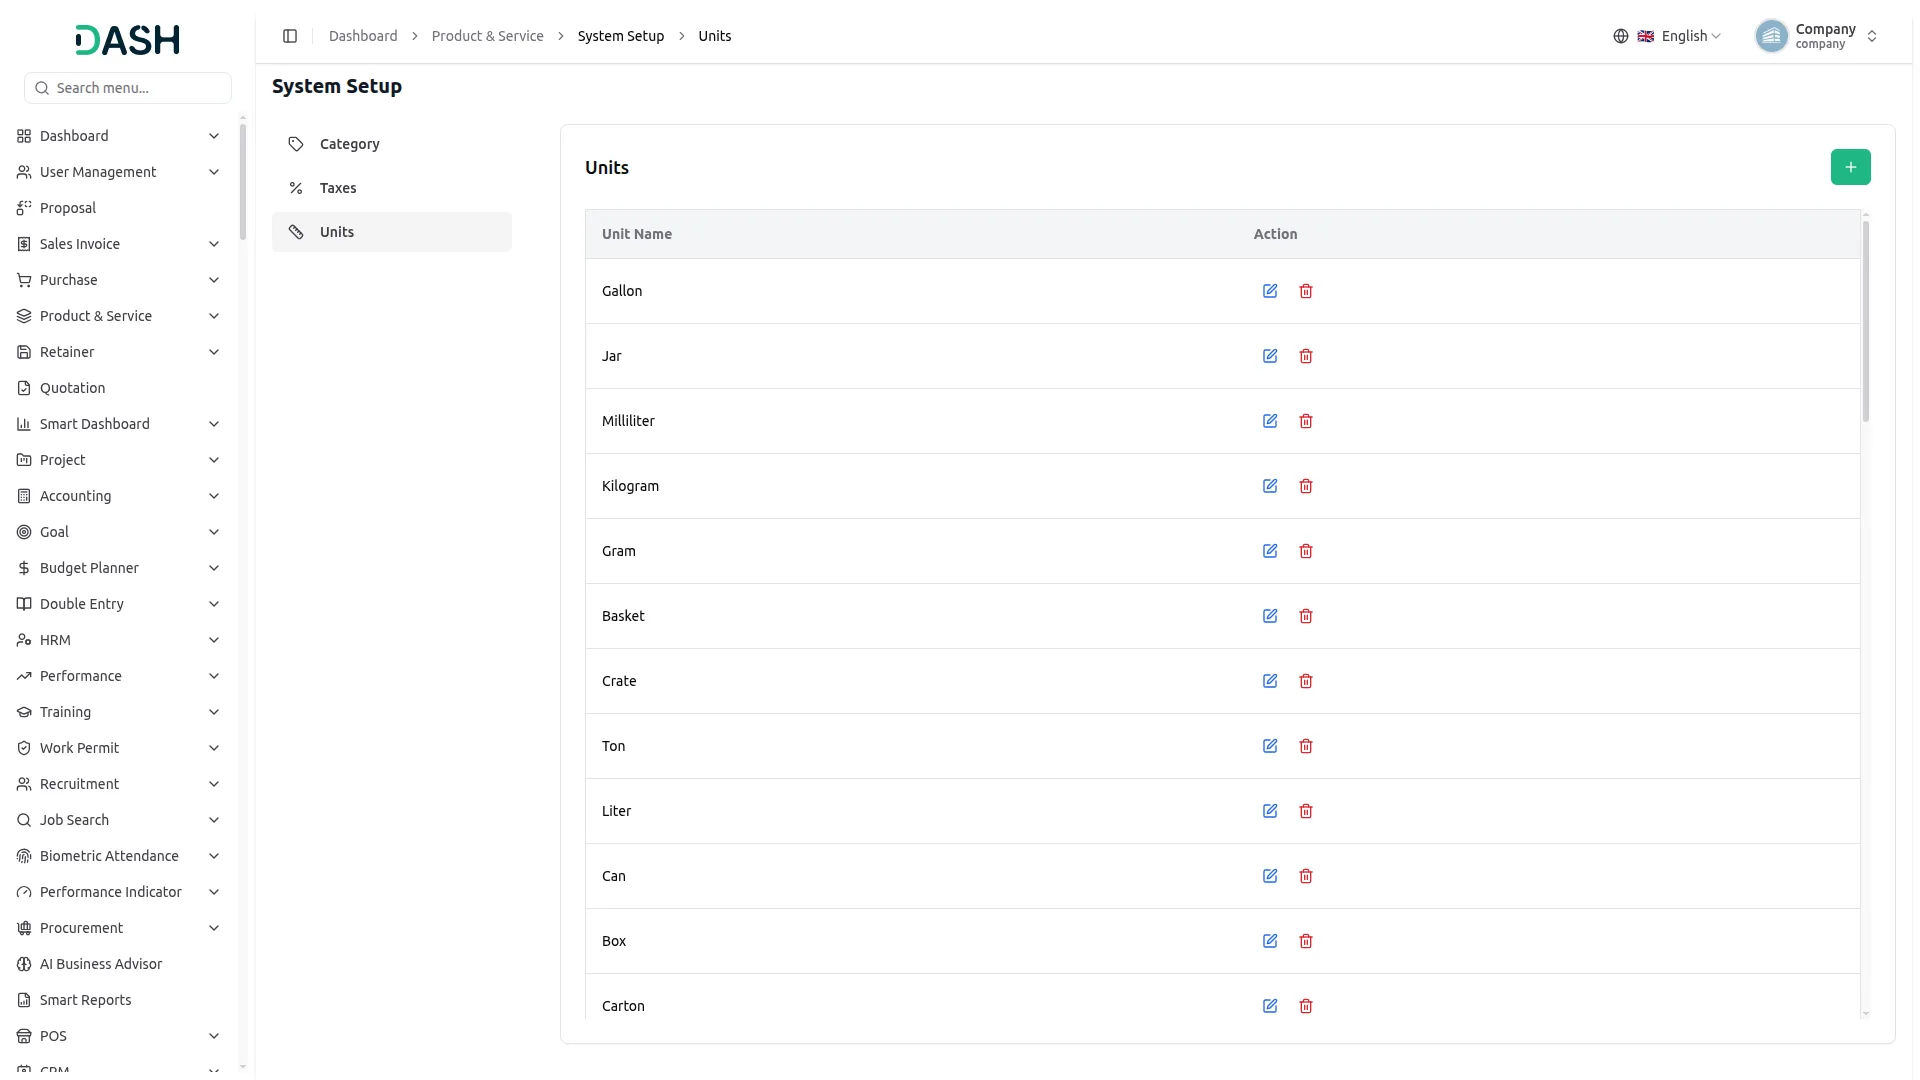
- To add a new unit, click the “Create” button on the Units page. Enter the unit name. Click “Create” to save.
- The list page shows each unit with the Unit Name and Action column. Use the Action column to edit or delete a unit.
Manage Items
- To create an item, click the “Create” button on the Manage Items page. This opens a multi-step form.
- Step 1: Select the Item Type (Product, Service, or Part) from the dropdown, (When a product or part is selected, the warehouse field will be displayed. If a service is selected, the warehouse field will not be shown), then enter the Name. Enter the SKU manually or click “Generate” to auto-generate a unique SKU.
- Select the applicable Taxes and Category from the dropdowns. Optionally add a Short Description and a formatted Description, then click “Next”.
- Step 2: Enter the Sale Price and Purchase Price, select the Unit from the dropdown (for example, Pair, Piece, or Kilogram), and enter the Quantity. Click Next to move forward or Previous to go back.
- Step 3: Upload a Product Image and any Additional Images using the “Browse” buttons. Click “Previous” to go back or “Create” to save the item.
- Step 4: Select the Warehouse from the dropdown where the item stock will be stored. Click Create to save the item, Cancel to discard it, or Previous to return to the earlier steps.
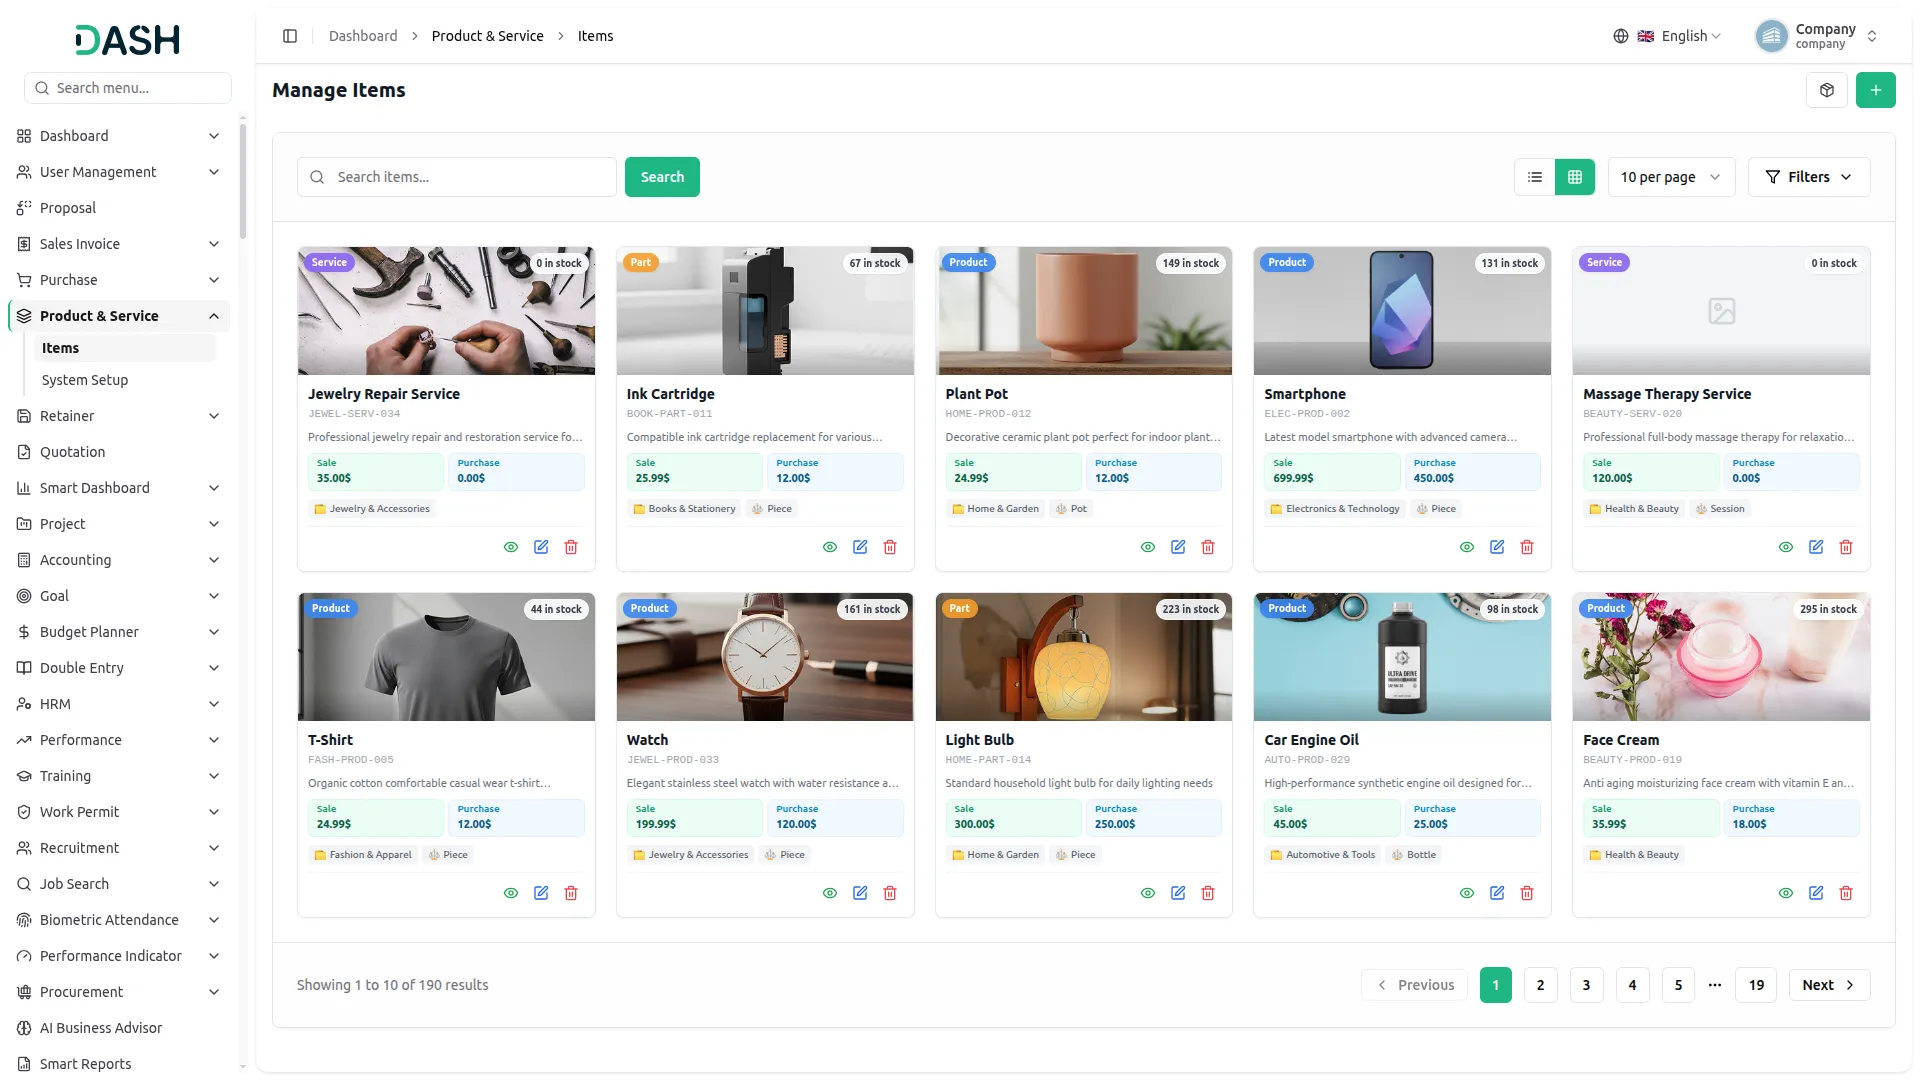
- The index page displays all items with options for List View or Grid View at the top. Use the Search field and Search button to find a specific item, or apply the Filter Dropdowns (Item Type, Category) to narrow results. Then click Apply to activate filters or Clear to reset them.
- In Grid view, each card displays the item’s Type badge (Product, Part, or Service), the current stock count, the item Image, Name, SKU code, and Description, the Sale and Purchase price boxes, the Category and Unit tags, and the Action icons.
- You can use the Action option on each card: the View button to open the item details, the Edit button to modify the item, or the Delete button to remove the item record.
- When you click the view button, you’ll see the Item Details page open. The Basic Information section shows the SKU, Category, and Type; the Pricing & Inventory section displays the Sale Price, Purchase Price, and Total Quantity in colored boxes; and the Warehouse Stock section lists each warehouse along with the quantity held at that location. The Additional Details section shows the assigned Unit, all applied Taxes (such as GST, VAT, and Service Tax), and the full Description. On the right, the Product Image and Additional Images are displayed, with the additional images shown in a carousel that you can scroll through using the navigation arrows or the Thumbnail previews below it.
Add Stock
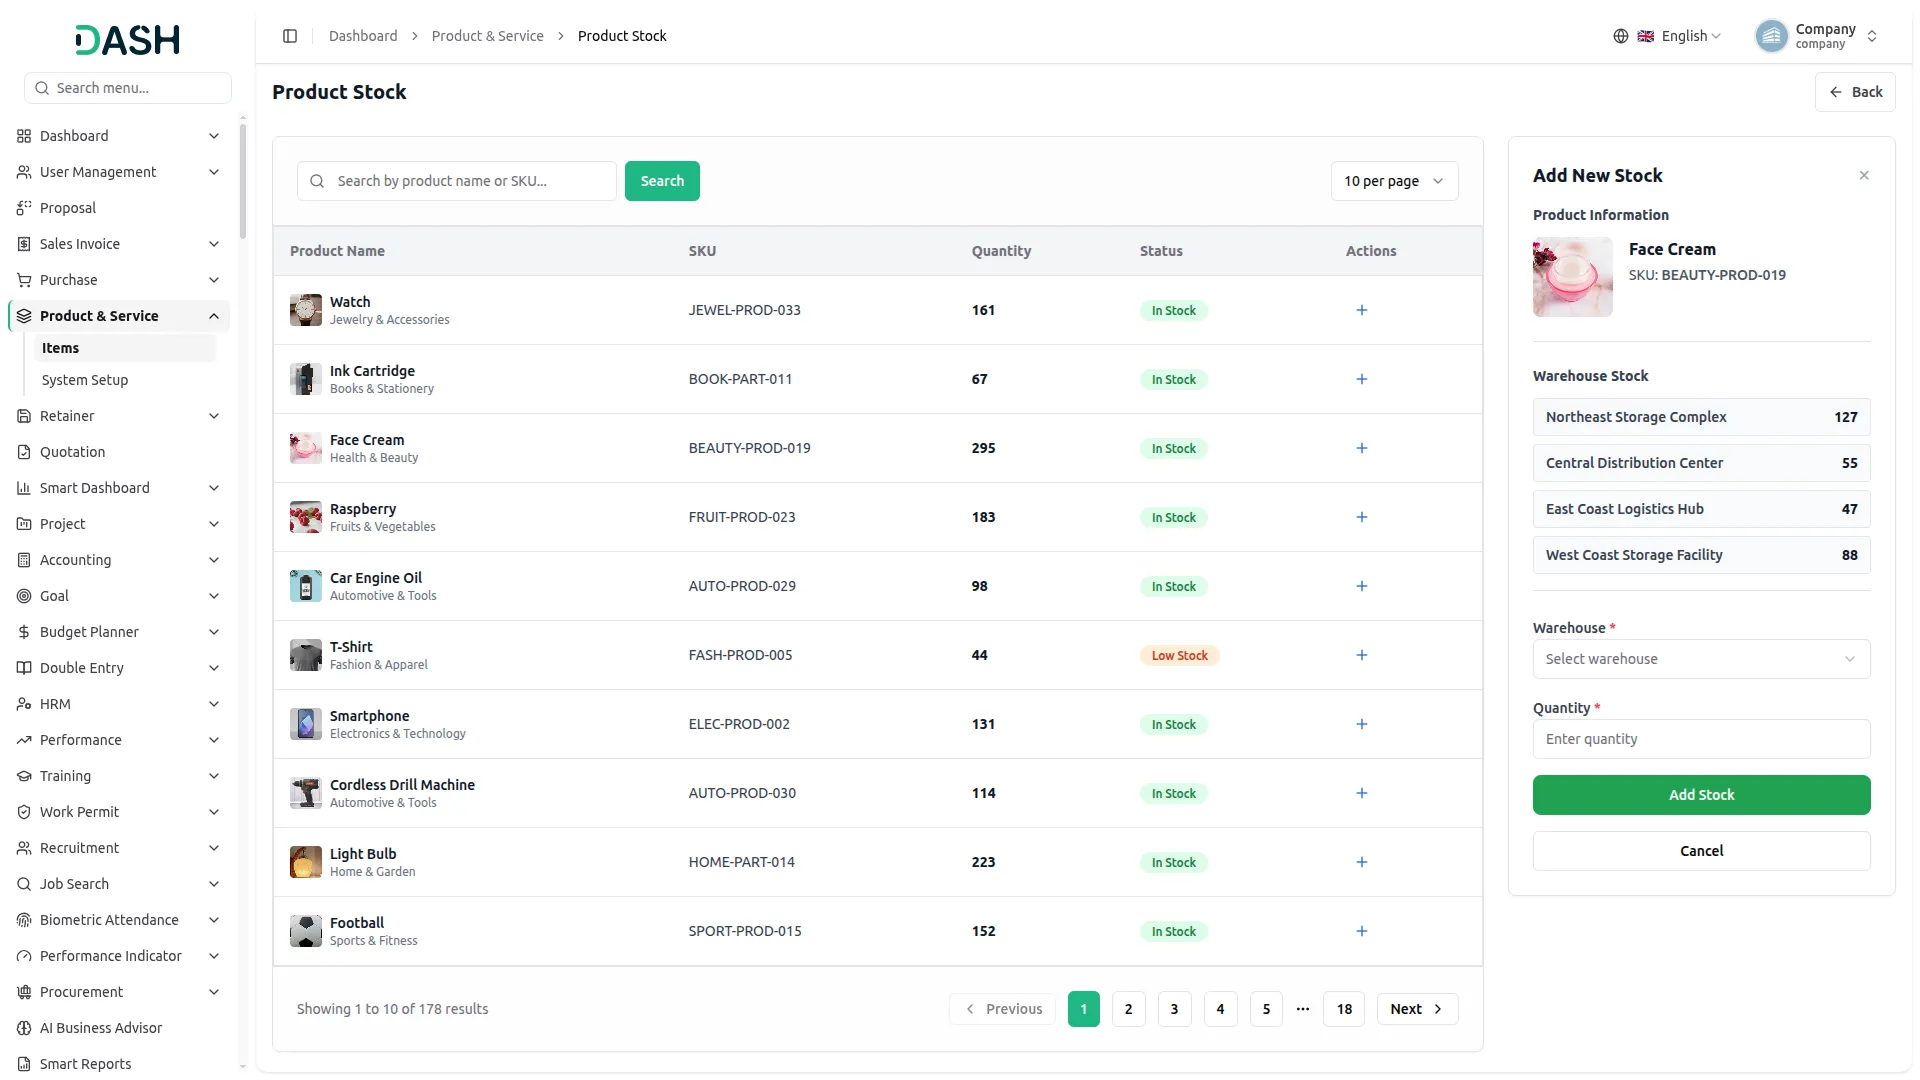
- When you click “Add Stock” on the item page, the Product Stock page displays all products with columns for Name, SKU, Quantity, Actions, and Type, and you can use the search bar to find products by name and the “+” icon to add stock to the warehouse.
- To add stock for a product, click the “+” icon in the Actions column. In the Add Stock popup, the Product Name and SKU are pre-filled; select a Warehouse from the dropdown (Stock is tracked and maintained separately in each warehouse) and enter the Quantity to add. Click “Create” to save.
Categories
Related articles
- Google Login – eCommerceGo SaaS Add-On Guide
- Square – BookingGo SaaS Add-On Guide
- Skrill – WorkDo Dash SaaS Add-On Guide
- PDF Voucher – eCommerceGo SaaS Add-On Guide
- Payfort – WorkDo Dash SaaS Add-On Guide
- Branding & White Label Settings Guide
- Outlook Calendar Credentials Generation Guide
- Sign in with GitHub – WorkDo Dash SaaS Add-On Guide
- Support Ticket Guide – eCommerceGo SaaS
- Paytm – WorkDo Dash SaaS Add-On Guide
- Attendance Management in WorkDo HRM
- Laundry Management – WorkDo Dash SaaS Add-On Guide
Get in Touch
We're Here to Help - Let's Talk
Have questions about our solutions, customization services, or business tools? Our team is here to help you. let's talk.